|
|
| (21 intermediate revisions by 3 users not shown) |
| Line 1: |
Line 1: |
| {{mininav|Games}} | | {{mininav| [[Remote controls]] {{l2| [[Games]] }} | [[Game controllers]]}} |
| {{notice|1= This is just an initial wiki copy of ''' http://forum.kodi.tv/showthread.php?tid=252465 ''' to help get the ball rolling on the final documentation. Much of this is subject to change, and some of the content below might not make sense outside of the thread it was copied from.}}
| |
|
| |
|
| Kodi v17 Krypton features improved controller support. The old system required cumbersome log scanning and xml editing. Now, everything can be done from the GUI. | | Since Kodi v17 (Krypton), Kodi now features an entirely new controller support system. Basic configuration can now be done from within the Kodi interface, without leaving the Kodi GUI. |
|
| |
|
| Kodi is joining a large effort to automatically configure controllers for emulators (because let's face it, input configuration is [i]by far[/i] the worst experience of any emulator setup). Automatic configuration means you can plug in an N64 controller and have it work in a SNES game, automatically and without any input. | | Currently, you can only configure the physical layout of your controller in Kodi. If you want to modify the actions that each button performs, see [[HOW-TO:Modify joystick.xml]]. |
|
| |
|
| If you'd like to help, you can share your button maps with the Kodi community. As we gather data from many users, this "votes" for your configuration, allowing it to potentially become the default for all Kodi users.
| | Kodi v17.0 has a bug where analog sticks can get "stuck" when they are first moved. This is fixed in v17.1. If this happens to you, see [[HOW-TO:Fix stuck analog sticks on v17.0]]. |
|
| |
|
| __TOC__
| |
|
| |
|
| == Setting up controllers == | | == Configuring controllers == |
| | <gallery widths=360px heights=180px> |
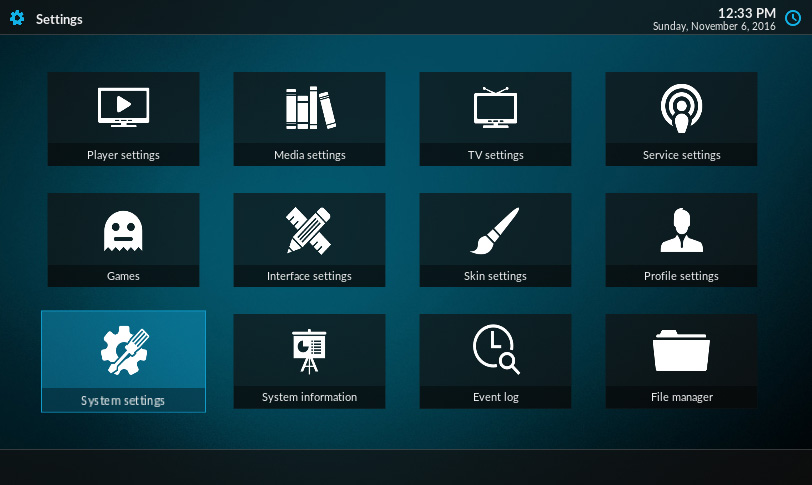
| | File:System settings.jpg|Enter Settings and open System settings |
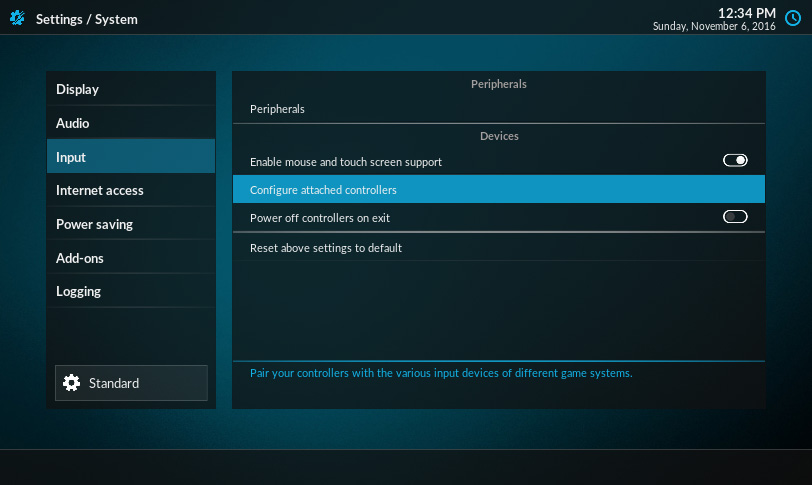
| | File:Configure attached controllers.jpg|Move to Input and select "Configure attached controllers" |
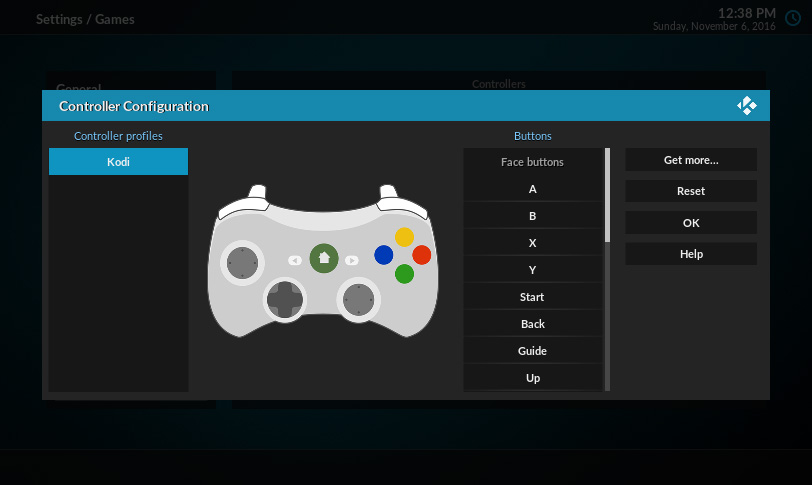
| | File:Controller configuration utility v17.jpg|The controller-mapping window will open |
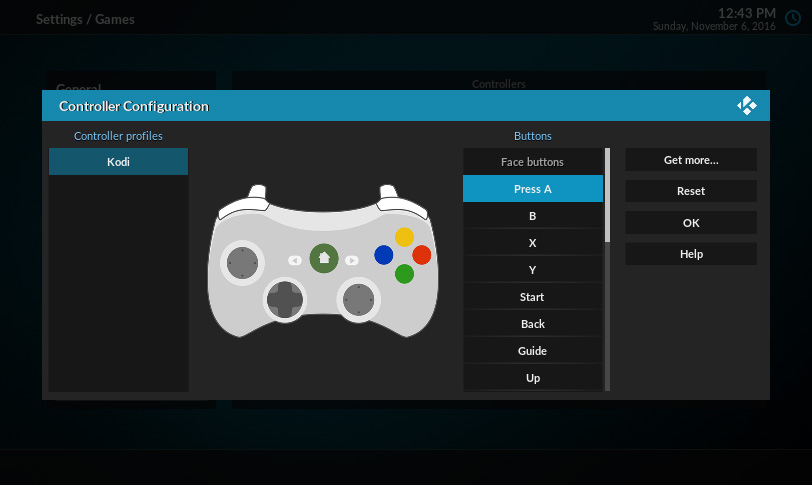
| | File:Controller dialog - Press A.jpg|Press Select to start mapping |
| | File:Controller dialog - Press B.jpg|For each item, press the button on your controller |
| | File:Controller dialog - Press Guide.jpg|If a button (like Guide) is missing, let the prompt timeout and continue below |
| | File:Controller dialog - Get more.jpg|You can configure controllers for different game systems |
| | File:Controller dialog - map SNES.jpg|If you have a SNES controller, use the SNES profile |
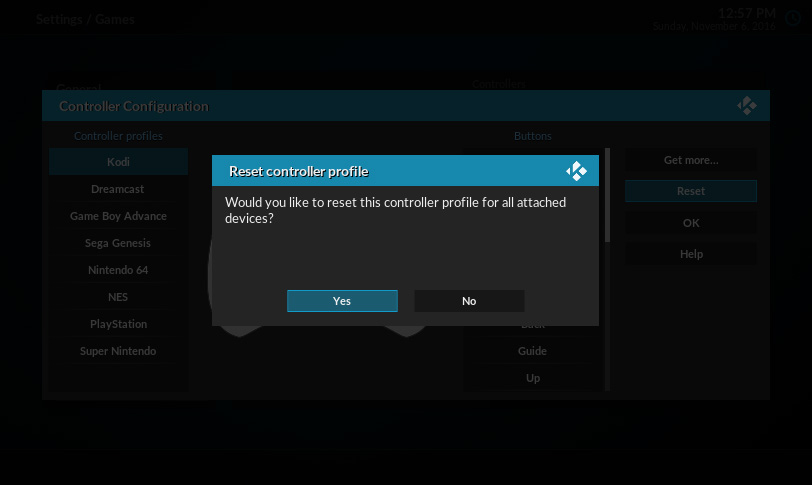
| | File:Controller dialog - reset controller.jpg|If you want to start over, select "Reset" |
| | </gallery> |
|
| |
|
| {{larger| First, find the controller window in System settings. It's well hidden. }}
| |
|
| |
|
| [[File:Controllers 1.png]] | | == See also == |
| | * {{big|'''[[HOW-TO:Modify joystick.xml]]'''}} |
| | * {{big|'''[[HOW-TO:Share button maps]]'''}} |
|
| |
|
|
| |
|
| |
| {{larger| When you first launch the configuration utility, you will see something that looks like this: }}
| |
|
| |
| [[File:Controllers 2.png]]
| |
|
| |
|
| |
| {{larger| (optional) The most interesting thing you can do here is to select "Get more...". This lets you install profiles of controllers for several game platforms. }}
| |
|
| |
|
| |
| [[File:Controllers 3.png]]
| |
|
| |
|
| |
| {{larger| When you've pimped out your install with every controller, it will look like this: }}
| |
|
| |
|
| |
| [[File:Controllers 4.png]]
| |
|
| |
|
| |
| {{larger| On the left is a list of controllers for several different platforms ("Kodi" will allow you to control Kodi). }}
| |
|
| |
| {{larger| On the right is a list of buttons belonging to each controller. When you select a different controller, the list updates to show its buttons. }}
| |
|
| |
| {{larger| The picture in the center gives a better idea of which buttons are which. }}
| |
|
| |
|
| |
| [[File:Controllers 5.png]]
| |
|
| |
|
| |
| {{larger| If the mapping process is not immediately evident, there is a help button in the bottom right. }}
| |
|
| |
|
| |
| [[File:Controllers 6.png]]
| |
|
| |
|
| |
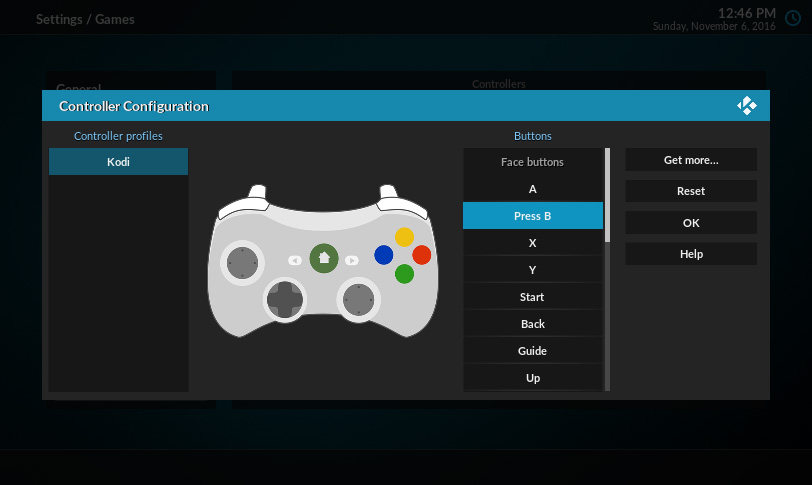
| {{larger| When you select a button, an instruction appears. }}
| |
|
| |
|
| |
| [[File:Controllers 7.png]]
| |
|
| |
|
| |
| {{larger| If your controller looks the same as the one on the screen, you should push the button on your controller that matches the button you see.
| |
|
| |
| {{larger| If your controller is radically different, you have two options. }}
| |
|
| |
| * {{larger| You can press the button that matches the physical location }}
| |
| * {{larger| You can press the button that matches the game logic }}
| |
|
| |
| {{larger| For example, a physical match would be the 360 controller's A and the SNES's B. }}
| |
|
| |
| {{larger| On the other hand, a logical match would be the 360 controller's A and the SNES's A. }}
| |
|
| |
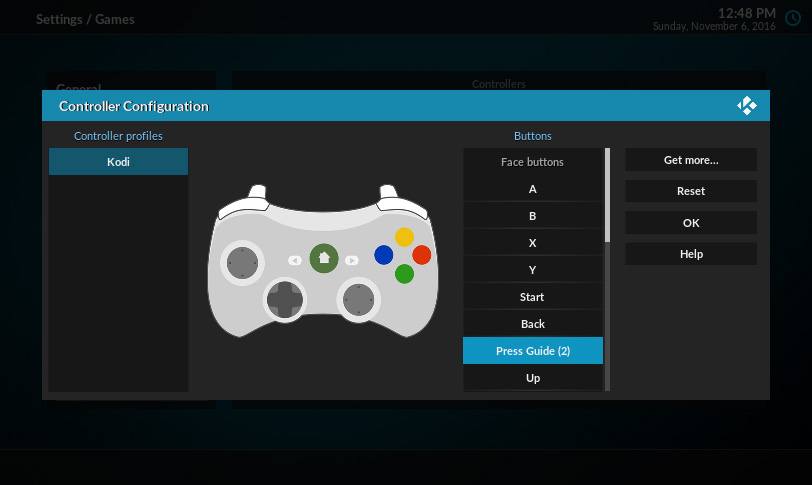
| {{larger| If no button is pushed after a few seconds, the instruction will start counting down. }}
| |
|
| |
|
| |
| [[File:Controllers 8.png]]
| |
|
| |
|
| |
| {{larger| When the countdown reaches zero, the prompt is aborted. }}
| |
|
| |
| {{larger| The prompt can also be aborted by pressing any key on the keyboard or remote that causes the button to lose focus. }}
| |
|
| |
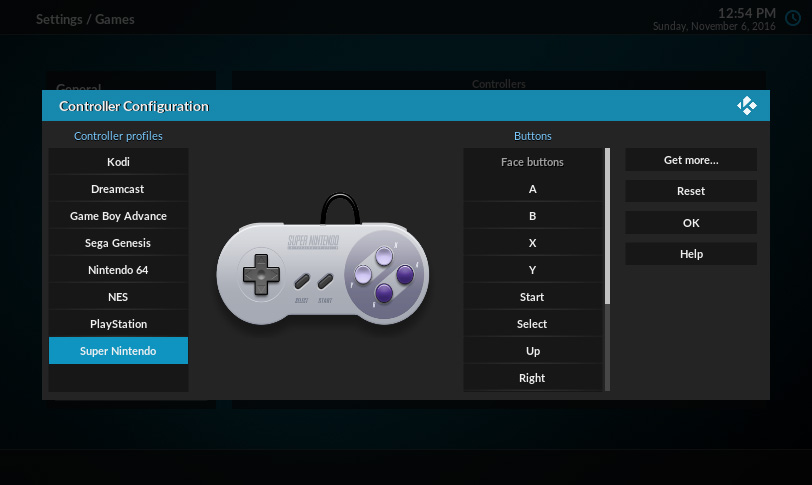
| {{larger| When the wizard reaches the end of the list, the instructions are over and your controller is mapped. }}
| |
|
| |
|
| |
| [[File:Controllers 9.png]]
| |
|
| |
|
| |
| {{larger| Good job!}}
| |
|
| |
|
| |
| == Limitations ==
| |
|
| |
| {{Note| This section assumes familiarity with Kodi's '''[[Keymap]]''' system for joysticks. }}
| |
|
| |
| It's important I mention the limitations of the current utility. This was built to solve ONE PROBLEM AND ONE PROBLEM ONLY. I've removed the 4,000 lines of joystick XML configuration and replaced it with a single keymap named [https://github.com/garbear/xbmc/blob/retroplayer-15.2/system/keymaps/joystick.xml joystick.xml].
| |
|
| |
|
| |
|
| |
| Specifically, the joystick keymap used to look like:
| |
|
| |
| <syntaxhighlight lang="XML">
| |
| <button id="1">Select</button>
| |
| <axis id="1" limit="-1">AnalogSeekBack</axis>
| |
| </syntaxhighlight>
| |
|
| |
|
| |
| The controller configuration utility creates a buttonmap that looks like:
| |
|
| |
| <syntaxhighlight lang="XML">
| |
| <feature name="a" button="1" />
| |
| <feature name="lefttrigger" axis="-1"/>
| |
| </syntaxhighlight>
| |
|
| |
|
| |
| And Kodi's remaining keymap looks like:
| |
|
| |
| <syntaxhighlight lang="XML">
| |
| <a>Select</a>
| |
| <lefttrigger>AnalogSeekBack</lefttrigger>
| |
| </syntaxhighlight>
| |
|
| |
|
| |
| The driver-specific data (button IDs, axis IDs) have been separated from the Kodi commands. Kodi's joystick keymap is now independent of the driver configuration. The controller configuration utility simply allows you to collect this driver information without doing it by hand as before.
| |
|
| |
| This means that all previous limitations STILL HOLD:
| |
|
| |
| * You can't have different button maps for different players if they use the same joystick
| |
| * You can't change commands in the joystick.xml keymap (you'll have to edit joystick.xml by hand, just like every other keymap)
| |
|
| |
|
| [[Category:Gaming]] | | [[Category:Gaming]] |
| | [[Category:Manual]] |
| | [[Category:Remotes]] |