Custom home items/Aeon Nox Silvo: Difference between revisions
(Page Creation) |
(Updated for v20) |
||
| (4 intermediate revisions by the same user not shown) | |||
| Line 1: | Line 1: | ||
{{mininav|[[Video library]]|[[Video_management|Video Management]]|[[Custom_home_items|Custom Home Items]]}} | {{mininav|[[Video library]]|[[Video_management|Video Management]]|[[Custom_home_items|Custom Home Items]]}} | ||
{{DISPLAYTITLE:How To: Custom Home Items using Aeon Nox Silvo}} | {{DISPLAYTITLE:How To: Custom Home Items using Aeon Nox Silvo}} | ||
= Introduction = | = Introduction = | ||
<section begin="intro" /> | <section begin="intro" />This Guide explains the process of creating new Main Menu in the Aeon Nox:Silvo skin. Example uses include: | ||
This Guide explains the process of creating new Main Menu | |||
*Separating childrens movies from mature movies | *Separating childrens movies from mature movies | ||
*Separately list documentaries, cartoons, sci-fi or any other genre | *Separately list documentaries, cartoons, sci-fi or any other genre | ||
*Separately list | *Separately list home movies <section end="intro" /> | ||
Note: This guide requires a moderate level of experience with {{kodi}}, including [[HOW-TO:Change_skins|installing skins]], [[Adding_video_sources|adding Sources]], and creating [[Smart playlists]] | |||
{{ | |||
| Line 31: | Line 19: | ||
Organize the video files on your file server/NAS/local hard drive into separate folders for each Main Menu button you require. | Organize the video files on your file server/NAS/local hard drive into separate folders for each Main Menu button you require. | ||
The image below is an example of how you might organize your folders and files (Windows 10). Each category that you intend to have as a movie menu item | The image below is an example of how you might organize your folders and files (Windows 10). Each category that you intend to have as a movie, TV show or music menu item will be saved in a dedicated folder. | ||
[[file:CustomMenuItemFolder.png|300px|left]] | [[file:CustomMenuItemFolder.png|300px|left]] | ||
| Line 41: | Line 29: | ||
The first step is to create a '''''[[Smart_playlists|Smart Playlist]]''''' for each new listing you require. The following is a simple guide to accomplish that: | The first step is to create a '''''[[Smart_playlists|Smart Playlist]]''''' for each new listing you require. The following is a simple guide to accomplish that: | ||
# Add each folder as a '''Source''' to the Kodi library using the '''[[Adding_video_sources|Add videos...]]''' option in Videos>Files, being sure to select the content type (Movies or TV, etc.) correctly and then scraping. | |||
#Add each folder as a '''Source''' to the Kodi library using the '''Add | |||
<gallery widths= | <gallery mode="packed" widths="500px" heights="283px"> | ||
File:CustomMenuItem01.jpg| | File:CustomMenuItem01.jpg|2. After each folder has been added as a Source and scraped, go to the '''Playlists''' button under the '''Videos''' Main Menu button. | ||
File:CustomMenuItem02.png| | File:CustomMenuItem02.png|3. Choose '''New smart playlist…''' | ||
File:CustomMenuItem03.png| | File:CustomMenuItem03.png|4. In the '''Type''' field choose the appropriate media type | ||
File:CustomMenuItem04.png| | File:CustomMenuItem04.png|5. Click on '''New rule…'''. | ||
File:CustomMenuItem05.png| | File:CustomMenuItem05.png|6. In the '''CHOOSE RULE TYPE''' dialog box click on the word '''Title''' and choose '''Path''' from the '''CHOOSE RULE TYPE''' menu. | ||
File:CustomMenuItem06.png| | File:CustomMenuItem06.png|7. Now, click on the word '''contains'''. | ||
File:CustomMenuItem07.png| | File:CustomMenuItem07.png|8. Choose '''starts with''' from the '''SMART PLAYLIST RULE''' dialog box. | ||
File:CustomMenuItem08.png| | File:CustomMenuItem08.png|9. Click on the word '''Browse''' in the '''SMART PLAYLIST RULE''' dialog box. | ||
File:CustomMenuItem09.png| | File:CustomMenuItem09.png|10. Choose the appropriate folder then click OK. | ||
File:CustomMenuItem11.png|11. Click '''OK''' again. | |||
File:CustomMenuItem11.png| | File:CustomMenuItem12.png|12. Click '''OK''' once more. | ||
File:CustomMenuItem12.png| | File:CustomMenuItem13.png|13. An onscreen keyboard will appear, type the name of your new Smart Playlist then click '''DONE'''. | ||
File:CustomMenuItem13.png| | |||
</gallery> | </gallery> | ||
: | :14. Repeat the above steps as needed create any additional Smart Playlists, then back out to the home screen. | ||
= Customising The Main Menu = | = Customising The Main Menu = | ||
This step will create the new Main Menu items | This step will create the new Main Menu items. | ||
<gallery widths= | <gallery mode="packed" widths="500px" heights="283px"> | ||
File:CustomMenuItem14.jpg| | File:CustomMenuItem14.jpg|15. Click on '''SKIN SETTINGS''' under '''SYSTEM''' in the Main Menu. | ||
File:CustomMenuItem15.png| | File:CustomMenuItem15.png|16. Click on '''Setup the Aeon Nox main menu''' | ||
File:CustomMenuItem16.png| | File:CustomMenuItem16.png|17. The '''MAIN MENU CUSTOMIZER''' windows opens and will look like the above image | ||
</gallery> | </gallery> | ||
The Menu Items are on the left | ;Description of options | ||
:The Menu Items are on the left | |||
:Options are along the top row (or next to menu item in previous versions) | |||
::'''X''' - deletes the item | |||
::'''+''' - adds a new menu item | |||
::'''↑''' - move menu item up the list | |||
::'''↓''' - move menu item down the list | |||
::'''Restore''' - default menu items that have been removed or modified will be restored to original. User added menu items will remain. | |||
::Note: The default center of them Main Menu is the third '''active''' menu item in the list. In this example, it is '''MOVIES'''). | |||
| Line 81: | Line 74: | ||
This final step now links the Smart Playlists created in Section 3 to the new Main Menu items created in the previous Section. | This final step now links the Smart Playlists created in Section 3 to the new Main Menu items created in the previous Section. | ||
<gallery widths= | <gallery mode="packed" widths="500px" heights="283px"> | ||
File:CustomMenuItem17.png| | File:CustomMenuItem17.png|18. Select a Main Menu item you want to change, or click the plus sign to create a new one. If you create a new item, it will appear below the selected menu item with the label '''NONE'''. Either way, on the right side, select '''Choose item for menu''' and a pop out menu will appear. | ||
File:CustomMenuItem18.png| | File:CustomMenuItem18.png|19. Click on '''Video Library'''. | ||
File:CustomMenuItem19.png| | File:CustomMenuItem19.png|20. In the pop out menu that appears next, choose '''Playlists >''' | ||
File:CustomMenuItem21.png| | File:CustomMenuItem21.png|21. In the Playlist pop out menu, choose the required Playlist | ||
File:CustomMenuItem22.png| | File:CustomMenuItem22.png|22. In the '''What do you want to do with the playlist?''' box, choose '''Display''' | ||
File:CustomMenuItem23.png| | File:CustomMenuItem23.png|23. Click on '''Select background''' to set background fanart for the individual playlists. This will rotate through fanart that is specific to that playlist. | ||
File:CustomMenuItem24.png| | File:CustomMenuItem24.png|24. Scroll thru the pop up menu to '''(Video Playlist) <your playlist>''' to choose the background specific to the playlist. | ||
</gallery> | </gallery> | ||
25a. Repeat these steps as needed to add your playlists to the Main Menu, adjust their positions on the Menu to your liking, add widgets, etc. | |||
or | |||
25b. If you have no further buttons to add, simply '''back''' out to return to the Home Screen. At this point a script will run to re-build the Main Menu. | |||
= Duplicated Listings = | = Duplicated Listings = | ||
If you prefer to not have the same Movie or TV Show listed in the original Movie and TV Show | If you prefer to not have the same Movie or TV Show also listed in the original Movie and TV Show menu items, then follow these steps: | ||
#Disable the original Movie or TV Show button in the '''Main Menu Customizer''' screen as shown in step | # Disable the original Movie or TV Show button in the '''Main Menu Customizer''' screen as shown in step 20 | ||
# | # Create a new Smart Playlist that excludes the titles in the new menu items | ||
# Create a new main menu item using the new "exclude" smart playlist. | |||
| Line 110: | Line 105: | ||
<gallery widths=500px heights= | <gallery mode="packed" widths="500px" heights="283px"> | ||
File:CustomMenuItem25.jpg | File:CustomMenuItem25.jpg | ||
File:CustomMenuItem26.jpg | File:CustomMenuItem26.jpg | ||
</gallery> | </gallery> | ||
{{top}} | {{top}} | ||
{{updated|20}} | |||
[[Category:Karellen]] | |||
[[Category: | |||
[[Category:Video library]] | [[Category:Video library]] | ||
[[Category: | [[Category:Music_library]] | ||
Latest revision as of 03:39, 29 January 2023
Introduction
This Guide explains the process of creating new Main Menu in the Aeon Nox:Silvo skin. Example uses include:
- Separating childrens movies from mature movies
- Separately list documentaries, cartoons, sci-fi or any other genre
- Separately list home movies
Note: This guide requires a moderate level of experience with Kodi, including installing skins, adding Sources, and creating Smart playlists
Folder Structure
The correct folder structure will ensure a relatively hassle free experience in setting up these menu buttons.
Organize the video files on your file server/NAS/local hard drive into separate folders for each Main Menu button you require.
The image below is an example of how you might organize your folders and files (Windows 10). Each category that you intend to have as a movie, TV show or music menu item will be saved in a dedicated folder.

Create Smart Playlists
The first step is to create a Smart Playlist for each new listing you require. The following is a simple guide to accomplish that:
- Add each folder as a Source to the Kodi library using the Add videos... option in Videos>Files, being sure to select the content type (Movies or TV, etc.) correctly and then scraping.
2. After each folder has been added as a Source and scraped, go to the Playlists button under the Videos Main Menu button.
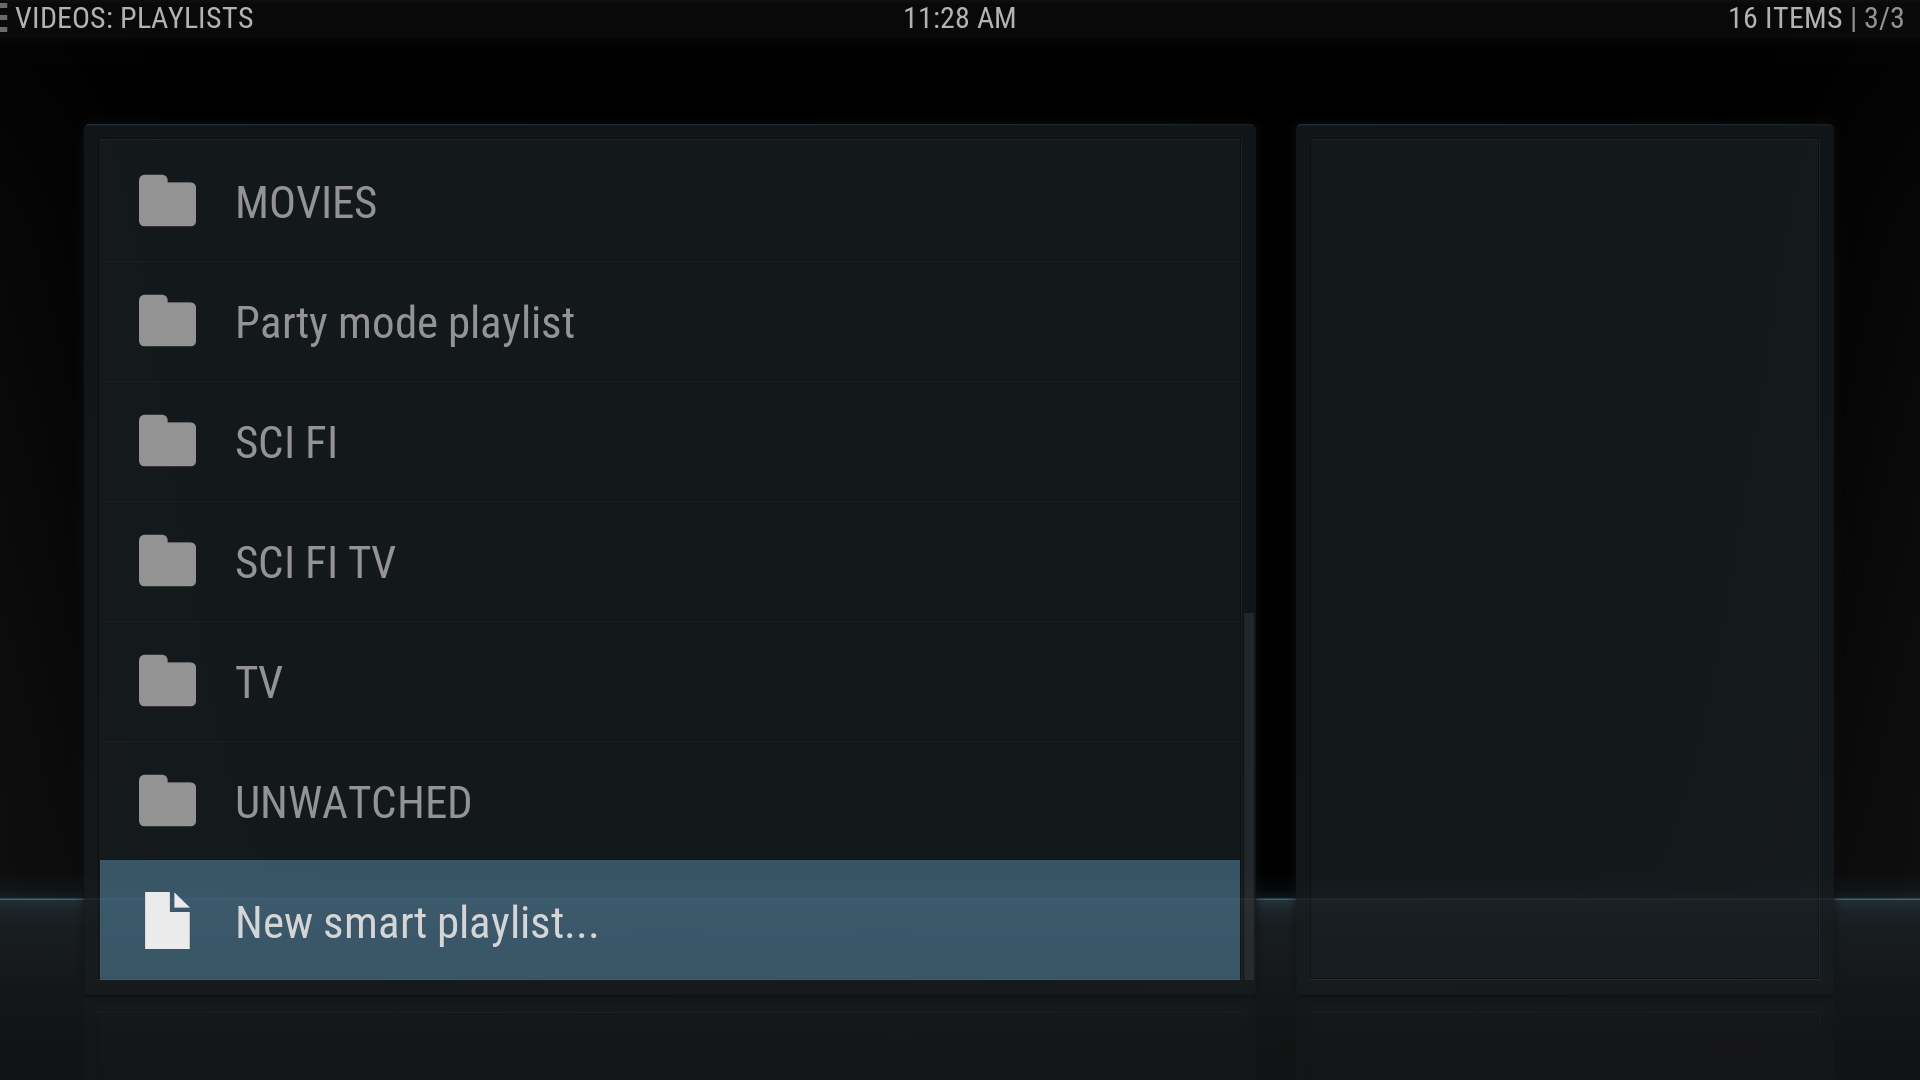
3. Choose New smart playlist…
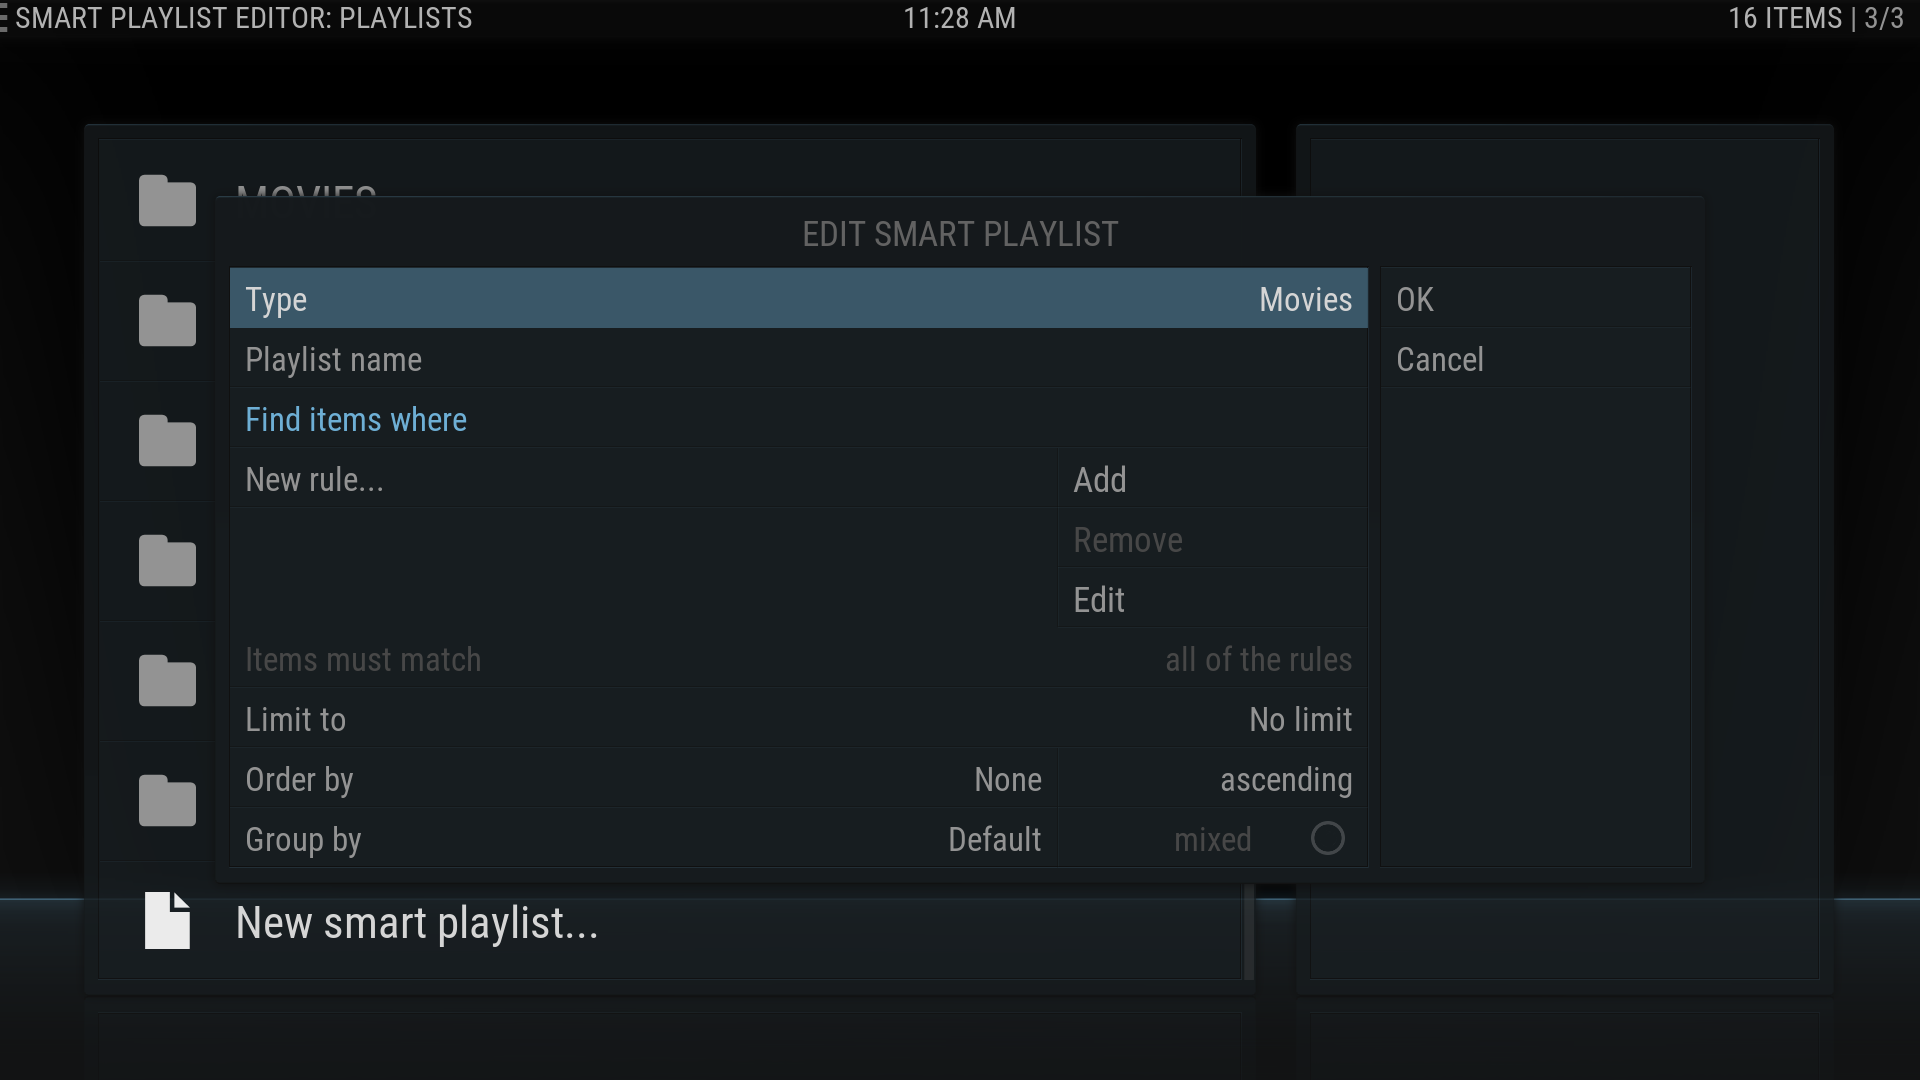
4. In the Type field choose the appropriate media type
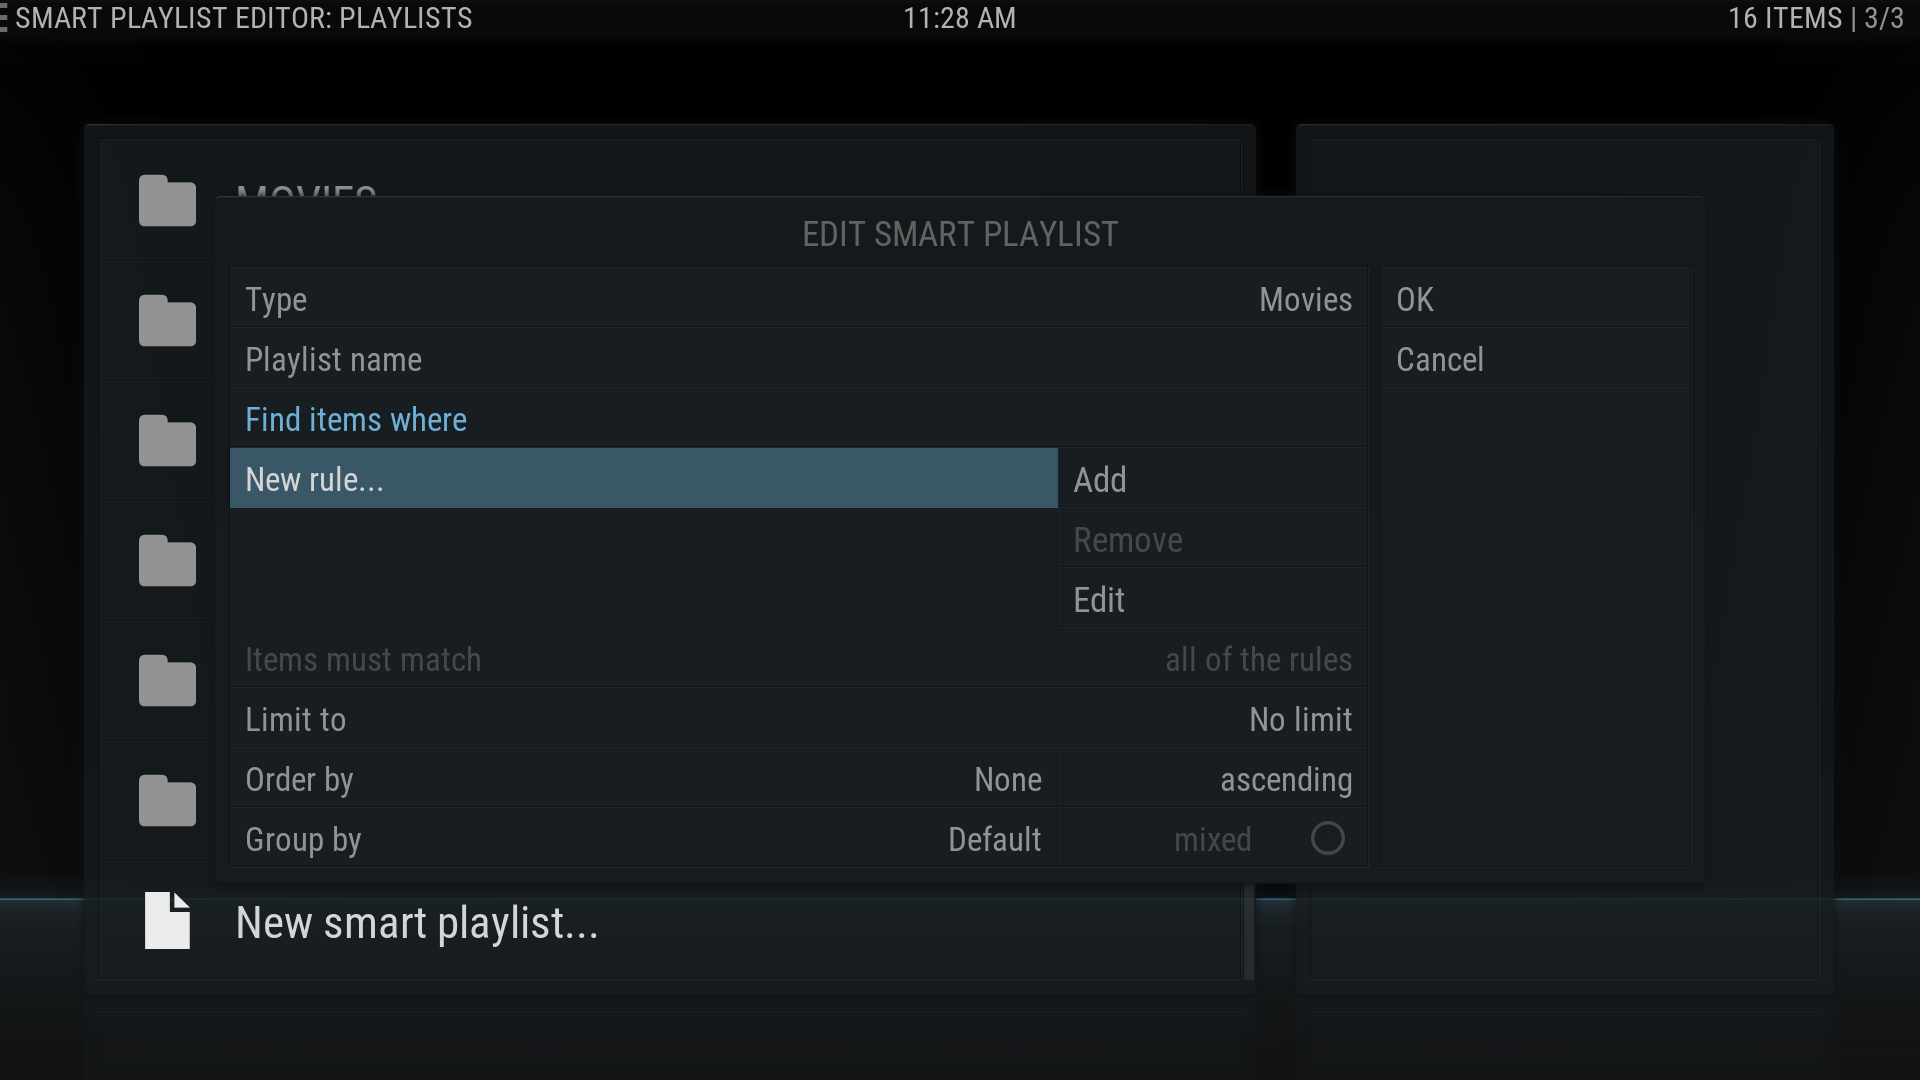
5. Click on New rule….
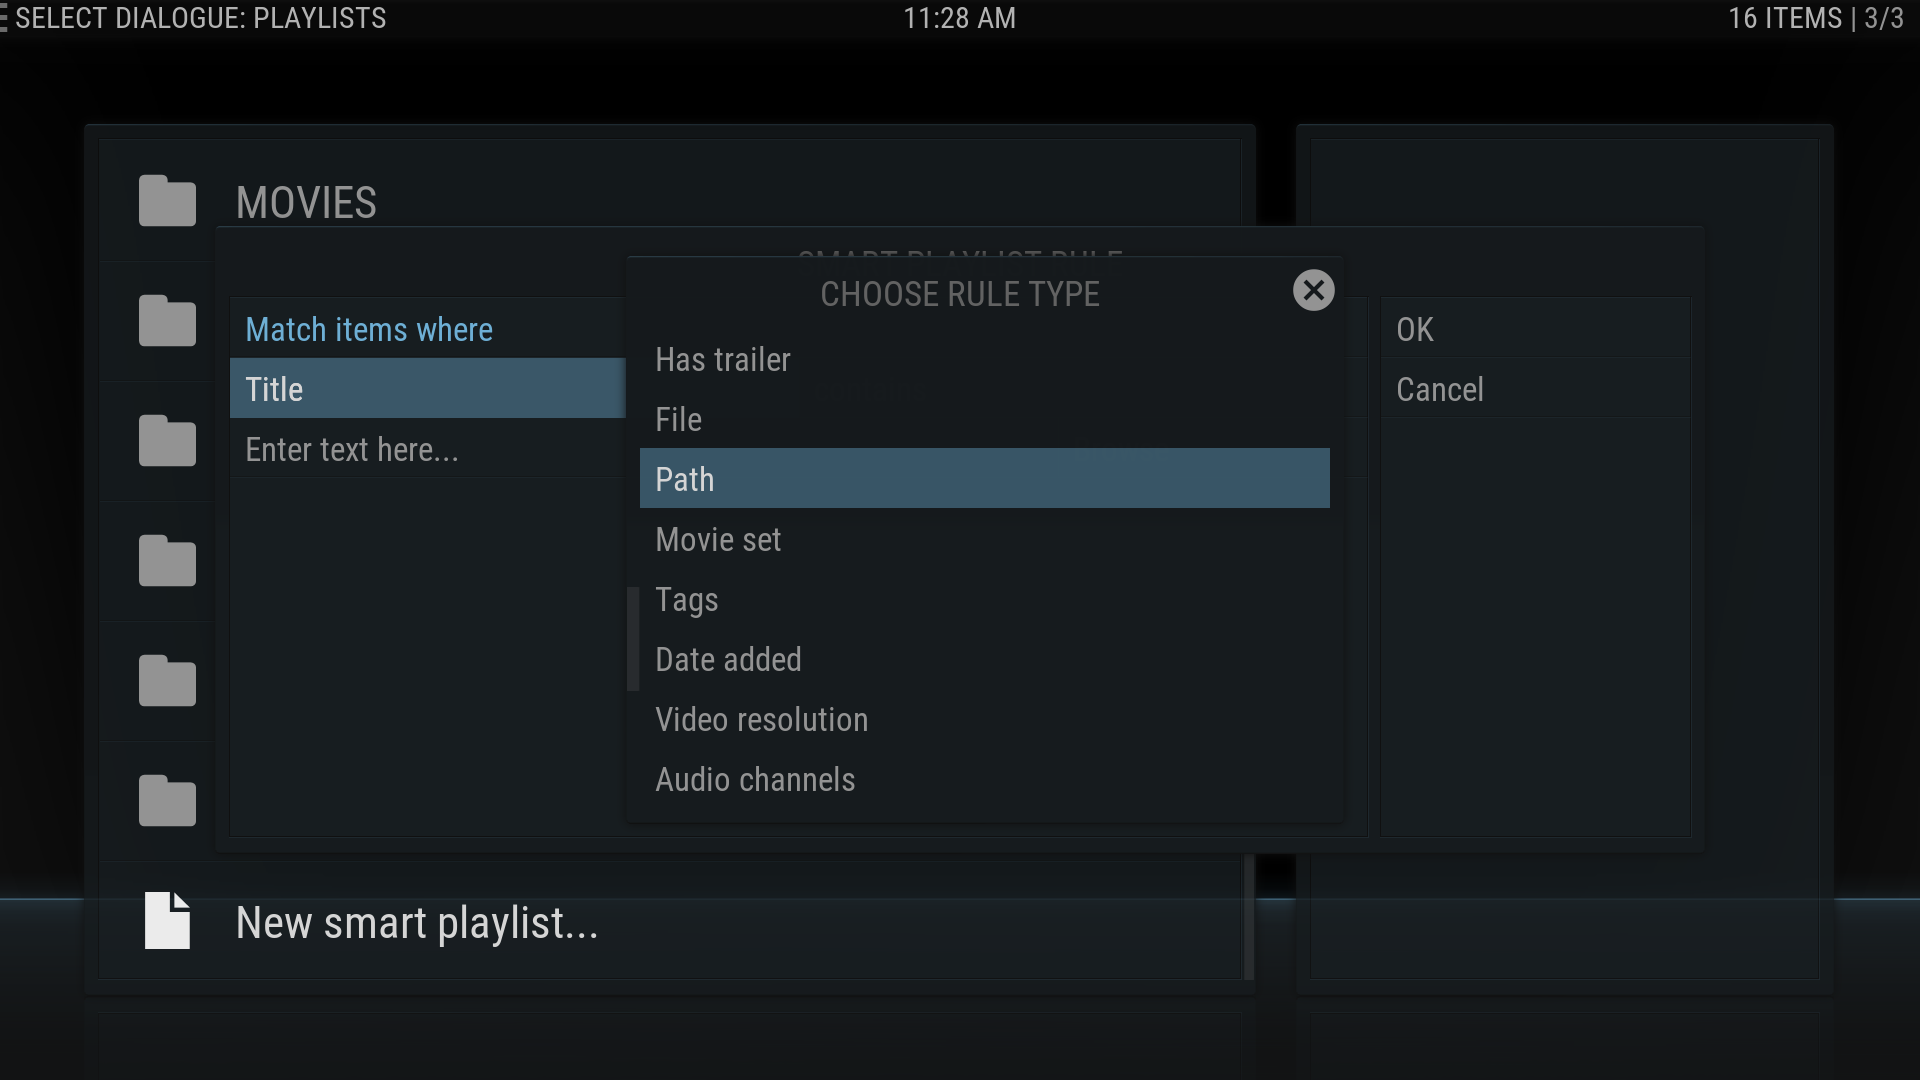
6. In the CHOOSE RULE TYPE dialog box click on the word Title and choose Path from the CHOOSE RULE TYPE menu.
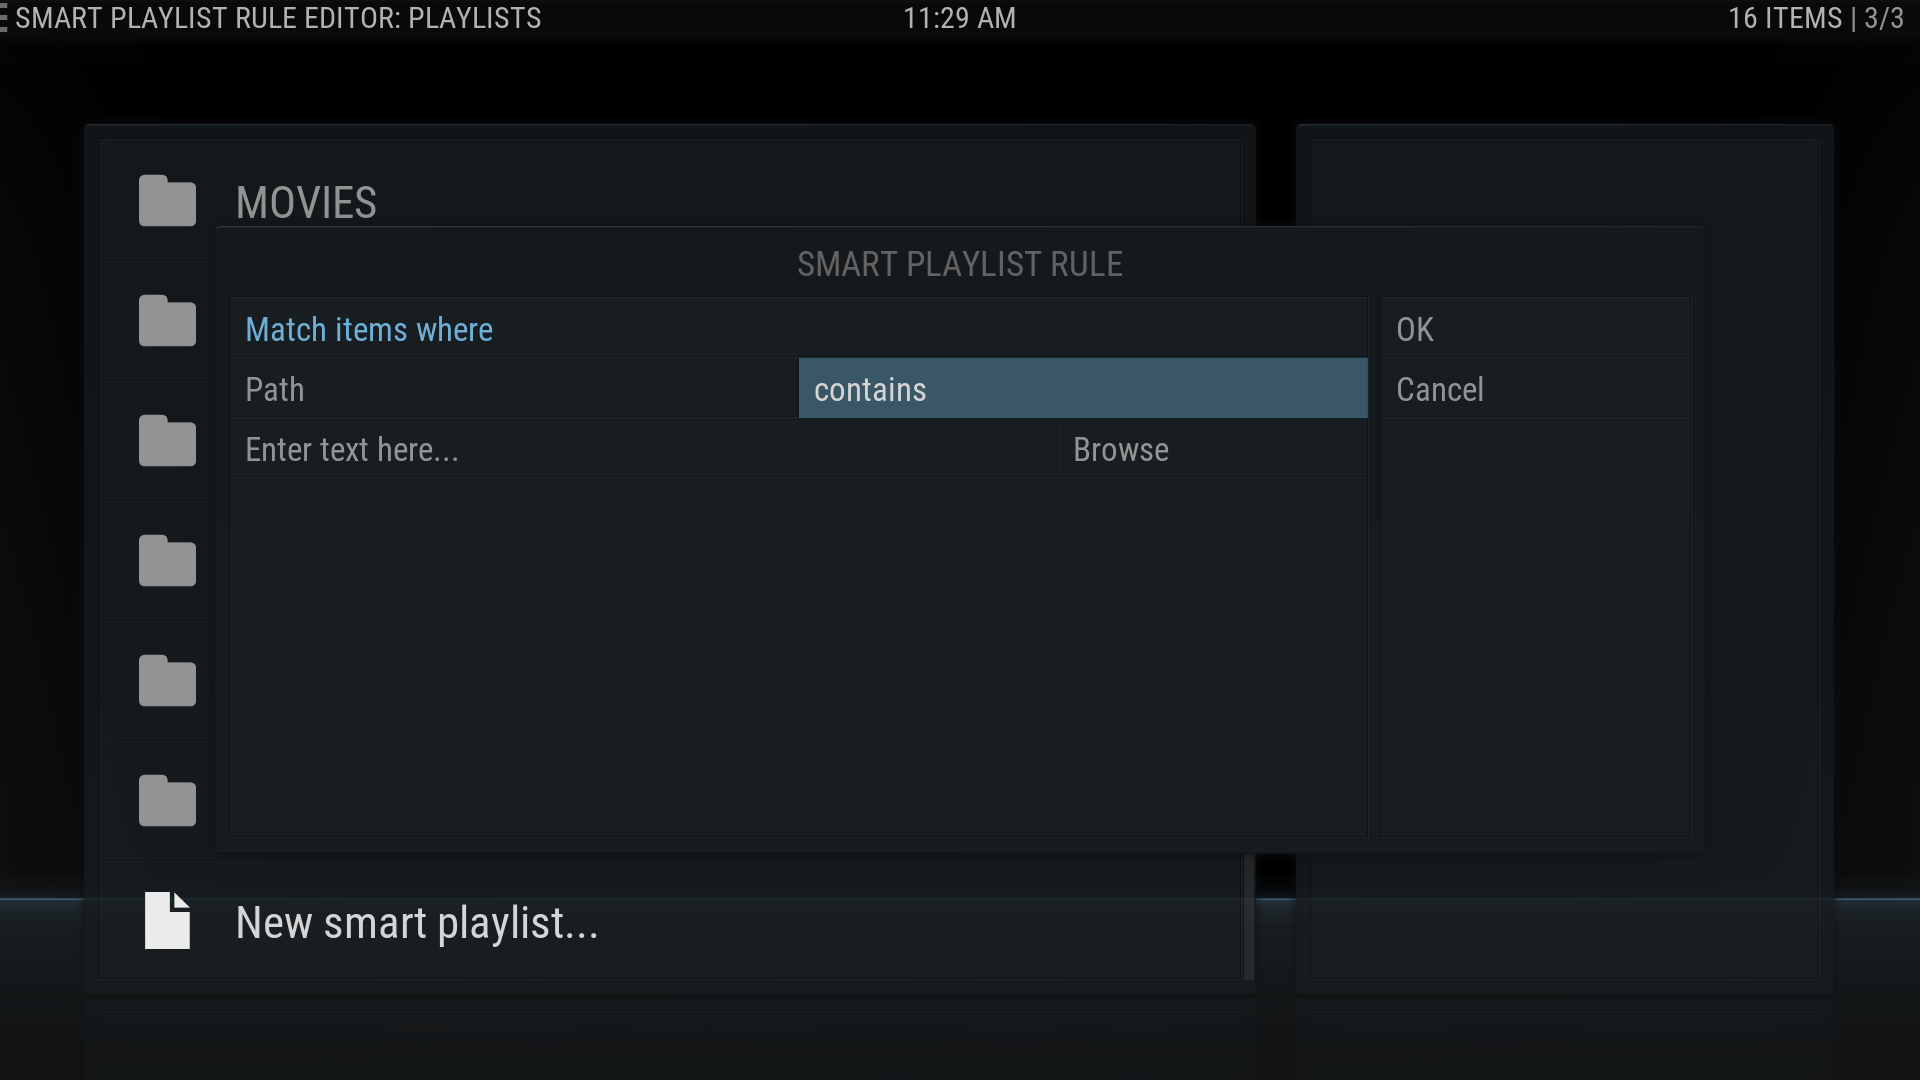
7. Now, click on the word contains.
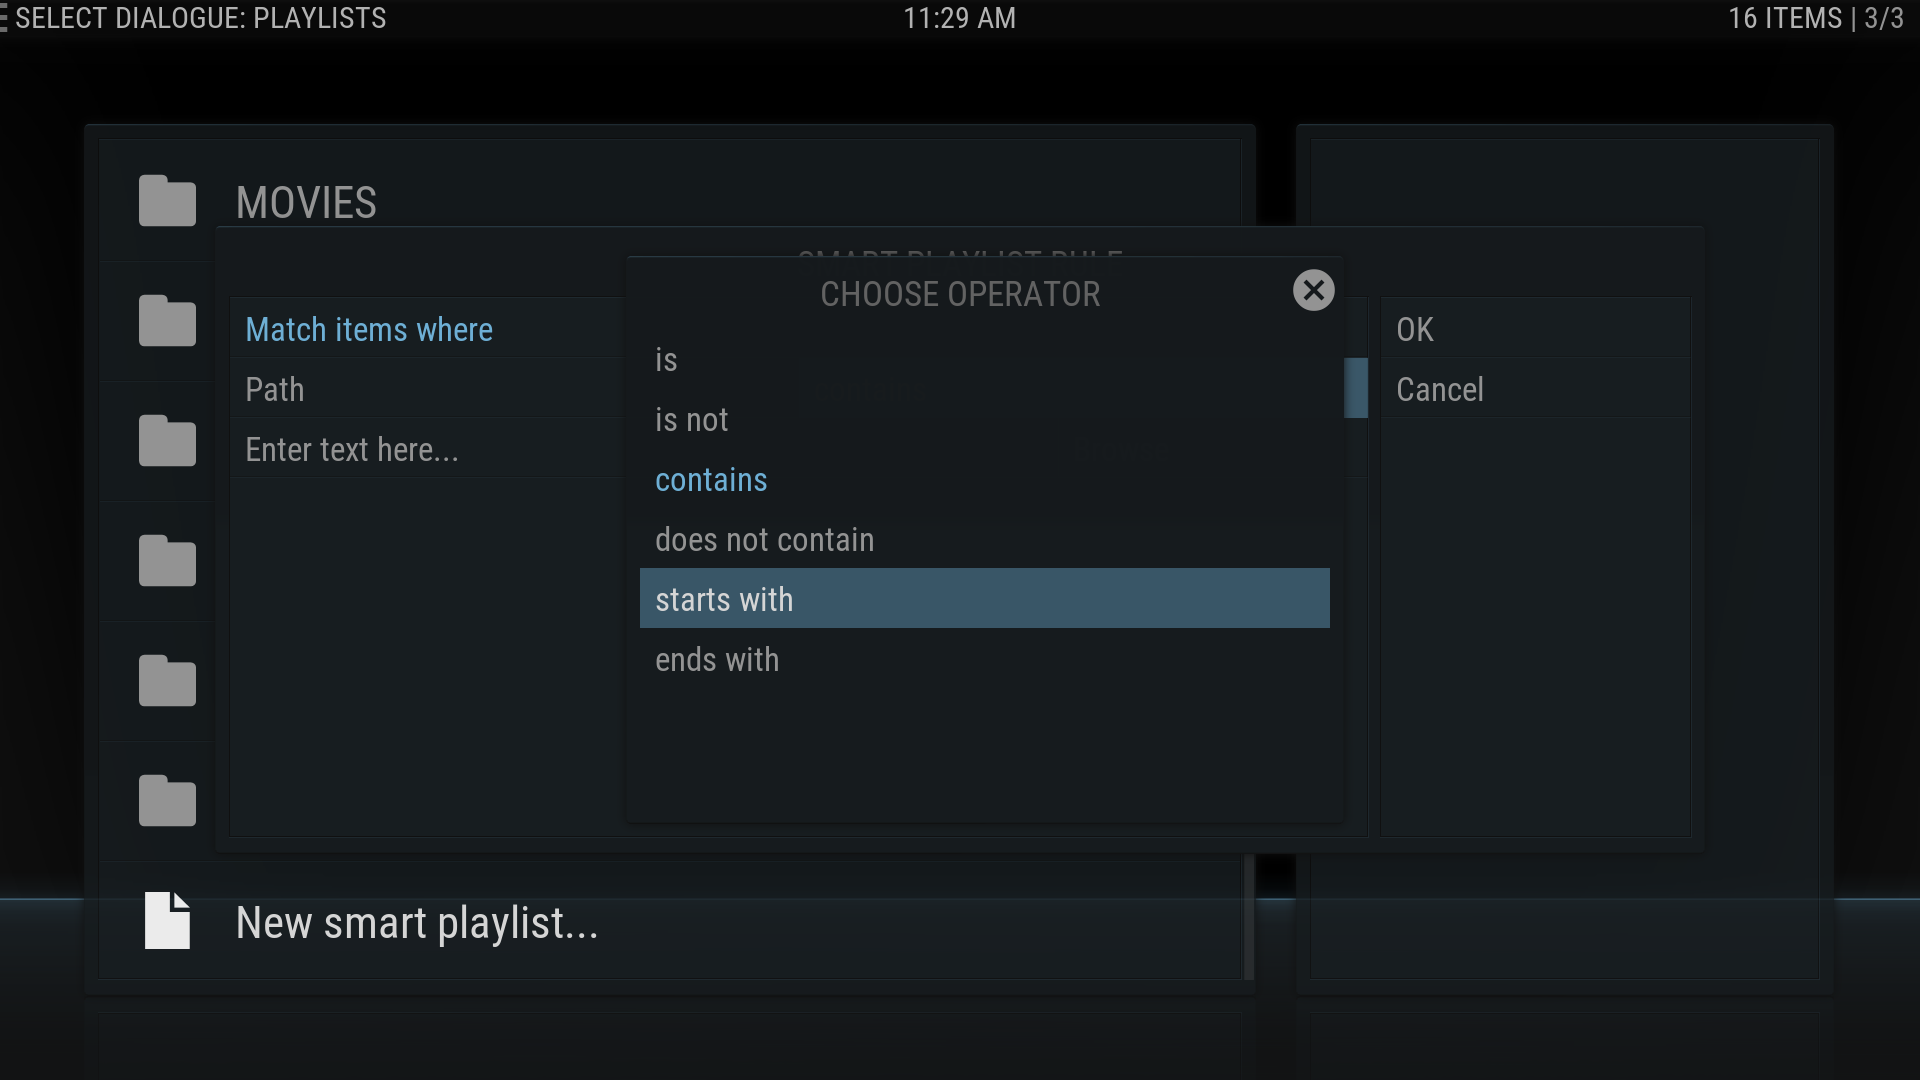
8. Choose starts with from the SMART PLAYLIST RULE dialog box.
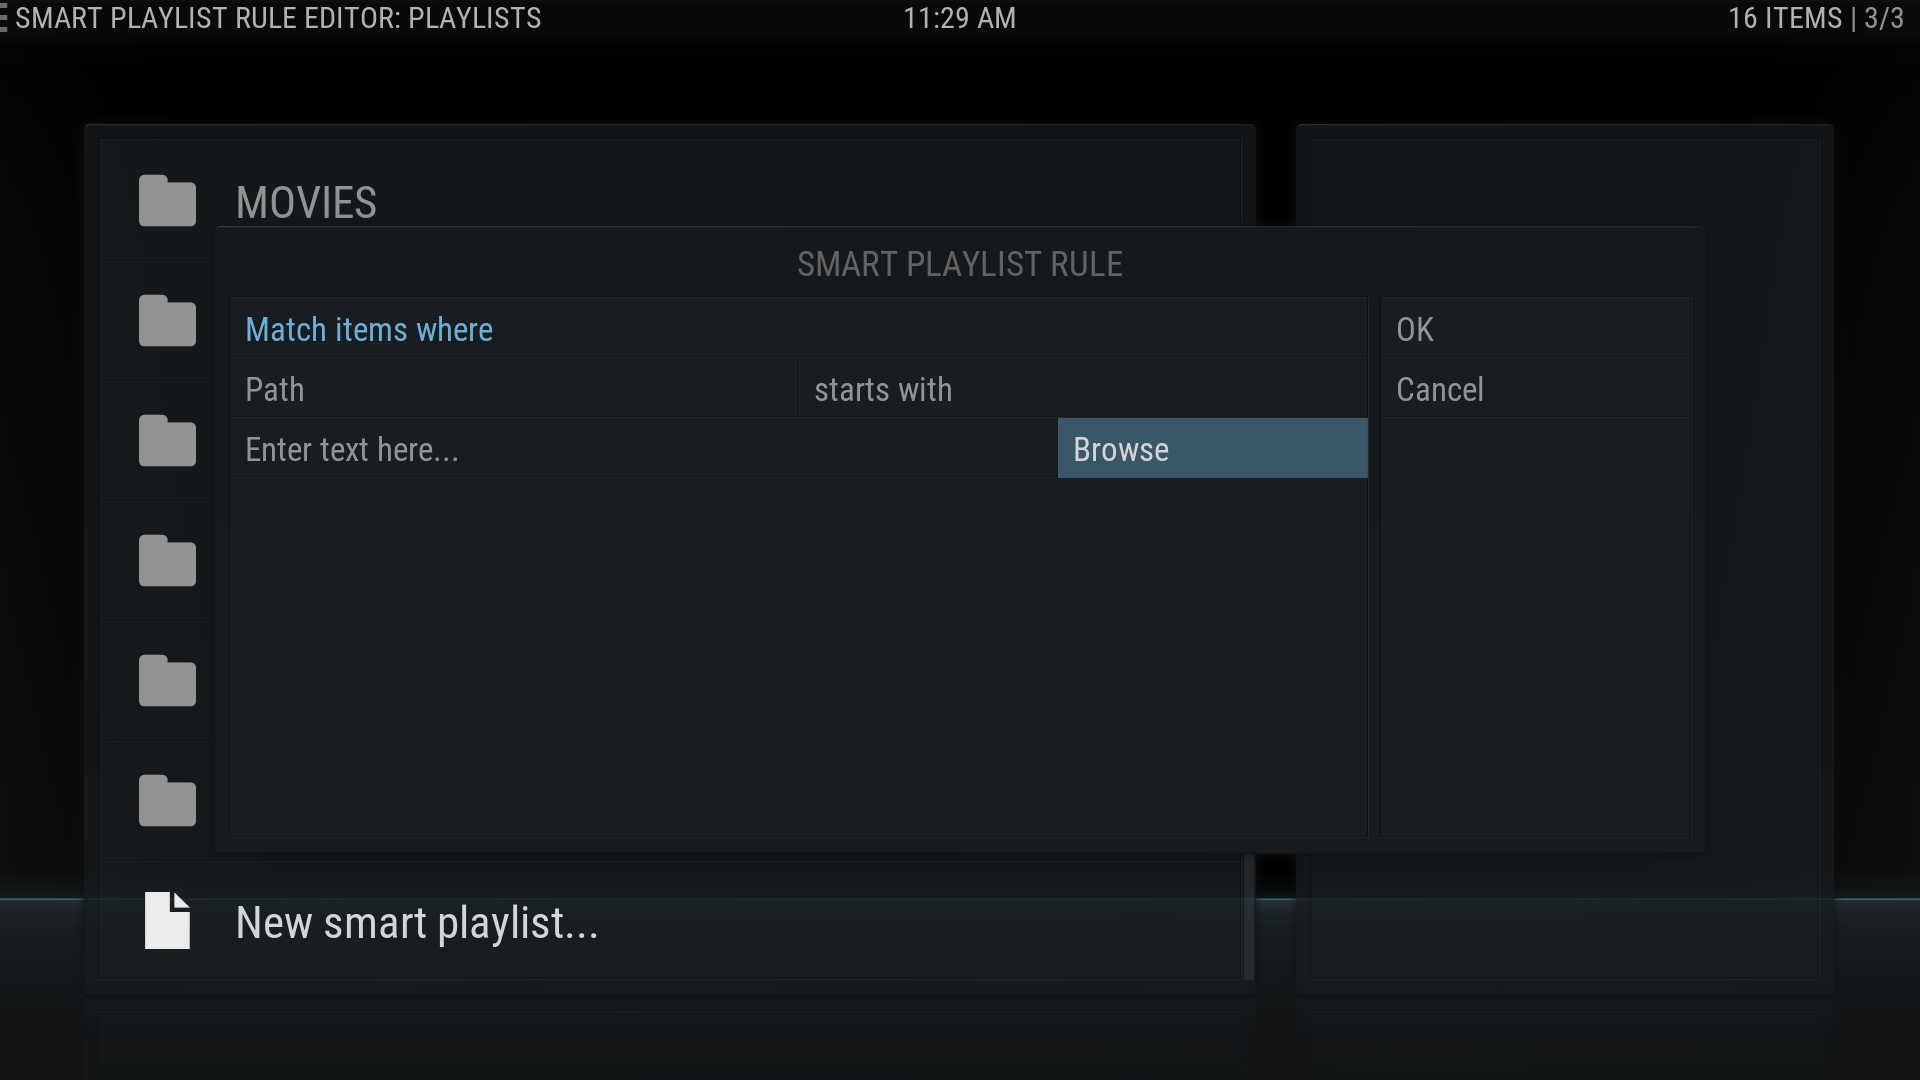
9. Click on the word Browse in the SMART PLAYLIST RULE dialog box.
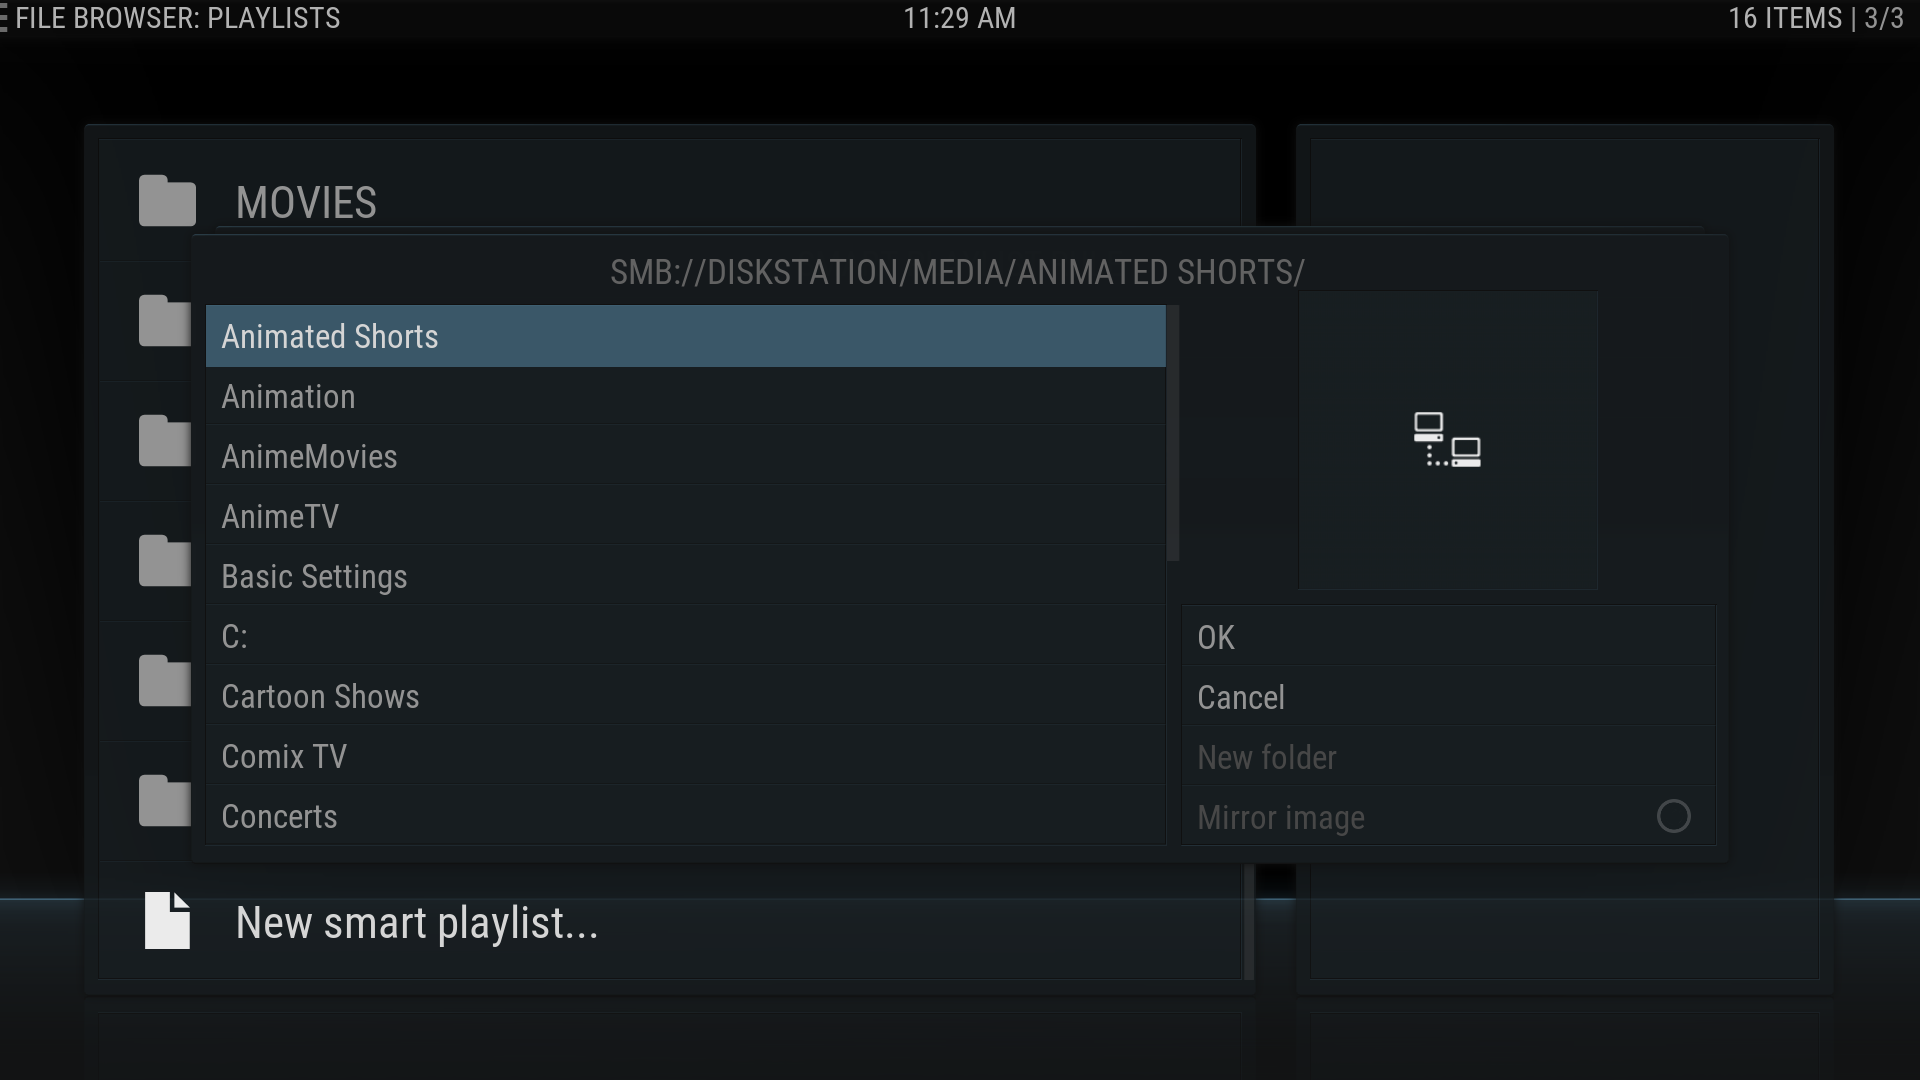
10. Choose the appropriate folder then click OK.
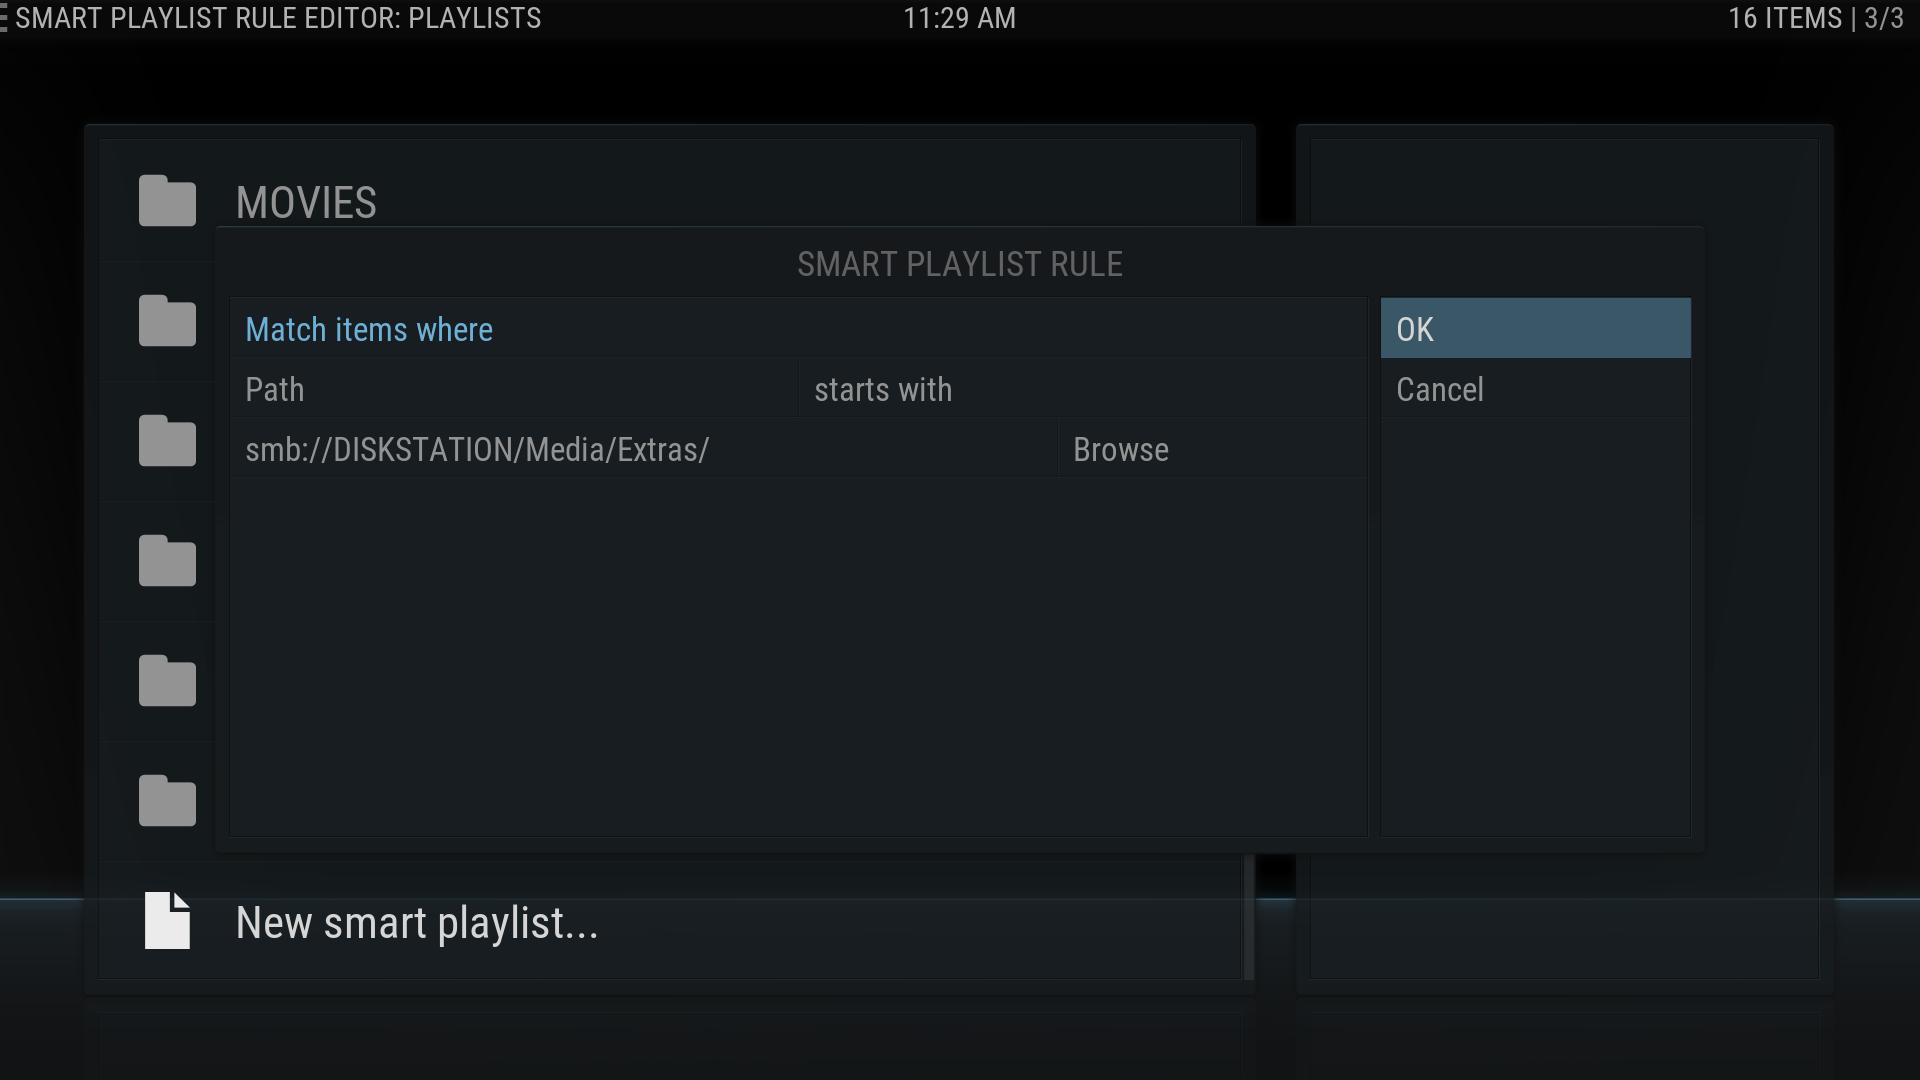
11. Click OK again.

12. Click OK once more.

13. An onscreen keyboard will appear, type the name of your new Smart Playlist then click DONE.


- 14. Repeat the above steps as needed create any additional Smart Playlists, then back out to the home screen.
Customising The Main Menu
This step will create the new Main Menu items.
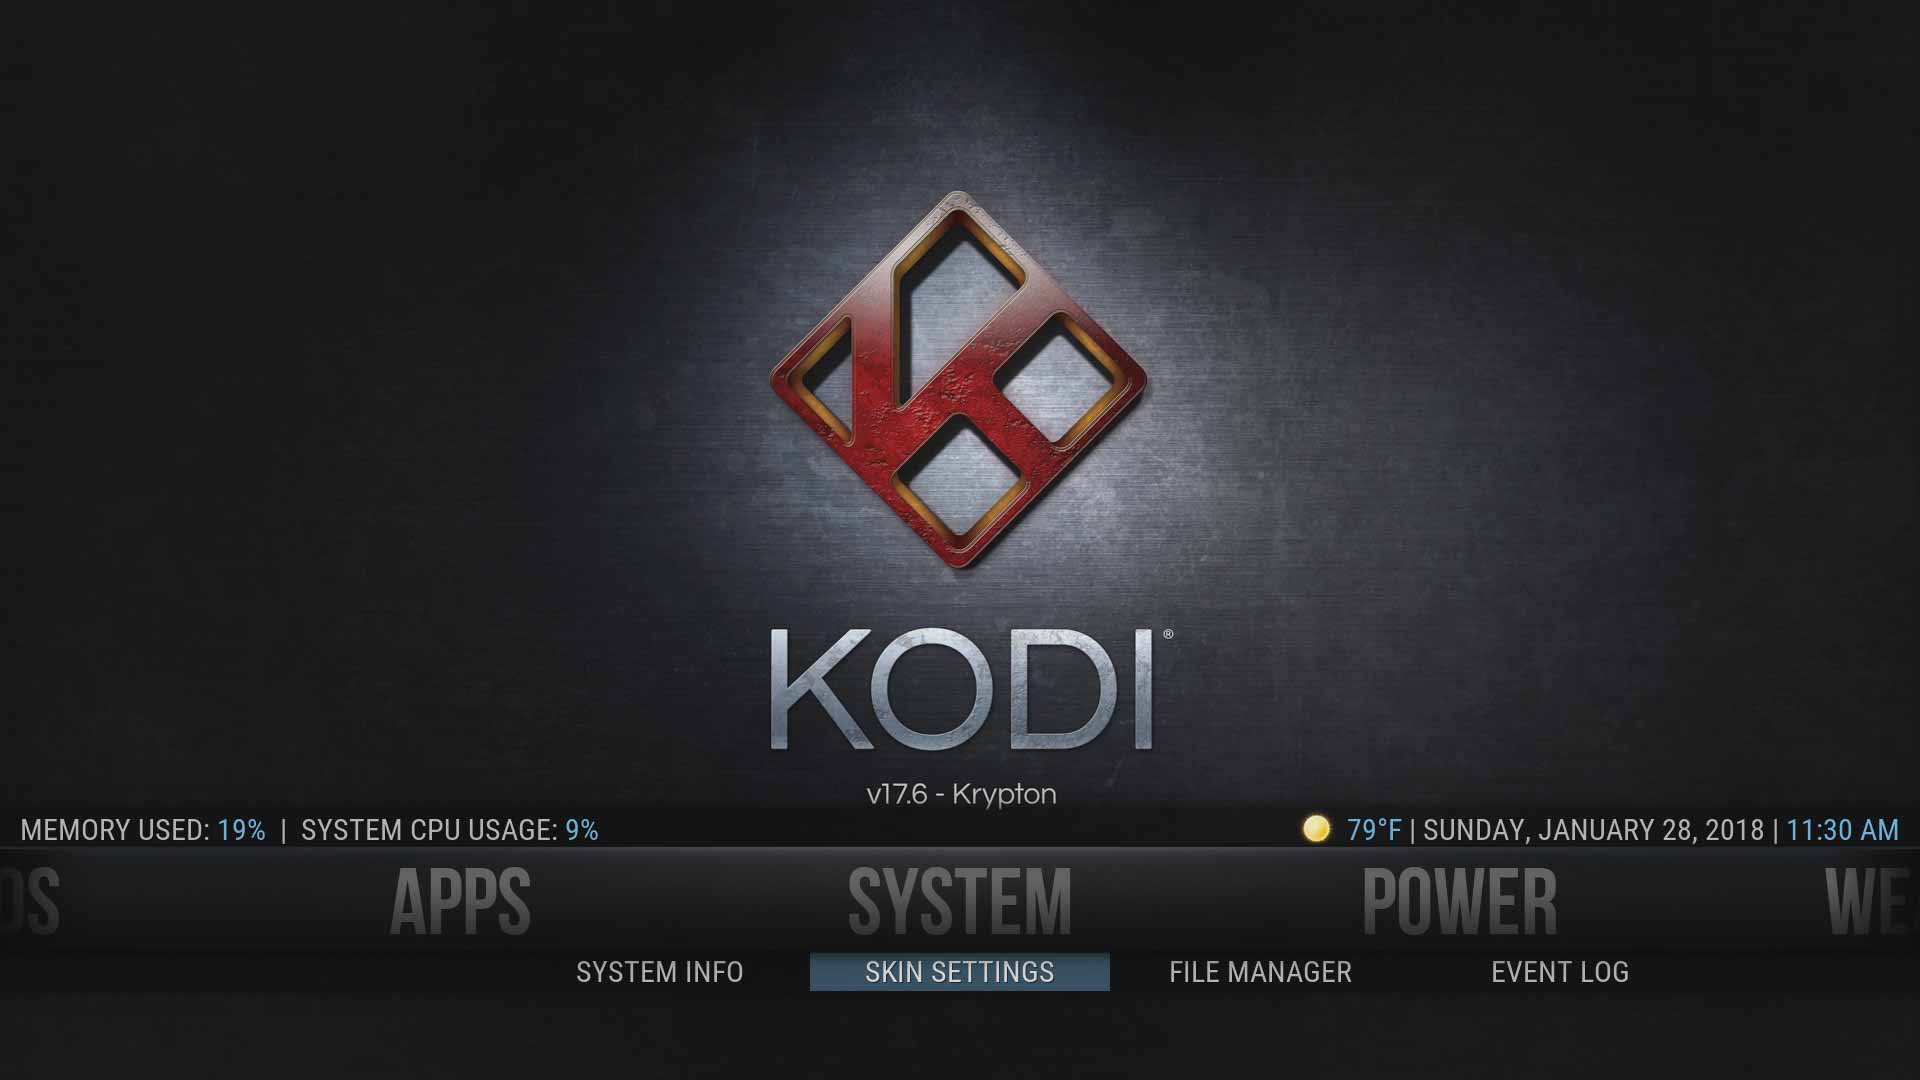
15. Click on SKIN SETTINGS under SYSTEM in the Main Menu.
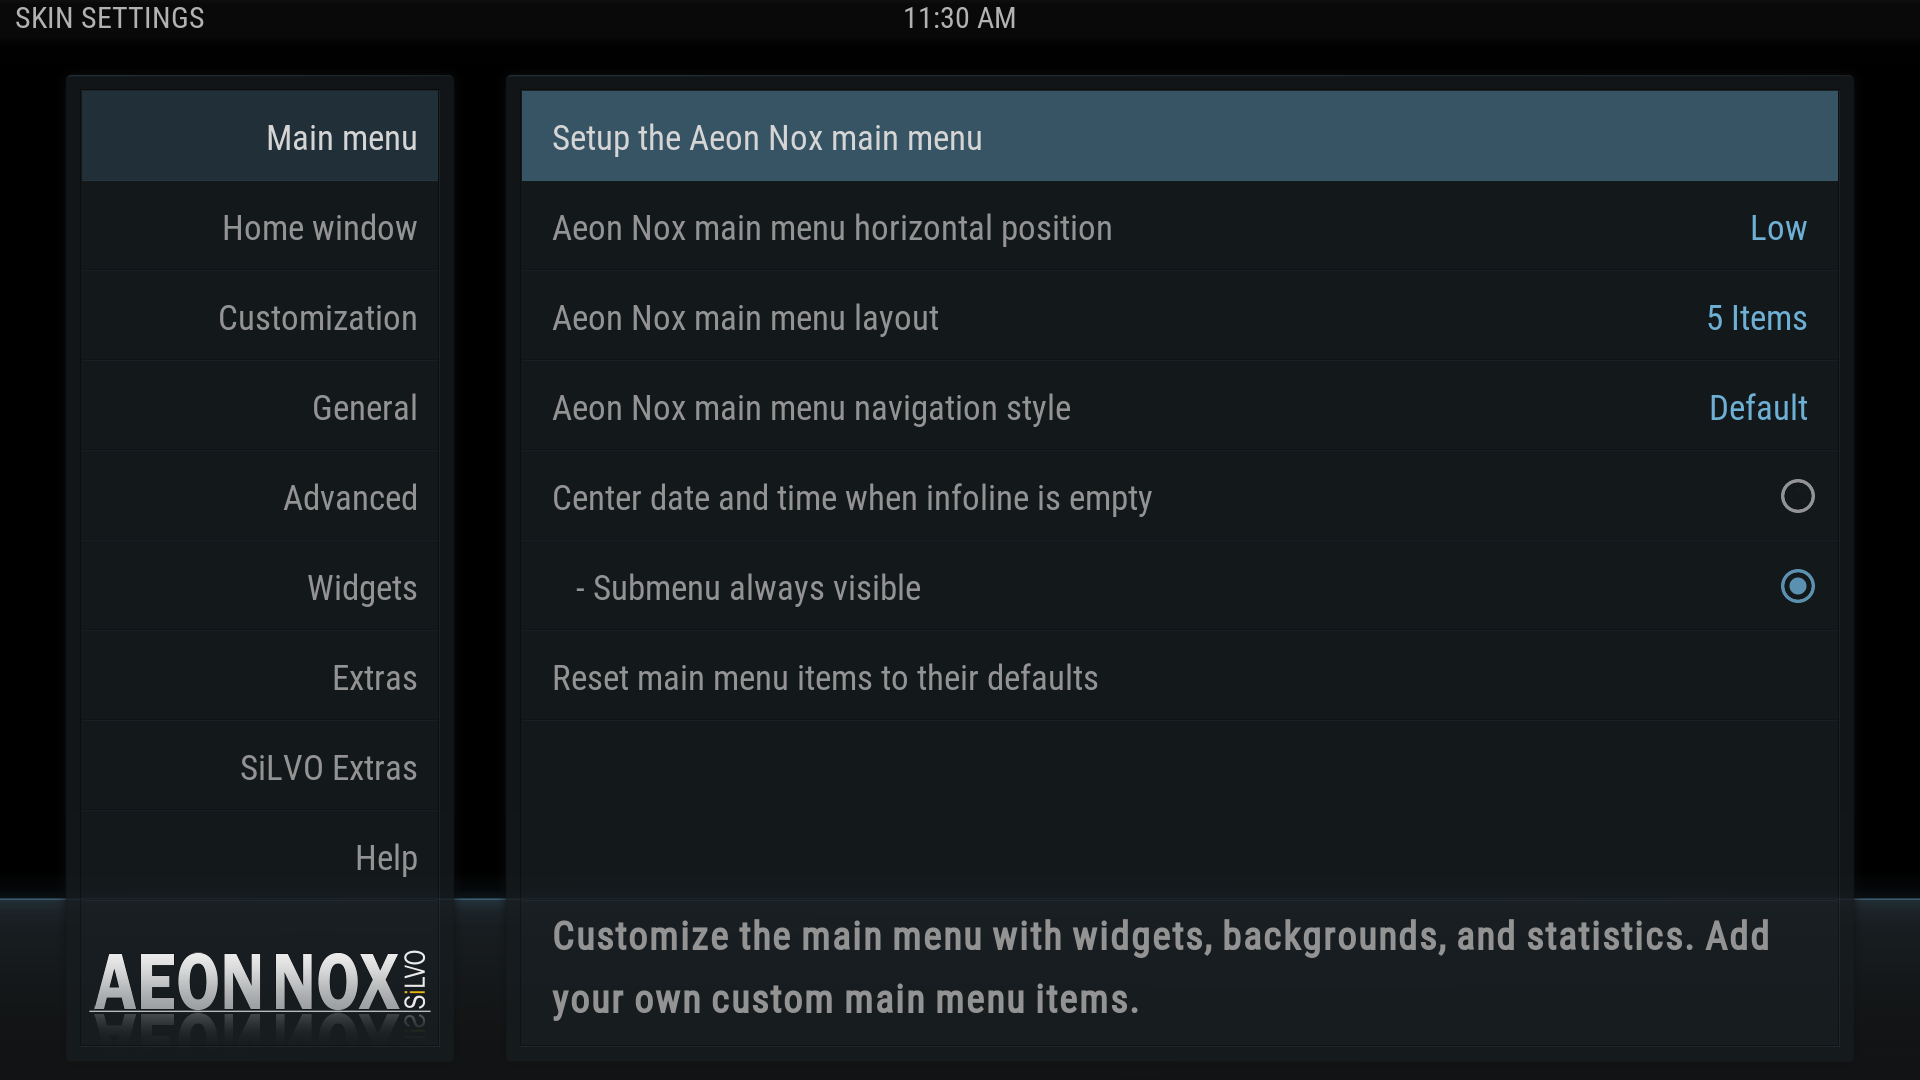
16. Click on Setup the Aeon Nox main menu
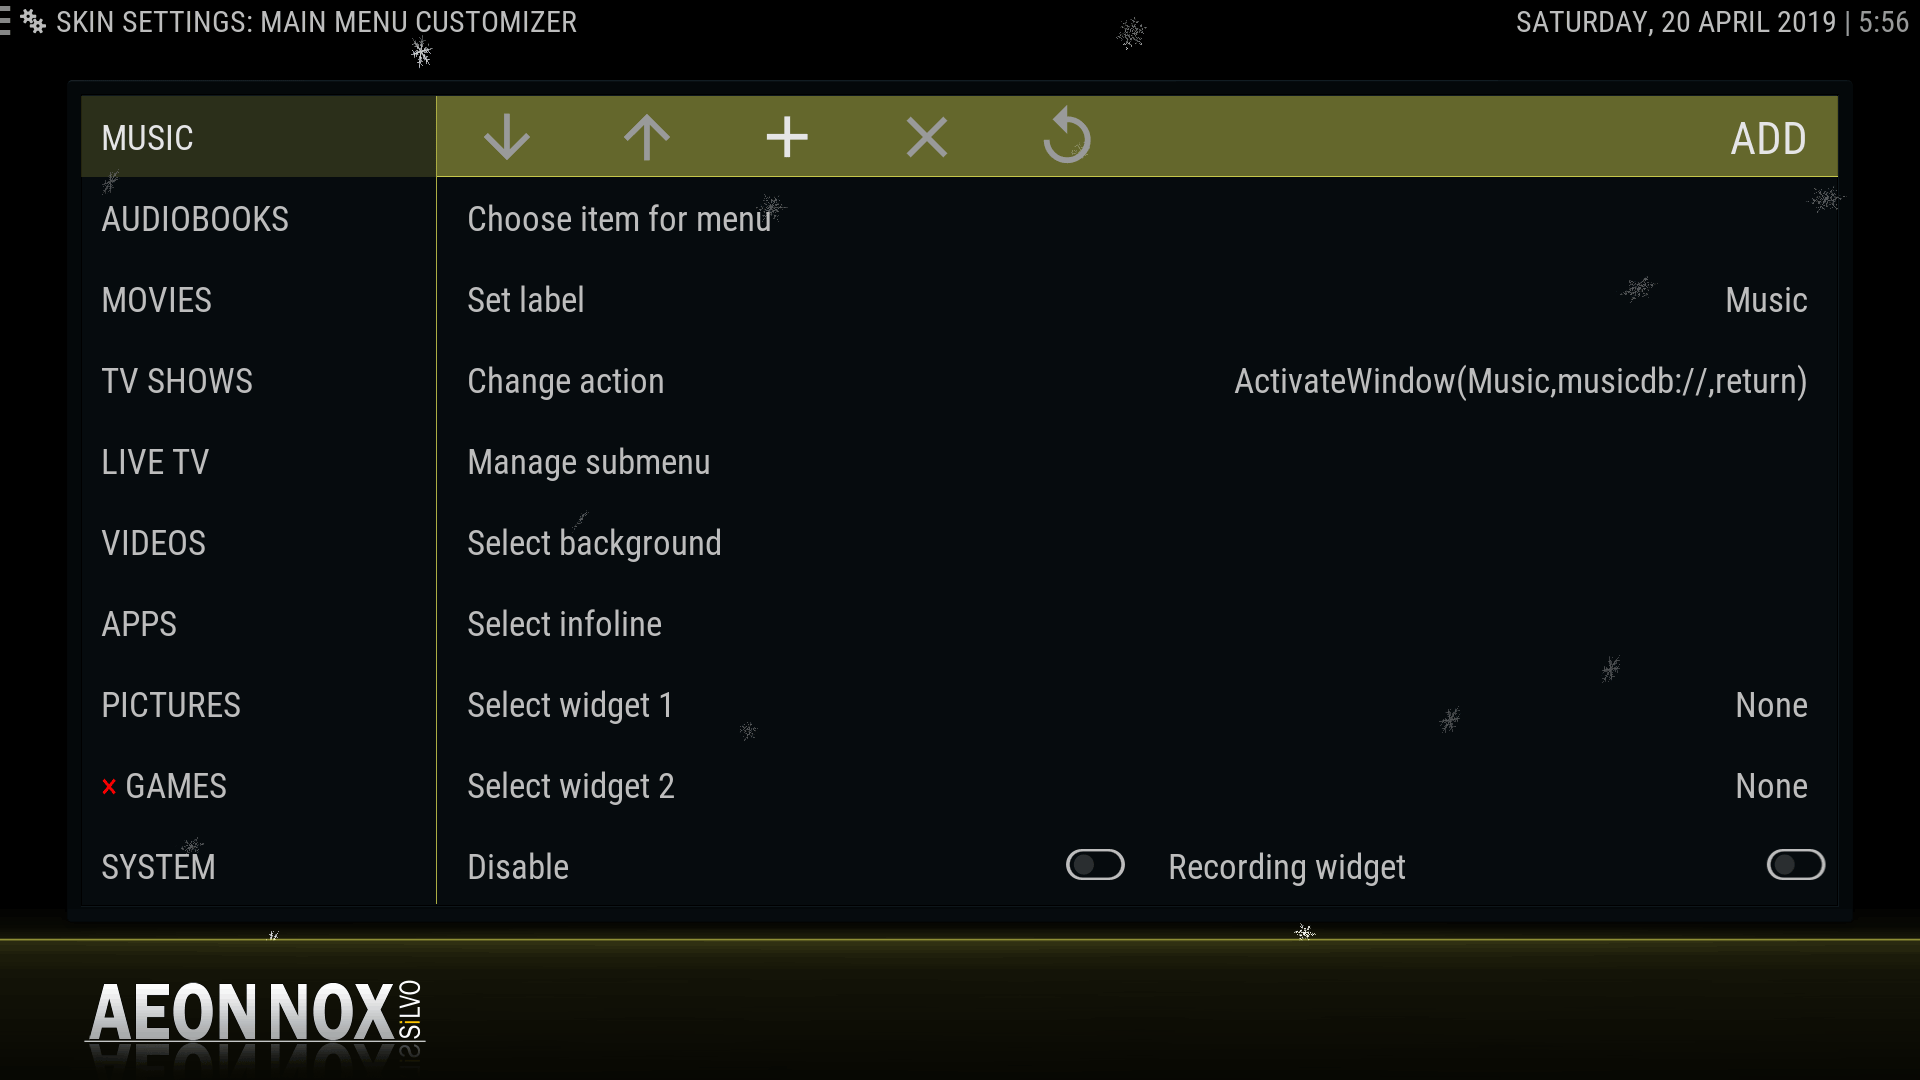
17. The MAIN MENU CUSTOMIZER windows opens and will look like the above image


- Description of options
- The Menu Items are on the left
- Options are along the top row (or next to menu item in previous versions)
- X - deletes the item
- + - adds a new menu item
- ↑ - move menu item up the list
- ↓ - move menu item down the list
- Restore - default menu items that have been removed or modified will be restored to original. User added menu items will remain.
- Note: The default center of them Main Menu is the third active menu item in the list. In this example, it is MOVIES).
Adding The Smart Playlists To The Main Menu
This final step now links the Smart Playlists created in Section 3 to the new Main Menu items created in the previous Section.
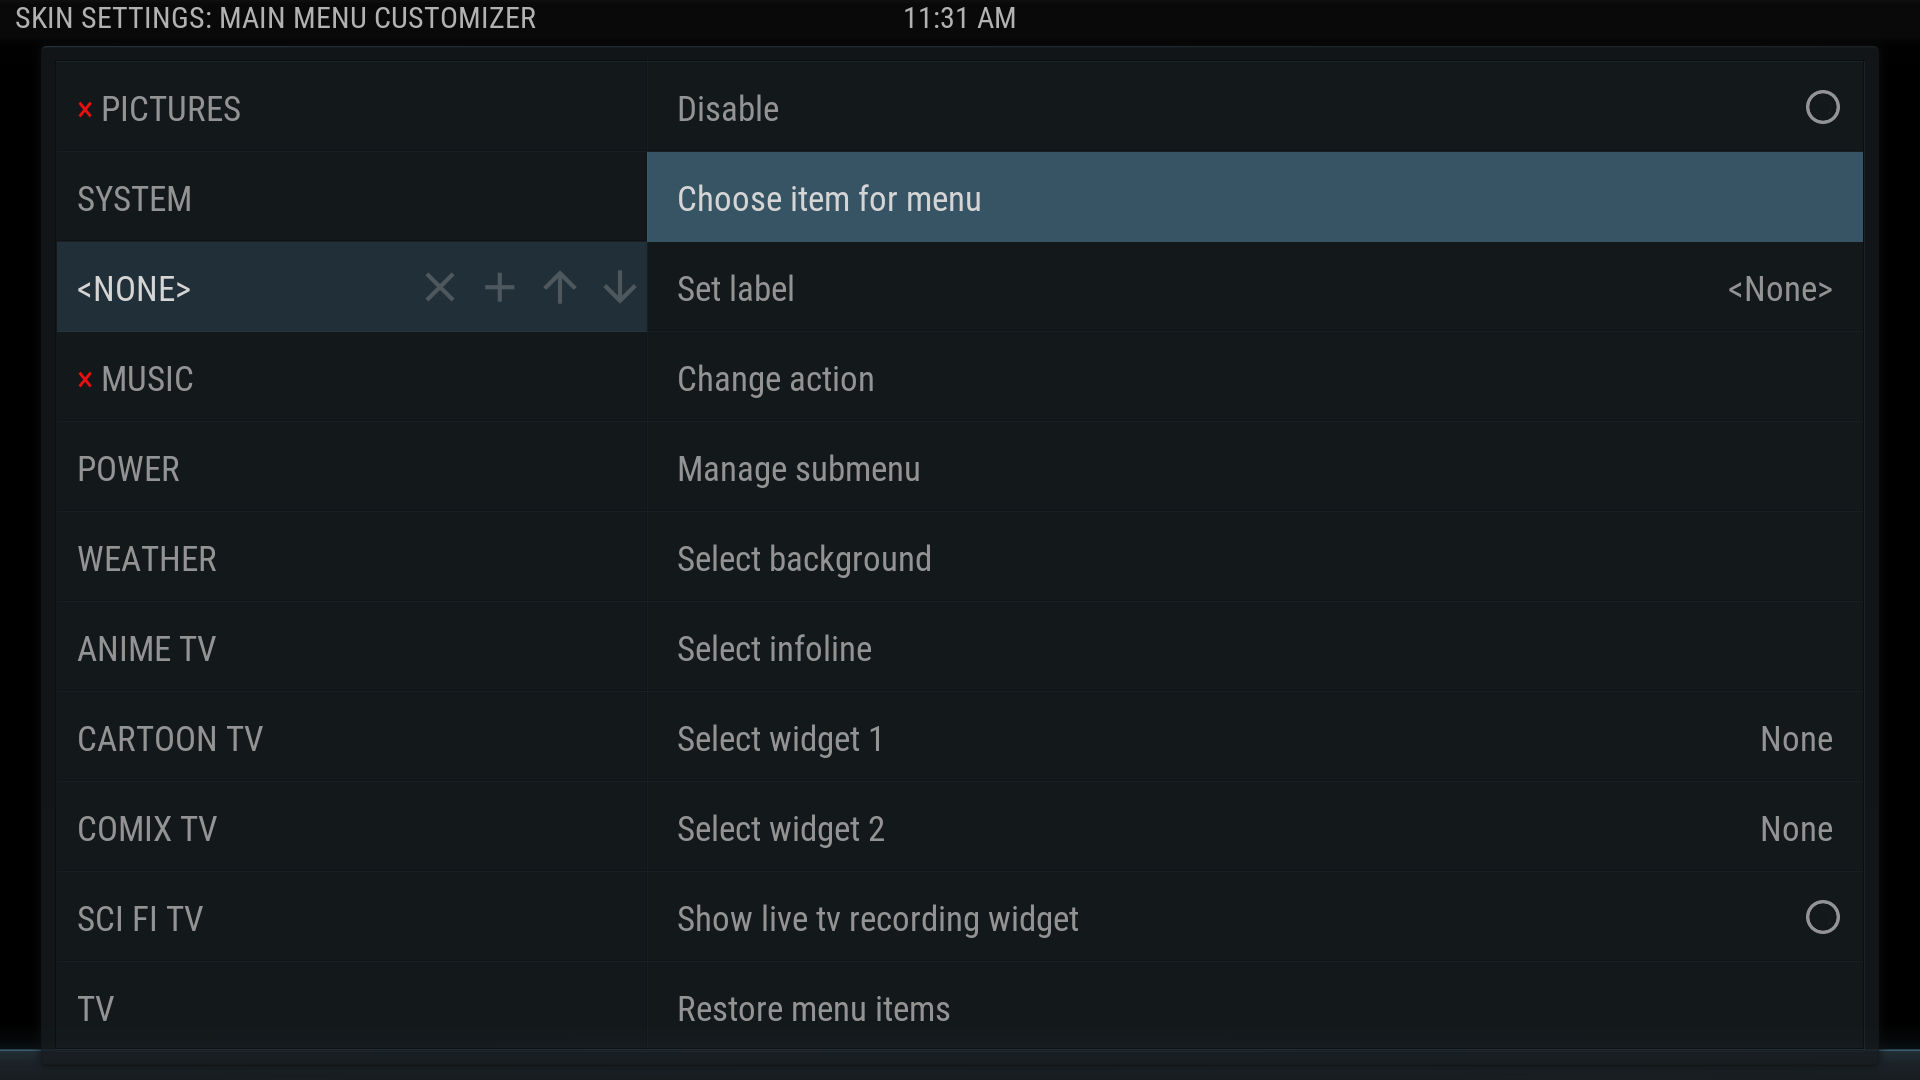
18. Select a Main Menu item you want to change, or click the plus sign to create a new one. If you create a new item, it will appear below the selected menu item with the label NONE. Either way, on the right side, select Choose item for menu and a pop out menu will appear.
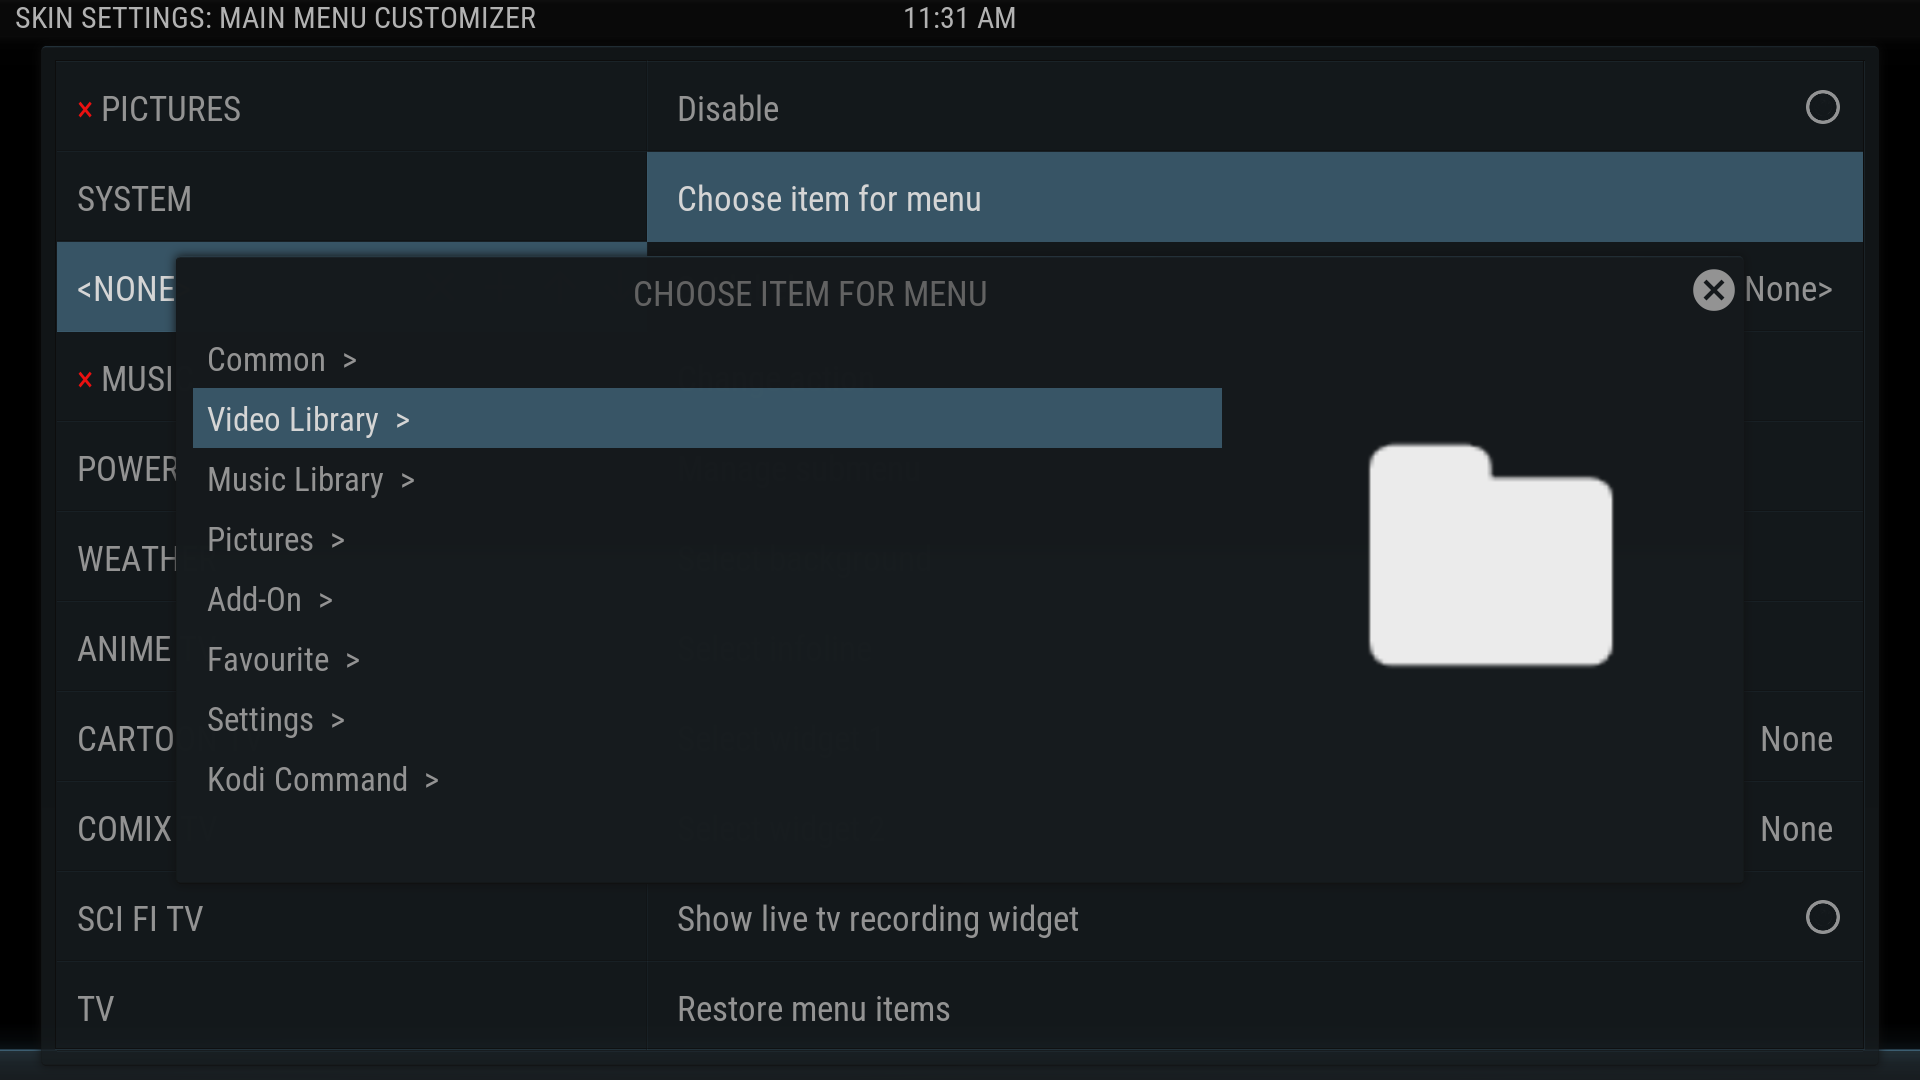
19. Click on Video Library.

20. In the pop out menu that appears next, choose Playlists >
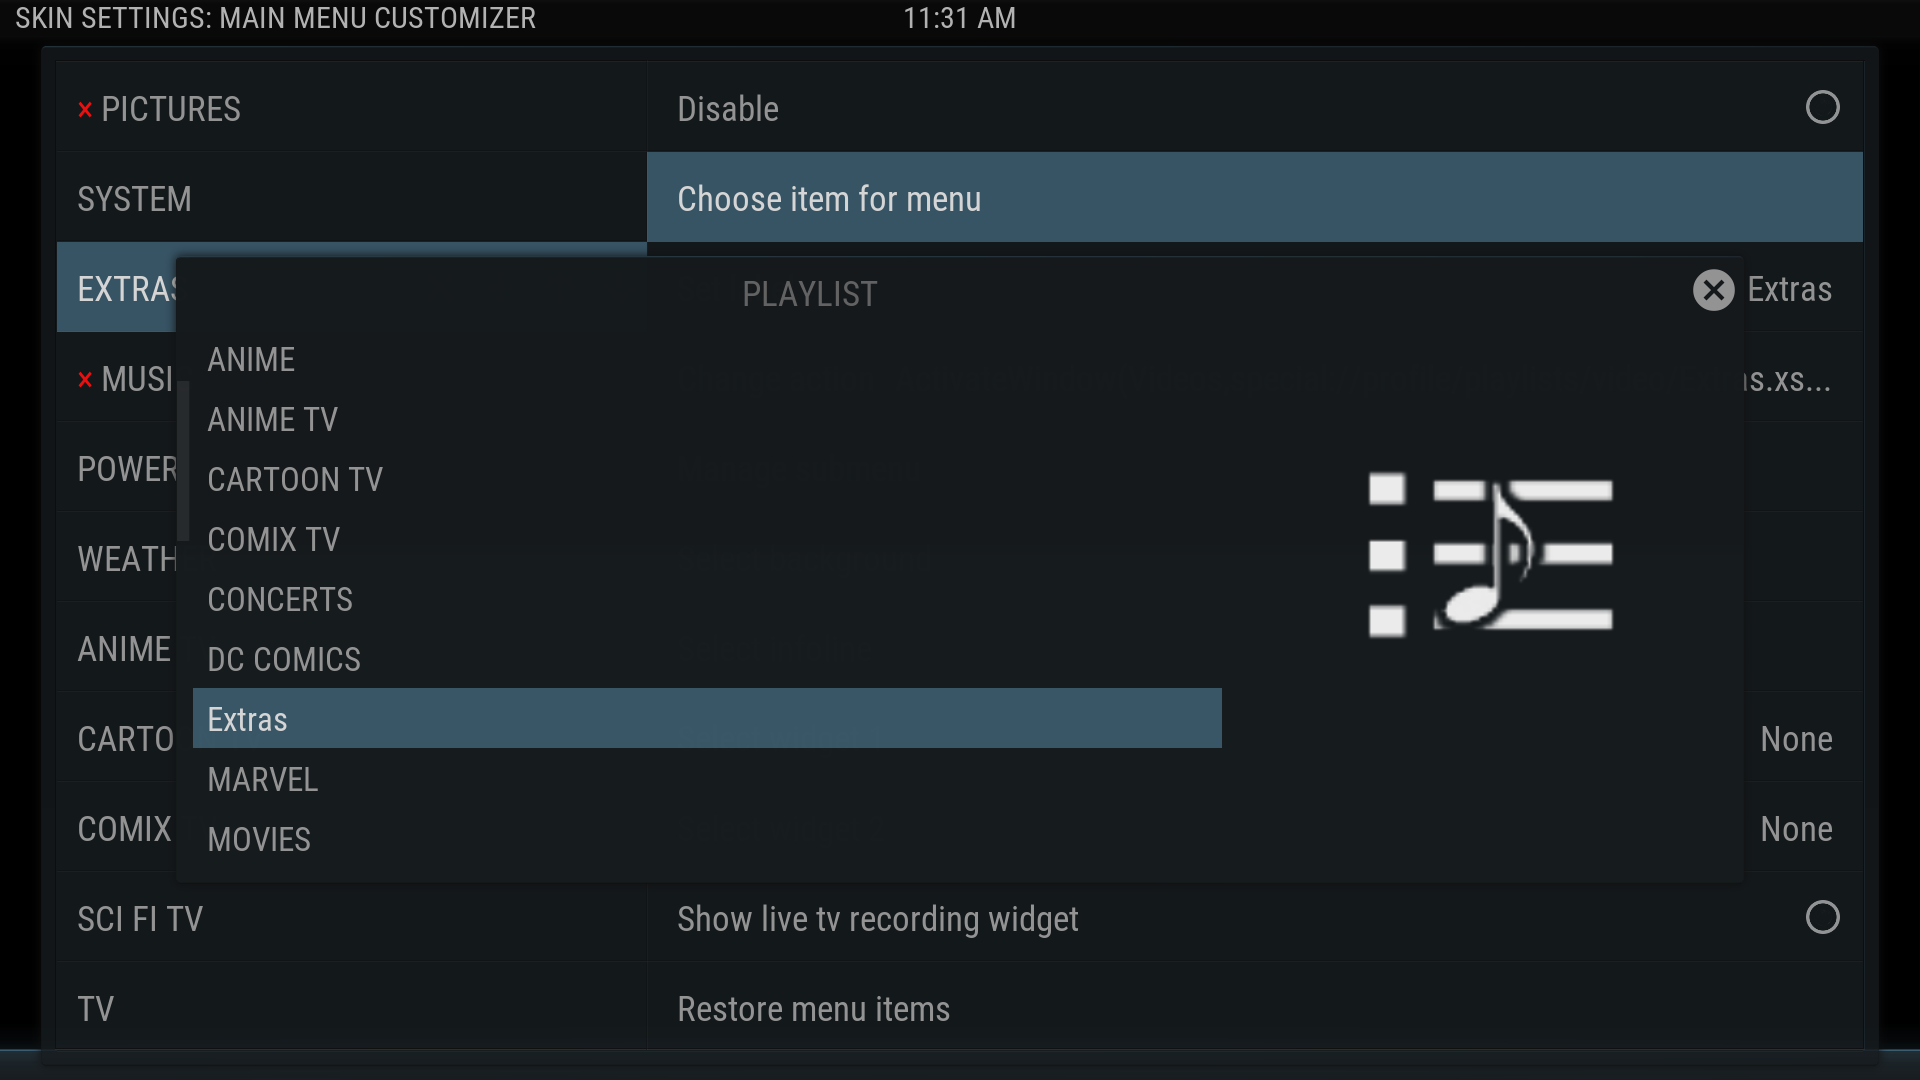
21. In the Playlist pop out menu, choose the required Playlist

22. In the What do you want to do with the playlist? box, choose Display
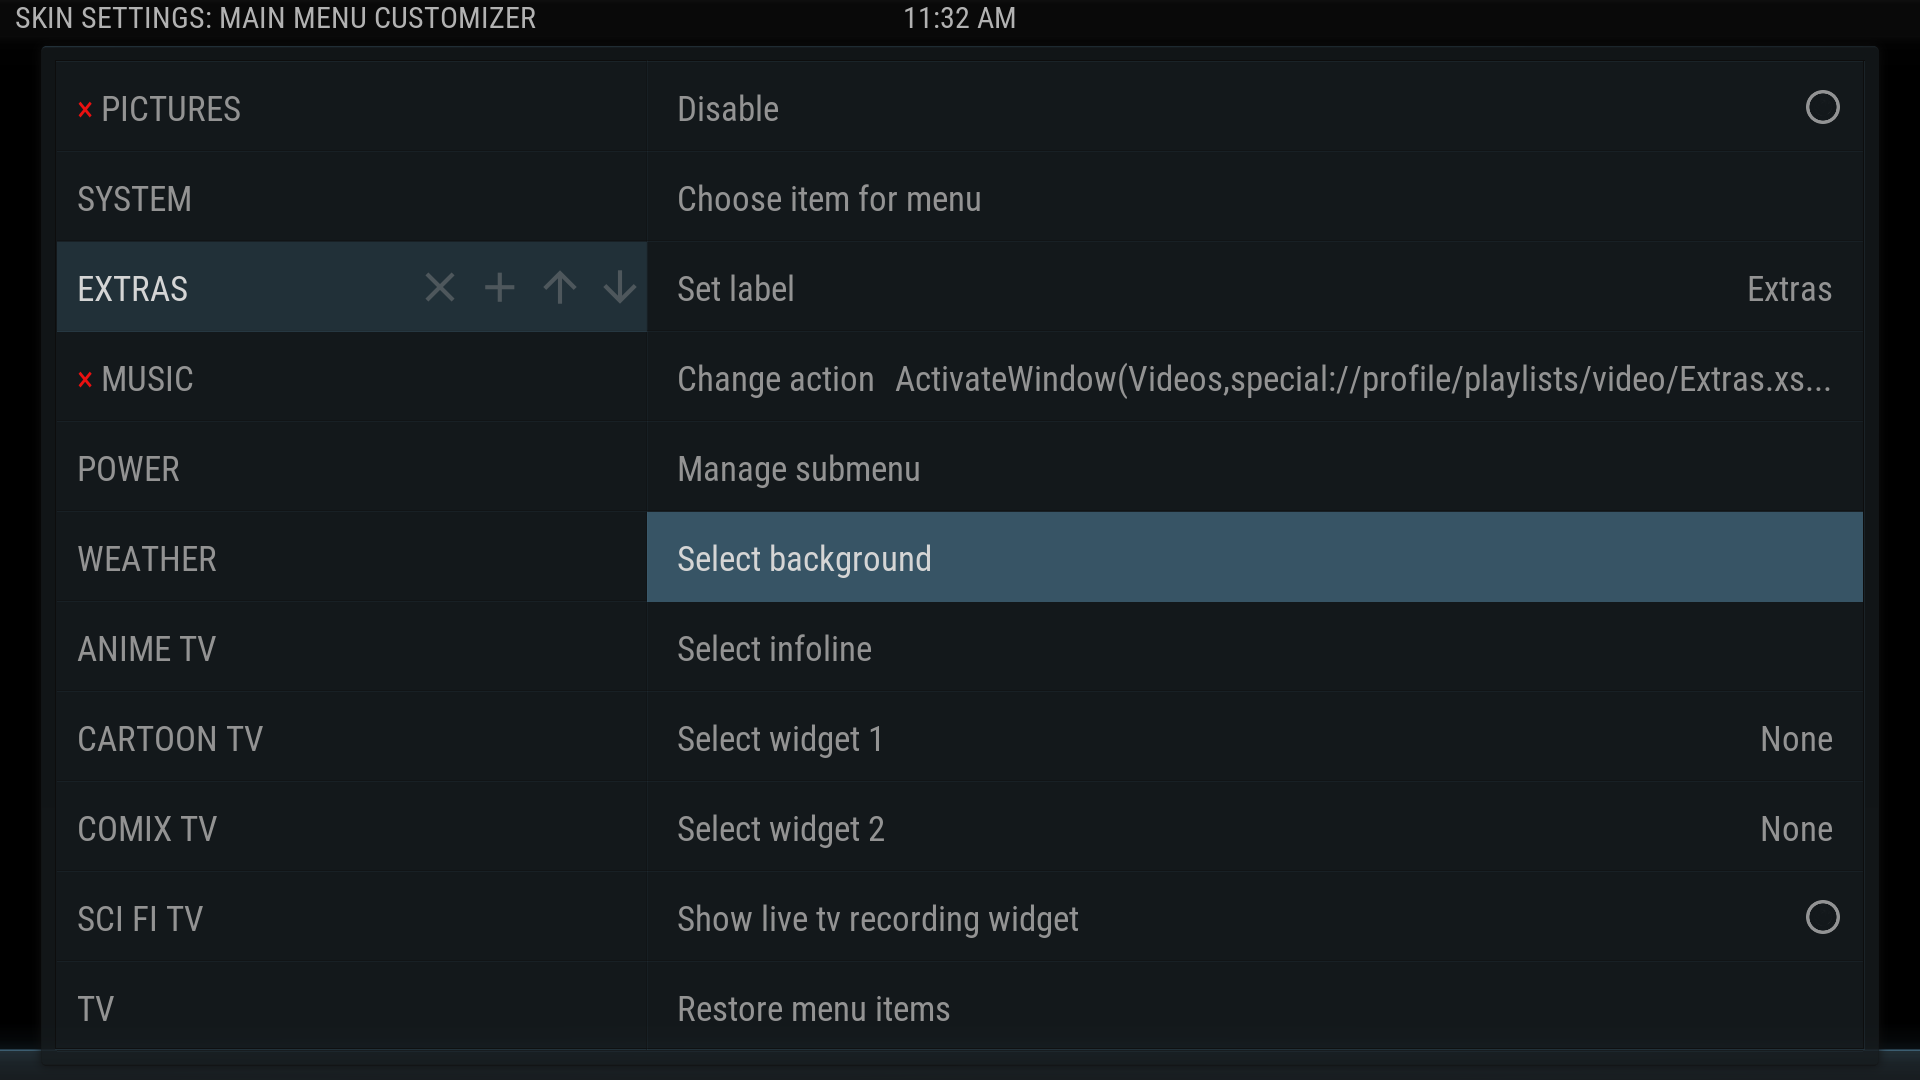
23. Click on Select background to set background fanart for the individual playlists. This will rotate through fanart that is specific to that playlist.
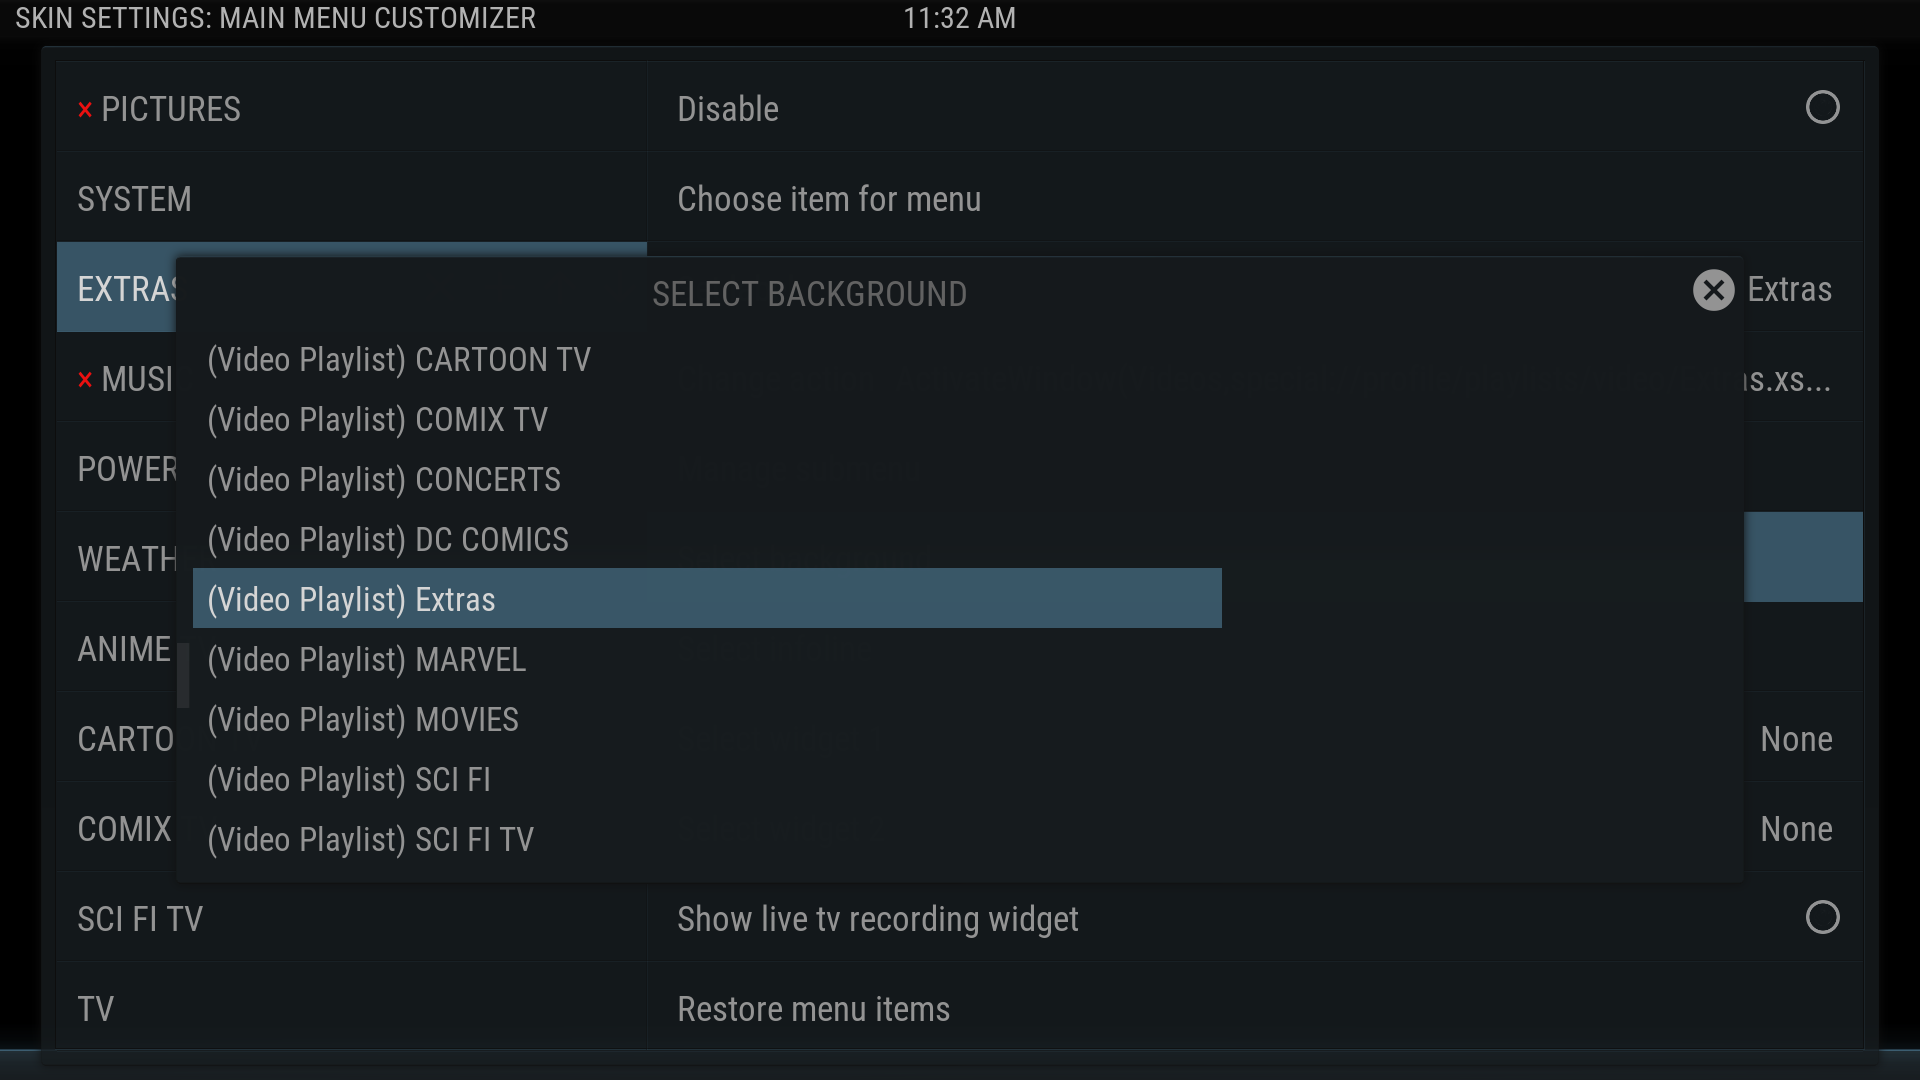
24. Scroll thru the pop up menu to (Video Playlist) <your playlist> to choose the background specific to the playlist.


25a. Repeat these steps as needed to add your playlists to the Main Menu, adjust their positions on the Menu to your liking, add widgets, etc.
or
25b. If you have no further buttons to add, simply back out to return to the Home Screen. At this point a script will run to re-build the Main Menu.
Duplicated Listings
If you prefer to not have the same Movie or TV Show also listed in the original Movie and TV Show menu items, then follow these steps:
- Disable the original Movie or TV Show button in the Main Menu Customizer screen as shown in step 20
- Create a new Smart Playlist that excludes the titles in the new menu items
- Create a new main menu item using the new "exclude" smart playlist.
You’re done!


| Return to top |
|---|