Quick start guide: Difference between revisions
newer template. Others are just redirects to this one. |
|||
| Line 71: | Line 71: | ||
As you read this wiki and experiment on your own, you will quickly learn about the value of the '''''[[context menu]]'''''. | As you read this wiki and experiment on your own, you will quickly learn about the value of the '''''[[context menu]]'''''. | ||
To use it, while highlighting an item, press the {{keypress|''' | To use it, while highlighting an item, long press the {{keypress|'''OK'''}} key on a IR remote, long press {{keypress|'''return'''}} on a keyboard. if you are using a mouse, you can right click while hovering over an item or long left click. | ||
== Alternative guides == | == Alternative guides == | ||
Revision as of 19:02, 16 September 2017
Congratulations, new user, in your choice of media center software: Kodi!
This guide is designed to get you up and running with Kodi in the shortest time possible, and was written with the most typical use cases in mind. For more in depth information please refer to the Kodi online wiki manual
The Kodi interface is designed with the 'Home Theater' in mind. This means it is best viewed on a large-screen TV while you sit on your couch 10-feet away from that TV, rather than on a small monitor while you sit at your desk. Because everything is designed with the home theater experience in mind, the best way to interact with Kodi is with a remote control, rather than a computer mouse. If it helps, think of Kodi as the ultimate DVD-player/set-top-box.
Installing Kodi
Kodi can be installed on a wide range of supported hardware, from normal desktop computers, ARM powered tablets and phones, to tiny set-top-boxes, and more.
If you haven't already done so, download Kodi from http://kodi.tv/download/ or see the installation guides here:
|
|
|
|
|
|
|


See the Installing page for additional guides.
Adding files
While you can just use Kodi with plain file views, adding/scanning files to the library will add rich features such as cover art, summaries, thumbnails, trailers, and more.
To just quickly add files see Adding videos to the library/Adding media sources.
Adding videos to the library
Video library/Adding media sources
Adding music to the library
- See also: Adding music to the library and Music library
In order to be able to include information on your music collection in the library, Kodi needs your music to be tagged. When your collection is scanned, Kodi stores all the tagging information (artist, album, year, genre, etc) in the database which allows you to efficiently search and manage your music collection. Today most media applications and players (e.g. iTunes / iPod) organize music by this ID tag information.
Note: Your audio files must have a valid ID tag for them to work properly in the Kodi music library.
This process achieves the following:
- Sets your music source(s) in Kodi. Simply explained, this points Kodi to your music files
- Allows Kodi to scan the tags in the music files and import that data into the library
-
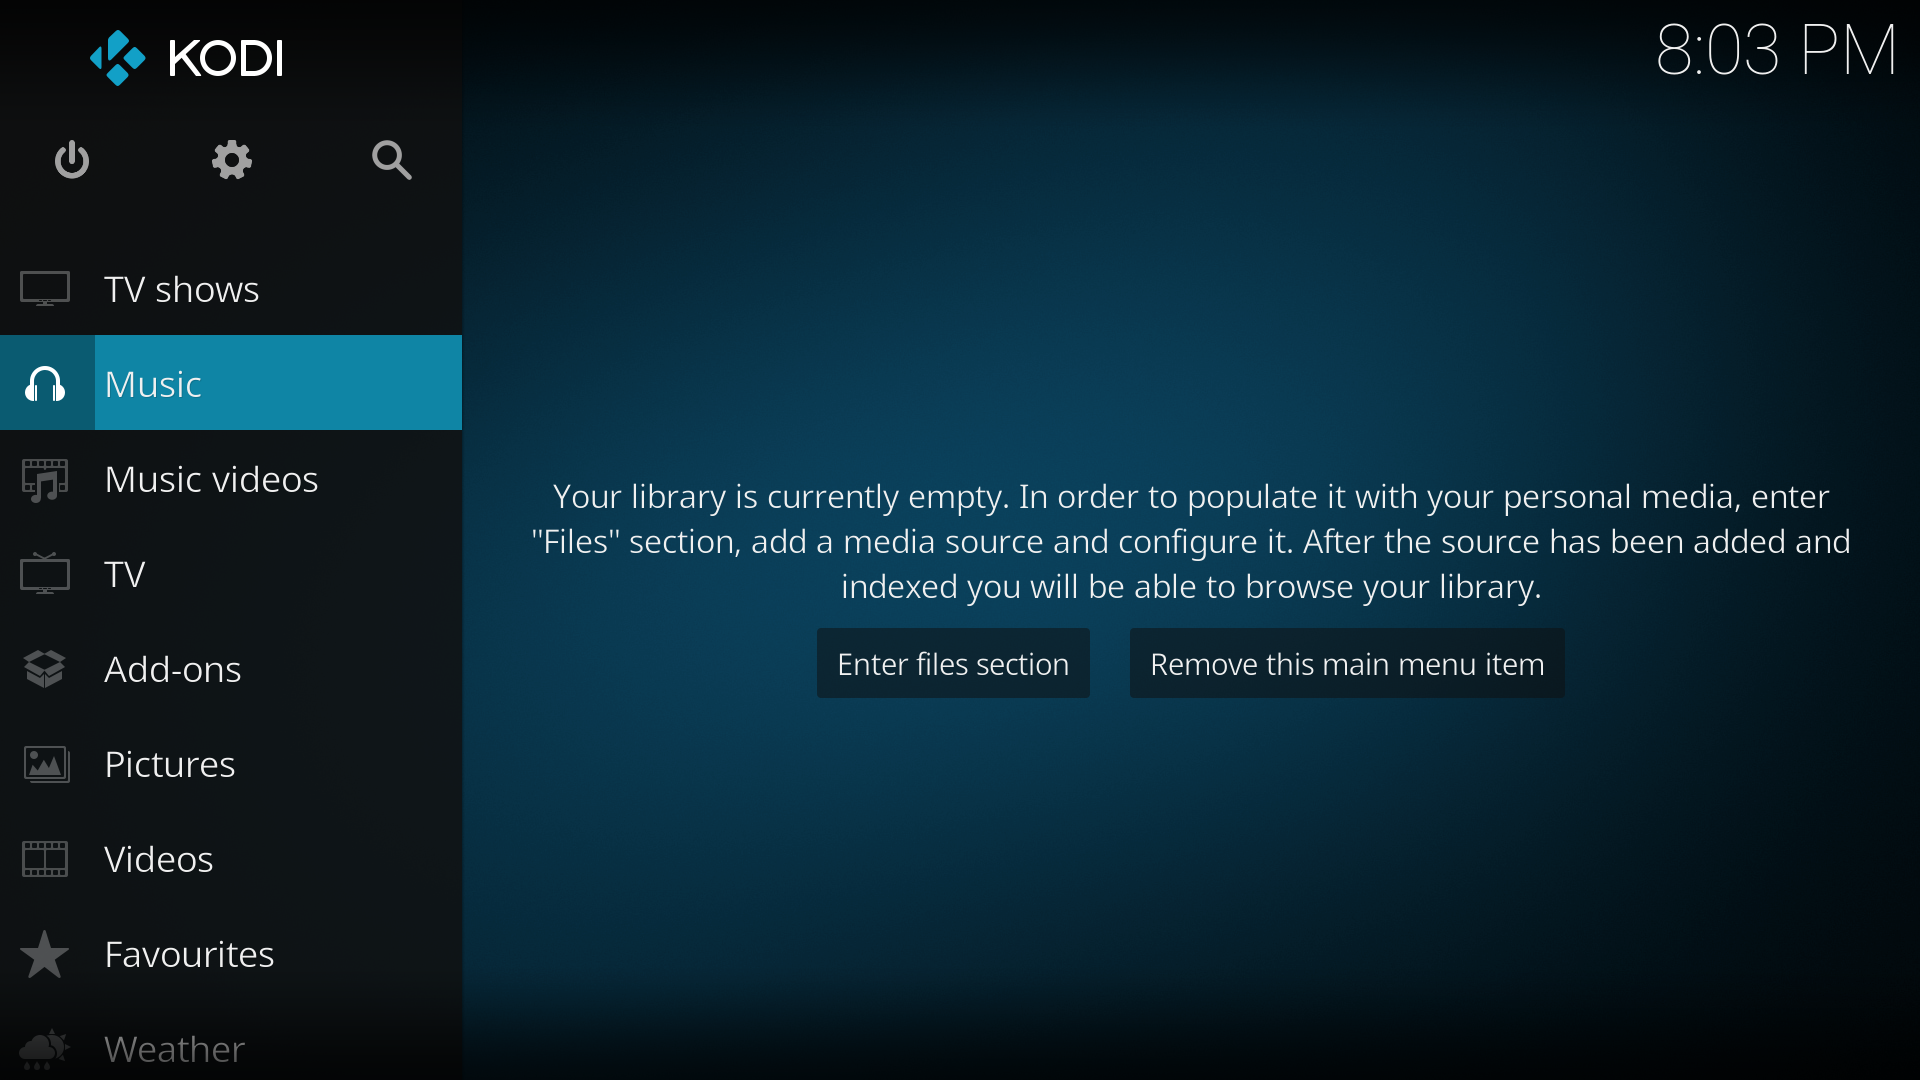 Step 1: On the Home menu select Music from the menu items.
 -
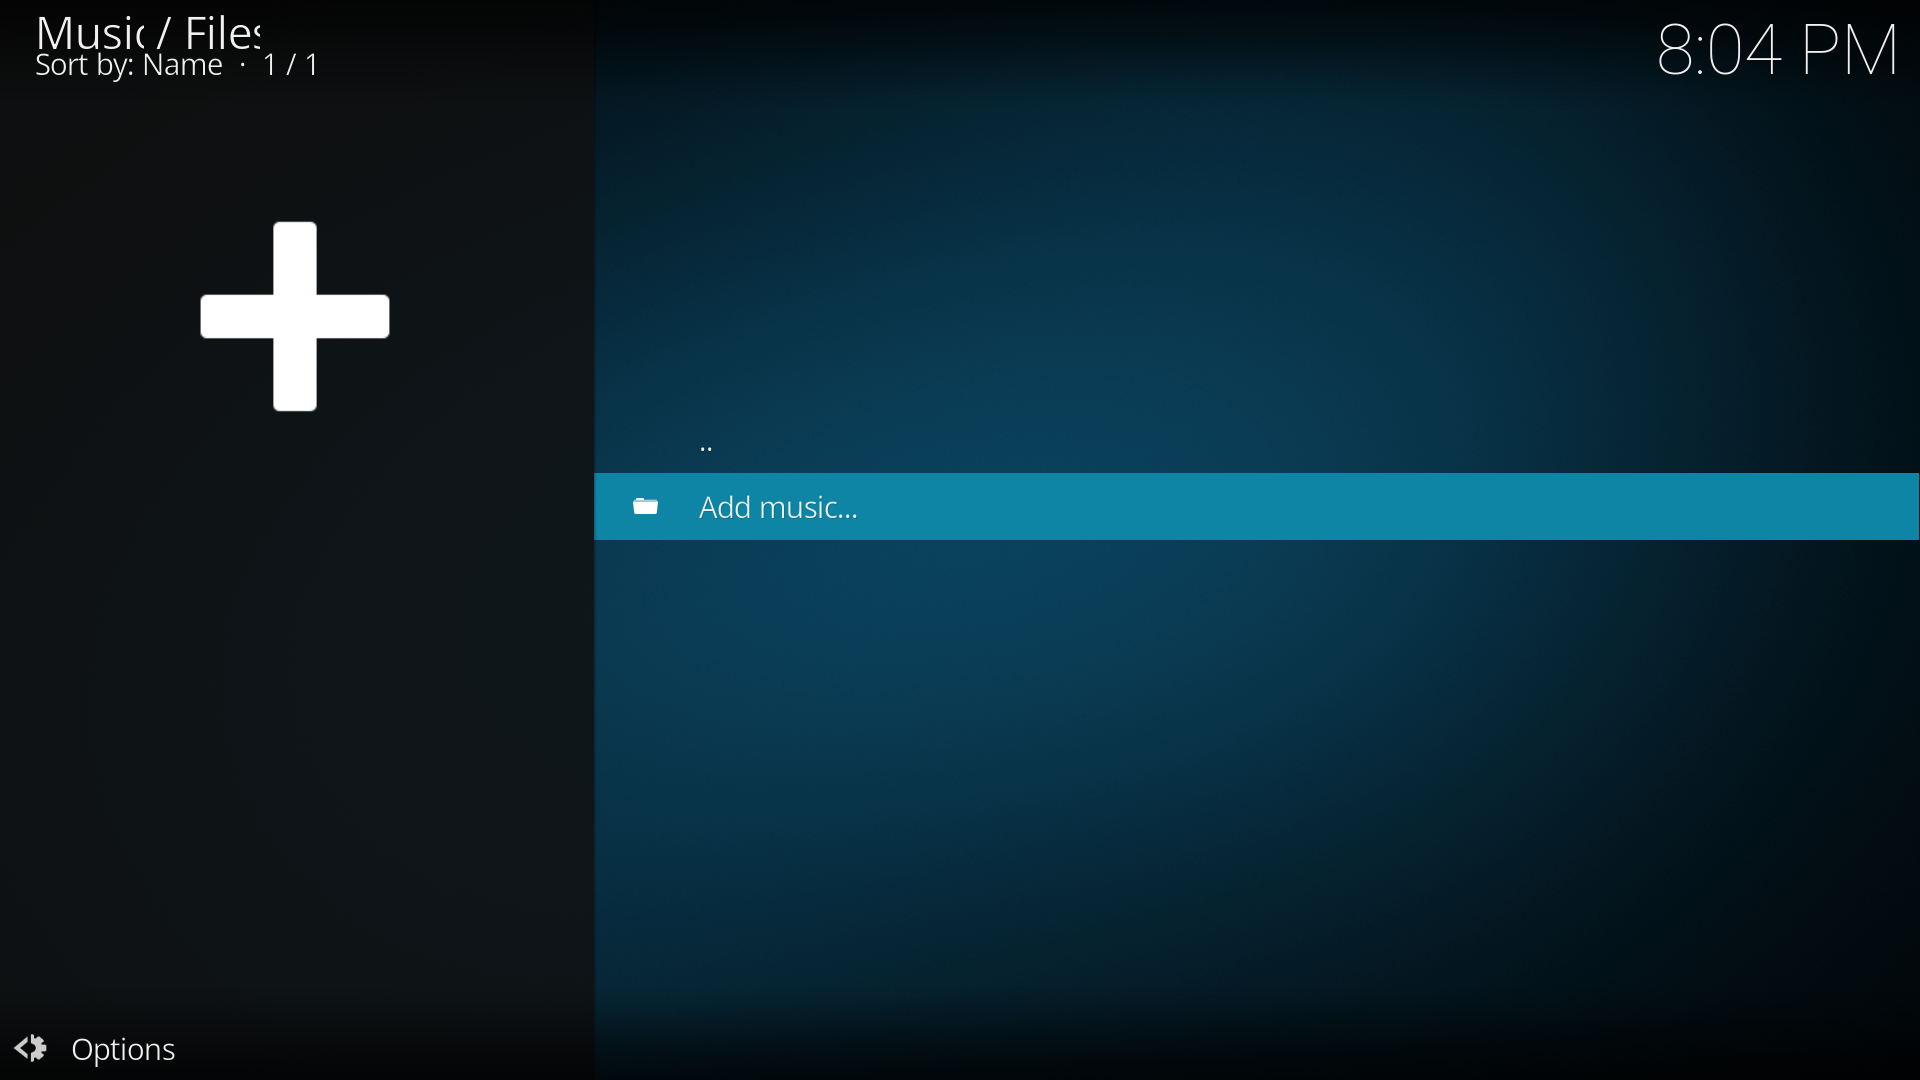 Step 2: In the Music File Browser select Add music. In some cases you may need to select Files to access this.
 -
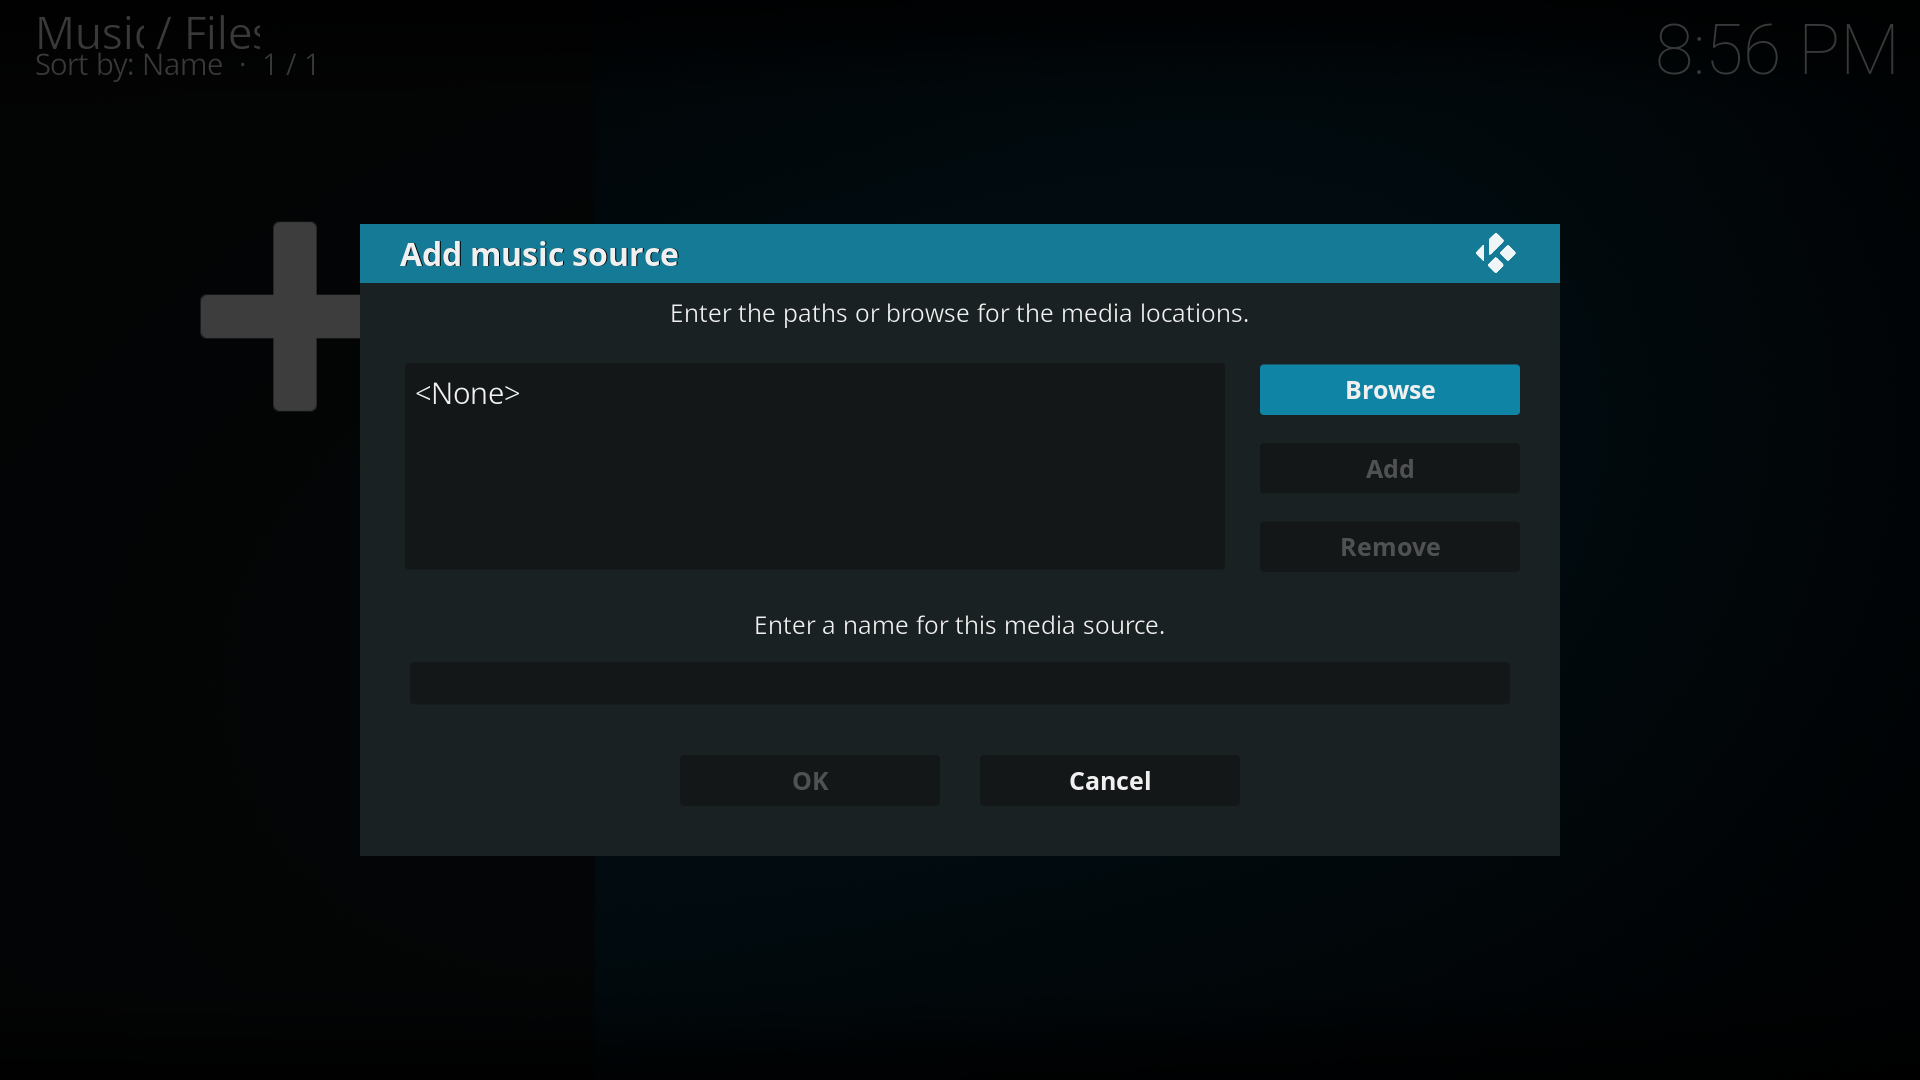 Step 3: In the Add music source window select Browse. You can also manually add your source by selecting the box with <None> then typing in your path. If you chose to do it this way skip to Step 5
 -
 Step 4: In the Browse for new share window, navigate to where your music is stored, select the folder and then select OK.
 -
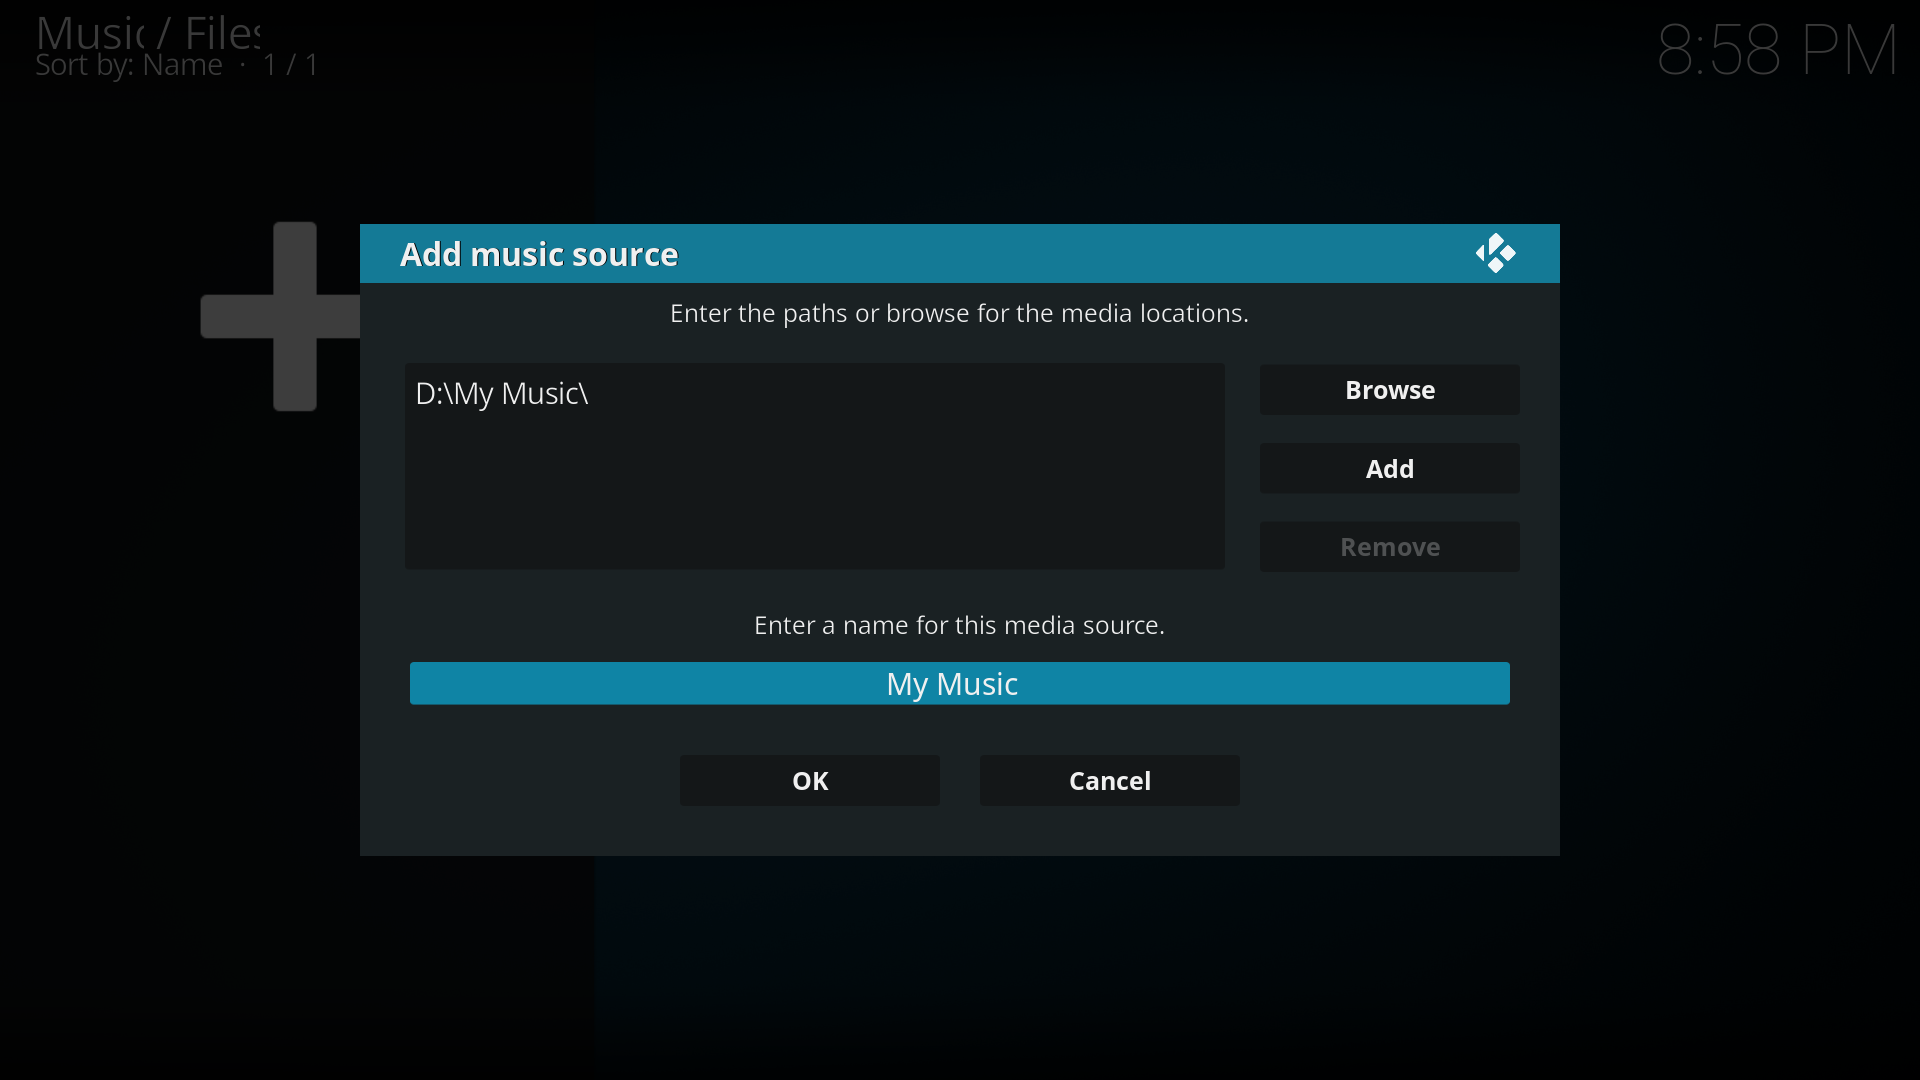 Step 5: You will now be taken back to the Add music source window. Under Enter a name for this media source you can optionally name your media source to replace the suggested name. Select OK
 -
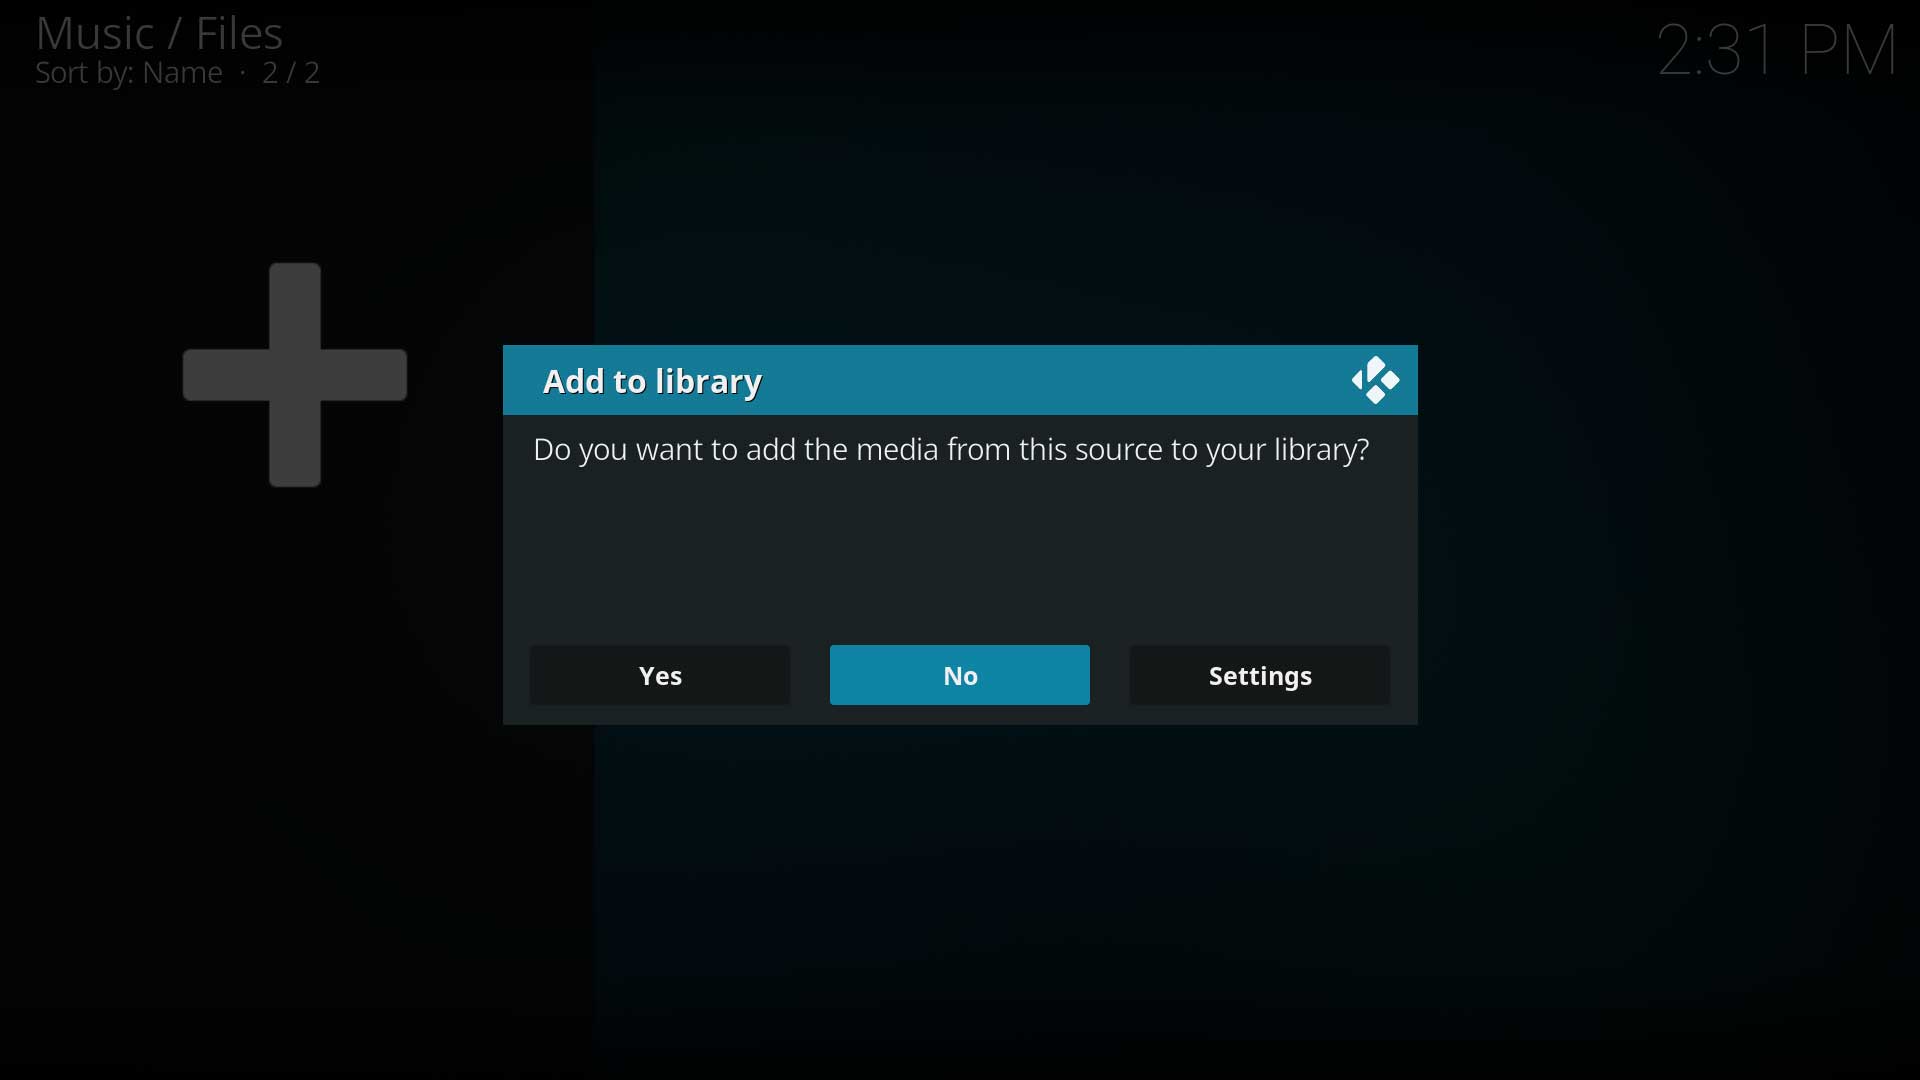 Step 6: You will now be asked if you wish to add your media source to the library. If you do, then select Yes, if you do not, then select No. By selecting No you will only have the option of accessing your media though the Music file browser
 -
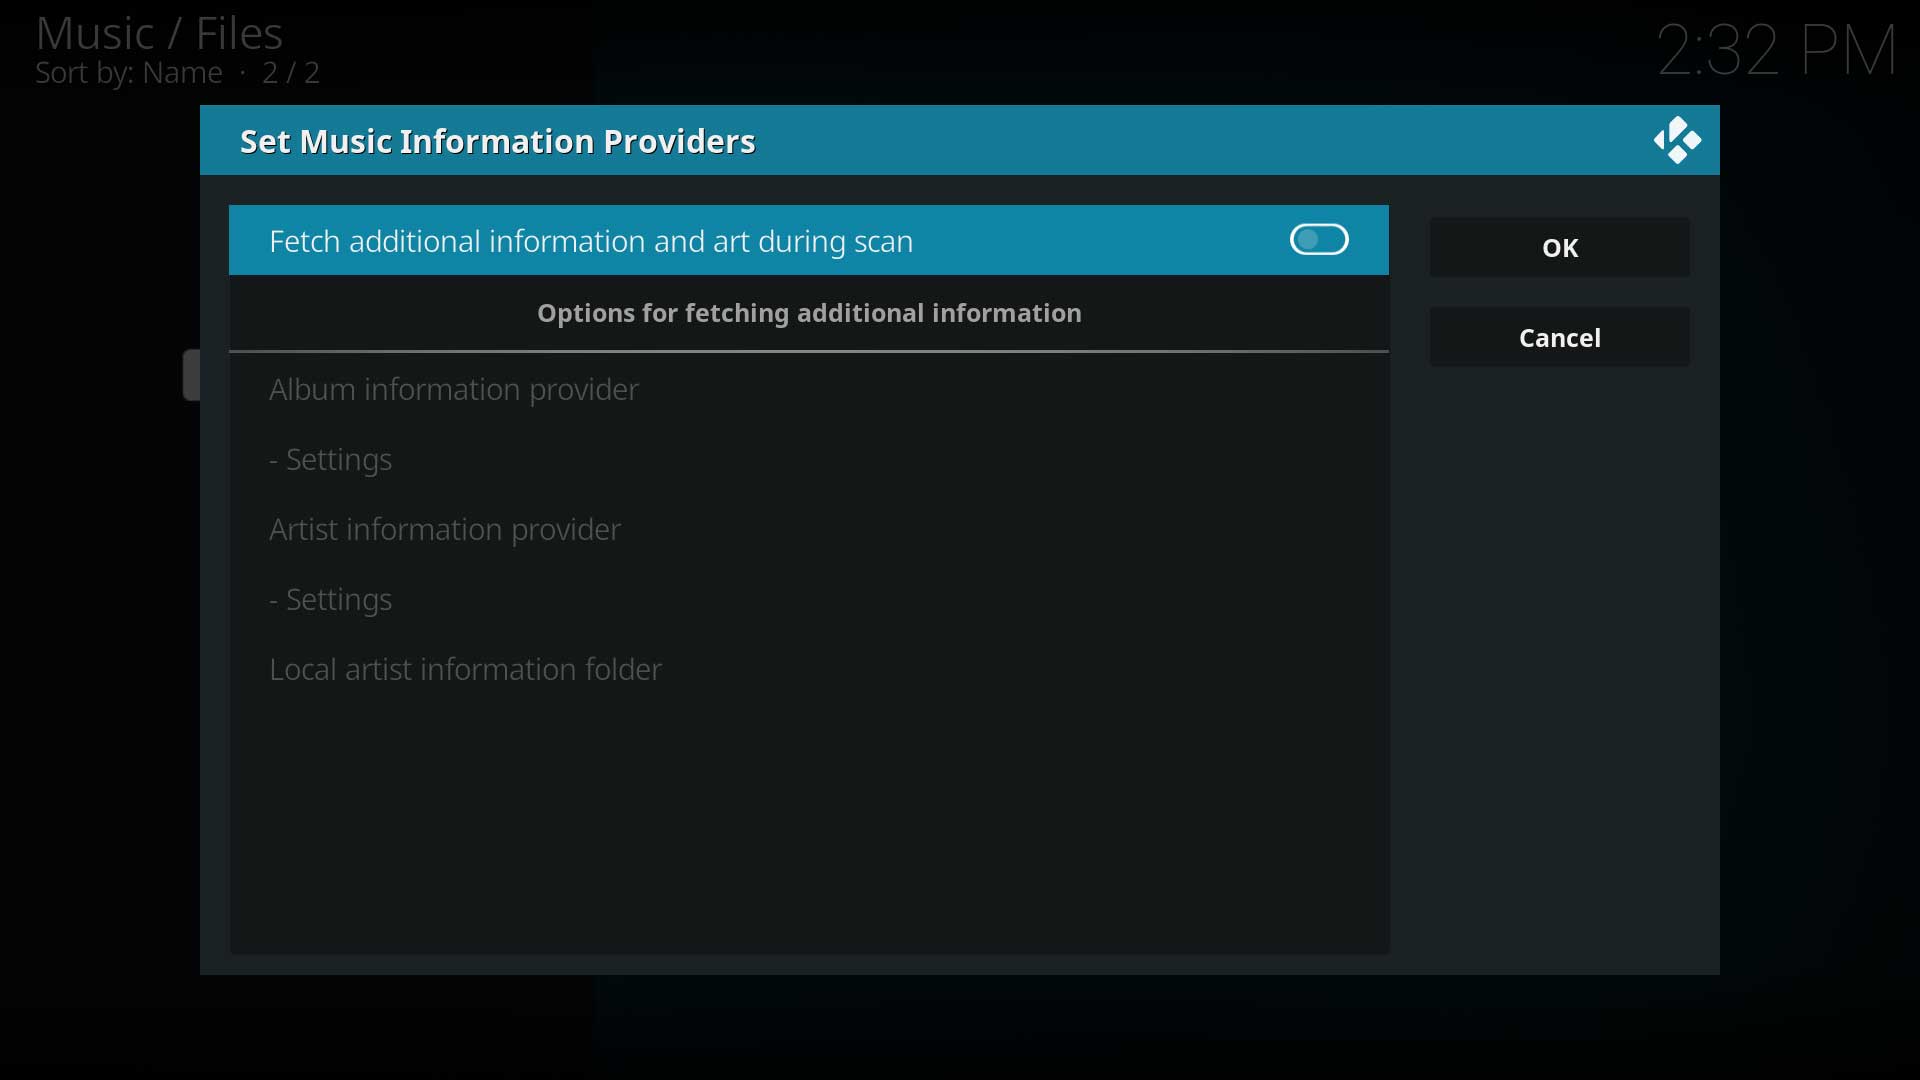 Step 7: Choosing Settings in the previous step allows fetching additional info, setting up the scrapers and adding the Artist Information Folder if these have not been done yet. For the first scan, leave these disabled.
 -
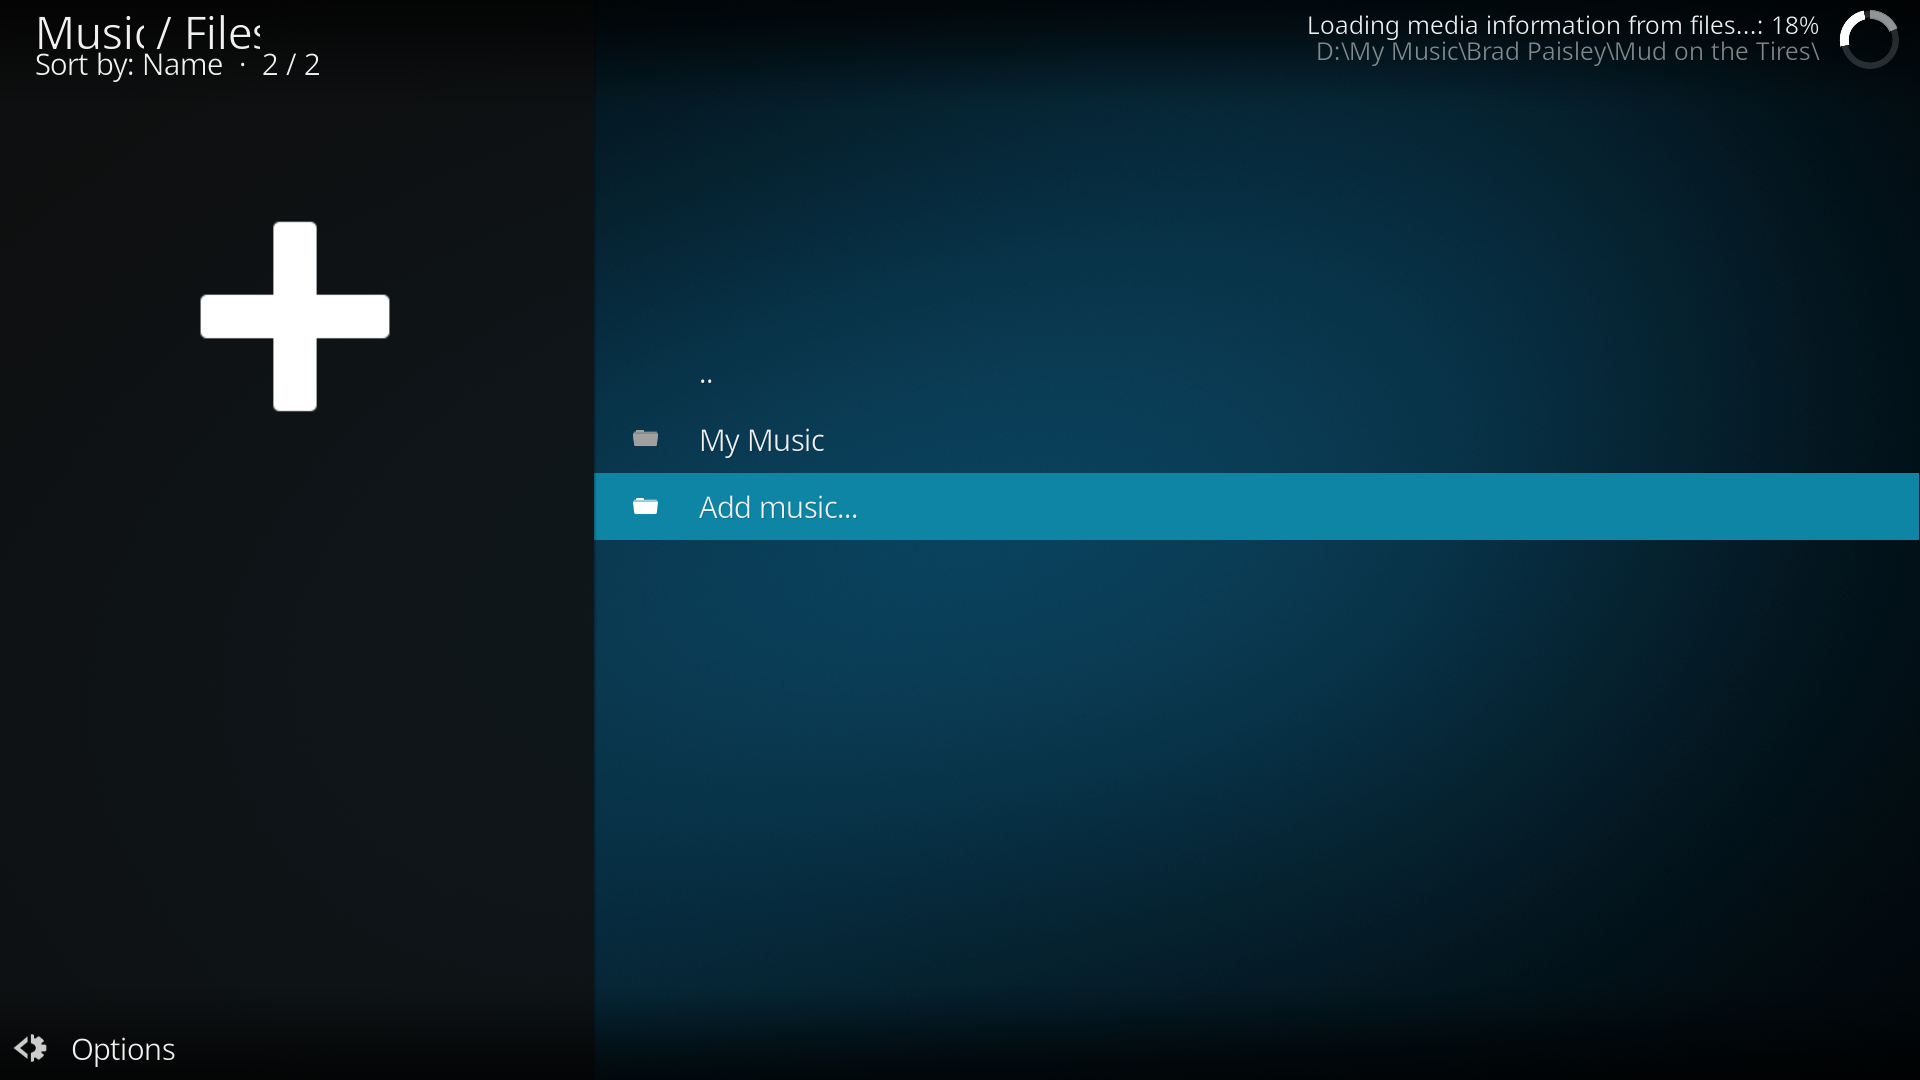 Step 8: If you selected Yes in step 6, Kodi will begin scanning your source to the library. Once finished, you can back out to the Main Menu. There is no ability to queue processes so wait until the first scan is finished before adding more sources.
 -
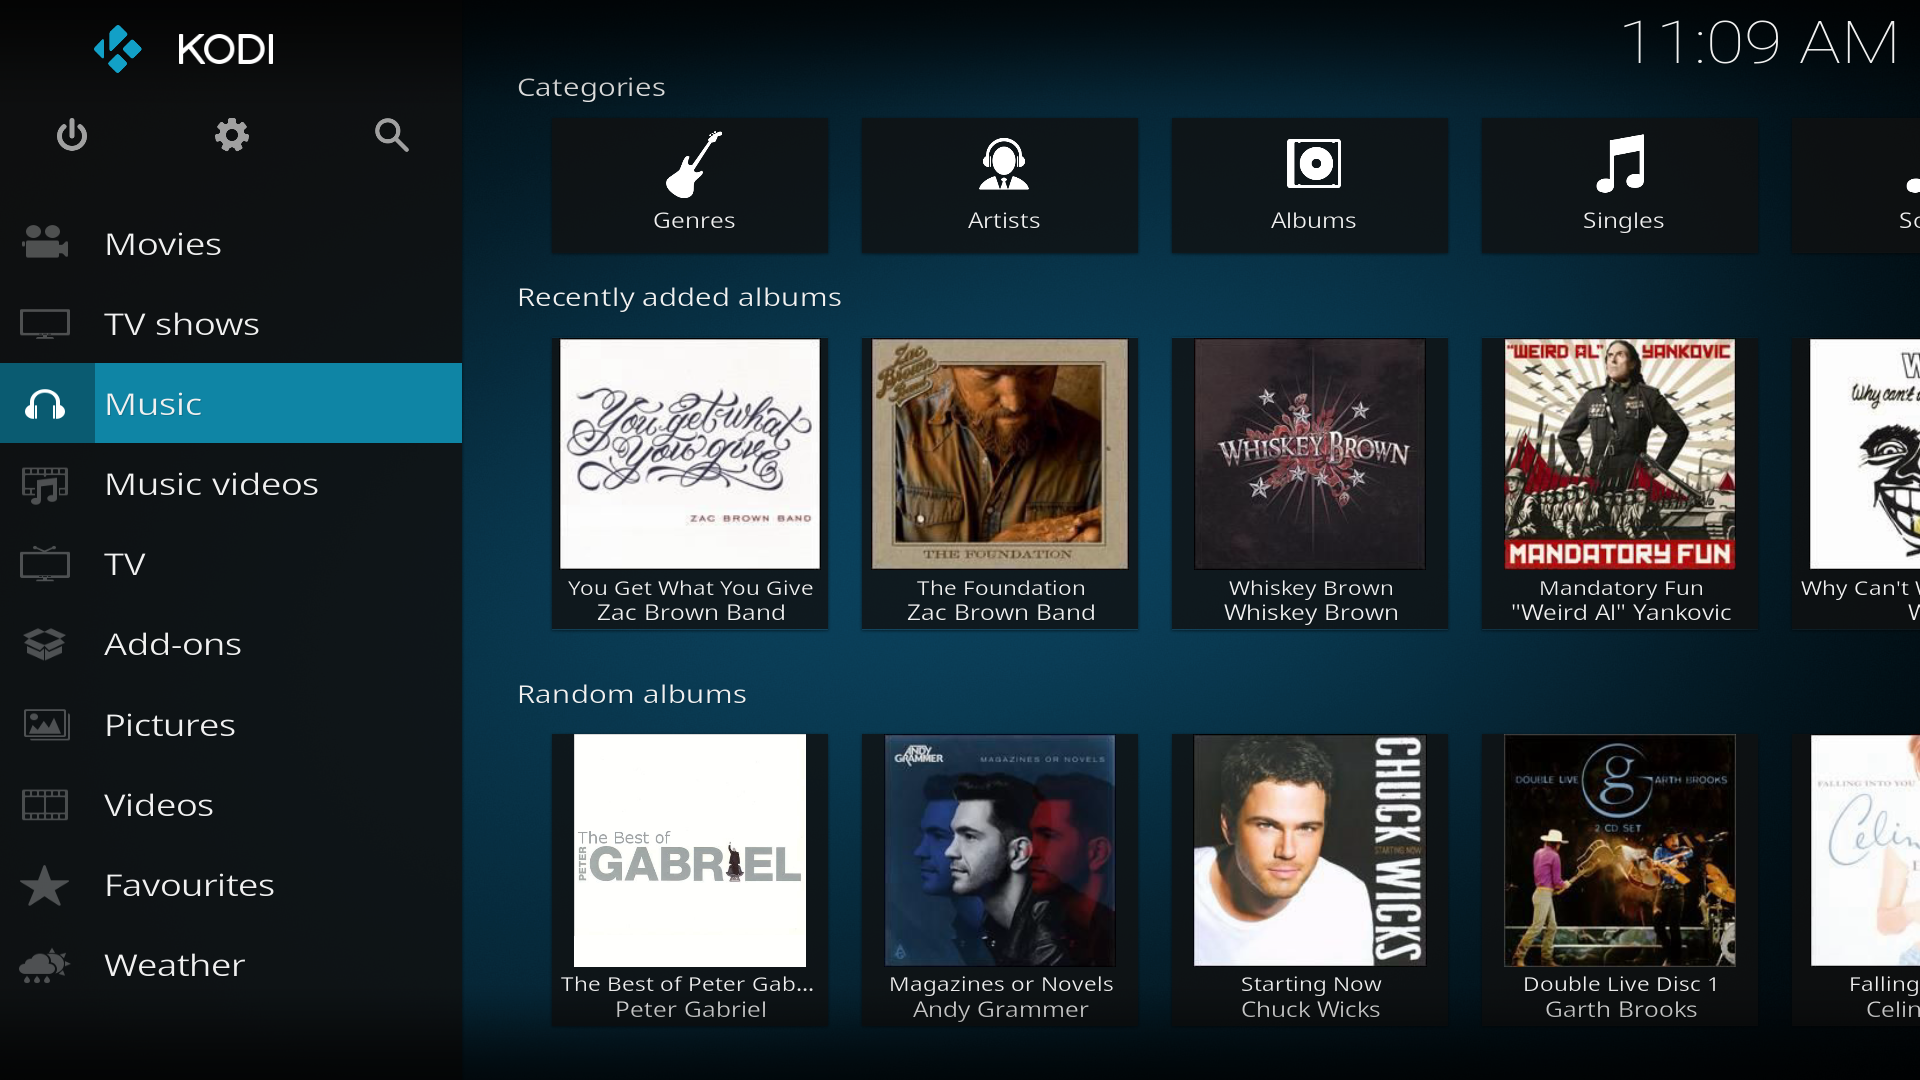 Step 9: Once your library is scanned you will be able to see & access Recently added albums, Random albums, Random Artist & Unplayed albums on the Home menu.


Adding pictures
Adding sources for your pictures follows the same method as adding other media sources. From the Home Page navigate to Pictures, select Add Source and browse to the location of your picture files.
Using a remote control
Kodi is primarily designed for the home theatre using the 10-foot user interface principles controlled with a remote control. Alternatively a (wireless) keyboard can be used.
Kodi add-ons
An Add-on is another piece of software that can be added to a program to further expand and enhance the features of that program. Imagine a smart phone and all the additional Apps that can be installed to enhance its functionality. Kodi has the same ability and these apps are referred to as Add-ons. Kodi has a growing list of community driven add-ons which can be installed from a common official repository, while still enabling third-party developers to also host their own unofficial repositories for add-ons that any user can choose to add themselves.
For this example a skin is being installed, the same method is used for other add-ons.
- Select Install from repository -> Select the repository (if no other repositories are installed it will automatically open the Kodi Add-on repository) -> Select the add-on category -> Select the add-on -> Select Install
To access the Add-on browser see: How to access the Add-on browser
-
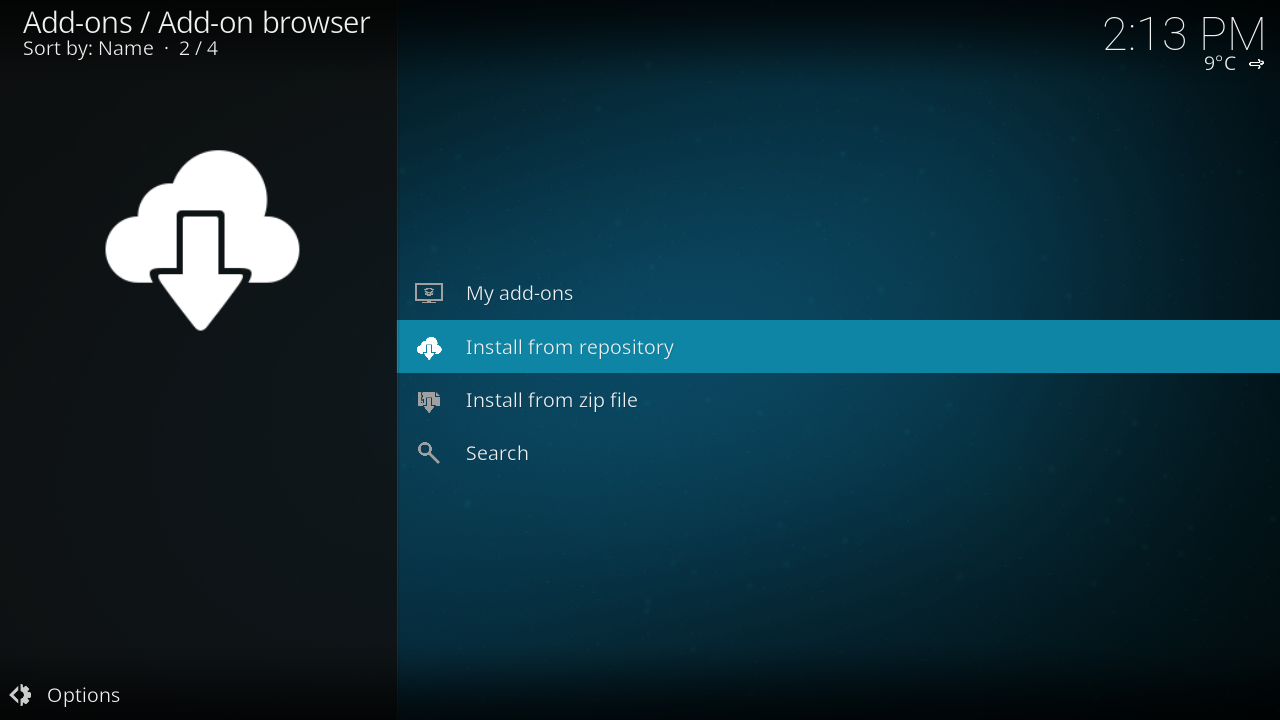 Step 1: Select Install from repository. If no other repositories are installed then this will open directly into the Kodi Add-on Repository. If other repositories then a different window will open allowing you the choice of which repository you want to use.
 -
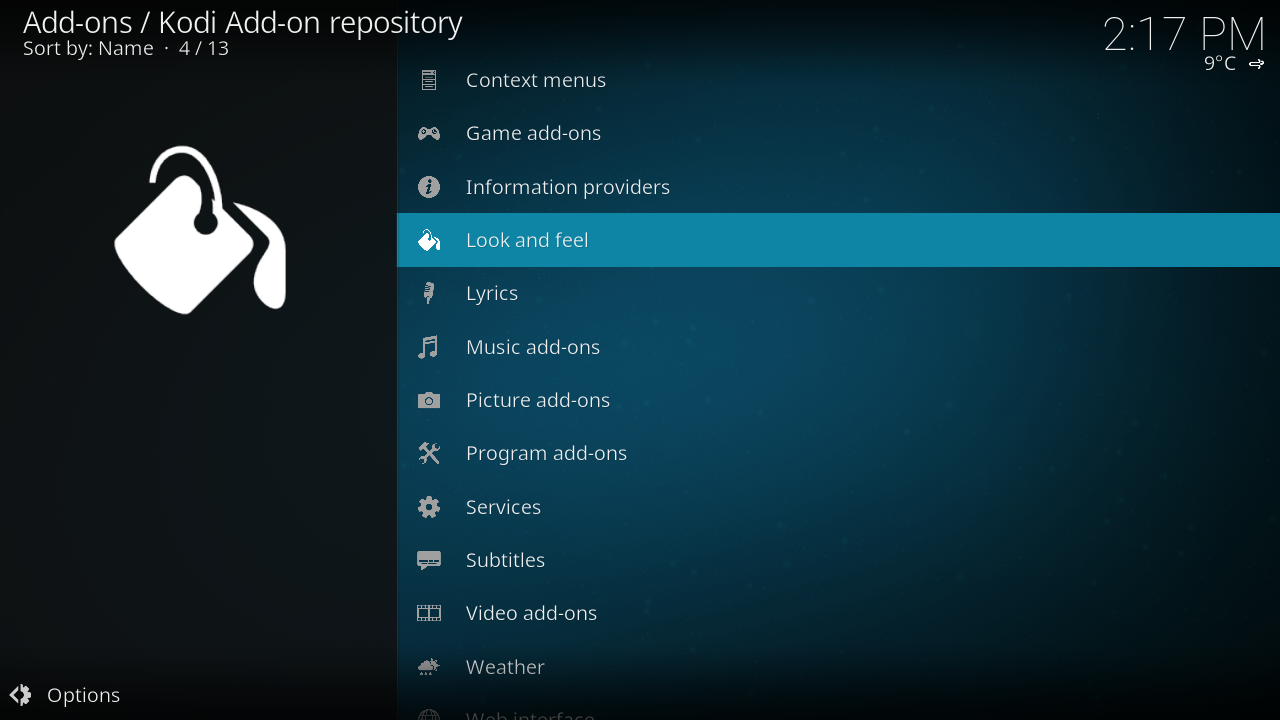 Step 2 Select the add-on category, in this case Look and feel (applies to Kodi Jarvis and up only).
 -
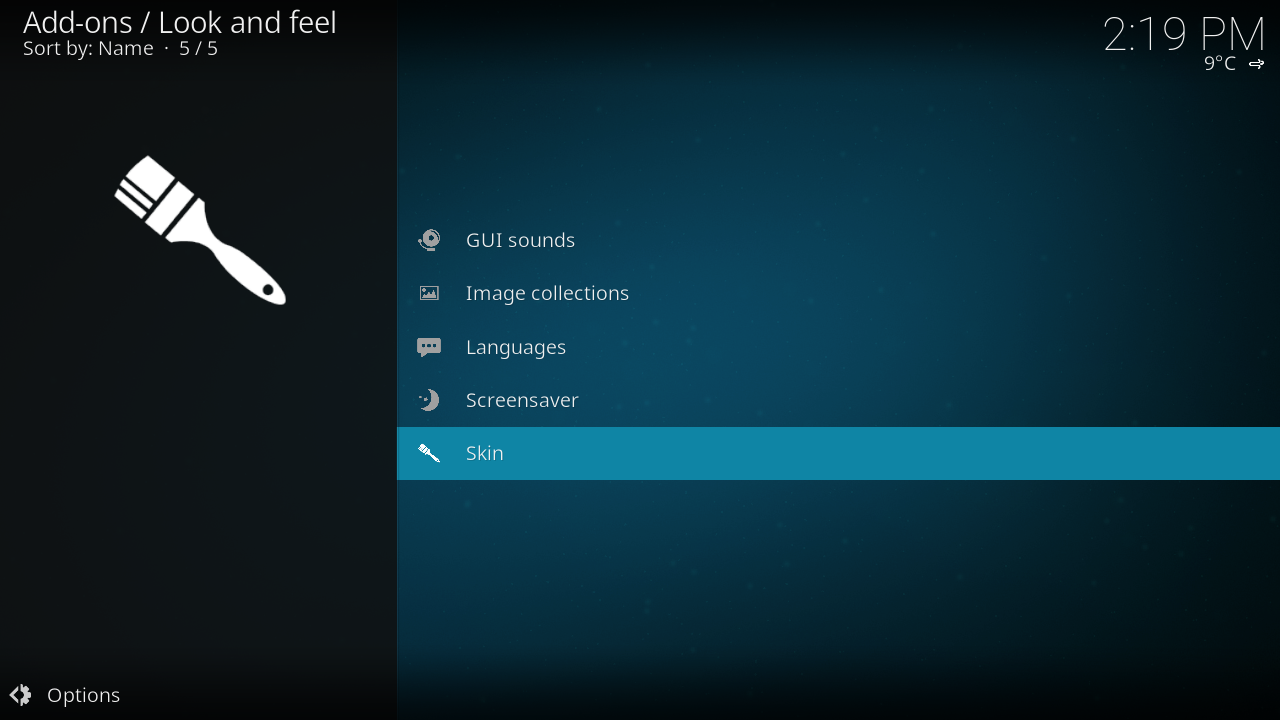 Step 3: Select the add-on sub-category, in this case Skin.
 -
 Step 4: Select the add-on you want to install, in this case the skin Aeon Nox: SiLVO.
 -
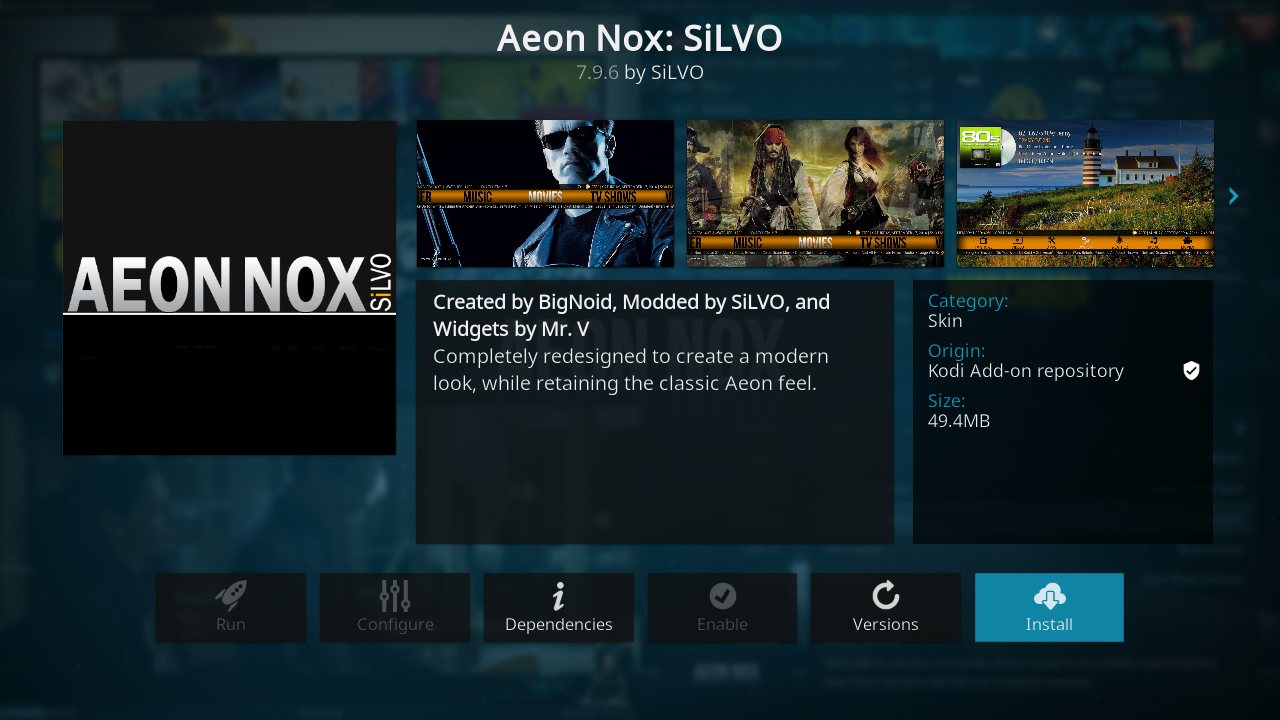 Step 5: A summary dialog will be brought up allowing you to see various properties of the add-on. Select Install to begin automatic downloading and installation.
 -
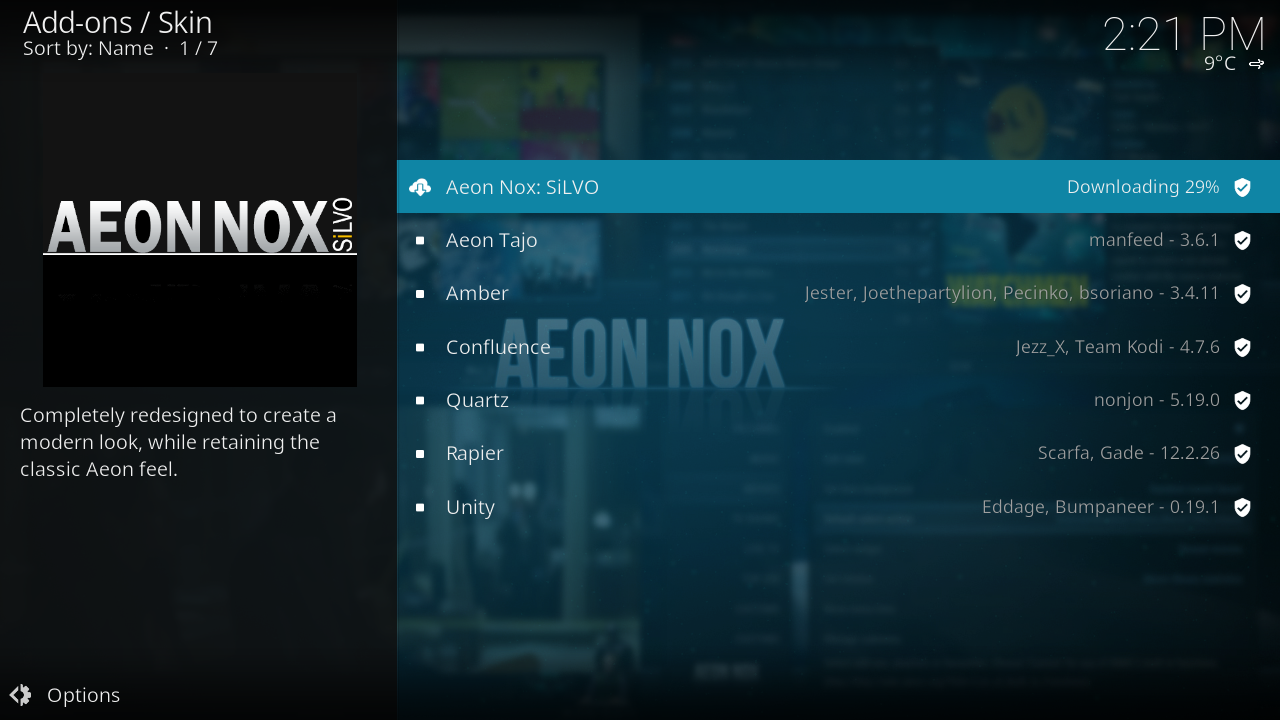 Step 6: Once you select install, Kodi will begin downloading your add-on and you will see the download progress beside the add-on's name.
 -
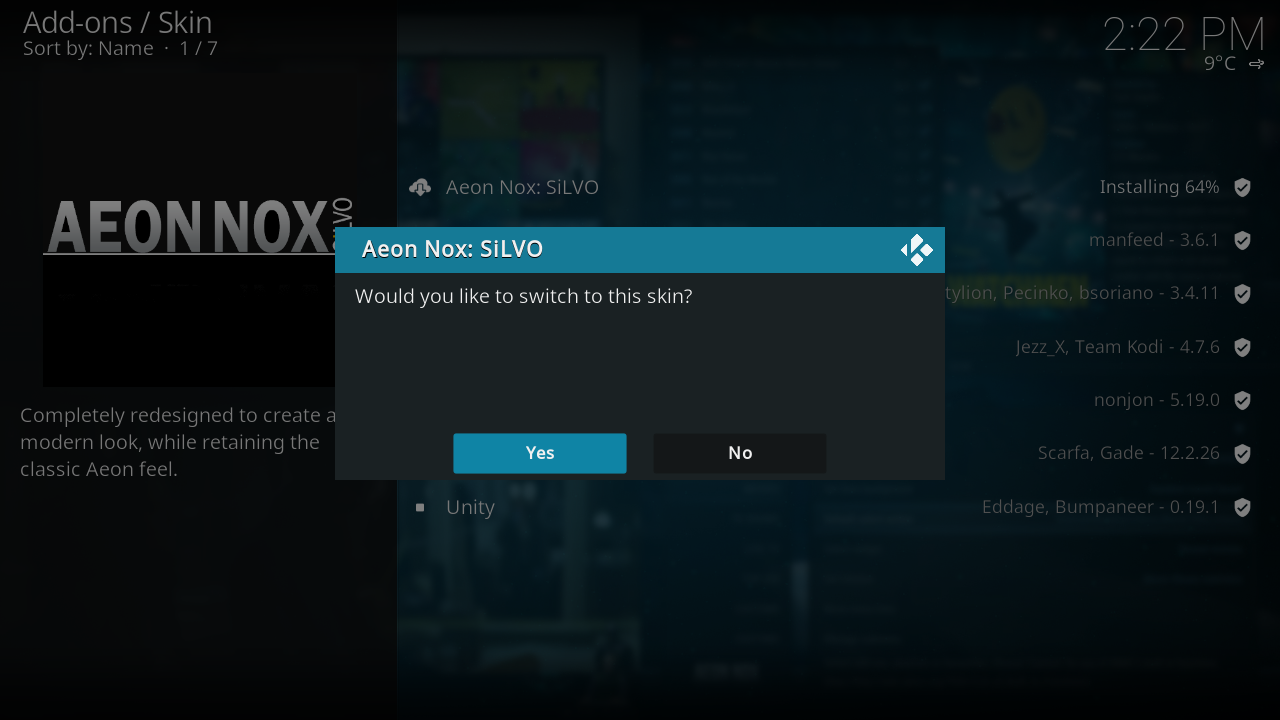 Step 7: Once the add-on and it's dependencies are installed you will be able to use that add-on. In the case of skin installation you'll be asked if you want to change to the installed skin immediately.


When the add-on has finished downloading Kodi will enable it and depending on the add-on ask if you want to start using it. Add-ons will then appear in their appropriate section (e.g. skins in the appearance section of settings, movie scrapers in the options of scrapers when adding a new movie source)
Changing the look and feel of Kodi
Kodi is unlike many contemporary media and gaming centers, in that it can be easily customized to look completely different using skins while still remaining equally as useable and providing access to all your videos, music, and more.
To get new skins, go to: Settings → Interface settings → Skin → Skin - Estuary
You will be provided a list of currently installed skins and an option to "Get More..." where you can download additional skins.
To change skins, see: How To: Change Skins
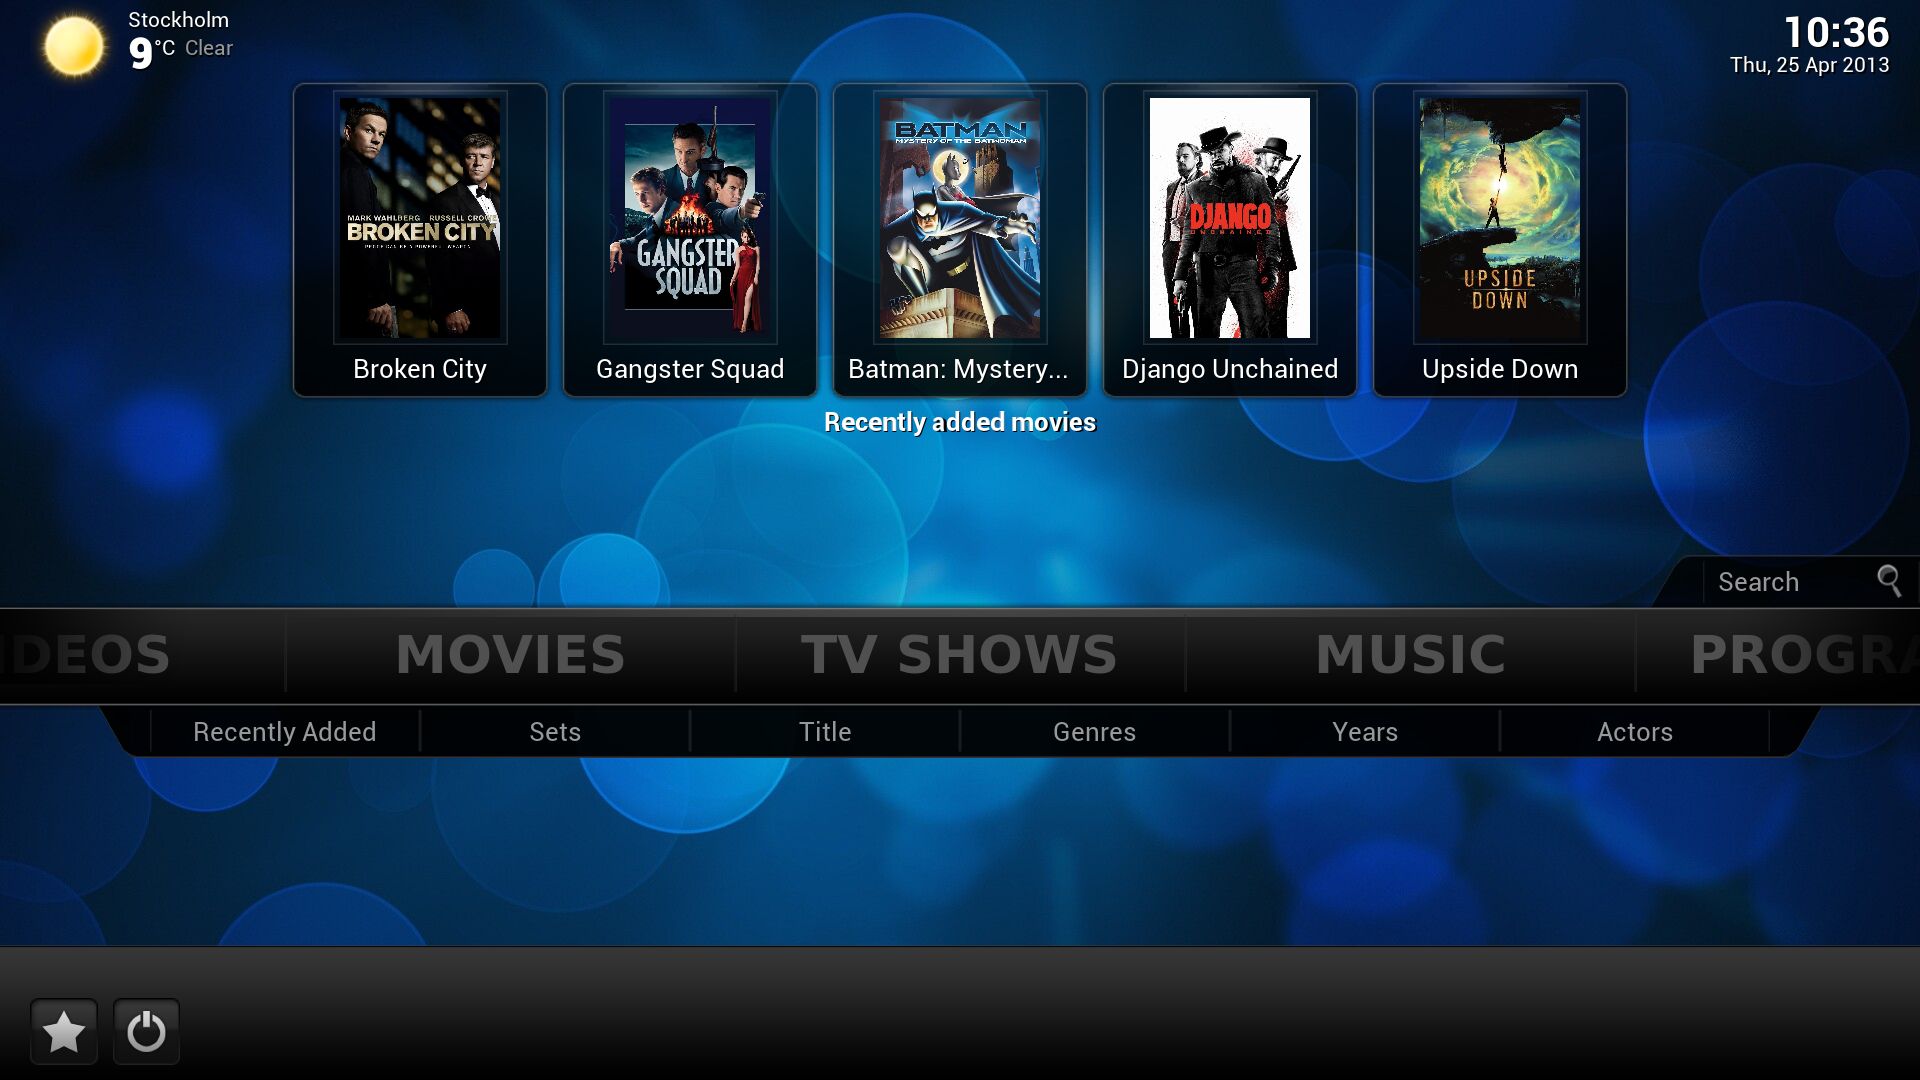
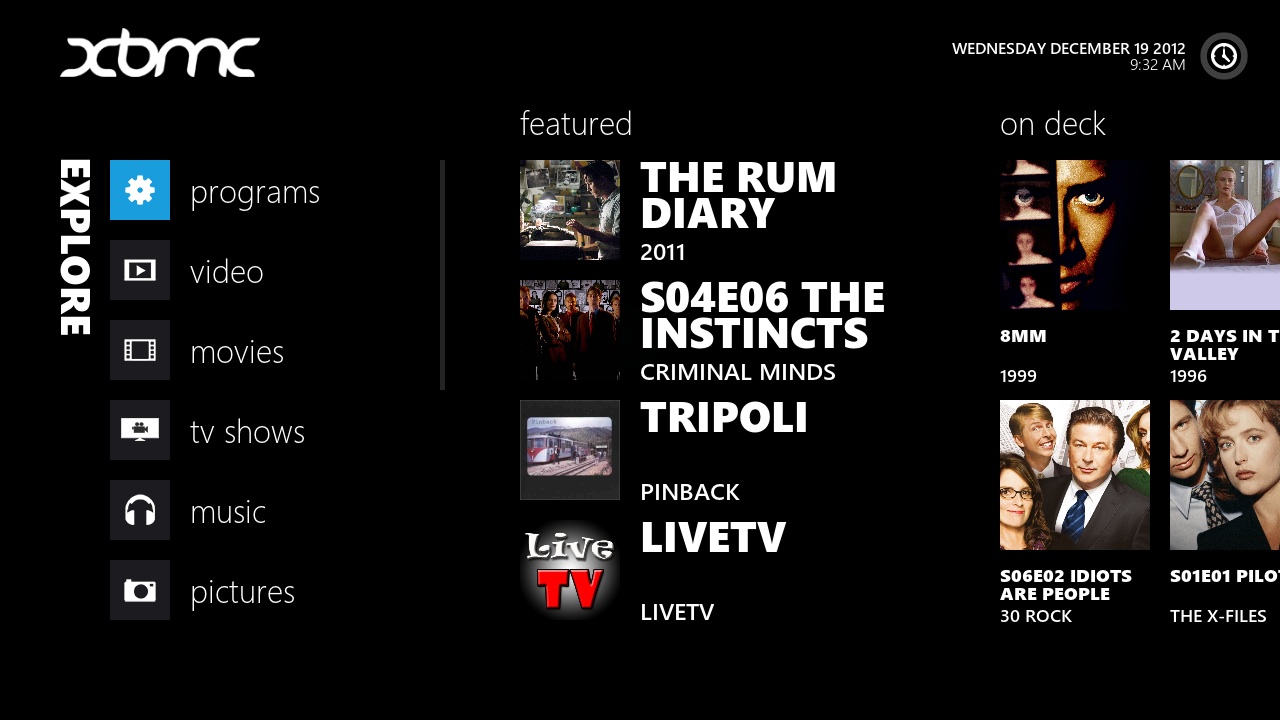
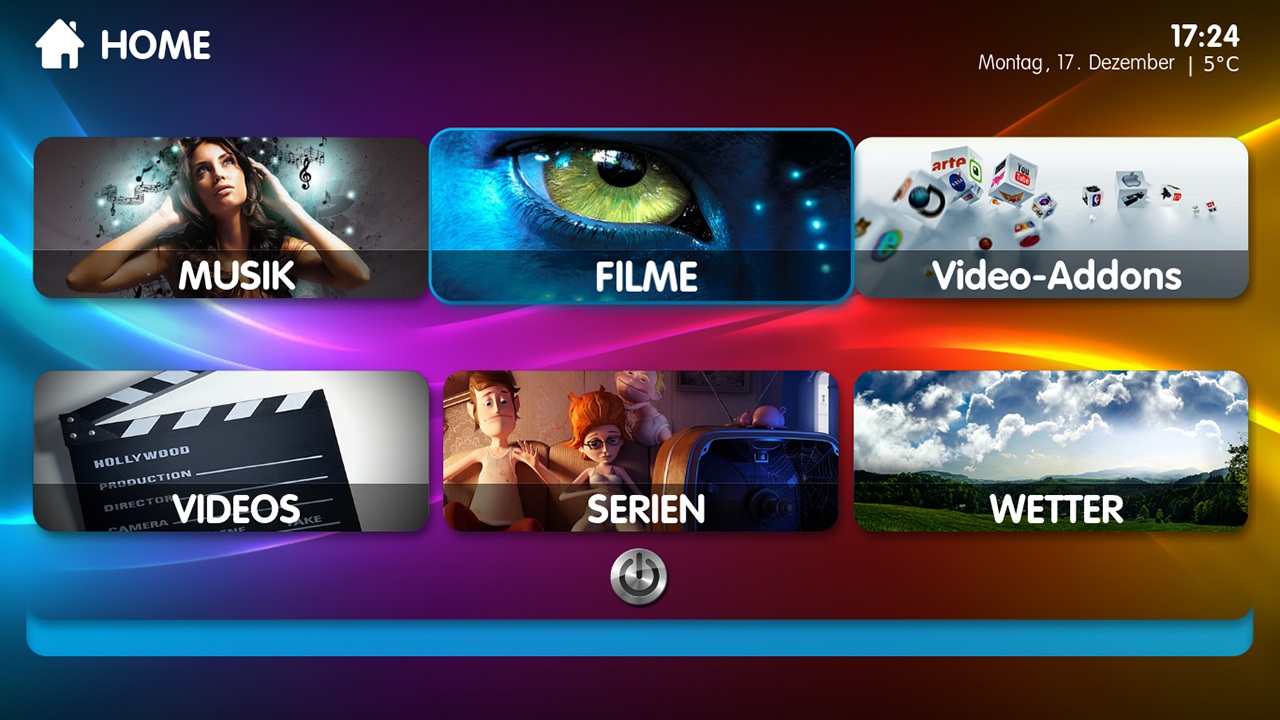
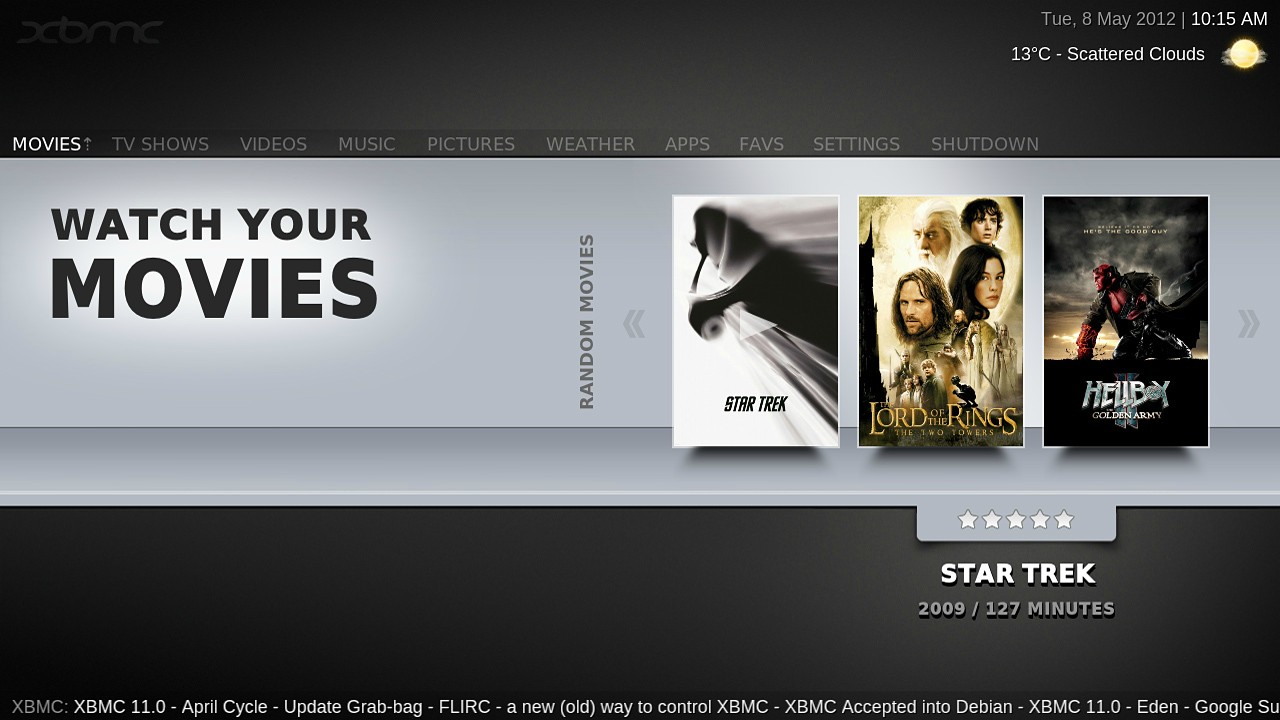
- The same home screen using different skins
-
 Estuary - default skin, Kodi 17 & above
 -
 Confluence - default skin, Kodi 16 & below
 -
 Aeon Nox
 -
 Immersive
 -
 Titan
Titan -
 Welo
Welo -
 Transparency


Important note about the Context Menu
As you read this wiki and experiment on your own, you will quickly learn about the value of the context menu.
To use it, while highlighting an item, long press the OK key on a IR remote, long press return on a keyboard. if you are using a mouse, you can right click while hovering over an item or long left click.
Alternative guides