Settings/System/Audio
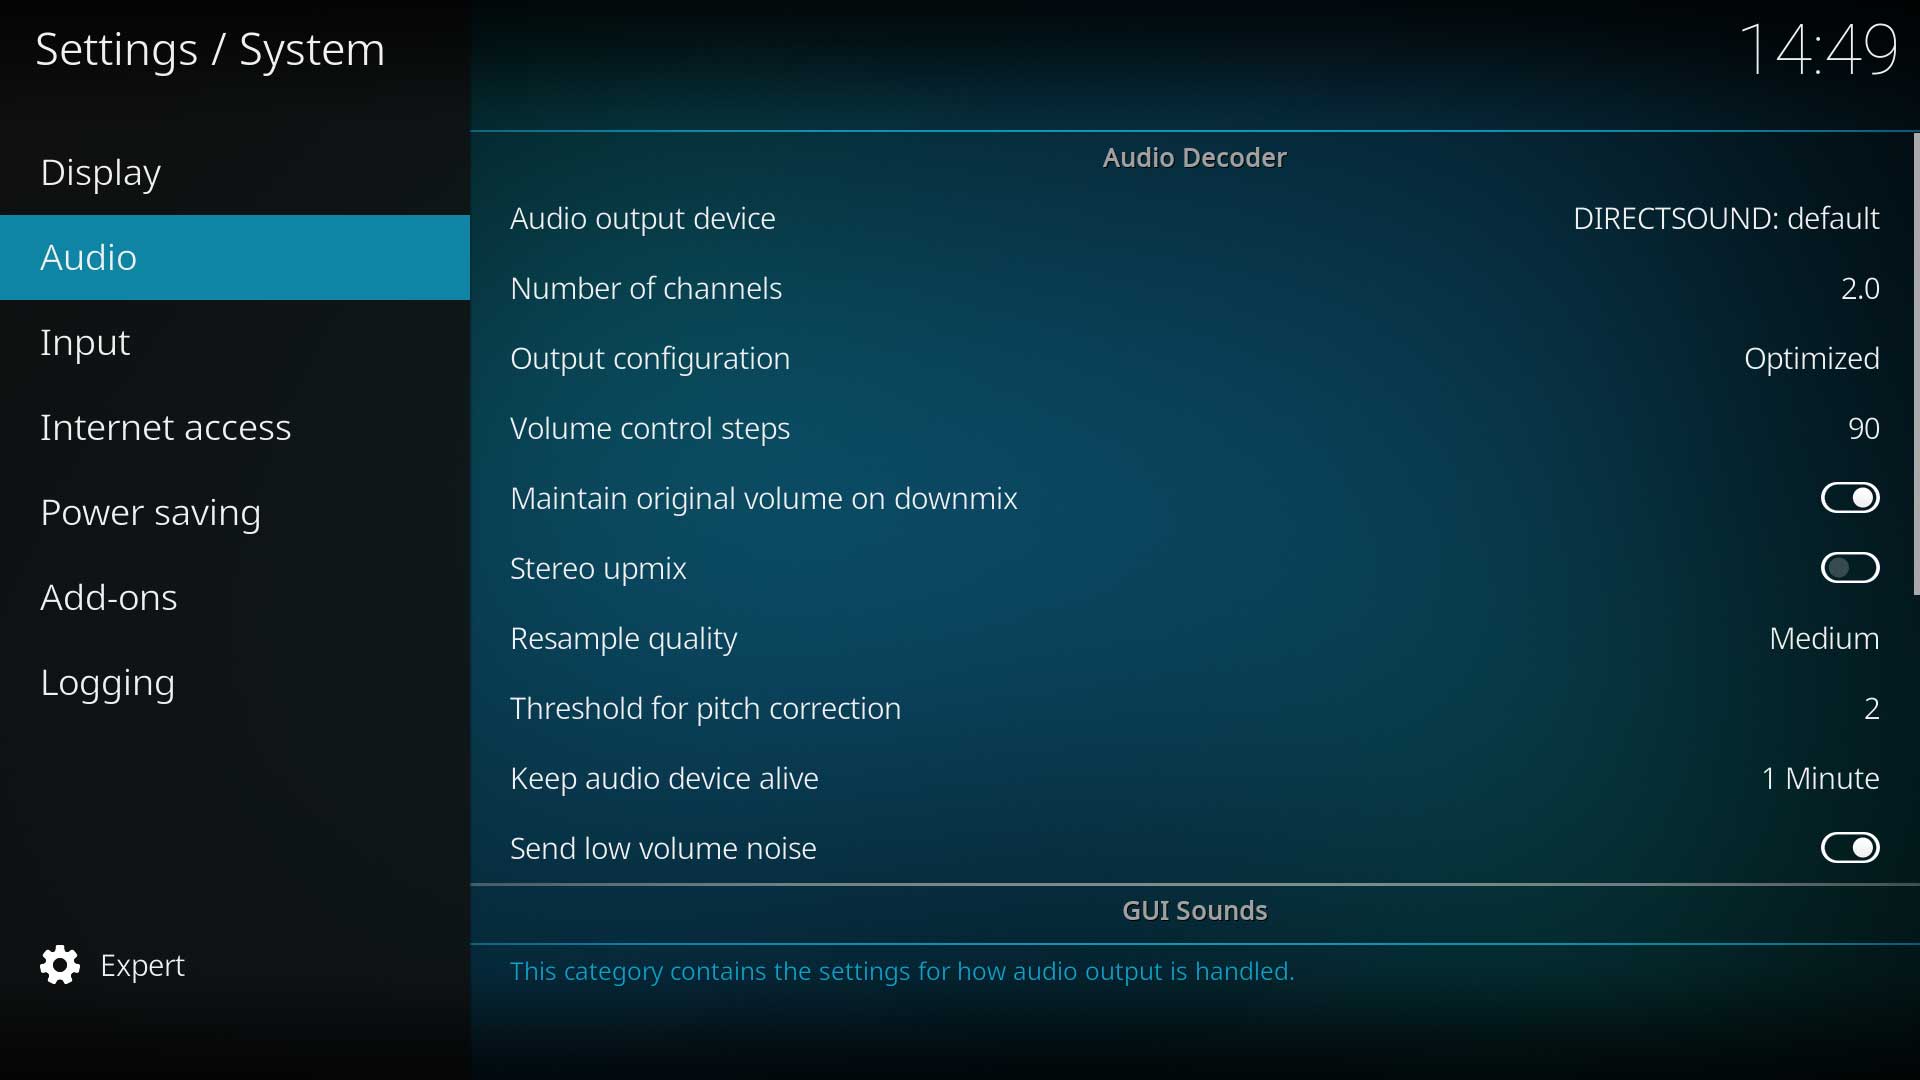
This page contains the options and settings to ensure your audio device functions correctly with Kodi. The settings chosen here can have a big impact on CPU load on lower powered hardware, so it is worth the time to understand the available options and how they should be configured.
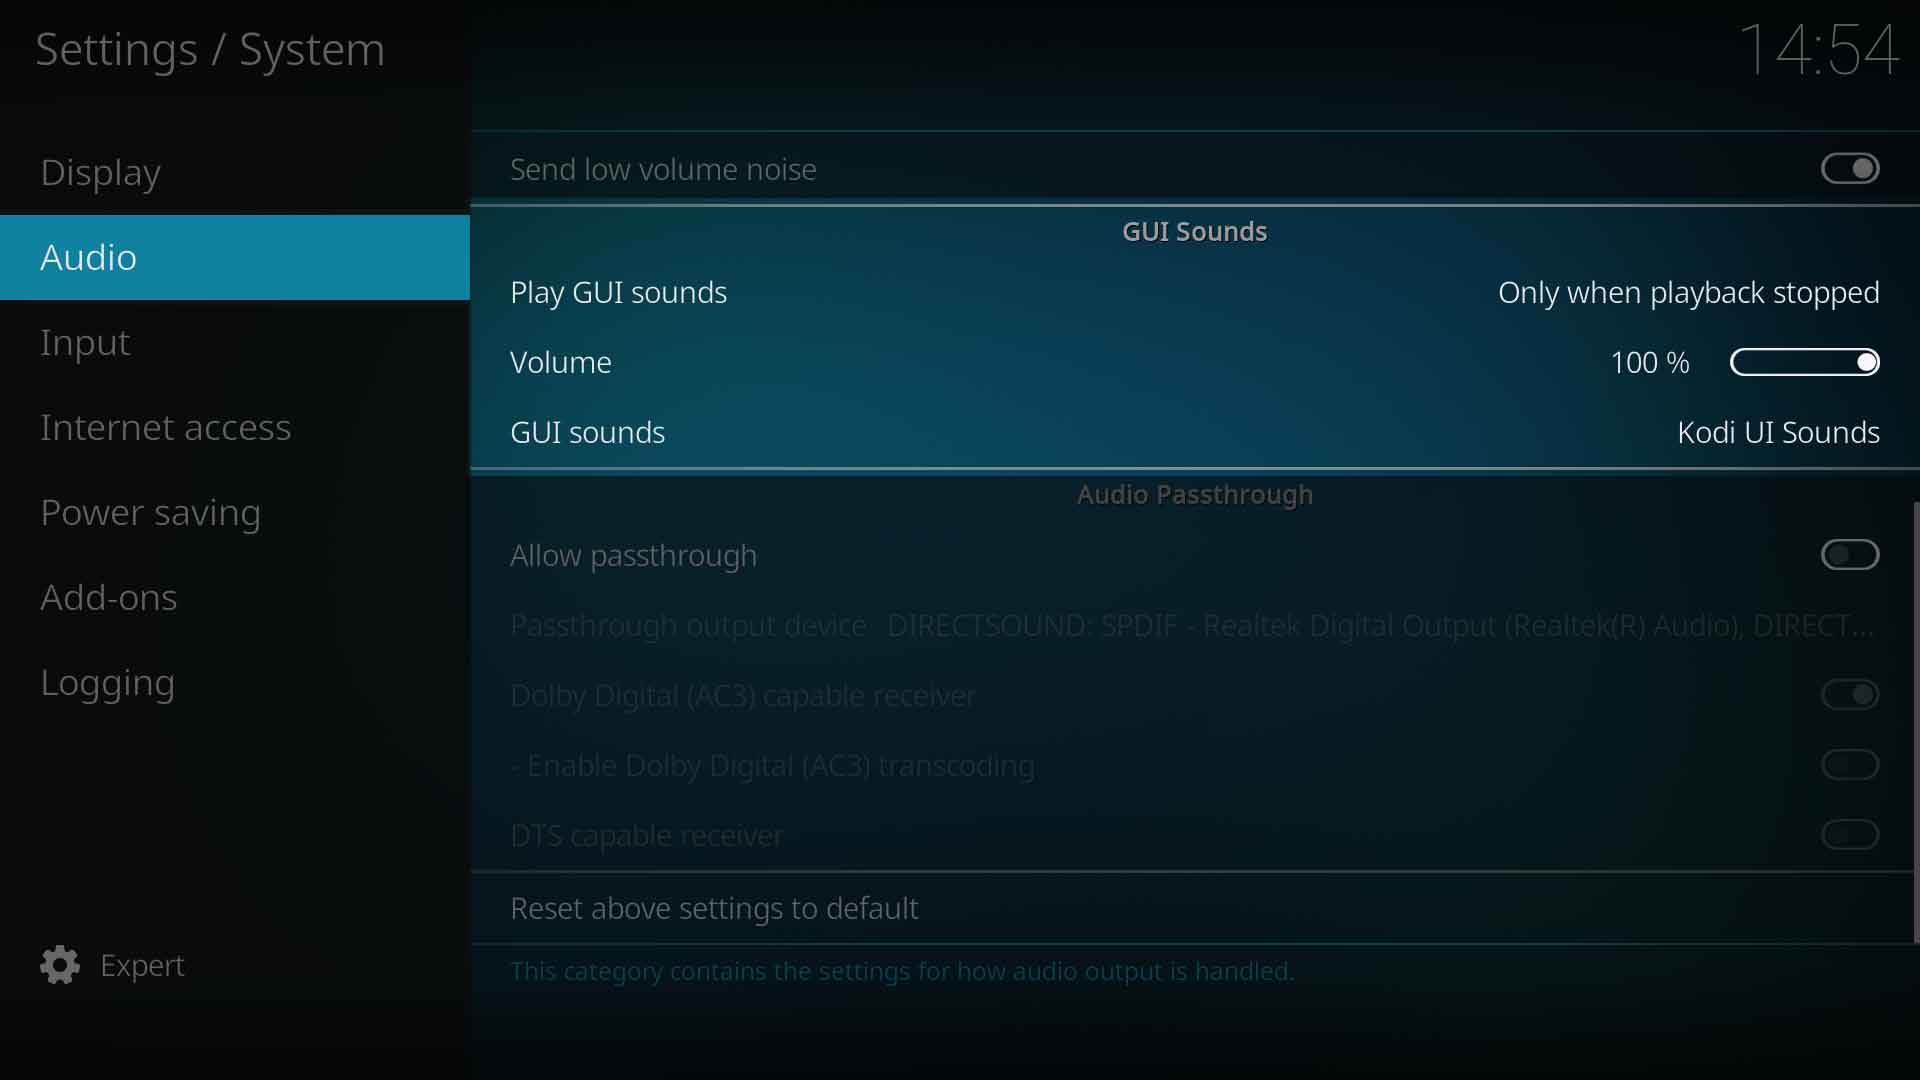
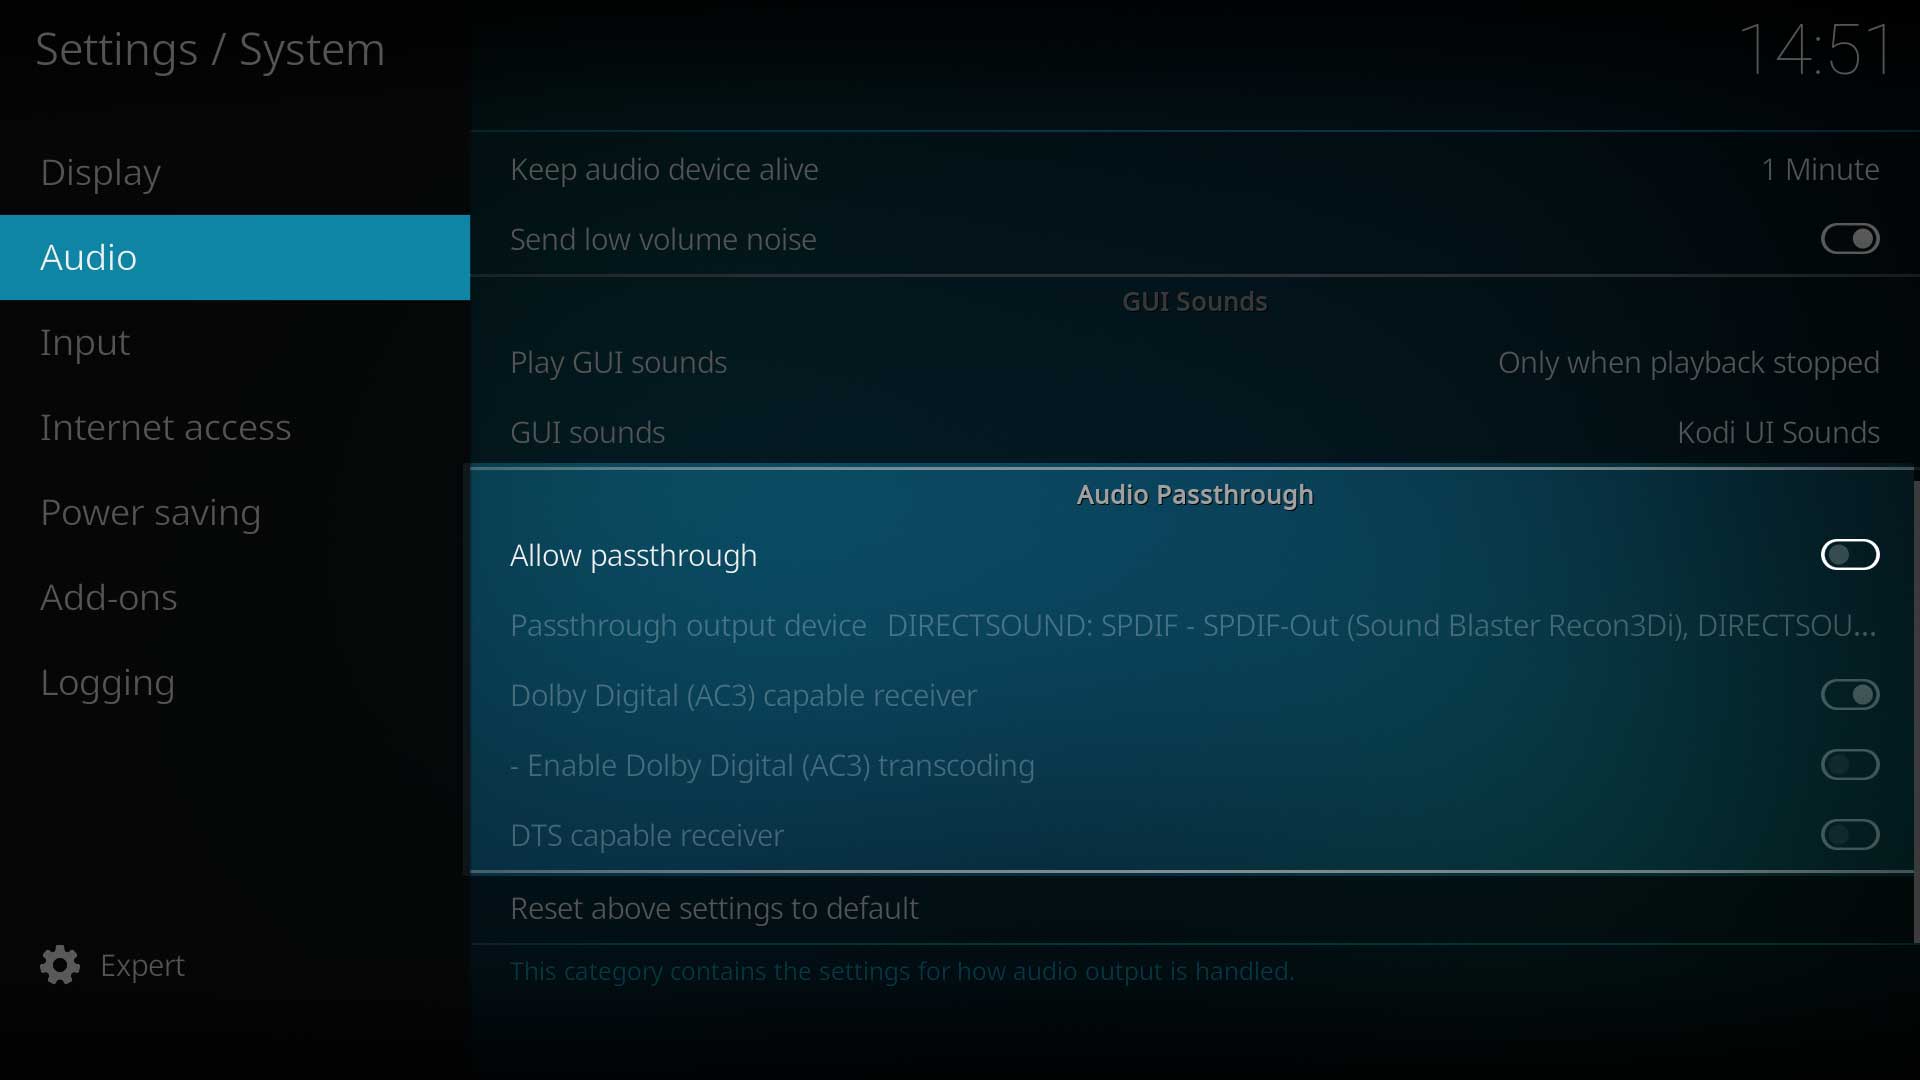
The options shown in the images are from a Windows 10 installation and may differ from other hardware platforms. Some options change depending on which audio output device has been selected.
If this is your first time adjusting the Audio Settings you may like to use the Audio Quick Start Guide.
- See Also: Audio
- See Also: Audio Engine
Audio Decoder
Select your Audio device and configure it to match your audio system.
Audio output device
| Settings level: | Basic |
| Description: | Select the device to be used for playback of decoded audio. If you do not have an AVR or TV that can decode all audio stream formats then Kodi will decode the audio stream.
Even if you do have an AVR, not all audio can be sent via passthrough- eg flac, mp3, wav and other music files and AAC audio streams |
| See Also: | Windows Audio Driver Setup |
| See Also: | Pulse Audio Driver Setup |
Number of channels
| Settings level: | Basic |
| Description: | Select the number of channels supported by the audio connection, or the number of speakers if connected by analogue connections. This setting does not apply to passthrough audio. Note: S/PDIF supports 2.0 channels only but can still output multichannel audio using a format supported by passthrough. |
| See Also: | Audio Settings |
Output configuration
| Settings level: | Advanced |
| Description: | Set the properties of the audio output. Available options are as follows:
|
| See Also: | Audio Settings |
Volume control steps
| Settings level: | Standard |
| Description: | This is the number of button presses to go from mute to full volume. Higher numbers for finer volume adjustments. |
| See Also: | Audio Settings |
Maintain original volume on downmix
| Settings level: | Advanced |
| Description: | Downmixing combines the Left, Right, Center, Left surround, and Right surround channels to drive stereo or mono speakers. Select how audio is downmixed. eg from 5.1 to 2.0
Note: Dynamic range is the difference between the quitest and loudest sounds. Enable this if you find that the movie dialogues are very low. |
| See Also: | Audio Settings |
Stereo upmix
| Settings level: | Advanced |
| Description: | Select to enable upmixing of 2 channel audio to the number of audio channels specified by the Output Configuration setting above. |
Resample quality
| Settings level: | Advanced |
| Description: | Select the quality of resampling for cases where the audio output needs to be at a different sampling rate from that used by the source. Available options are...
|
| See Also: | Audio Settings |
Threshold for pitch correction
| Settings level: | Expert |
| Description: | When the speed change exceeds this threshold, a pitch correction filter will be applied to reduce the "chipmonk" effect of voices. This can occur when using 1.5x playback speed. Can be set from 0 to 100 |
| See Also: | Audio Settings |
Keep audio device alive
| Settings level: | Advanced |
| Description: | Select the behaviour when no sound is required for either playback or GUI Sounds. Available options are...
Note: Sounds can be missed if the system is slow in waking. |
| See Also: | Audio Settings |
Send low volume noise
| Settings level: | Advanced |
| Description: | To keep AV Receivers awake, an inaudible random noise signal is sent. This setting can be disabled when using headphones or analogue outputs. |
GUI Sounds
This section deals with feedback and confirmation sounds created by the Kodi user interface.
Play GUI sounds
| Settings level: | Basic |
| Description: | Configure when you want to hear the sounds. Available options are...
|
Volume
| Settings level: | Basic |
| Description: | Adjust the volume of GUI sounds. Does not affect music or video playback volume. [1] |
GUI sounds
| Settings level: | Basic |
| Description: | Select the preferred sound theme. Use the Get more button to download other sounds from the Kodi repository. |
Audio Passthrough
If you have an AVR, then using Passthrough will send the raw audio stream to the AVR for decoding.
Passthrough capable hardware and an AV Receiver capable of decoding some or all of the formats listed below is required.
Any formats that the Receiver cannot decode will be decoded by the Kodi Audio Output Decoder using the Output Audio Device specified in setting 1.1 above. When the AVR display shows Multi-Channel In, this indicates Kodi is decoding the stream and sending the Raw stream to the AVR. This is normal for *.aac audio, and for music formats such as *.flac, *.mp3 and others.
If you have a quality AV Receiver, Audio Passthrough should be used.
Note:
Do not enable a codec type if the AV Receiver does not support that codec. Doing so will result in poor playback of video, typically with very low frames-per-second video and no audio.
If connected directly to a TV be aware that TV's are not compatible with DTS, TrueHD or DTS-HD. Typically AC3 is the only encoded format a TV will be compatible with.
Allow Passthrough
| Settings level: | Standard |
| Description: | Select to allow passthrough audio for playback of compressed audio such as Dolby Digital (AC3), DTS, etc. The Client of the AudioEngine might decide to decode the audio stream under certain conditions.
Note: Enabling the setting Sync Playback to Display will disable Passthrough as audio corrections will need to be made to perform the sync operations. |
| See Also: | Audio Settings |
Passthrough output device
| Settings level: | Standard |
| Description: | Select the device to be used for passthrough of the encoded formats. Windows users should use WASAPI as passthrough is not available for all codecs when using DirectSound.
The following codecs can be passed through and should be set in accordance with the capabilities of the AV Receiver:
|
| See Also: | Audio Settings |
References
| Return to top |
|---|


