Music Navigation & Playback
Aim
This page will provide information to navigate around the music section and the various ways to play your music.
If you have not already setup your library then you are strongly urged to follow the Music setup guide here... Create your Music Library
Keyboard Controls
Kodi is primarily designed to be used with a correctly programmed remote control.
Using a keyboard is possible, but can be awkward at times. If you are using a keyboard, shortcuts can be found here... Keyboard_controls
Library Mode
To use the Library mode you must, at a minimum, have Scanned your music into the library. If you have not already completed this step, the Library mode will be unavailable to you.
Either follow the Create your Music Library Guide or read File Mode below.
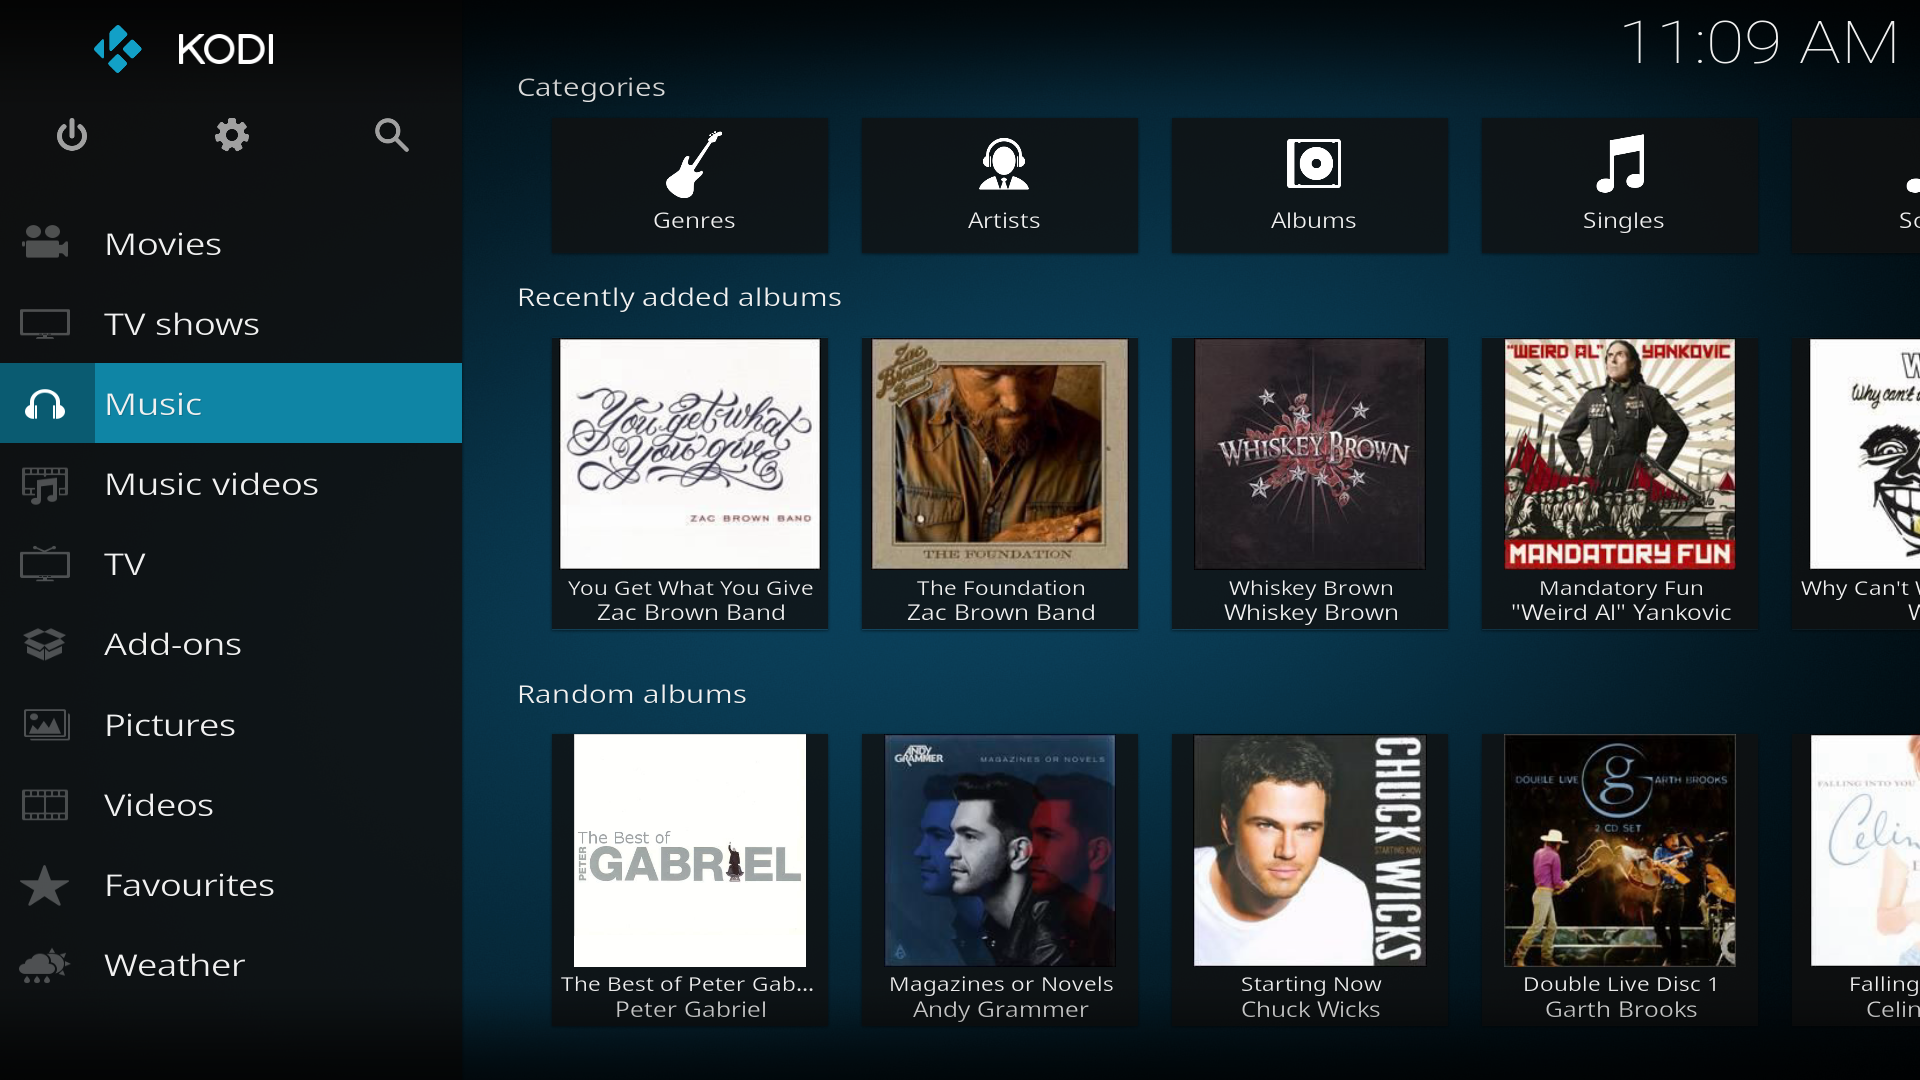
The Music section of Kodi can be accessed from the Kodi Home Screen as seen in this image...
Image 1
This image displays the Kodi Home Screen with a scanned library. The left quarter of the screen shows the vertical menu and the remainder of the screen shows the Home Screen for the selected menu item. In this image we have highlighted the Music menu option and the right portion of the screen is displaying the Music Home Screen.
The information displayed on the Music Home Screen is as follows:
- Music Categories
- Recently played albums
- Recently added albums
- Random albums
- Random artists
- Unplayed albums
- Most played albums
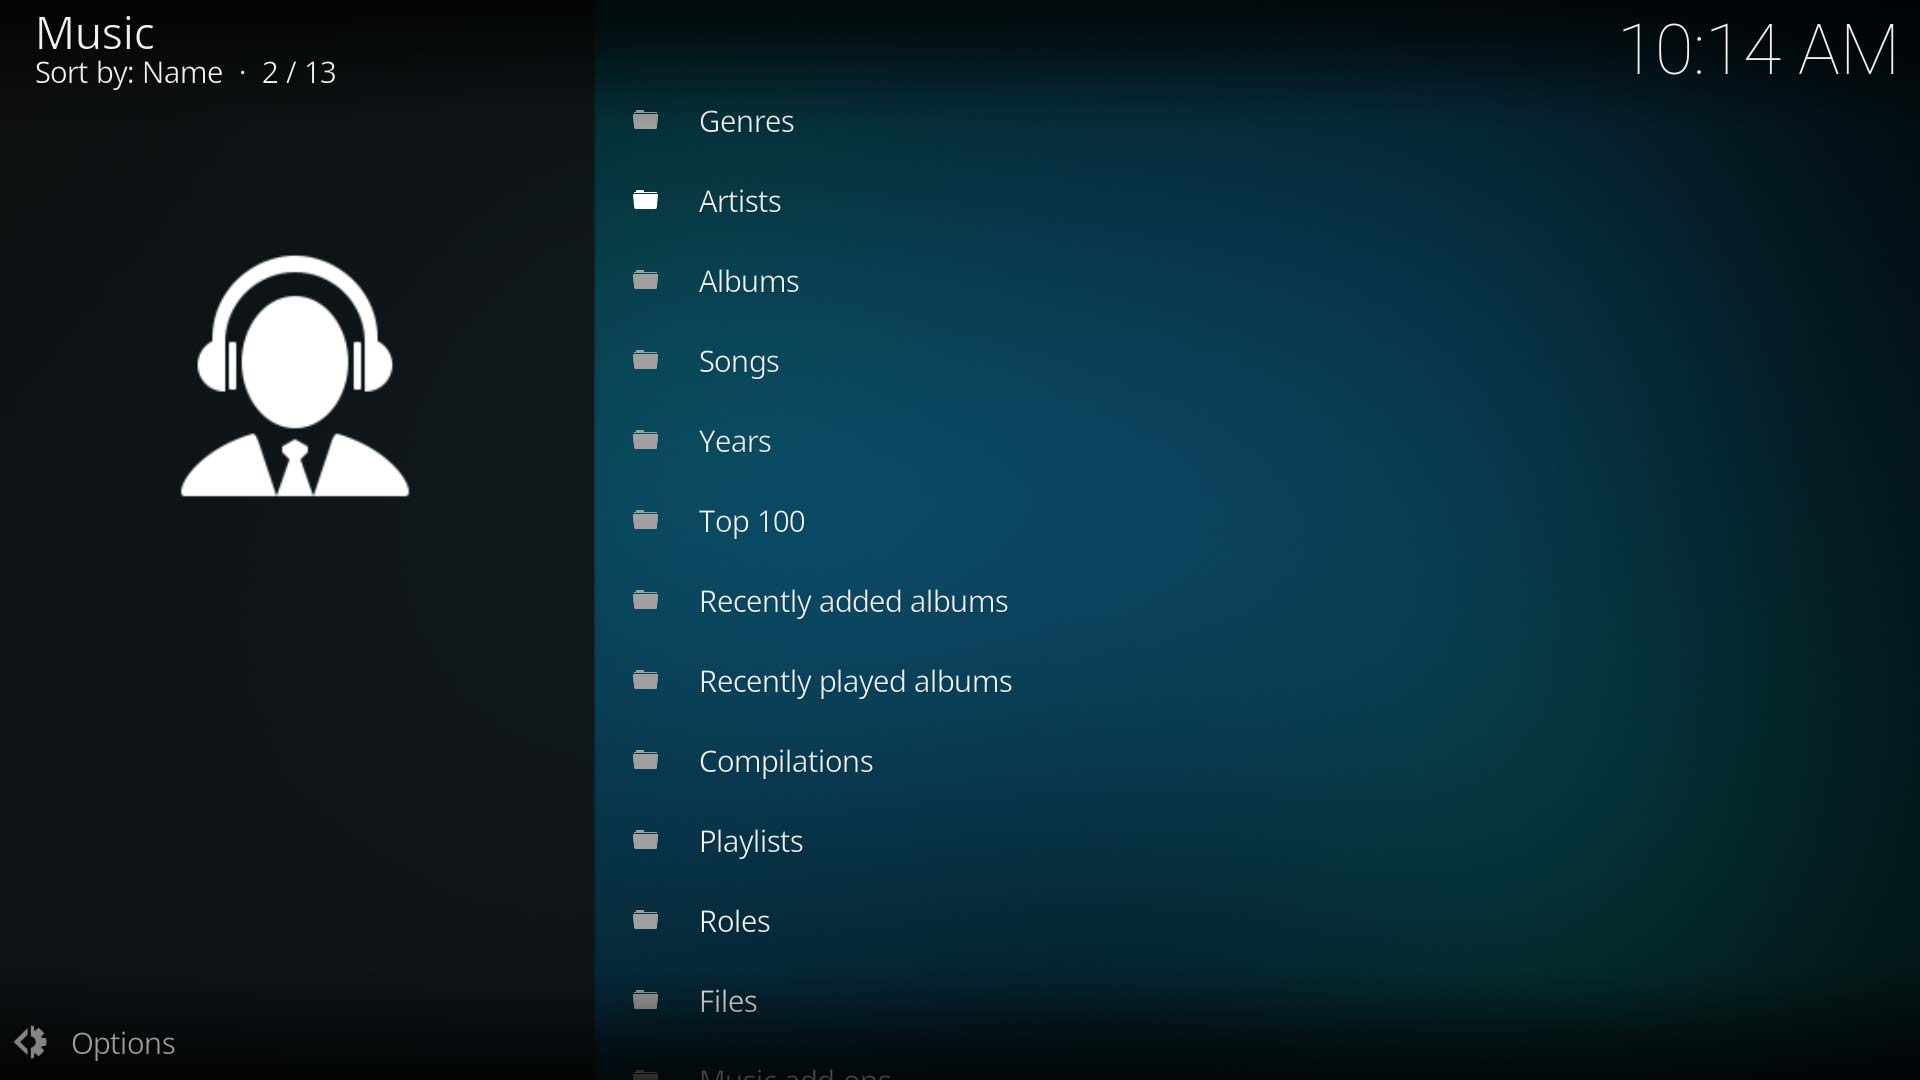
Image 2
Selecting Music from the main menu will display the default Music Category list as shown in Image 2. From this screen you select how to navigate your music library eg. Artists, Albums, Songs etc.
You are able to create your own Category Nodes by selecting Edit Nodes in the Left Sideblade Menu or in the Settings menu. See: Main Menu Items
File Mode
Using File Mode is a very limited way of using the Music Library. It is similar to using the File Browser in your operating system to navigate your music files in the folder structure you created.
To access your music files:
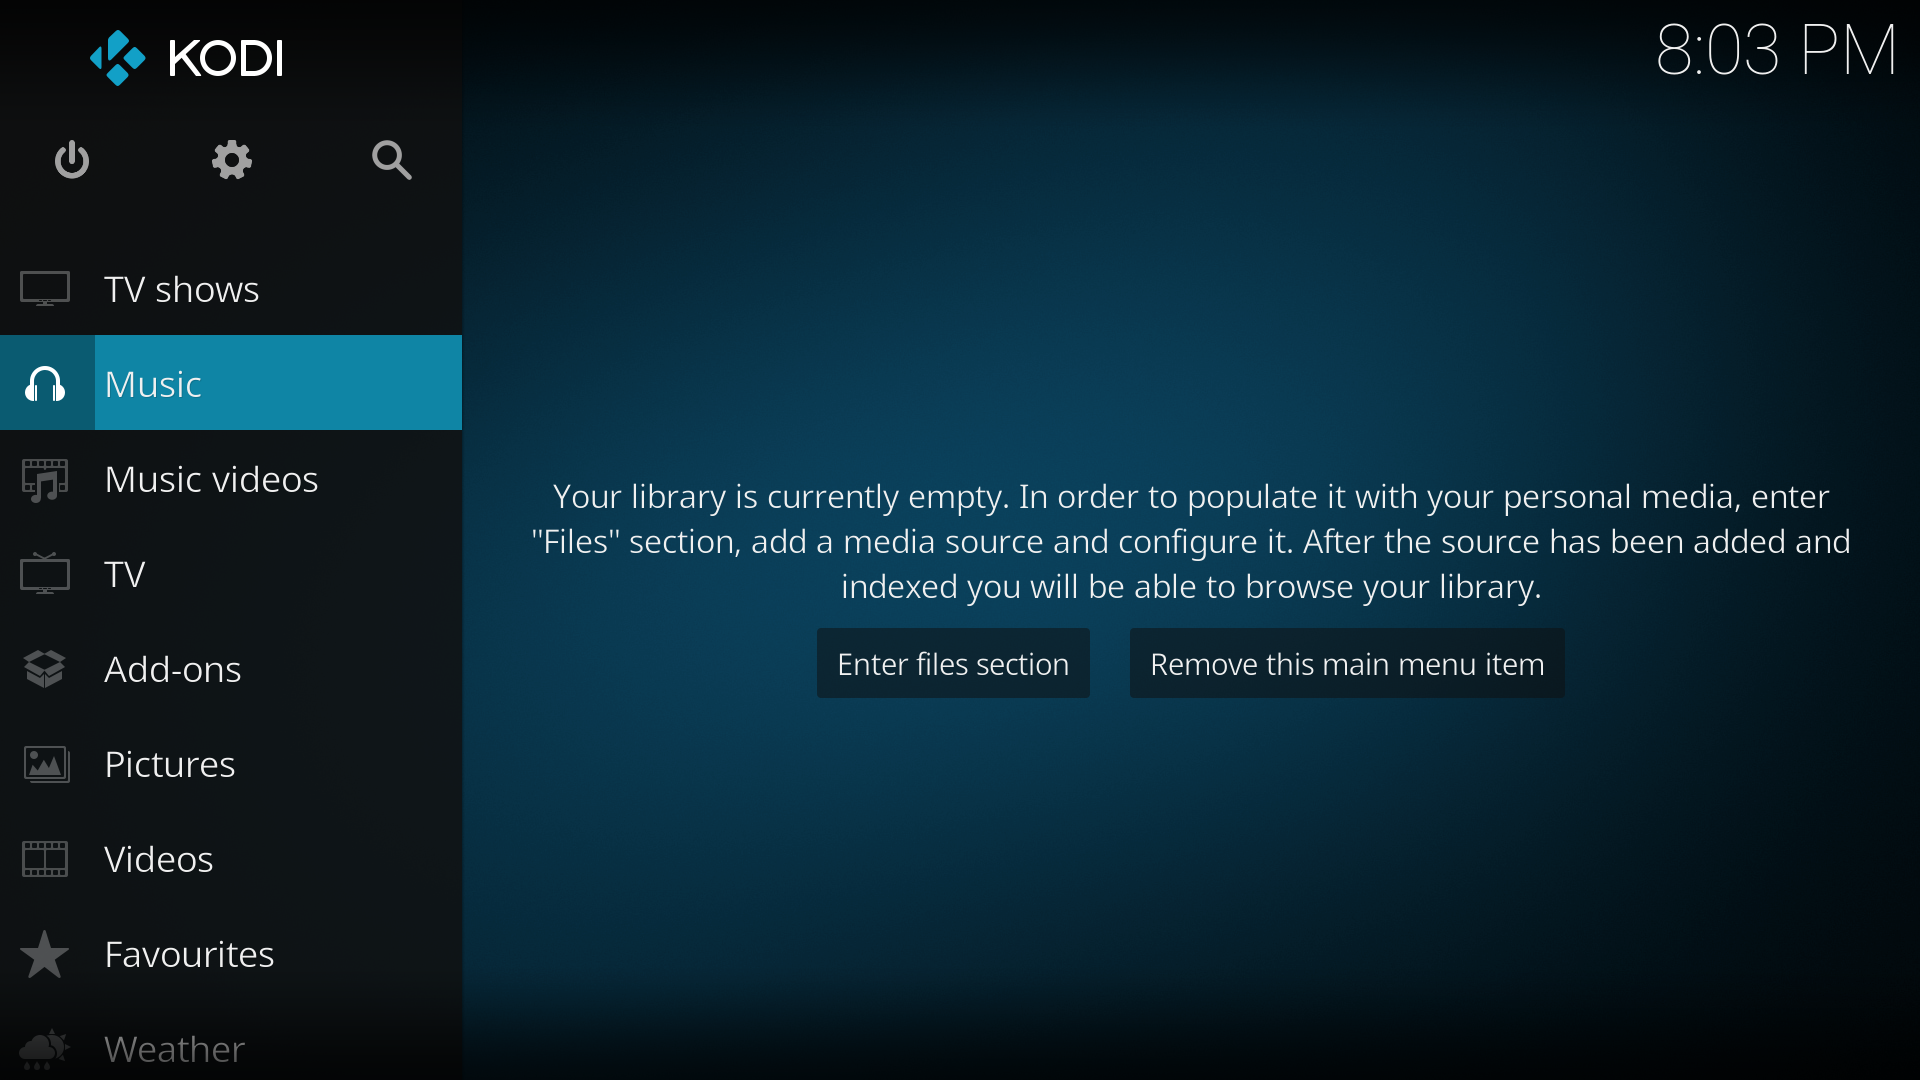
- Select Enter files section as seen in Image 1
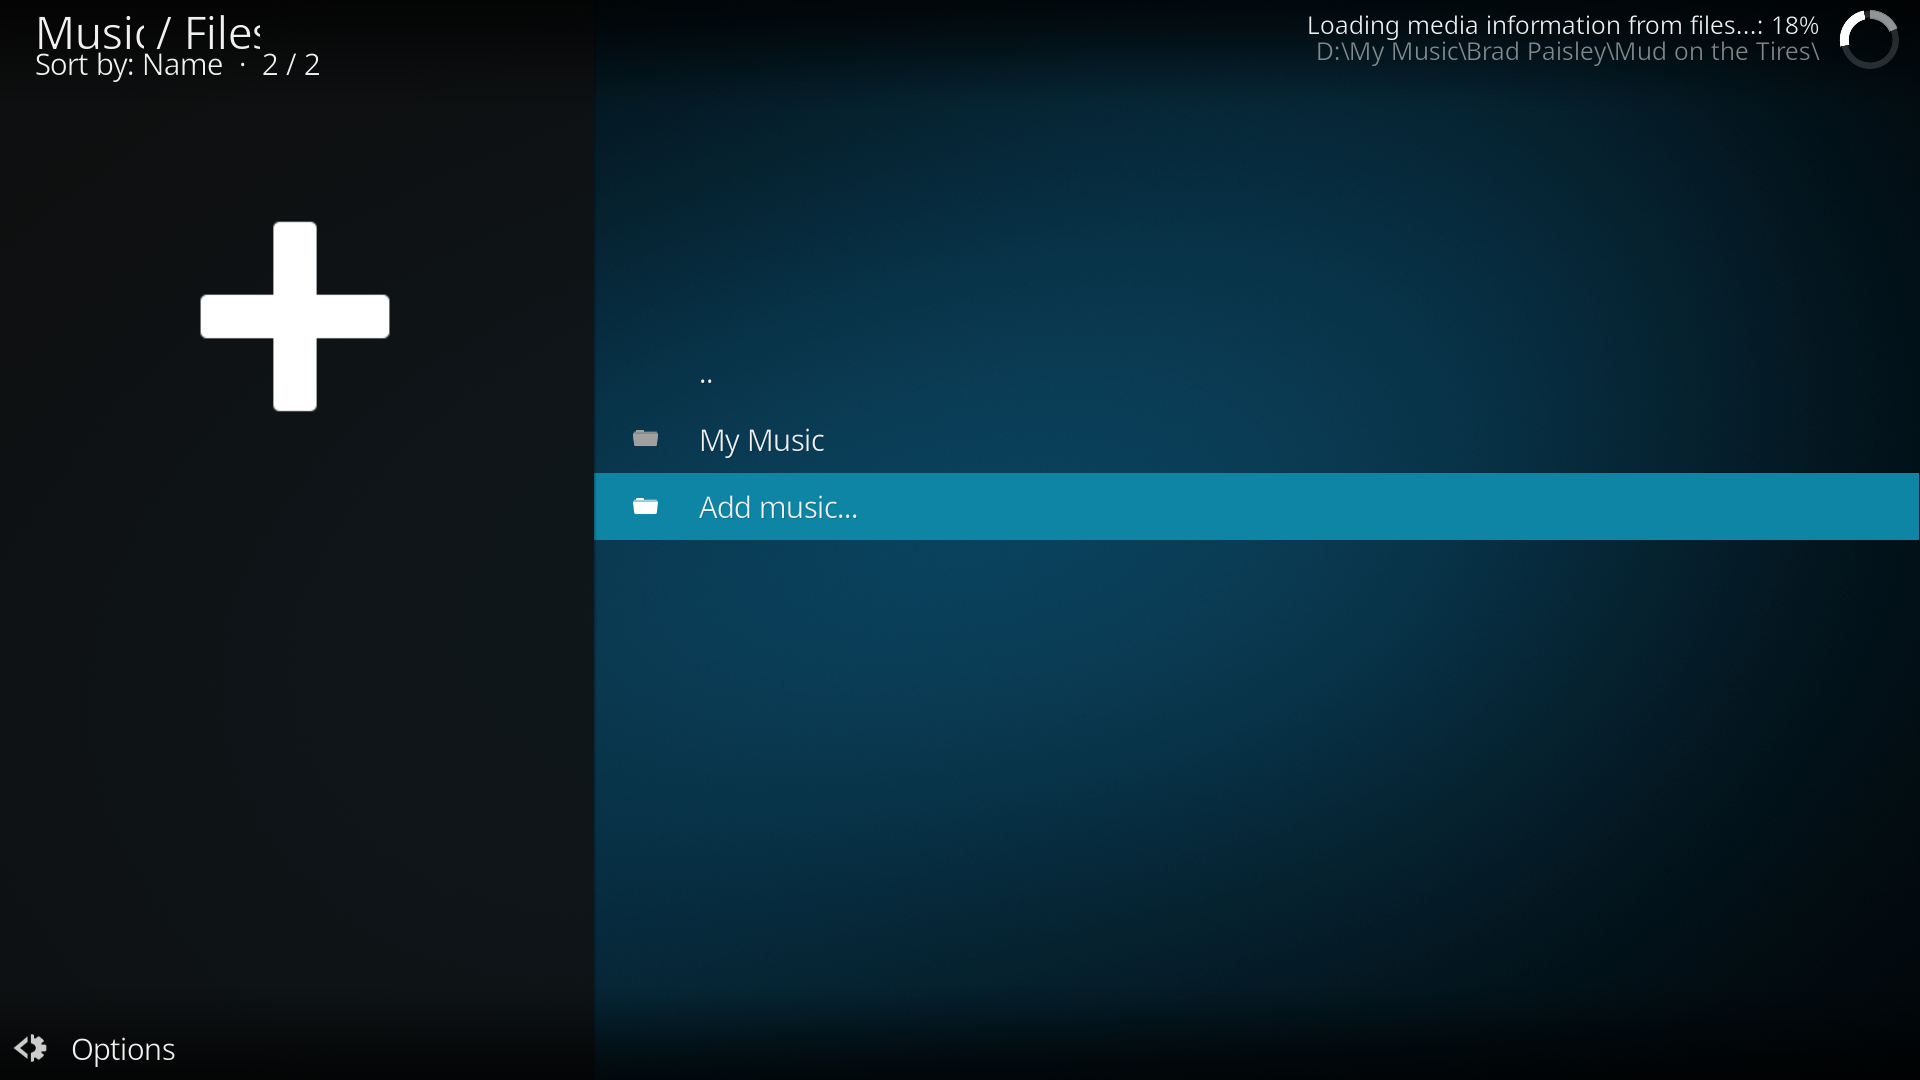
- Select the Source which contains the music you want to access, as seen in Image 2
- Navigate to your desired album or song.
Sideblade Menu
The Sideblade Menu can be accessed using the Library or File Modes. There is limited functionality when using File Mode.
You can bring up the sidebar menu either by:
- bringing the mouse cursor to the left side.
- pressing the ← key, when browsing Files in Files Mode
- pressing the ← key, when browsing the Category nodes listing as well as within each Category view in Library Mode
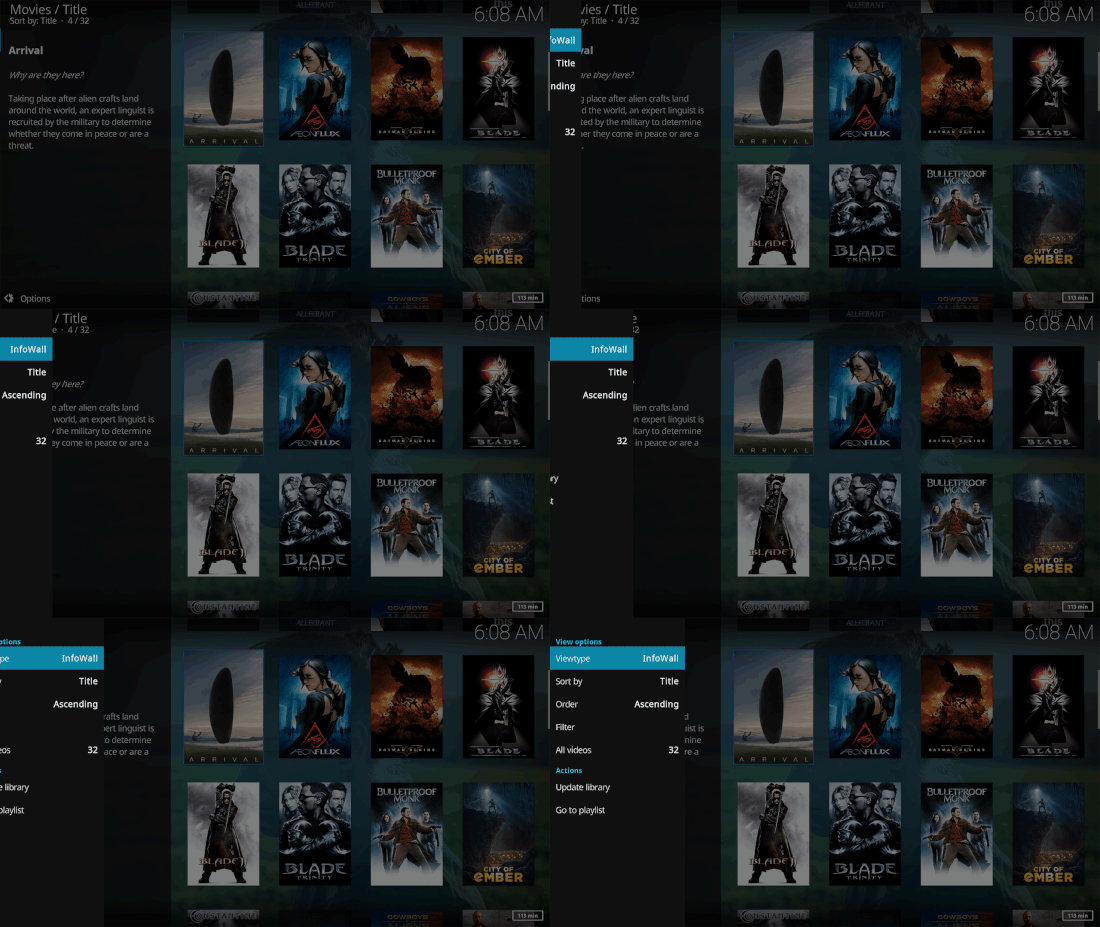
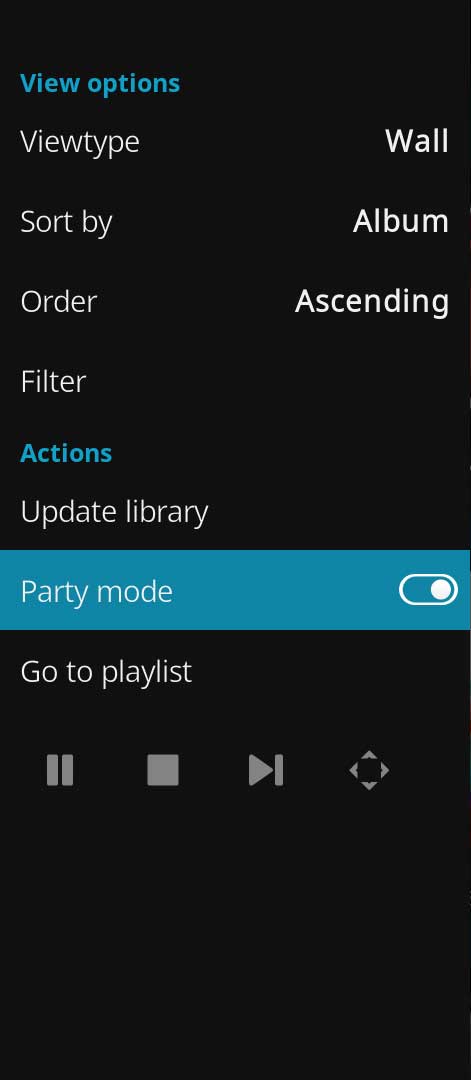
The image to the right shows the Sidebar Menu with Party Mode activated. If Party mode is deactivated, the entries below Party Mode will not be available.
Available Options
- ViewType
- Change current library view. Options differ depending upon location.
- Not available in File Mode
- Sort by
- Select how the list of Music is sorted. Available options differ between categories
- Order
- Once the Sort by is selected, do you want the order Ascending or Descending
- Filter
- Allows you to filter (aka Search) your list on certain criteria which differ between Categories. eg Artists, Albums, Genre, etc
- Not available in File Mode
- Update library
- Scans the library for newly added Music Files
- Not available in File Mode
- Party Mode
- Party Mode is context sensitive. The music used in the Party Mode Playlist will depend on which screen you invoked Party Mode from.
The following entries become visible when Party Mode is enabled
- Go to playlists
- Will open the currently playing Party Mode playlist
- Bottom Icons- From Left to right
- Pause
- Stop
- Skip to next Songs
- Open Play Mode screen. Displays Fanart and song information. aka Now Playing screen.
Playing Music
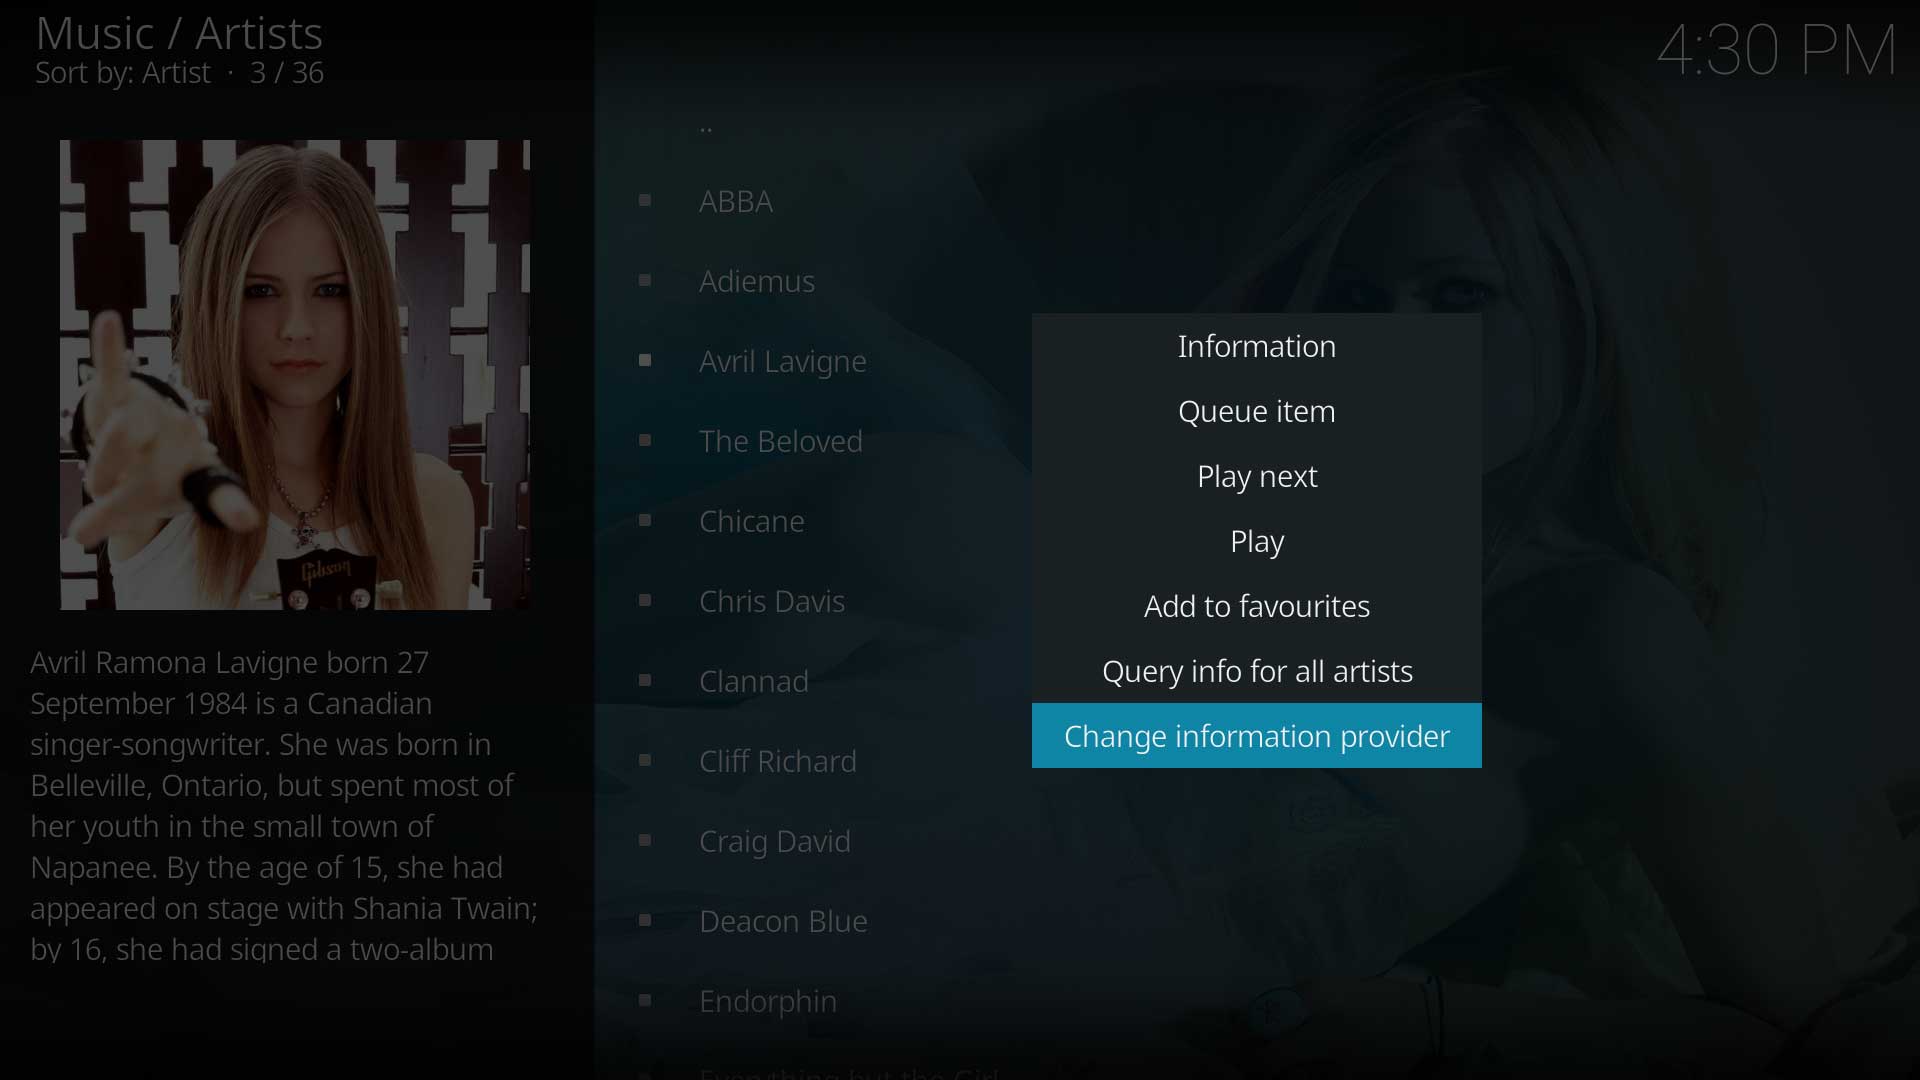
To commence music playback locate the desired song, album, artist or any other category and select the item to be played with the appropriate remote control button, Enter on a keyboard or use the Context menu.
The most common methods for commencing playback
- Individual Song selection
- Select a song for immediate playback using your remote or keyboard. Alternatively, using the Context Menu for the highlighted song, either play or queue the item into the playlist as shown in the above image.
- Album or Artist playback
- Highlight any Album or Artist. Call up the Context Menu and select Play for immediate play or Queue item to add the selection into the playlist as shown in the above image.
- Category playback
- Highlight any Category item such as year, genre etc. Call up the Context Menu and select Play for immediate play or Queue item to add the selection into the playlist as shown in the above image.
When selecting music for playback, a temporary Playlist is created and allows continuous playback. See the Playlist section on this page for further information
Now Playing Controls
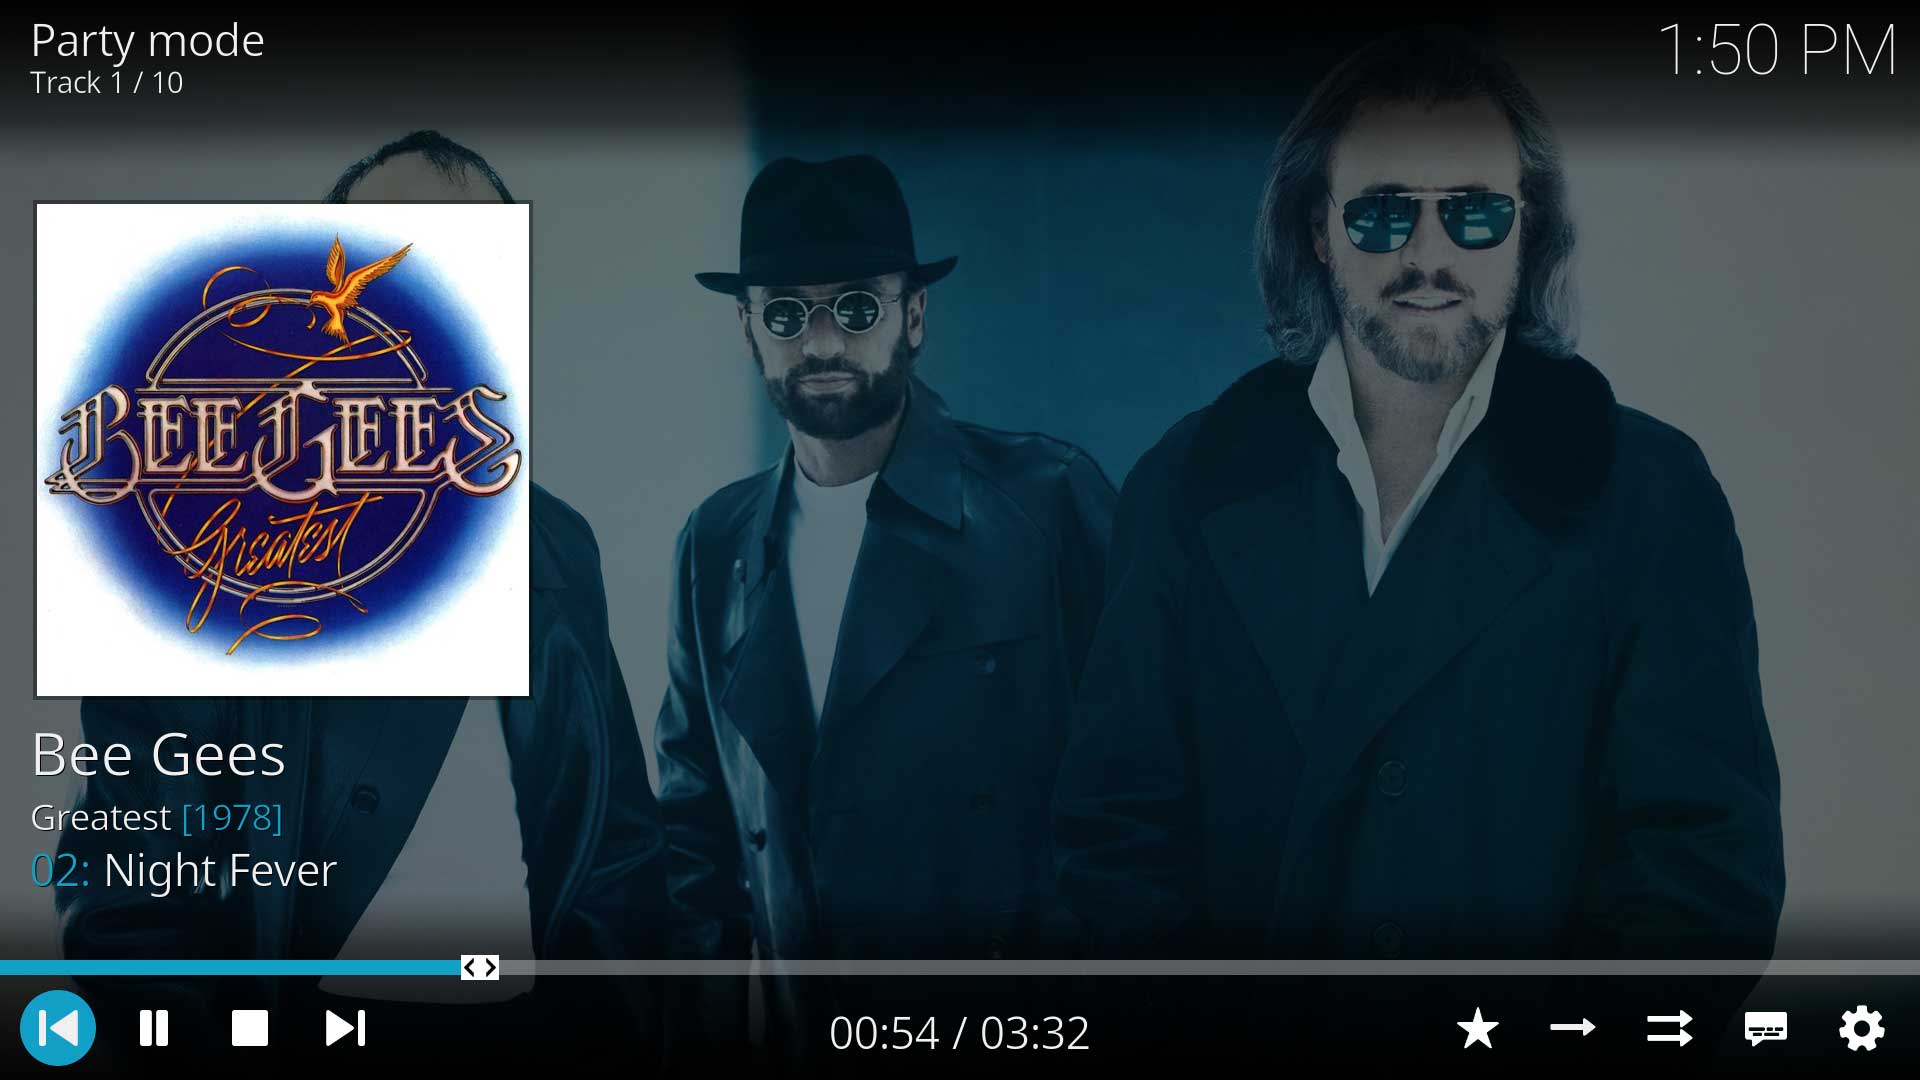
Once playback has commenced, the now playing screen is invoked by one of the following methods:
- After a period of inactivity the Now Playing screen will display automatically
- Use the the Tab ⇆ key on a keyboard or equivalent on a remote control
- From the Sideblade Menu as described in the previous section
From the Now Playing screen, the controls as shown in the above image are available. The Now Playing Controls can be accessed by:
- Use the ↵ Enter key on a keyboard or equivalent on a remote control
- Moving the mouse around the screen.
The controls will disappear after a period of inactivity
The controls along the bottom of the screen from Left to Right are:
- Previous Track
- Pause
- Stop
- Next Track
- Song Play Time / Song Duration
- Your Rating- Allows you to rate the song out of 10
- Repeat:- On/Off- Allows you to repeat the song. Not available in Party Mode
- Random:- On/Off- Changes play mode to Random. Not available in Party Mode
- Lyrics- Select to Install CU LRC Lyrics Initially. Then used to Activate CU LRC Lyrics
- Settings
- Visualisation- Enable or Disable
- Visualisation Settings
- Lyrics add-on
- Lyrics add-on Settings
Playlist
A playlist is a collection of songs that can be played sequentially. Kodi uses two types of playlists:
- Temporary or Default playlist that is auto-created to enable immediate music playback
- User playlists are created by the user to meet specific requirements.
Temporary Playlist
When music is selected and playback commences, a temporary Playlist is created. This playlist will contain the song selected for playback, plus the remaining songs in the list which enables continuous playback. For example, if a song is selected from an album, then all songs in the album will be added to the playlist with playback always commencing at the selected song.
The temporary playlist is populated differently, depending on where the songs were added from. For example...
- If a song is selected from the Song Category, then all songs in the library are added to the playlist.
- When a song is selected from an Album, the playlist will contain only the songs from the selected Album
- When selecting a Category for playback the playlist will contain only the songs from the selected Category
- etc
The temporary playlist will remain available until one of the following occurs
- Kodi is shut down
- Another song selection is made
- A user created playlist is selected
User Playlists
These playlists are created by the user for specific requirements. The two types of playlists available for user creation are:
- Basic playlists - The Basic Playlist is a user created list of music or video that does not require a correctly scraped library as it uses the folder paths to the media files. As the playlist is based on paths, different classes of media can be mixed, like movies and episodes. The list can be created within Kodi or transferred from another media player.
- Smart playlists - Smart Playlists are a versatile feature that allow you to create customised lists of media that may be more suited to your browsing preference. They are a set of rules/filters that allow you to display a sub set of the media in your library.
Playlist Controls
The playlist is accessible as follows:
- Extend the Sideblade Menu from any location within Music
- Select Go to playlist
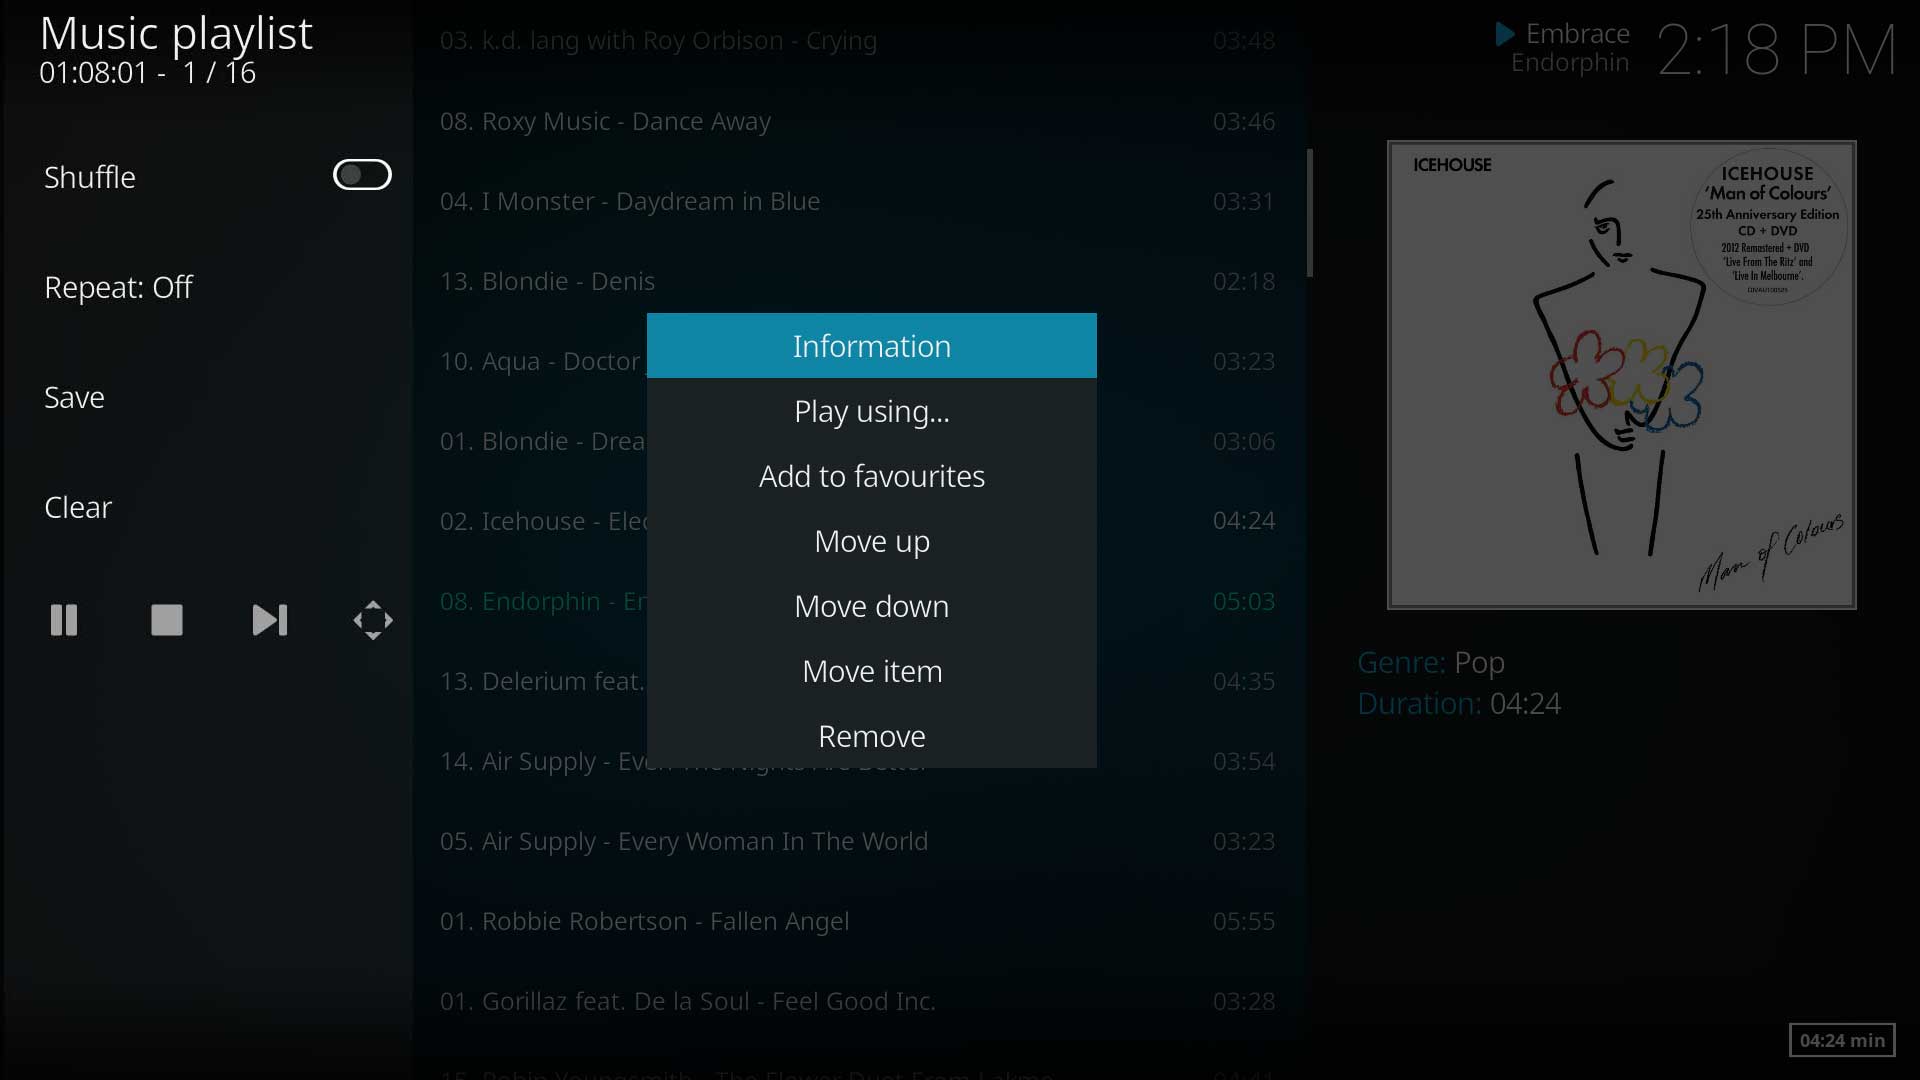
The above image shows the Playlist screen displaying the list of songs, the sideblade menu and the Context Menu activated. The following controls are now available:
- Sideblade Menu
- Shuffle- Disabled by default. Once enabled, songs will playback in random order.
- Repeat- Off by default. When enabled, will repeat the playlist once the end of the list is reached.
- Save- Save the current playlist. This allows you to create playlists to be saved and easily played back.
- Clear- Will clear the playlist. Once the current playing song ends, music playback will end.
- Icons- From left to right
- Pause
- Stop
- Next Track
- Now Playing Screen
- Context menu- for individual selected song
- Information- Shows Artist information
- Play using- Allows the use of other players for playback
- Add to favourites- Add the selected song to your Favourites list
- Move up- Move the selected track up in the queue
- Move down- Move the selected track down in the queue
- Remove- Remove the selected song from the playlist
Party Mode
Party mode is a quick and simple option to create a continuous playlist of music from your library. As the name implies it is a great way to set and forget music playback for parties.
- See also: Party Mode
Search / Filter
A Music search function is available from the Left Sideblade Menu. It is named Filter
The search function is context sensitive so will only return results relevant to the Category where the search is performed. eg, searching in Artists Category will only find Artists
A global search function is availabe from the Home Screen and is the Search Icon at the top left of the screen next to the Settings Icon. The Global Add-on is required to be installed for this to function.
Useful Links
Kodi can be used as a UPnP Server that will stream its library contents to other players on the network, or it can be used as a UPnP Client that can receive music and video from a UPnP Server on the network.
As of v11 (Eden), Kodi has very limited support for being an AirPlay target, allowing any device/platform that can run Kodi to receive some AirPlay content.
Various internet video and audio streams can be played back in Kodi as if they were locally stored on your media center by using STRM files. As long as the format and streaming-method (network-protocol) is supported by Kodi, stream can be added. These are basic text files that look like <name>.strm and contain a URL to the internet stream. STRM files can also be added to the video library and can have cover art, summaries, etc.
Some internet sites may have an add-on available that can also access these media streams, rather than having to manually create STRM files. See Add-ons for more information on how to find and install add-ons.
Music nodes are defined views that are used to organize your media from the music menu. In the past Kodi has had a number of standard nodes such as Artist, Album, Tracks that were hard coded. As of v15 Isengard, Kodi introduces the ability to customize these nodes using an XML file. Using XML files really gives great flexibility in how you display your media and lets you browse large collections quickly. Don't want your country music in your main album node... exclude it. Want a genre in a separate node, create it. Don't like how Top 100 Played is presented, change it.
To get full functionality from custom nodes, you need to use a skin that allows you to deploy them as you would like (e.g. latest builds of Aeon Nox). Confluence will show your nodes, but doesn't allow you to decide exactly where.
| Return to top |
|---|
