Archive:Share libraries using UPnP: Difference between revisions
Jump to navigation
Jump to search
mNo edit summary |
m (Karellen moved page HOW-TO:Share libraries using UPnP to Archive:Share libraries using UPnP without leaving a redirect: Not needed. Repetitive content) |
||
| (One intermediate revision by the same user not shown) | |||
| Line 1: | Line 1: | ||
UPnP can be used for limited sharing of media files between two {{kodi}} devices. | |||
UPnP cannot share library functions and is a file only sharing protocol. If you are looking for full library functionality, UPnP is not the method to use. | UPnP cannot share library functions and is a file only sharing protocol. If you are looking for full library functionality, UPnP is not the method to use. | ||
For a more complex method of sharing using MySQL see | For a more complex method of sharing using MySQL see MySQL | ||
# For {{kodi}} device A (the "server") go to: | # For {{kodi}} device A (the "server") go to: | ||
#* {{highlight|bordered=yes | #* {{highlight|bordered=yes|Settings → Service Settings → UPnP/DLNA}} | ||
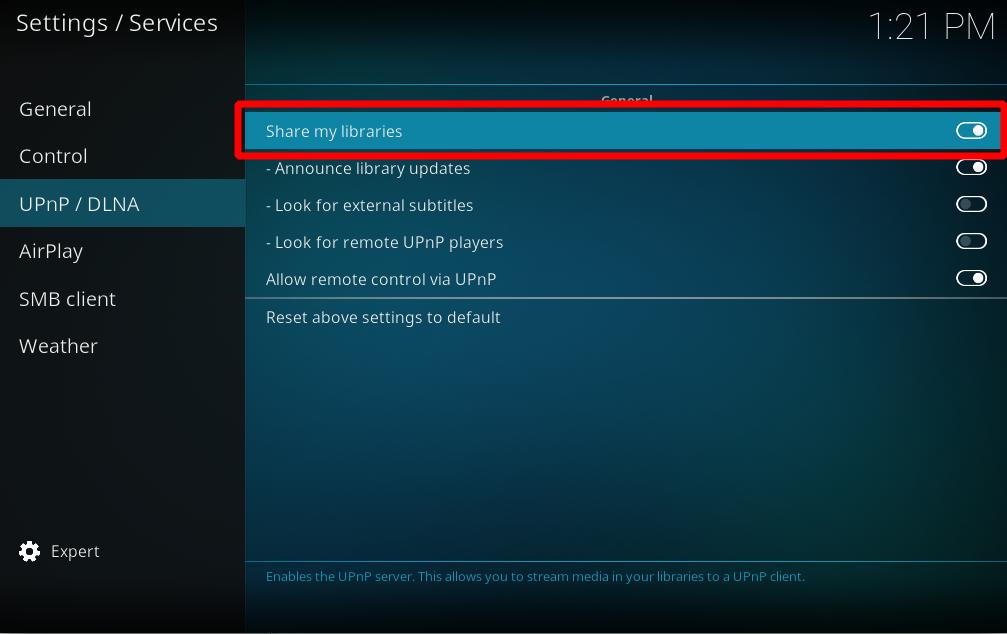
# Enable the UPnP server ('''Share my libraries''')<br />[[File:Share-upnp-library1.jpg|500px]]<br /><br /> | # Enable the UPnP server ('''Share my libraries''')<br />[[File:Share-upnp-library1.jpg|500px]]<br /><br /> | ||
# For {{kodi}} device B (the "client") you will need to (1) enable UPnP support in {{highlight|bordered=yes | # For {{kodi}} device B (the "client") you will need to (1) enable UPnP support in {{highlight|bordered=yes|Settings → Service Settings → UPnP/DLNA}} and then (2) add device A as a media source: {{highlight|'''Videos''' → '''Files''' → '''Add Videos...''' → '''Browse''' → ''(scroll down to)'' '''UPnP Devices'''}}<br />[[File:Share-upnp-library2.png|500px]]<br /><br /> | ||
# A shows up there. Open the share and then hit '''OK'''. | # A shows up there. Open the share and then hit '''OK'''. | ||
# Give the new video source from A a name. | # Give the new video source from A a name. | ||
| Line 17: | Line 15: | ||
{{big|For a detailed description how to add UPnP sources, please visit: | {{big|For a detailed description how to add UPnP sources, please visit: UPnP Media Source}} | ||
== Other guides == | == Other guides == | ||
| Line 25: | Line 23: | ||
{{youtube|EYX-8FrB1DM}} | {{youtube|EYX-8FrB1DM}} | ||
Latest revision as of 04:01, 19 August 2020
UPnP can be used for limited sharing of media files between two Kodi devices.
UPnP cannot share library functions and is a file only sharing protocol. If you are looking for full library functionality, UPnP is not the method to use.
For a more complex method of sharing using MySQL see MySQL
- For Kodi device A (the "server") go to:
- Settings → Service Settings → UPnP/DLNA
- Enable the UPnP server (Share my libraries)
- For Kodi device B (the "client") you will need to (1) enable UPnP support in Settings → Service Settings → UPnP/DLNA and then (2) add device A as a media source: Videos → Files → Add Videos... → Browse → (scroll down to) UPnP Devices

- A shows up there. Open the share and then hit OK.
- Give the new video source from A a name.
- You should now be able to see everything as it is set up on A on B.


For a detailed description how to add UPnP sources, please visit: UPnP Media Source
Other guides
Video guides
- UPnP sharing (as seen in XBMC v12, Frodo)