HOW-TO:Change skins: Difference between revisions
newer template. Others are just redirects to this one. |
No edit summary |
||
| Line 1: | Line 1: | ||
{{mininav| | {{mininav||[[Skins]]|page={{FULLPAGENAME}} }} | ||
<section begin="intro"/>Many of us have been tempted by the allure of Kodi's beauty. There are some excellent skin designers out there who have gone to great lengths to create and share beautiful ways of viewing and navigating our media collections. As default, Kodi comes with the excellent skin Estuary, but there are plenty more to choose from.<section end="intro"/> | <section begin="intro"/>Many of us have been tempted by the allure of Kodi's beauty. There are some excellent skin designers out there who have gone to great lengths to create and share beautiful ways of viewing and navigating our media collections. As default, Kodi comes with the excellent skin Estuary, but there are plenty more to choose from.<section end="intro"/> | ||
Revision as of 22:17, 22 January 2018

|
 Skins Skins |
HOW-TO:Change skins
|
Many of us have been tempted by the allure of Kodi's beauty. There are some excellent skin designers out there who have gone to great lengths to create and share beautiful ways of viewing and navigating our media collections. As default, Kodi comes with the excellent skin Estuary, but there are plenty more to choose from.
Installing a new skin
-
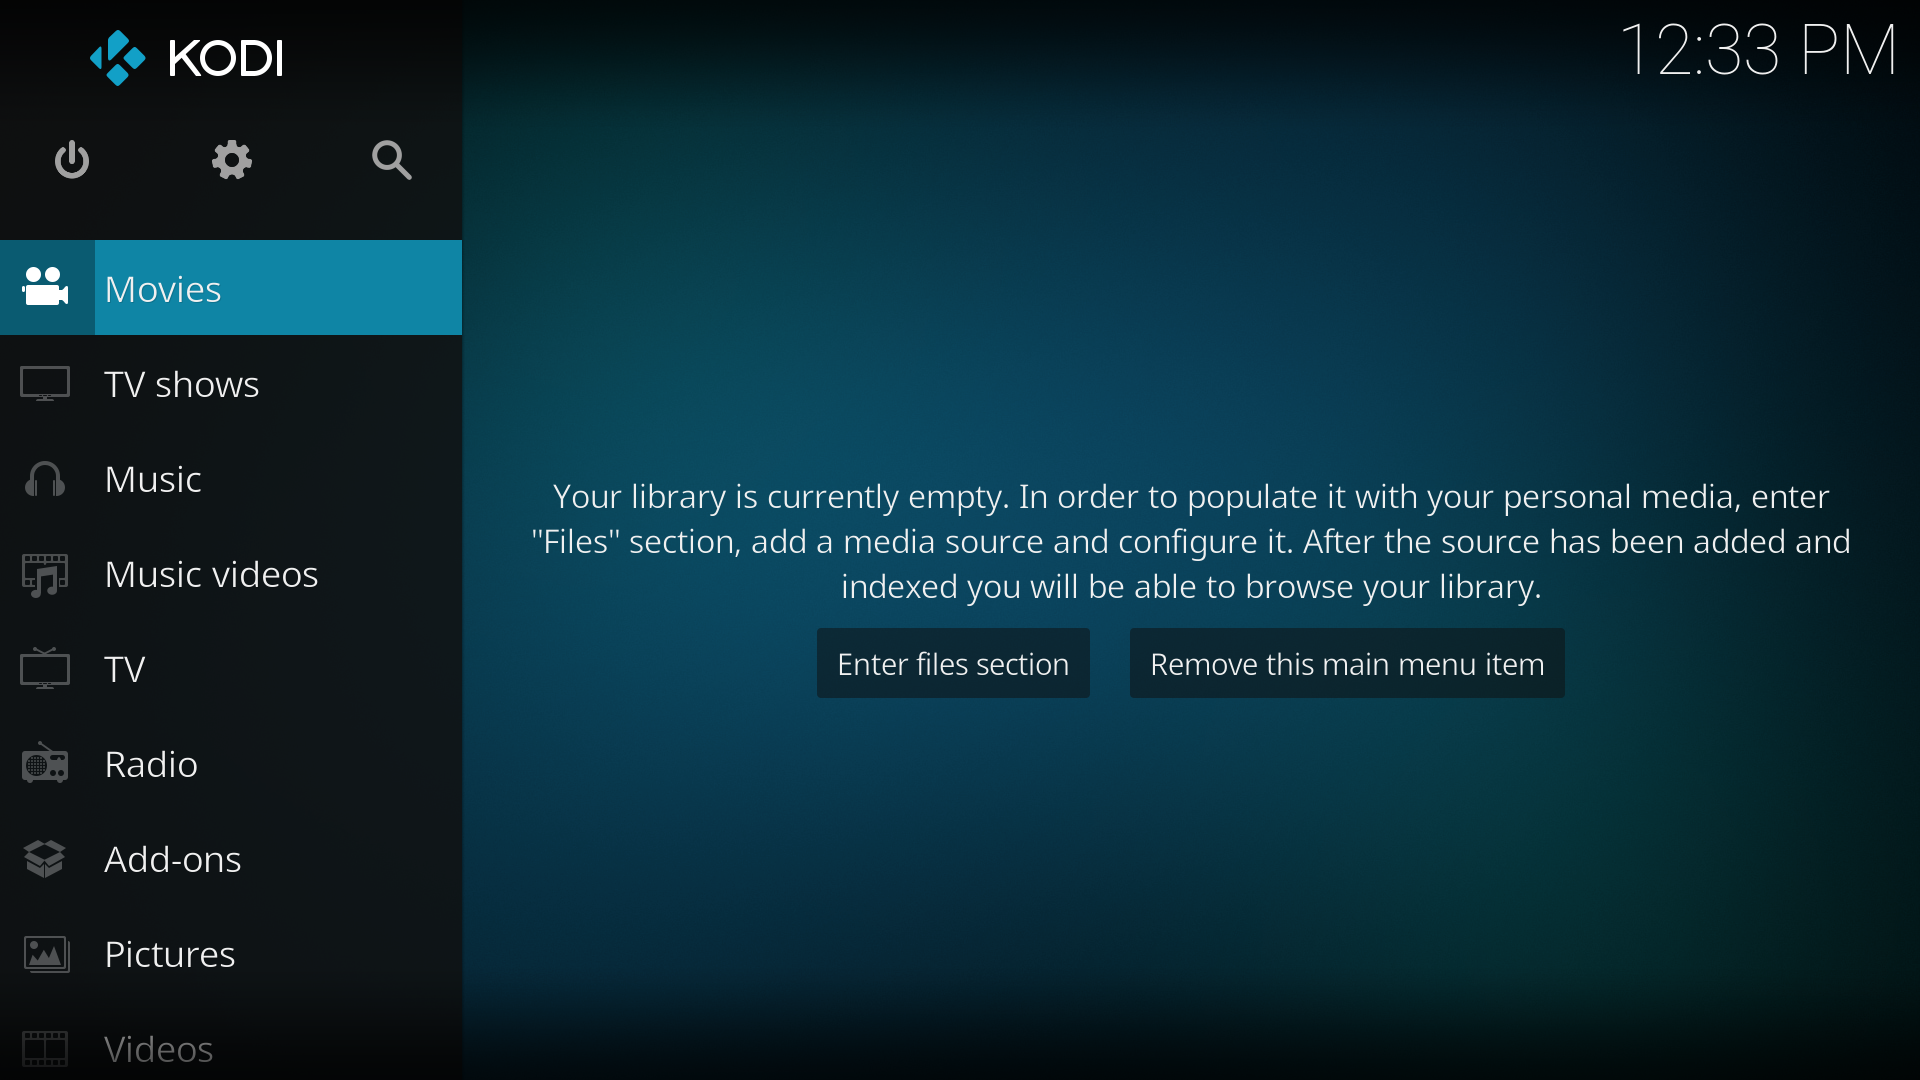 Step 1: Start from the Home screen
 -
 Step 2: Navigate to the top of the menu and select System Settings (the gear) icon.
 -
Step 3: Select Interface settings.
-
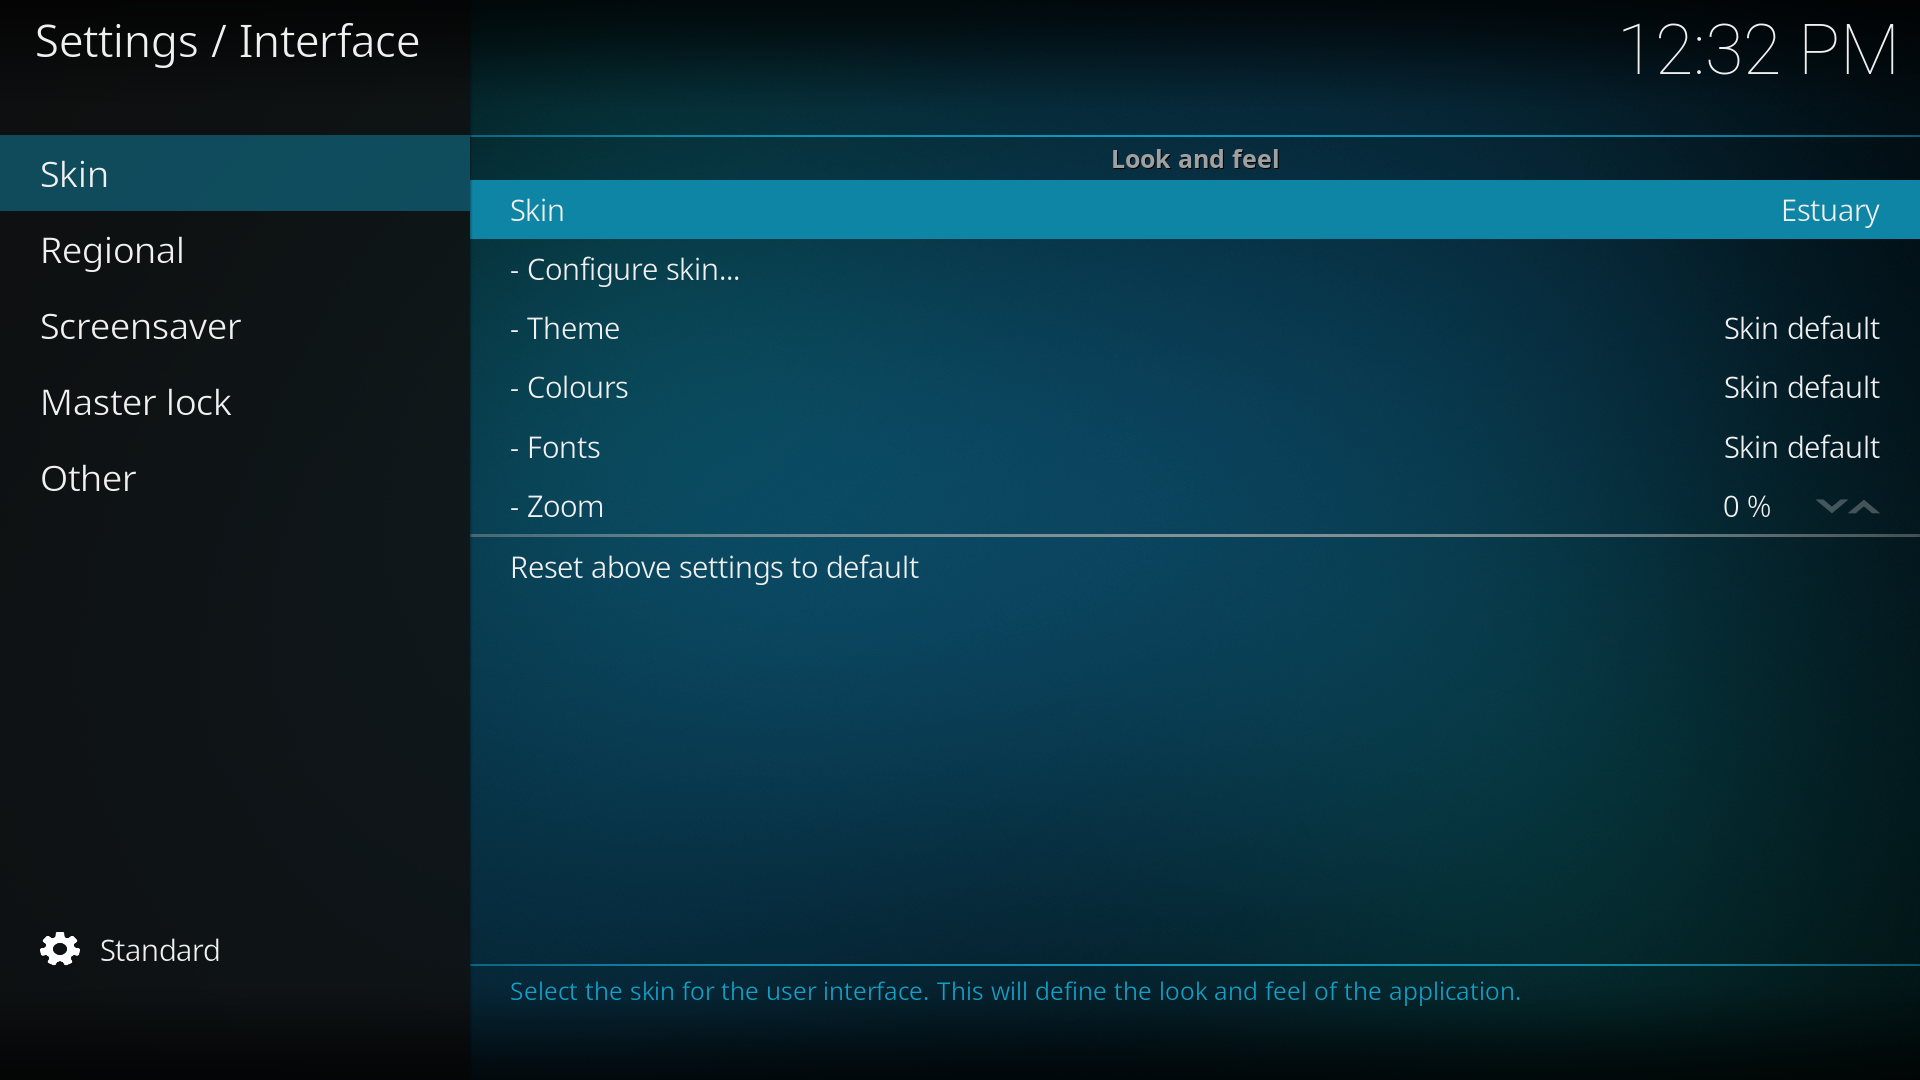 Step 4: In the Interface setttings, select Skin, then Skin under Look and feel.
 -
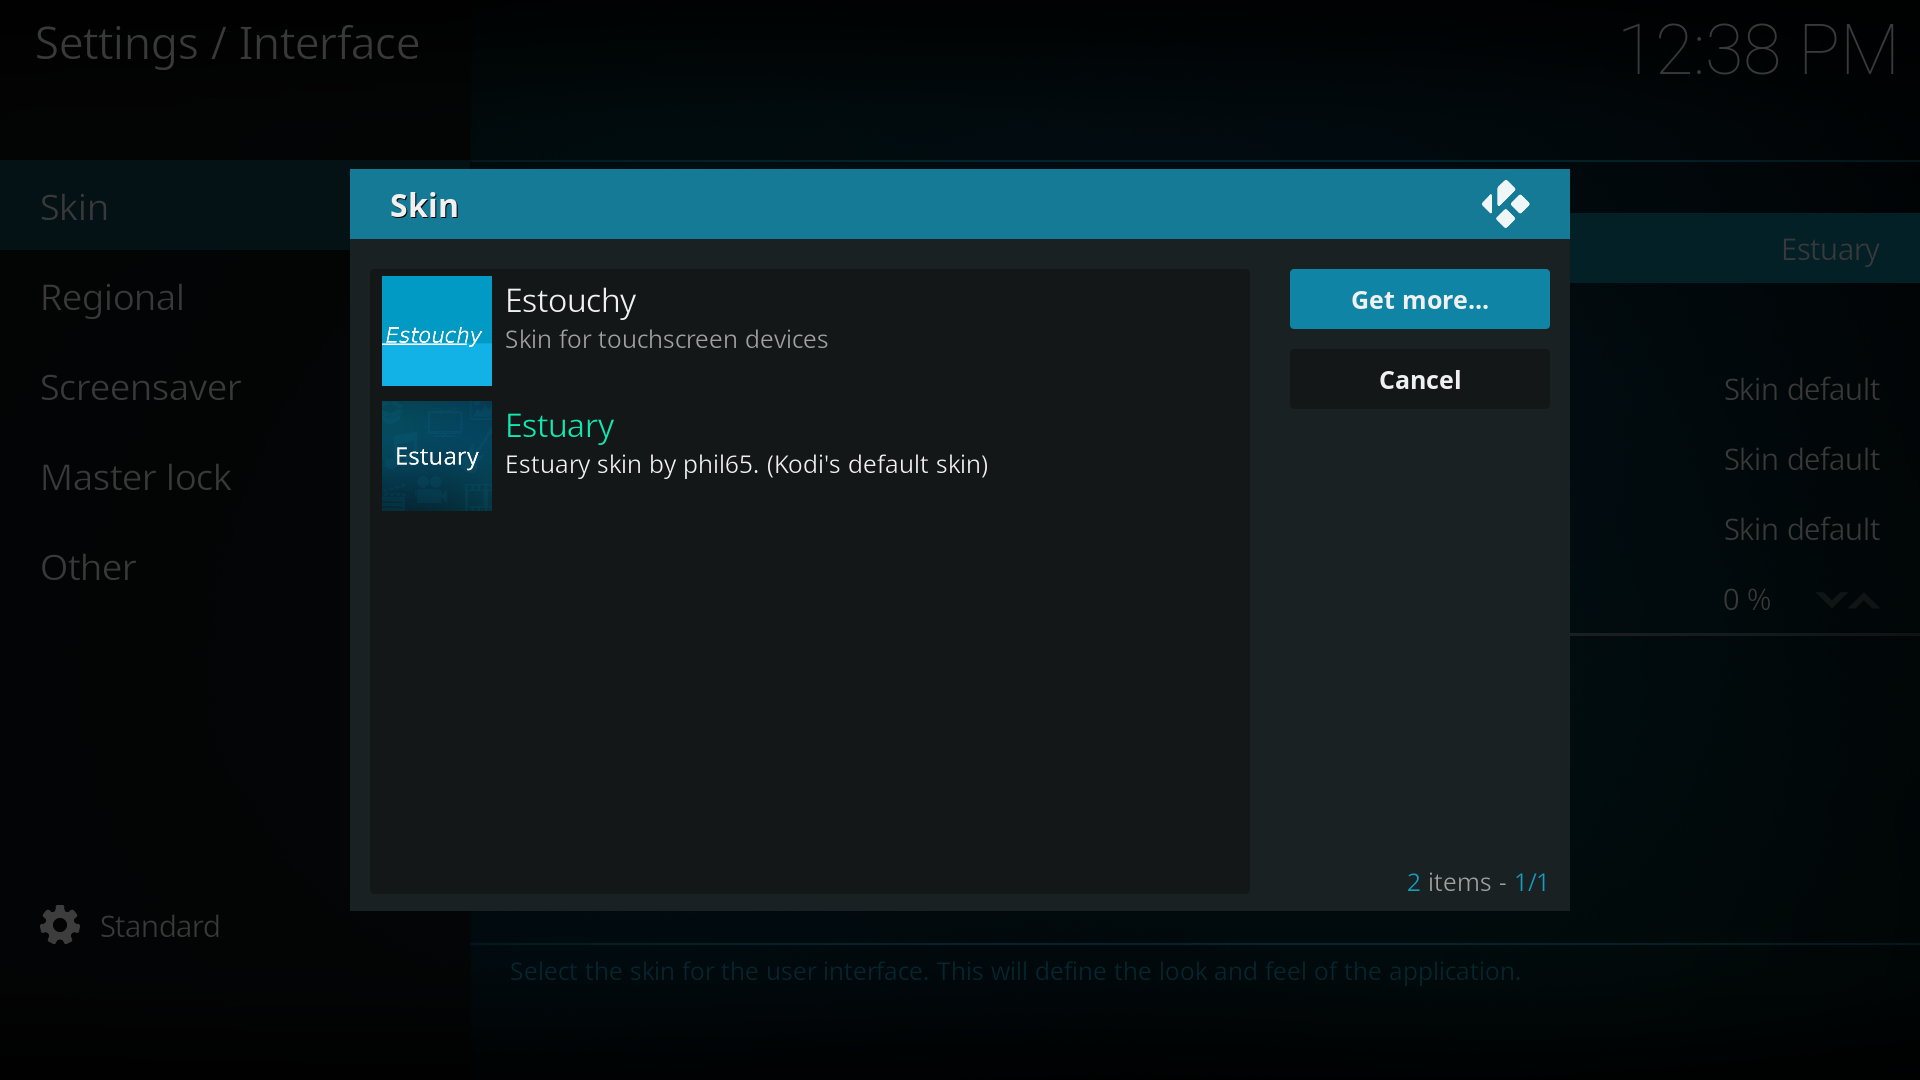 Step 5: By default, there are only 2 skins installed, Estuary(the default skin) and Estouchy. To install another skin, select Get more...
 -
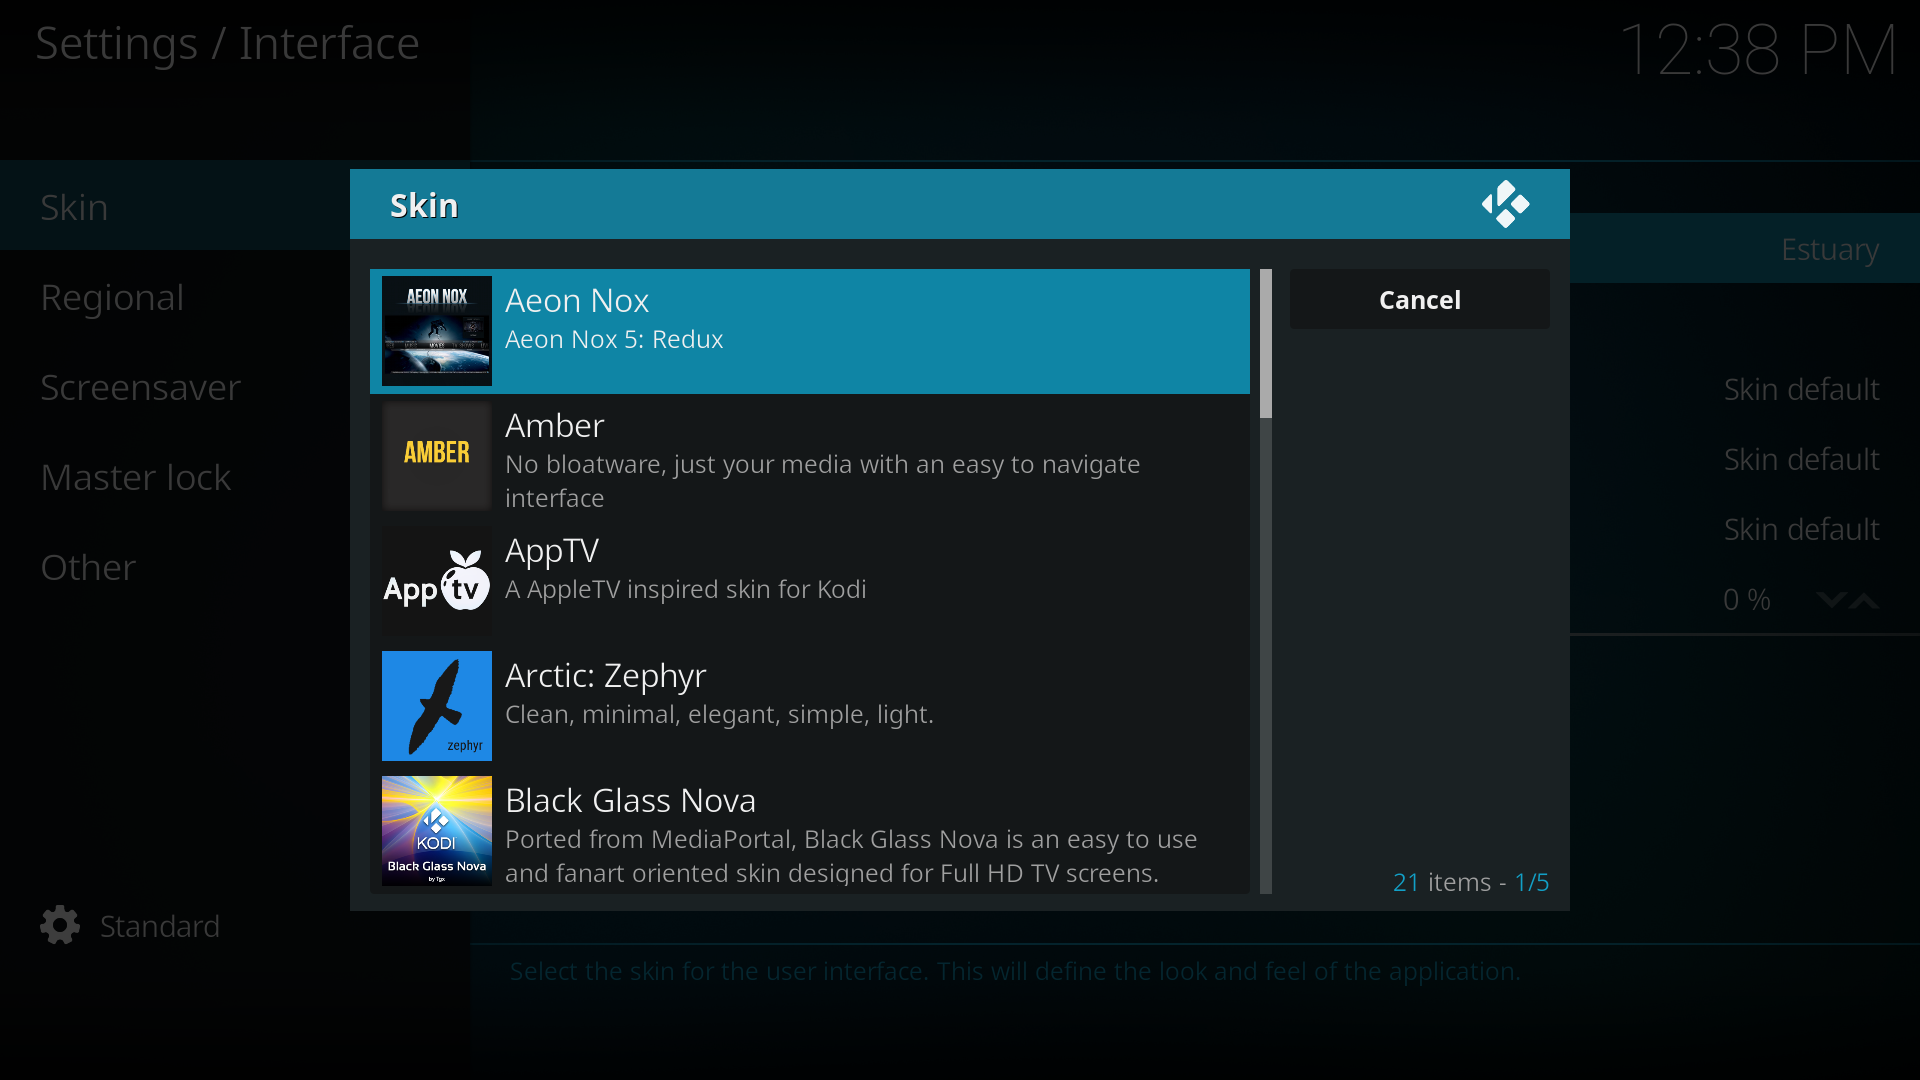 Step 6: In the new window, select the skin you want to install from the list.
 -
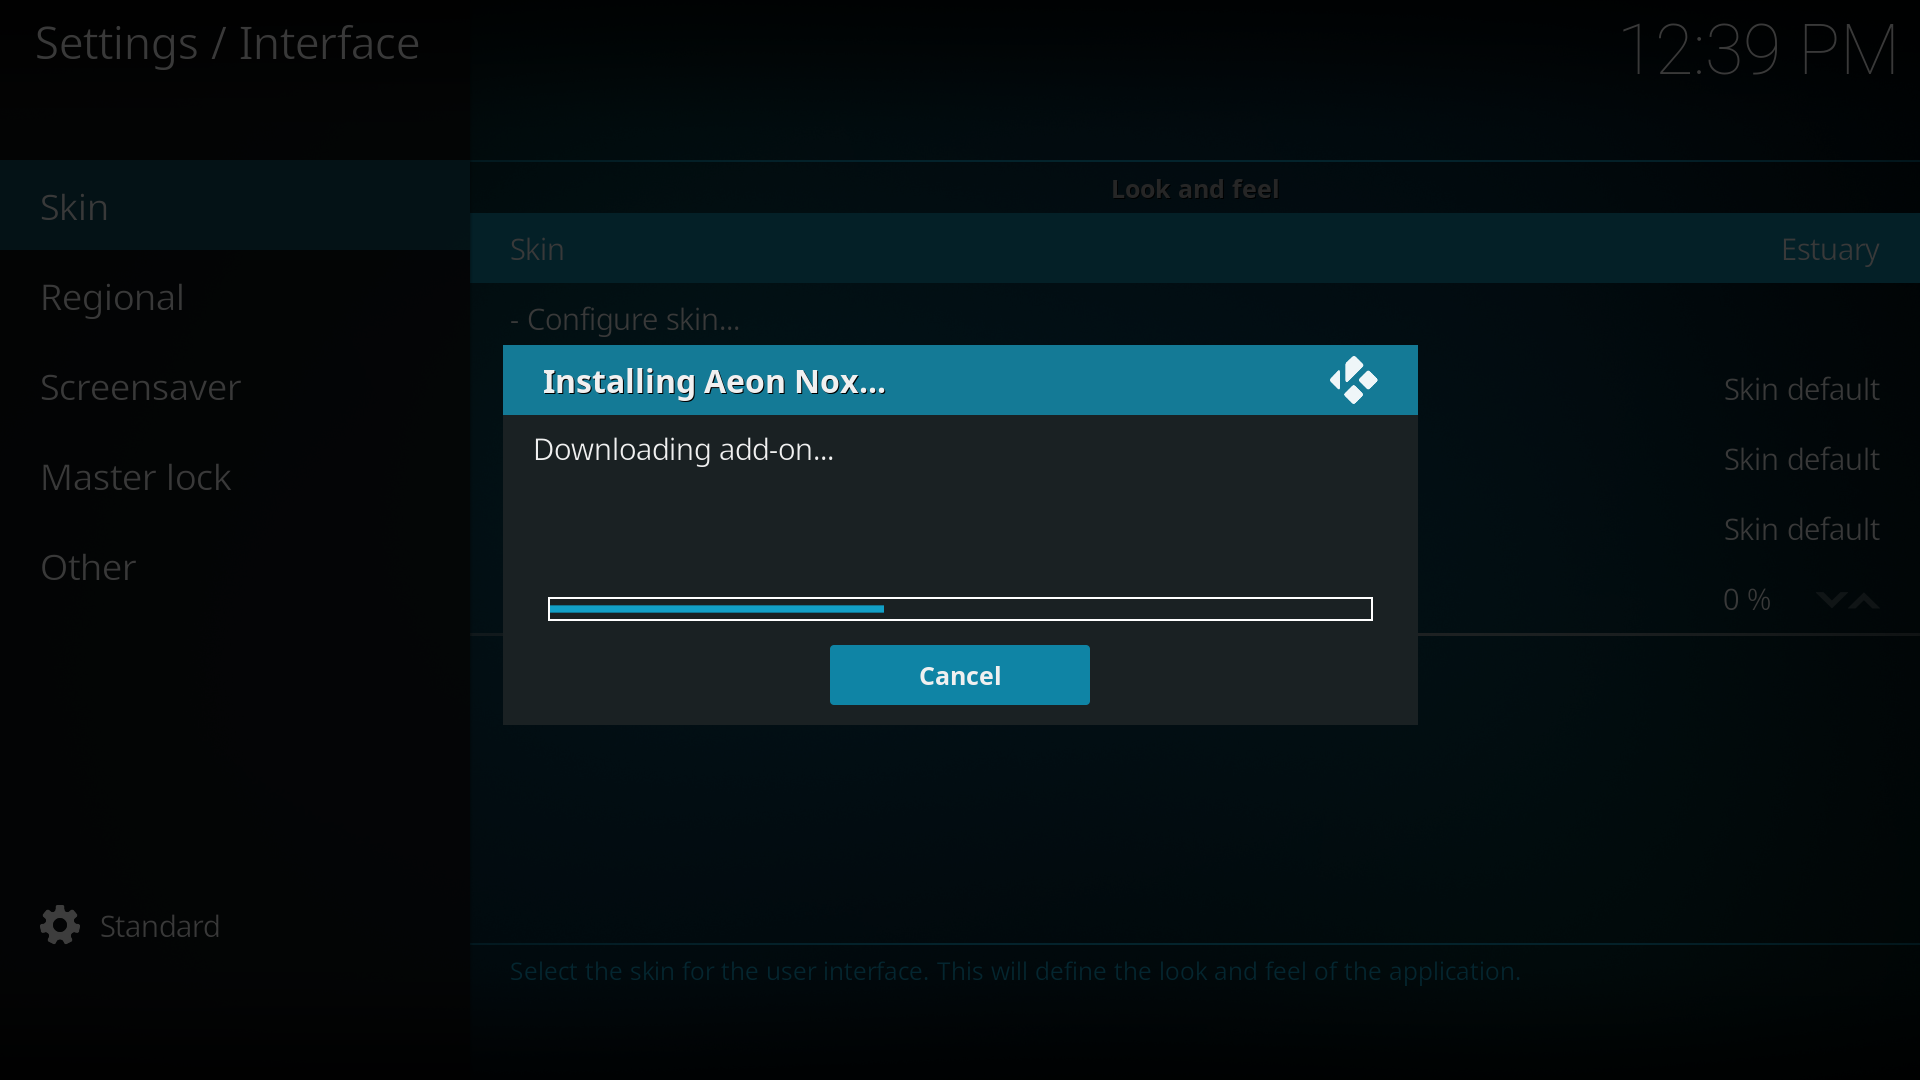 Step 7: After you have select the skin it will begin downloading.
 -
Step 8: Once downloaded, the skin and any dependencies it requires will install.
-
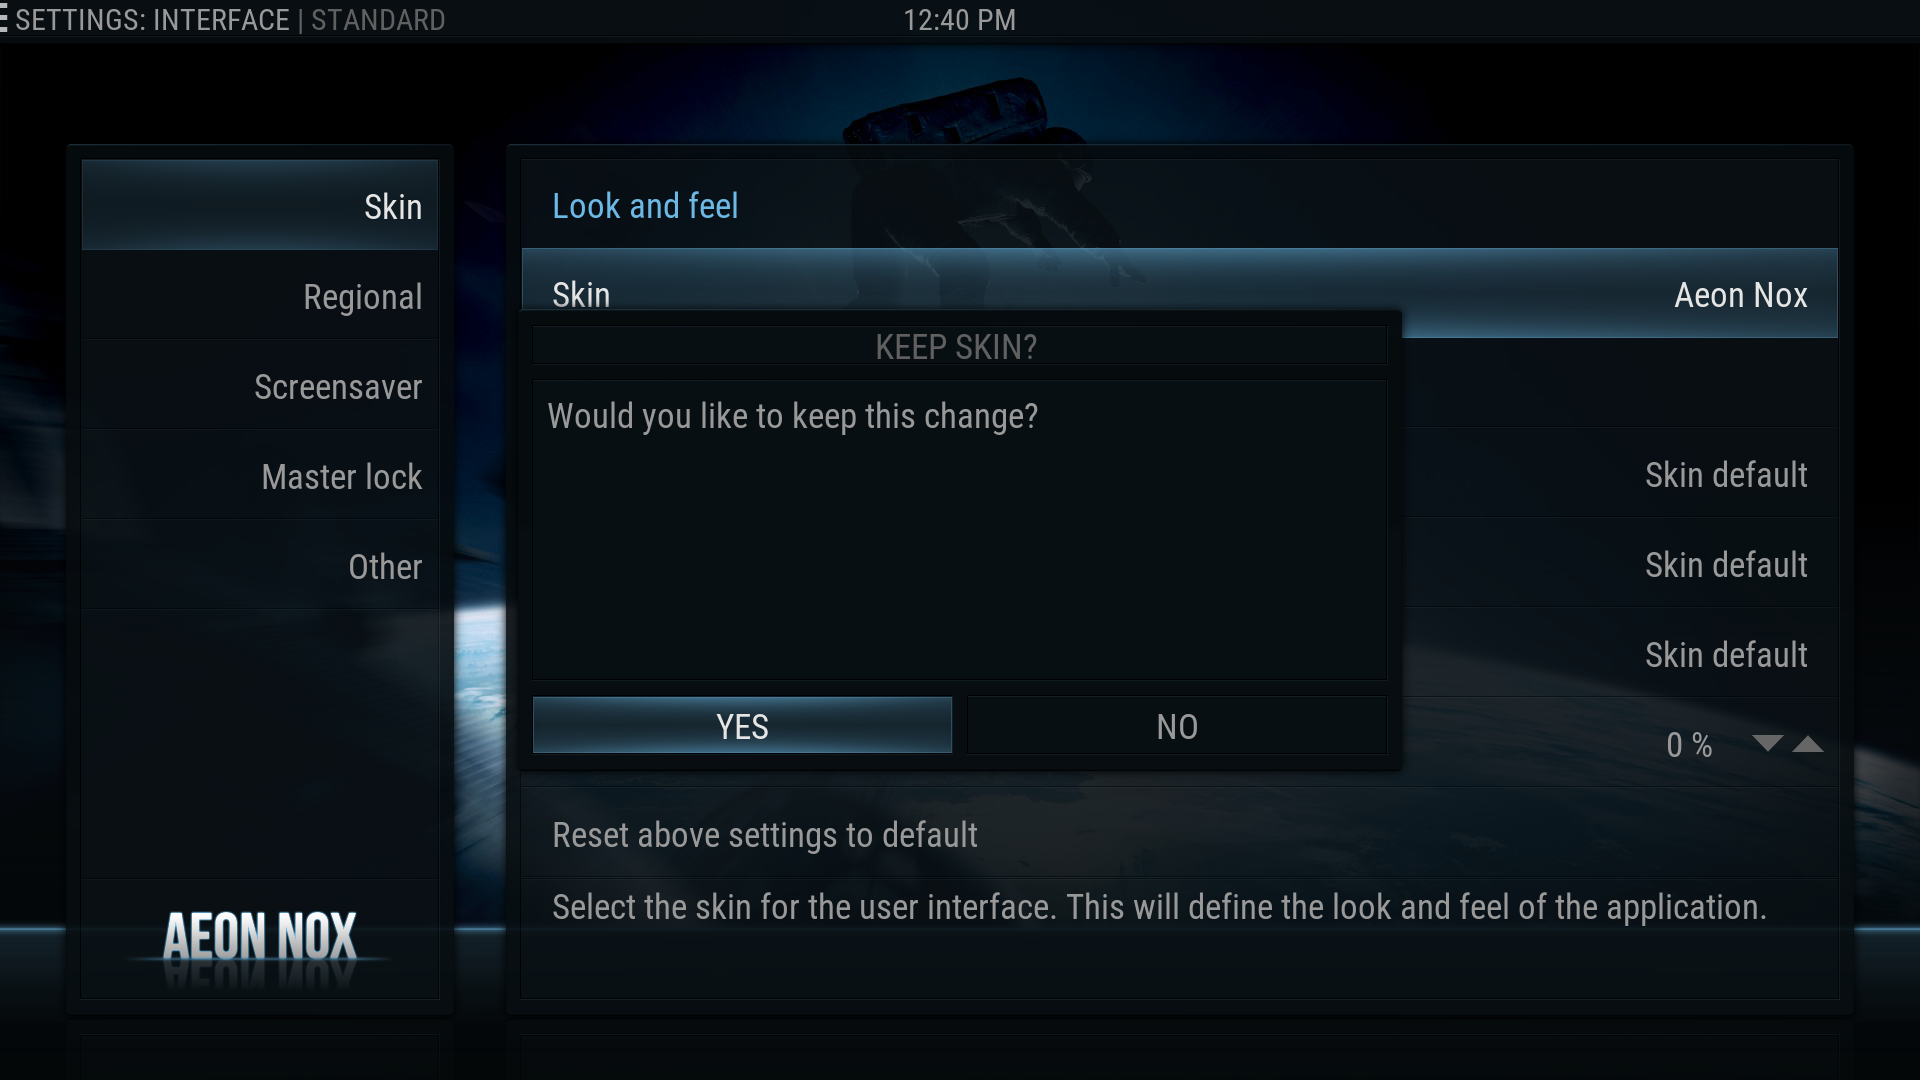 Step 9: Once installed, Kodi will ask you if you want to start using that skin. If you do the select Yes
 -
 Step 10: Enjoy your new skin!!!


Installing a skin from a zip file.
Although there are many skins already available to you from Kodi Add-on repository, there are even more that you may want to try out, including modified skins of the ones available. Some of those skins can be found in the Skin Support section of the Kodi forum as well as Work in Progress skins which can be found in the Skinning/WIP Skins sub-section of the Kodi forum.
To install these skins you will need to install them from a zip file. See How to install from a ZIP file for how to install.
- Note: Estuary was designed to be fully featured. Sometimes as a new user, it can be daunting enough to get used to the program for starters without changing things. It is highly recommended that you stick to Estuary until you’re sure of how things work. Should you ever encounter issues with another skin, such as the feeling that something is missing, consider reverting to Estuary to see if it was simply an issue with that skin.'