Video versions
Introduction
Video Version is a new Kodi feature introduced in v21. It allows users to keep multiple versions of the same video title in the library.
Do you have the DVD, Bluray, 3D and 4K version of a title? Do you have the Theatrical Release, Director's Cut, Extended version or any other type of version for the same title? Do you dislike the same title being repeatedly listed in the library?
All these different formats and versions can be attached to a parent title in the library. Think of it as Movie Sets for the same movie.
This feature works on the movie library and may be expanded to TV shows and episodes in a later release of Kodi.
Understanding Versions
Kodi uses a parent/child method for video versions. i.e. one version is selected as the parent version, which is the default version, and other versions are added to this parent version. Using the Update Library method, which version becomes the parent/default version cannot be controlled, but the default version can be changed later as required.
Using Blade Runner (1982) as an example, to make the original US Theatrical Release as the default version of the movie, using the Versions Manager method it would be selected as the movie to which all other versions are added to.
 -Blade Runner (1982) - US Theatrical Cut [dvd]          (parent movie; default movie)
    |- Blade Runner (1982) - Directors Cut [dvd]           (child version)
    |- Blade Runner (1982) - Intl Theatrical Cut [dvd]     (child version)
    |- Blade Runner (1982) - The Final Cut [bluray]        (child version)
    |- Blade Runner (1982) - The Final Cut [dvd]           (child version)
For those familiar with the Kodi video database, scanned movies are saved in the movie table of the MyVideos database. When a movie is added as a child to a Video Version, that child movie is deleted from the movie table and moved into the videoversion table which contains no movie metadata and contains links to the file, video version type and parent movie via the use of primary and foreign keys. The parent movie remains in the movie table and the child versions use the metadata of the parent movie. When the default parent movie is changed, it is only the idFile in the movie table that changes.
As this is a Library feature, how the files are stored on your hard drives does not affect Video Versions. Your video files can continue to be in their own folder, on different drives or in a single folder.
Versions are matched as follows:
- The scanner first checks for duplicate TMDB or IMDB UniqueID
- If no ID is matched, then the scanner checks for a duplicate Title+Year.
To increase the accuracy of the scan, especially when using nfo files, ensure:
- TMDB and IMDB ID's are included, correct and they are the same for all the versions
- The value in the <title> tag is clean and that all the versions use the same title. i.e. Use
<title>Blade Runner</title>instead of naming the version like<title>Blade Runner - US Theatrical Release</title>
Settings
There are three settings that control the behaviour of Video Versions.
| Settings level: | Basic |
| Description: |
Settings ► Media ► Library ► Video Library ► Ignore different video versions on scan
|
| Settings level: | Standard |
| Description: |
Settings ► Media ► Videos ► All ► Select default video version
|
| Settings level: | Standard |
| Description: |
Settings ► Media ► Videos ► All ► Show videos with multiple versions as a folder
|
Creating a Version
There are two methods to creating a Video Version as detailed below. The methods can be used singly or in combination with each other.
For example, you may initially manually scan a single title, then run an Update Library to scan additional titles and using the pop-up notifications to create the Video Version, or vice versa.
Note: During initial creation of a Video Version collection, the parent/default version needs to be scanned/scraped into the library (but changing via Set as default does not need scraping again). Child titles do not need to be scanned into the library as any metadata that is scanned/scraped is discarded once the title is added as a child version. Using the Browse files option in the Versions Manager method, a video file can be directly linked to a Version collection without scanning. Child versions always use the metadata of the parent title.
Library Update Method
When using the this method, ensure the setting Ignore different video versions on scan is Disabled
Kodi will scan titles into the library until it encounters a duplicate at which time the scanning pauses and requires a user response.
To create a Video Version, follow these steps.
- Run the Update Library function, or navigate to your Source and from the context menu select Scan for new content
- When a title is scanned that is a duplicate of a title already in your library the Different movie version found dialogue will notify you
- Select Yes to add as a version or No to ignore and continue scanning
- When Yes is selected, the Add as a version to... pop-up will offer the matching parent title
- After selecting the parent title, from the Choose version pop-up, select what type of version this title is. If a pre-defined name is not listed, add a new name using the New version... button
- The Update Library scanner will continue with the scan until it finds another duplicate movie.
Versions Manager Method
If you prefer to use the Versions Manager method rather than interrupting the Library Update runs, ensure the setting Ignore different video versions on scan is Enabled.
See the Add Version section below for details.
Versions Manager
Versions are managed through the Versions Manager. There are two methods to access the version manager shown in the following images...
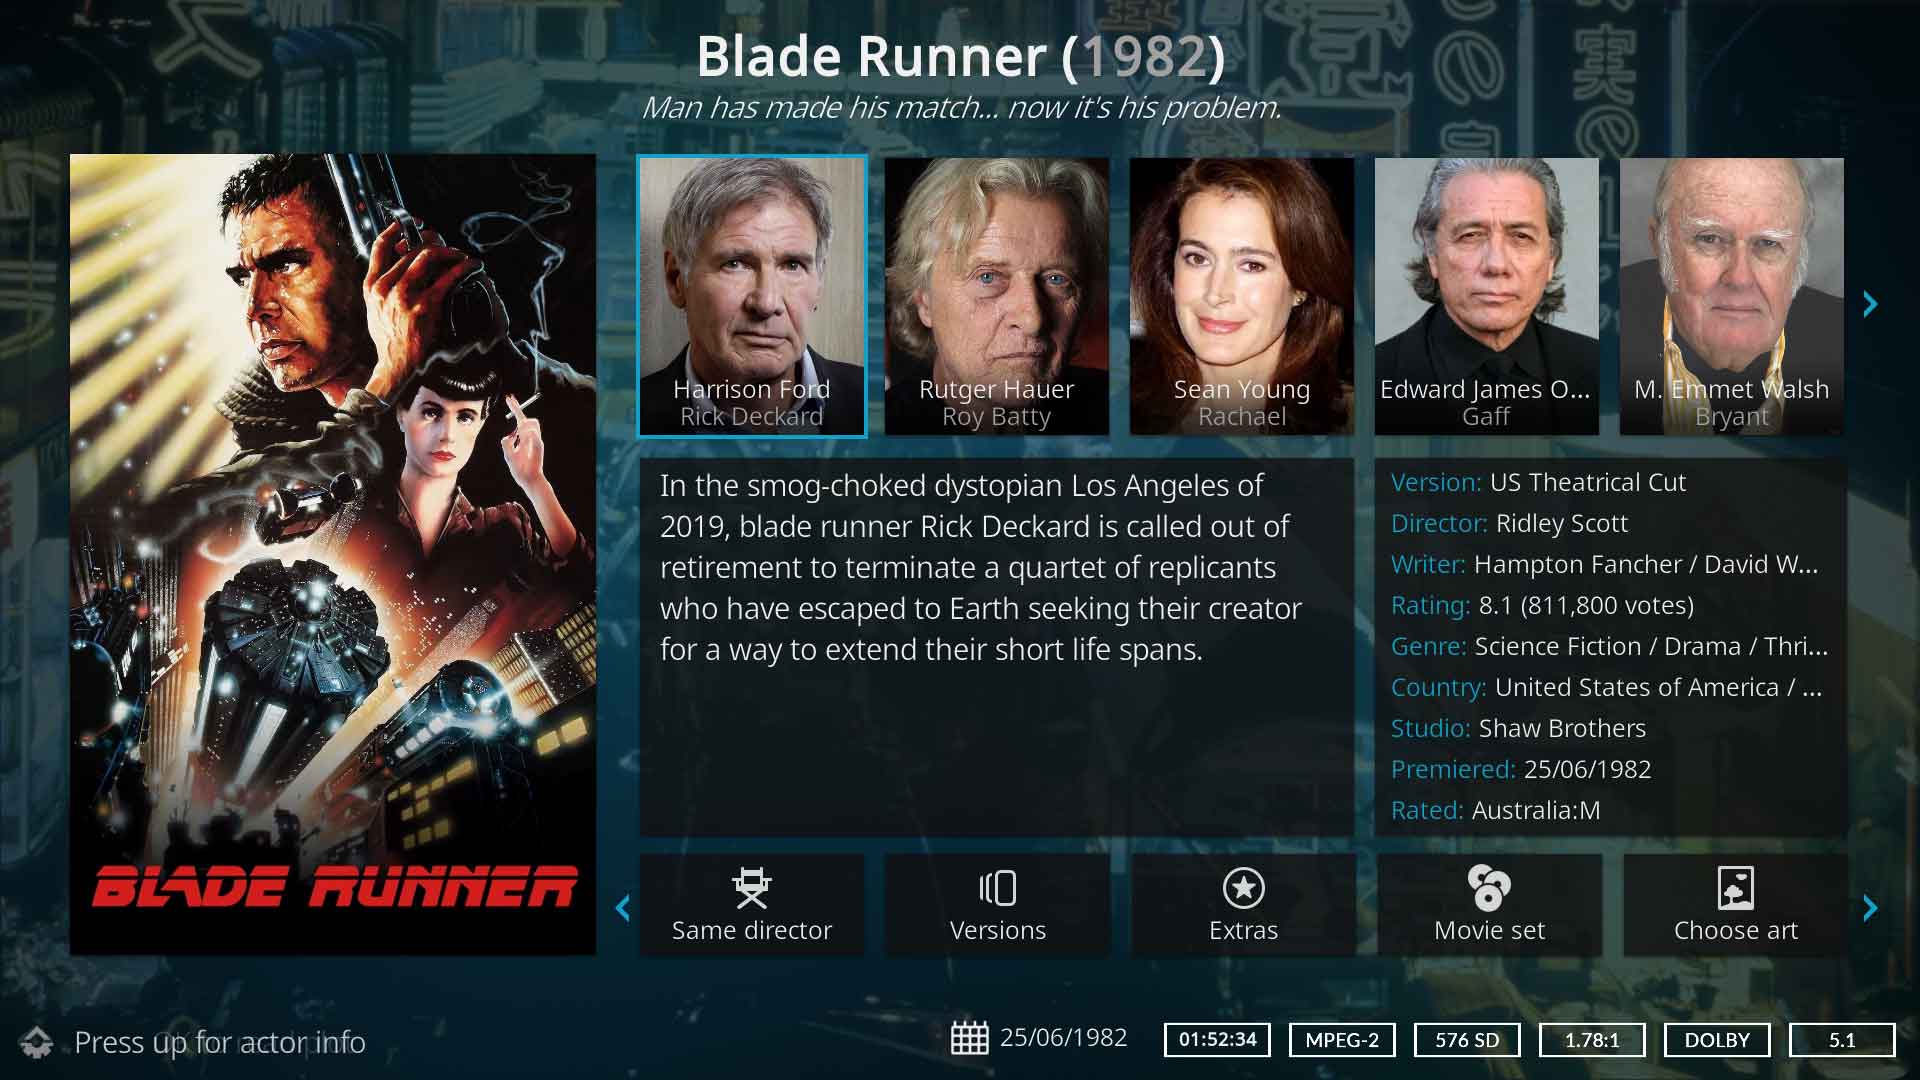
Image 1- In the library highlight the title that either currently is, or will become, the default version of the title and call up the Information Page
Select the Versions button along the bottom row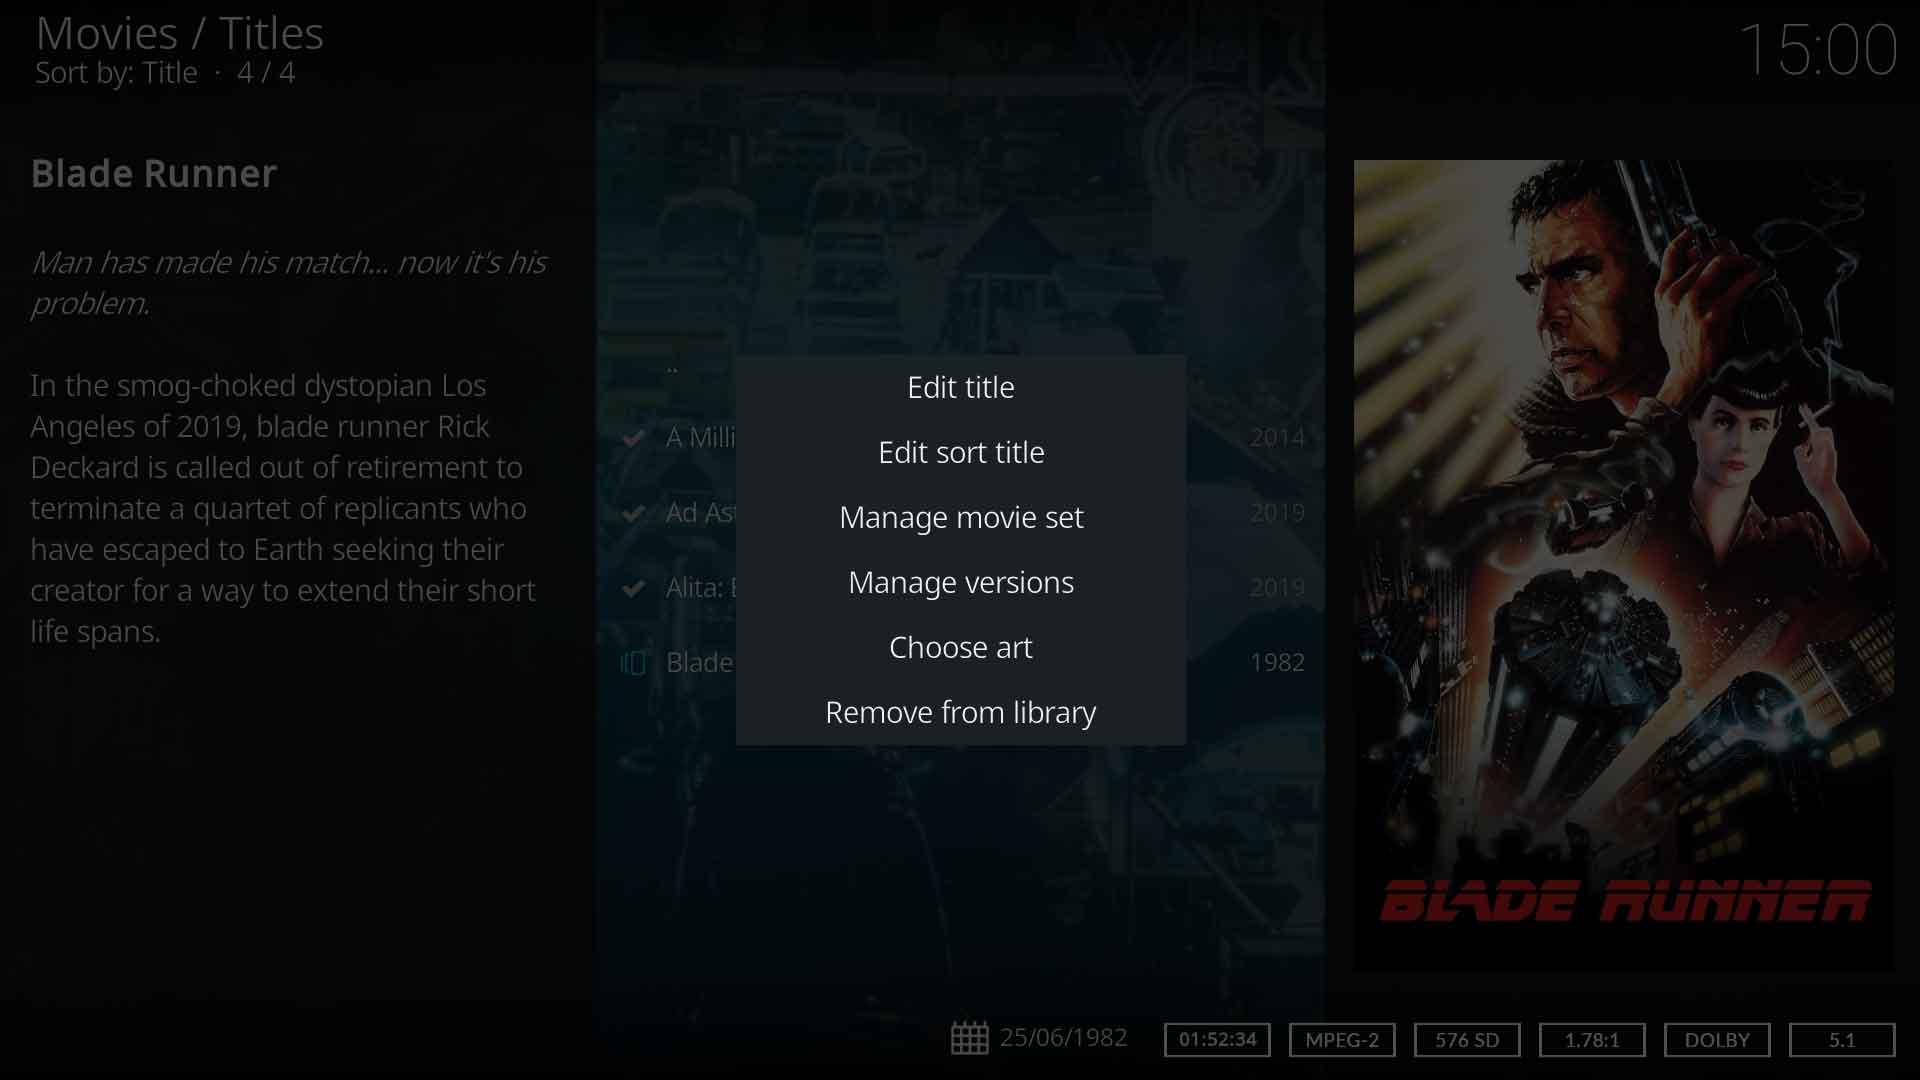
Image 2- In the library highlight the title that either currently is, or will become, the default version of the title and call up the Context Menu
Select Manage ► Manage versions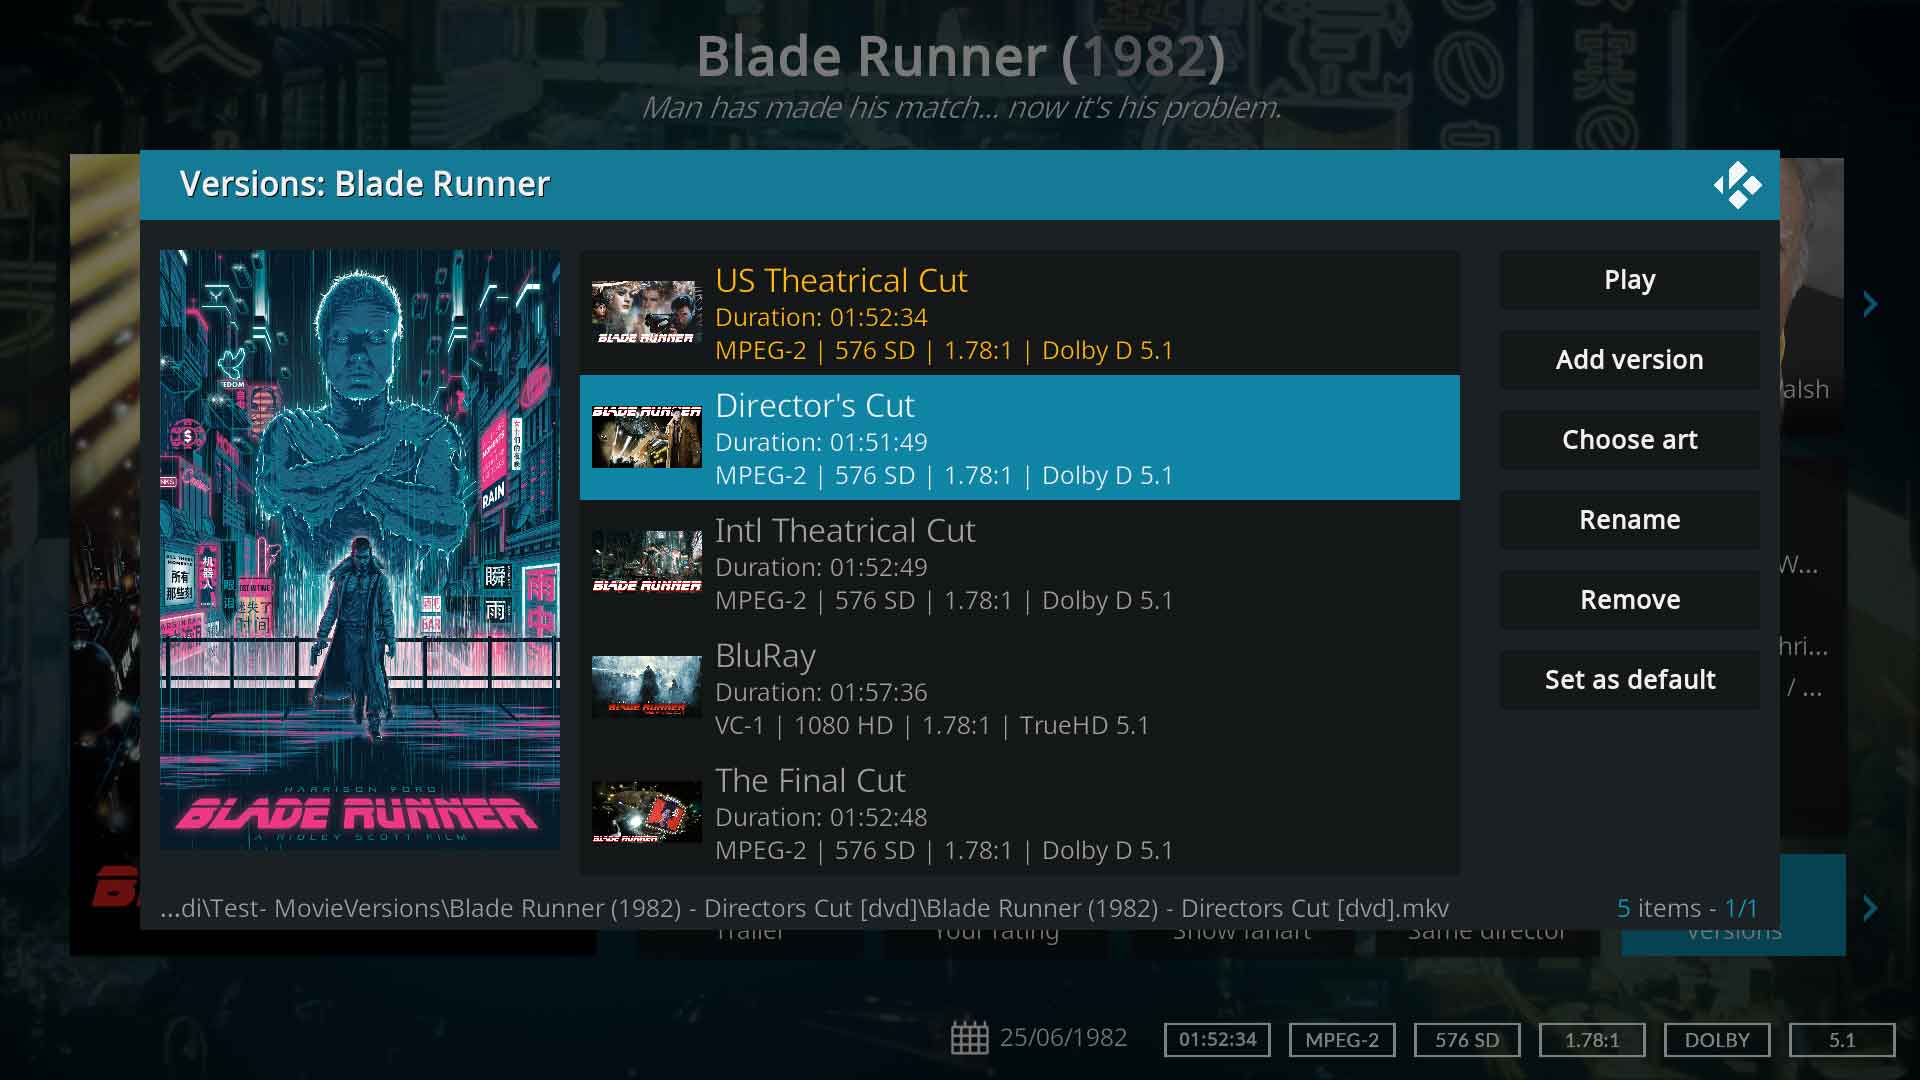
Image 3- The Versions Manager


Play
Play the selected title.
Add Version
To add a new Version using the Version Manager follow these steps...
- Access the Versions Manager
- The pop-up box will display details of the parent movie. It defaults to "Standard Edition" but this can be changed using the Rename button
- To add another version, select Add version
- If the message No similar movies were found in the library choose one of the following options:
- Browse files- Browse your source folders to find another version of the movie. It will be scanned once selected
- Browse library- Browse titles currently in the library and select the title from the library list.
- Cancel- Cancel the operation
- If the message No similar movies were found in the library choose one of the following options:
- From the pop-up box, scroll to select the next version to be added and press Enter or equivelant keypress
- From the next pop-up, select the version format. If a pre-defined name is not listed, add a new name using the New version... button
- The new version will be added
- To add additional versions, repeat these steps.
Choose Art
Allows the changing of artwork for the highlighted version.
Rename Version Types
Used to nominate the version type- i.e. Directors Cut, Extended Edition etc.
- Call up the Versions Manager
- Scroll to the version to be renamed
- Select Rename
- From the Choose version dialogue,
- Select the required version
- If the required version is not listed, select the New version... button and add the name of the version type
Remove a Version
The only method that allows removal of individual child versions is the Remove Child Version method described in this section. Any other method you may use will remove the entire Version collection.
Remove Version Collection
To remove the entire version collection from the library, use one of the following methods...
- Highlight the Video Version to be deleted from the library
- Press del on the keyboard, or
- Use Context Menu ► Manage ► Remove from library
Remove Child Version
To remove a single child version, use the following method...
- Call up the Versions Manager
- Scroll to the child version to be deleted
- Select Remove
- If the button is greyed out this indicates you have selected the parent version. To delete the parent version see the next section.
Remove Parent Version
To remove the parent version without removing the entire collection, use the following method...
- Call up the Versions Manager
- The version manager lists all movies in the version. The parent version is the one with the Remove and Set as default buttons greyed out
- Select another version to become the parent version and press Set as default
- Scroll back to the version to be deleted and select Remove
Change Default
The default title allows immediate playback, instead of browsing for a version, when the setting Select default video version is enabled.
To change which version becomes default, use the following method...
- Call up the Versions Manager
- Highlight the version to be made as the new default version
- Select Set as default
| Return to top |
|---|