Archive:Install Kodi on Fedora 26 using RPMFusion packages
This page presents an approach to turning a minimal installation of Fedora 26 into a standalone Kodi 17.x (Krypton) installation, with minimal additional software / overhead. The Kodi packages available from RPMFusion are used as the basis for this setup. The guide shows how to install pre-built packages from RPMFusion (which do not support DVD playback), and alternatively shows how to rebuild the RPMFusion packages with DVD-playback capability enabled. At the end of this guide you will have a set-top box style of system that, when powered up, will quickly boot and then start Kodi automatically without intervention (e.g. no need to first log in).
Current State of This Guide
As of February 10th, 2017, this guide was updated to cover Fedora 26 and to Kodi 17.x Krypton. It is ready for mainstream use.
This guide has been author-tested on the following hardware/software:
| OS | Fedora 26 Server (x86_64) |
|---|---|
| Kodi | Kodi v17.4 (Krypton) from the rpmfusion-free repository |
| Motherboard | Gigabyte GA-F2A88XM-D3H (rev 3.0) |
| CPU | AMD A6-5400K dual-core 3.8GHz 65W |
| Memory | Corsair Vengeance 8GB (2x4GB) DDR3 1600MHz PC12800 |
| Graphics | EVGA GeForce GTX 460 SuperClocked 1024MB PCI-E 2.0 card |
| Disk | Western Digital 1TB 7200RPM Black HDD |
| Case | Antec Fusion Remote Black HTPC Case |
| Receiver | Denon AVR-3808ci |
| TV | Panasonic 50" VIERA TH-50PZ800U Plasma |
Assumptions
- This guide assumes you have at least a slight familiarity with Linux in general. If you know what a Bash shell is, can cut-and-paste commands, and are comfortable editing files with VI or Emacs, then you should be fine.
- It is assumed that Kodi will be installed into a freshly-installed Fedora 26 Server (x86_64) environment that was set up with no additional software specified. If you already have such an environment then you can skip the steps showing how to do a fresh-install of Fedora.
- This guide was written with the use of an nVidia-based graphics card in-mind, (tested with an EVGA GeForce GTX 450 SuperClocked 1024MB PCI-E 2.0 card). If you have an AMD, Intel or other graphics solution, then either skip the nVidia-specific steps or substitute your own. Also, this guide covers replacing the open-source Nouveau (open-source) video drivers that come included in Fedora with closed-source binary drivers drivers from nVidia (as obtained from Negativo17's nVidia repository) for improved performance. You can skip this if you'd prefer, although your performance mileage may vary.
- It is assumed that audio will be passed via the HDMI port on your video card / motherboard to your TV / sound-system. Kodi can certainly handle other methods of passing audio, however those are beyond the scope of this article.
- Everything is done with the goal of minimizing how many software packages / dependencies are required. For example, since Kodi will be run as a fullcreen application, there is no need for heavyweight desktop environments such as Gnome and KDE, and all the apps/clutter they introduce.
- This guide shows how to either enable TCP port 8080 (for Kodi Remote Control), or fully disable the local Firewalld daemon. It also shows how to disable SELinux. Ensure that the system is adequately protected by things like your internet router's firewall, and encrypted/passworded WiFi (you DO have your WiFi protected, right?...)
- As of release 26, Fedora comes in three flavours: Workstation, Server, and Atomic. This guide installs the Server edition (with no additional software specified) in order to get the leanest, most minimal install possible. At the time of writing, when tested this installation consumed approximately 410MB of memory (excluding buffers / cache) when playing a 1080p 5.1-channel video. The full installation including Fedora, Kodi and a modest library of thumbnails/artwork consumed about 9GB of disk space. For the purposes of testing, a 20GB partition was used.
Installing Fedora 26
Obtaining the Fedora 26 Server (x86_64) Installation Image
Visit the Fedora 26 (Server) download page at https://getfedora.org/en/server/download/ , and click the download button to start your download (64-bit 2.2GB iso image). Once your download has completed, burn the .iso image you just downloaded to a DVD. It's also possible to create an installable USB flash drive with this ISO and install from it, or even to perform a network install without having any local DVD media, but these are outside the scope of this guide.
Configure How Fedora will be Installed
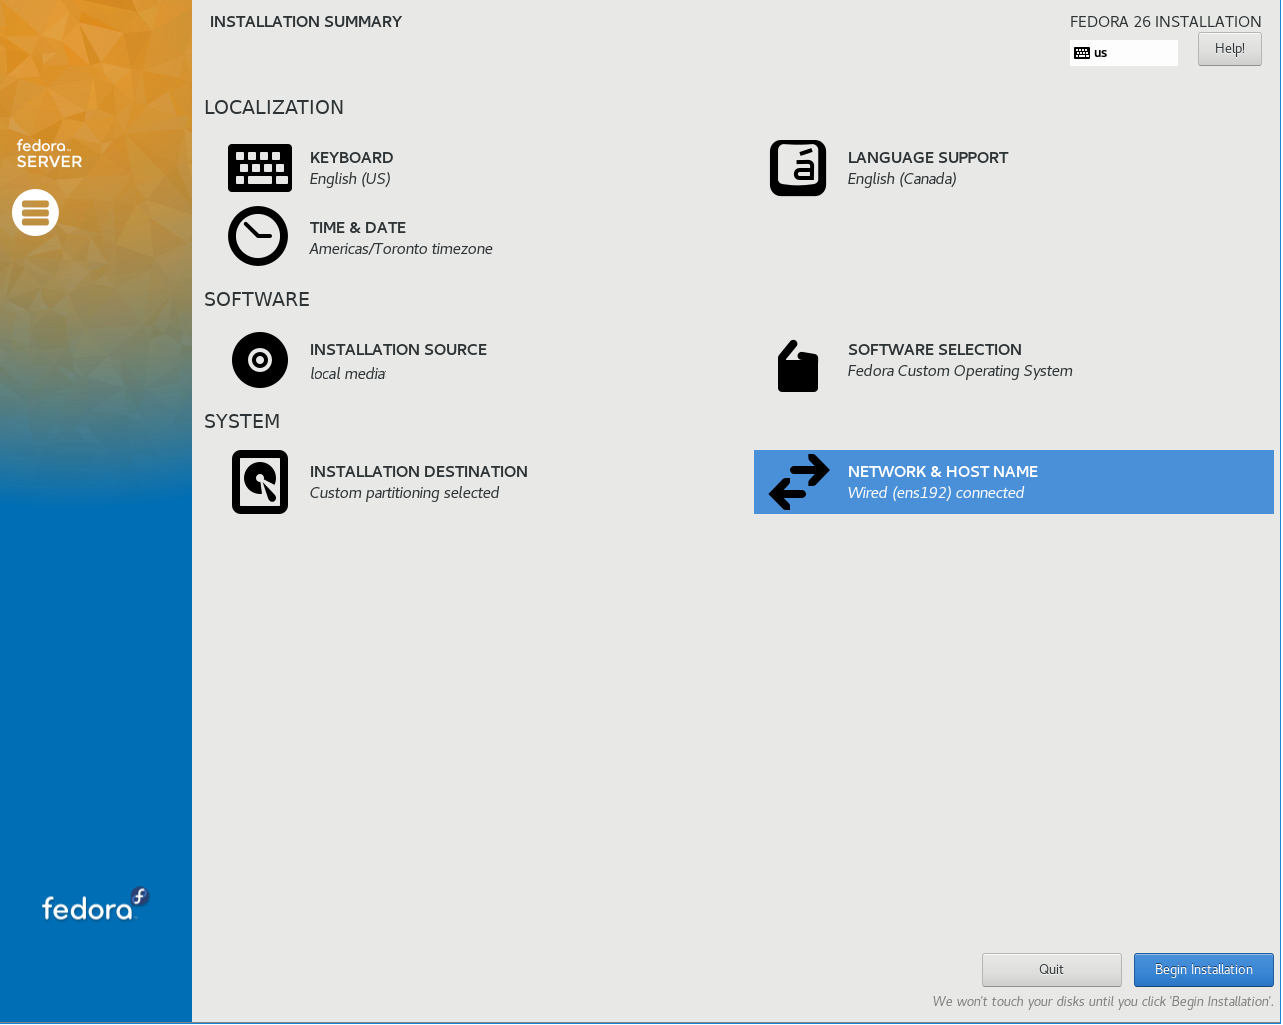
Boot from the DVD you just created. If necessary, bring up your BIOS's boot-menu by pressing <F12> (or whatever your BIOS uses) to select booting from your optical drive. When the DVD boots you will be shown a text-menu with several options. Select "Install", and proceed. The system will then boot up into Fedora's graphical installer (Anaconda). Choose your desired keyboard layout and language, and proceed. You will then be shown Anaconda's main installation screen, similar to this:
You can make whatever choices you like for everything in the LOCALIZATION and SYSTEM sections.
Ensure that the INSTALLATION SOURCE section is set to Local Media. If not then click to enter it, and change it accordingly.
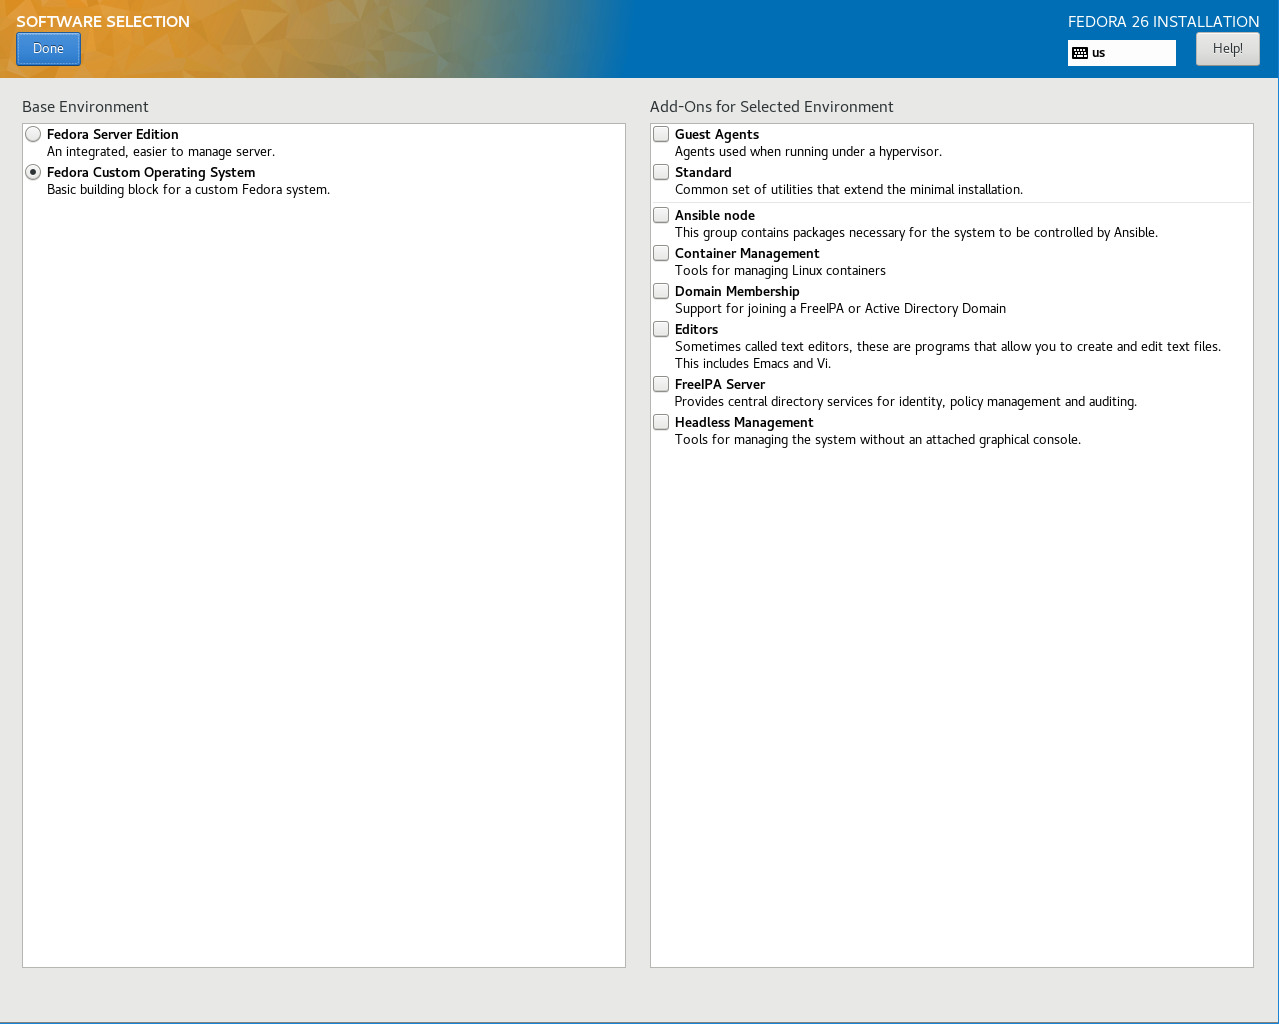
Within the SOFTWARE SELECTION section:
- Ensure that Base Environment in the left-pane is set to Fedora Custom Operating System (equivalent to Minimal Install in previous Fedora versions).
- Ensure that none of the add-ons in the right-hand pane are selected.
When correctly set, this screen should look as follows:
Starting the Installation and Creating a Kodi User
When finished setting up all desired installation options, Begin the install.
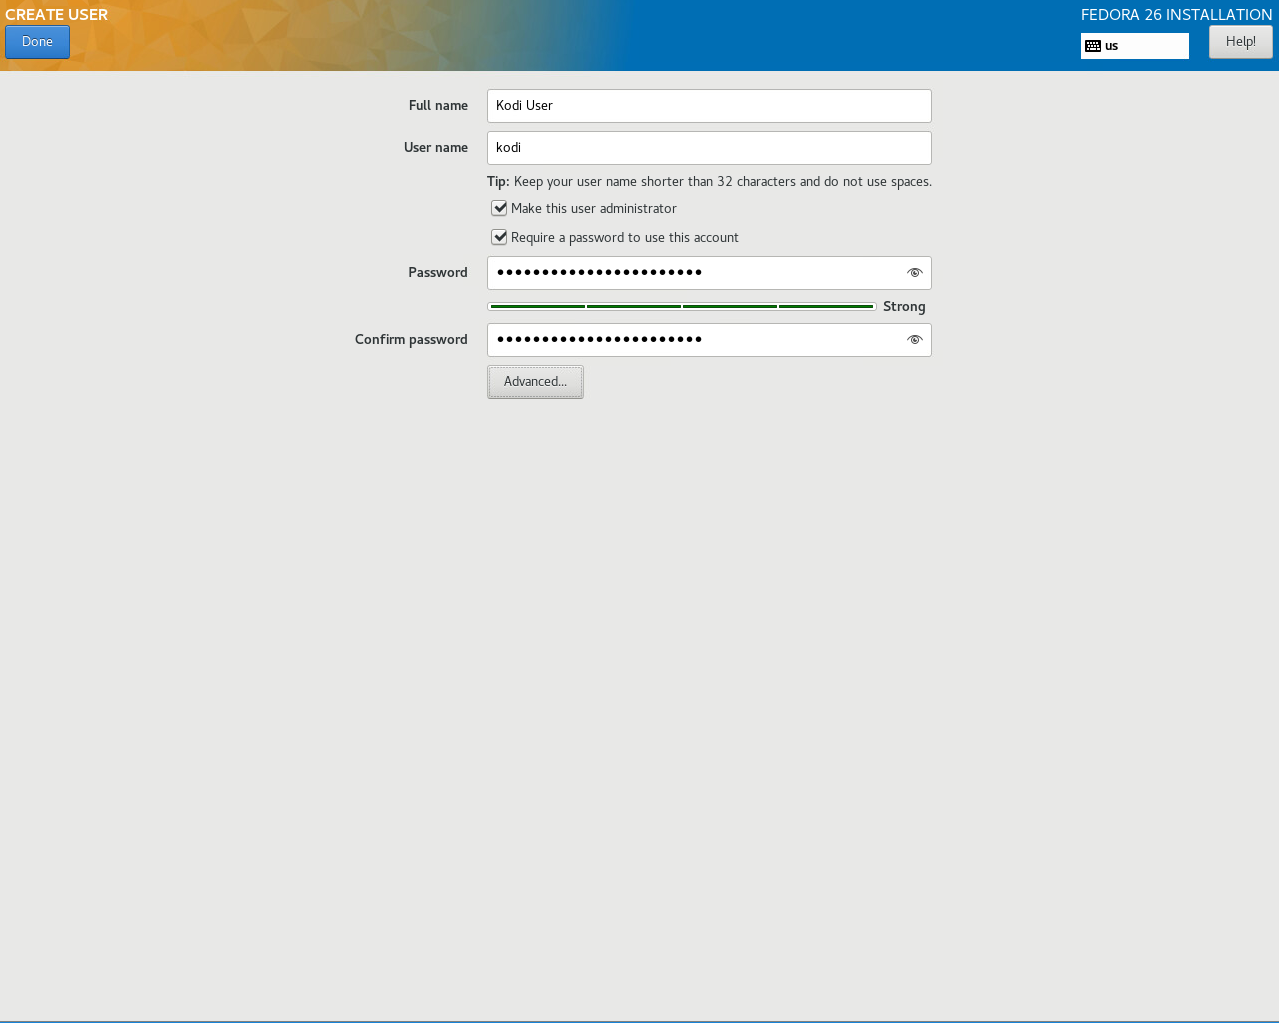
During installation, set the password for user root by clicking ROOT PASSWORD). You should also create the non-privileged user that Kodi will run as - click USER CREATION. You can choose whatever full-name / username / password you'd like; this guide assumes a username of 'kodi'. When creating this account, check Make this user administrator. (Note: This user isn't granted superuser rights directly; rather it can run privileged commands via tools such as sudo.)
The User Creation screen should looks as follows:
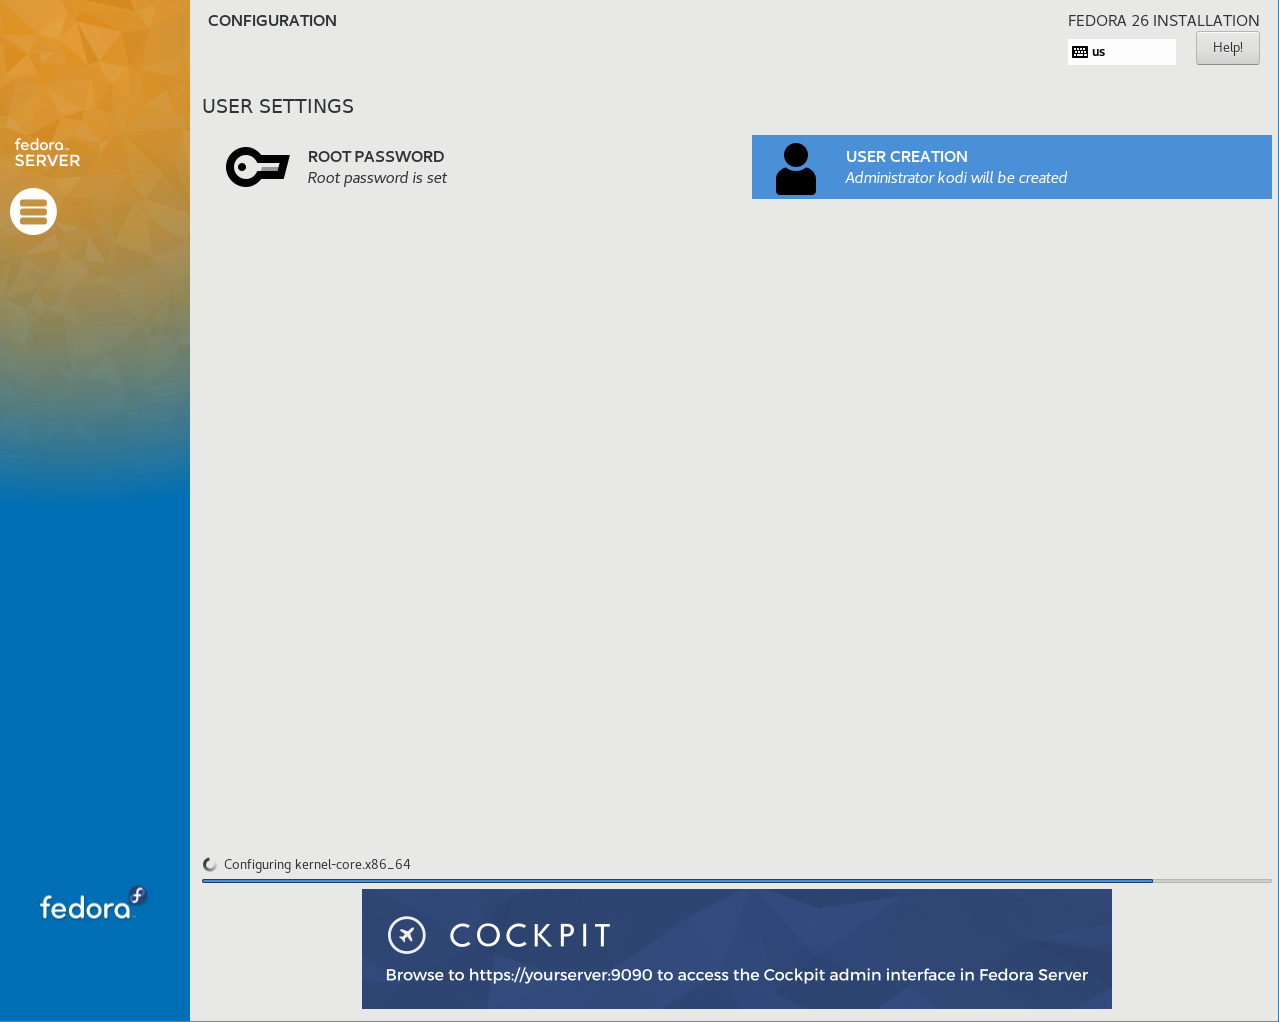
Once you've finished with these two settings, installation will continue. The installation screen should look similiar to:
Rebooting into Fedora
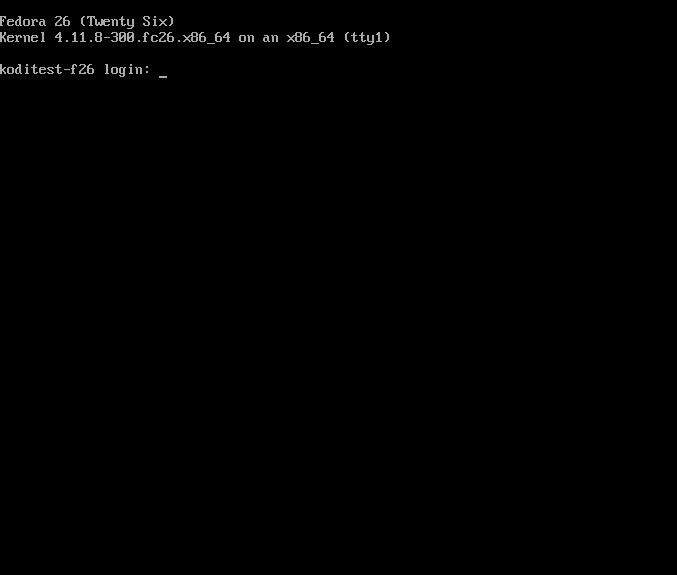
When the installation has completed, remove the installation DVD and click REBOOT to restart the system. The system should reboot and reach a textmode console login screen, as shown below. If you reach this point then you've successfully finished a minimal install of Fedora 26.
Configuring Fedora / Installing Dependencies
Now that Fedora is installed, some configuration needs to be performed, and some dependencies need to be installed and configured.
Perform a full update of all installed packages (including the kernel if necessary).
sudo dnf update
When you're ready, reboot the system after these steps have completed for changes to take effect (especially any Kernel updates that may have happened).
sudo systemctl reboot
Adjusting or Disabling Firewalld
Firewalld is the local firewall daemon that is included by-default with recent Fedora releases. It greatly enhances security, but it can interfere with certain networking features of Kodi such as uPnP, file-sharing, remote-control apps, etc. Because of this, two steps are shown below. One step opens TCP port 8080, which allows Kodi to be remotely controlled and for remote-control apps such as Kore or Yatse to work properly. The second step completely disables Firewalld, and is intended for situations where other network connectivity is required (e.g. uPnP, file-sharing, AirPlay, Bonjour, etc.). Only one or the other of these steps should be performed depending on your needs. If you have no need for this kind of network connectivity, then it is probably better to skip both steps and leave Firewalld running as-is.
Enable TCP Port 8080 to Enable Kodi Remote-Control
The following command adds a new permanent rule to Firewalld that allows access via TCP port 8080. This step assumes that your local network is 192.168.0.0/24. If it is something else, then adjust the command accordingly.
sudo firewallctl zone --permanent FedoraServer add rich-rule 'rule family="ipv4" source address="192.168.0.0/24" port port="8080" protocol="tcp" accept'
Disable Firewalld Entirely
The following commands fully disable and uninstall Firewalld. This may also trigger removal of some additional, dependent packages, which are not necessary to the operation of Kodi.
sudo systemctl stop firewalld
sudo dnf remove firewalld
Setting SELinux to Permissive Mode
SELinux is a part of the kernel that enforces access control over many parts of the system, including filesystems, processes, sockets, etc. Although Kodi can be made to operate with SELinux active, that is beyond the scope of this guide. Instead, SELinux left active but set to permissive mode. It could also be completely deactivated, but then the entire filesystem would require re-labeling should you later decide to turn SELinux back on.
Next, reconfigure SELinux to change its policy from enforcing to permissive.
sudo sed --in-place=.bak 's/^SELINUX\=enforcing/SELINUX\=permissive/g' /etc/selinux/config
You will need to reboot afterwards for these two changes to completely take effect.
sudo systemctl reboot
Enable Use Of the RPMFusion Repository
RPMFusion is a set of 3rd-party repositories providing legally redistributable software (including Kodi) which, for one reason or another, is not included in Fedora distributions. This includes a free repository containing open-source software, and a non-free repository containing redistributable software that is not open-source. Only the free repository is required by Kodi. The release and updates variants of the free repository for Fedora 26 will be installed and enabled.
sudo dnf install --nogpgcheck \
  https://download1.rpmfusion.org/free/fedora/rpmfusion-free-release-$(rpm -E %fedora).noarch.rpm
(nVidia) Install Closed-Source Binary nVidia Drivers
Although the open-source Nouveau drivers that come with Fedora have made great strides recently, the closed-source binary drivers from nVidia still offer better performance/features. There are a variety of places to obtain these binary drivers, including from RPMFusion, however this guide shows how to install them from the Negativo17 fedora-nvidia repository.
(nVidia) Enabling the Negativo17 fedora-nvidia Driver Repository
sudo dnf config-manager --add-repo https://negativo17.org/repos/fedora-nvidia.repo
(nVidia) Installing the nVidia Drivers
The following will install your selected nVidia drivers along with VDPAU (hardware-accelerated video decoding and postprocessing) support.
sudo dnf install                \
            nvidia-driver       \
            nvidia-settings     \
            kernel-devel        \
            dkms-nvidia
Install Basic X-Windows Support
Installing the base X-Windows Group
Kodi requires a functioning X-Windows Server to be present on the system it runs on. However, since it typically runs in fullscreen mode without any X-Windows decorations, it does not require any desktop environments such as Gnome or KDE; It also does not require their display managers (GDM and KDM respectively). In this guide, only a basic X-Windows system is installed.
The following commands install a basic X-Windows setup.
sudo dnf groupinstall "base-x"
(nVidia) Removing the Nouveau Driver
Next, remove the open-source Nouveau driver, now that it has been superceded by the closed-source binary nVidia driver.
sudo dnf remove xorg-x11-drv-nouveau
Enabling Kodi Audio and Accelerated Video Within X-Windows
In order for the Kodi user-account to be able to use produce audio and accelerated video within the X-Windows system, it must be added to the audio and video user-groups.
sudo usermod kodi -a -G audio
sudo usermod kodi -a -G video
Installing Kodi
The simplest way to install Kodi is to use the pre-built packages provided by RPMFusion. However at present these pre-built packages do not provide DVD playback capability (including TS_VIDEO folders). If you require DVD playback capability, then see below for a series of steps that recreate your own Kodi packages with DVD playback capability enabled.
Installing Kodi Using Pre-Built RPMFusion Packages (No DVD Playback)
The following command installs the pre-build Kodi packages from the RPMFusion repository. Any dependencies that Kodi requires but are not yet installed will also be included automatically.
sudo dnf install kodi
Rebuilding Kodi Packages (Includes DVD Playback)
The following steps first set up a development environment, and then build Kodi from the RPMFusion Source package, after enabling DVD Playback. The resulting RPMs may then be installed either on this system, or another Fedora 26 system intended to run Kodi. Any dependencies that Kodi requires but are not yet installed will also be included automatically.
Set-Up Build Environment and Toolchain
These steps create an RPM build tree within your user's home environment, and install some tools used by the build process.
sudo dnf install rpmdevtools rpmlint gcc-c++
rpmdev-setuptree
These steps install the RPMFusion Source RPM for Kodi, which will be used to reproduce the Kodi packages. They also install the source-trees for libdvdcss, libdvdnav, and libdvdread, which collectively provide DVD playback capability.
rpm -iv https://download1.rpmfusion.org/free/fedora/updates/26/SRPMS/k/kodi-17.4-1.fc26.src.rpm
curl -Lo ~/rpmbuild/SOURCES/kodi-libdvdcss-master.tar.gz https://github.com/xbmc/libdvdcss/archive/master.tar.gz
curl -Lo ~/rpmbuild/SOURCES/kodi-libdvdnav-master.tar.gz https://github.com/xbmc/libdvdnav/archive/master.tar.gz
curl -Lo ~/rpmbuild/SOURCES/kodi-libdvdread-master.tar.gz https://github.com/xbmc/libdvdread/archive/master.tar.gz
Enable DVD Playback Capability
This step creates a patch that re-enables libdvdcss/libdvdnav/libdvdread as well as optical-drive support. It then applies the patch to the Kodi Source RPM SPEC file. The original SPEC file is saved as *.orig. Cut-and-paste this step in its entirety.
cat <<"ENDcat" >/tmp/re-enable_dvd_spec.patch
--- kodi.spec   2017-08-30 19:57:26.794695552 -0400
+++ kodi.spec.patched   2017-08-30 19:57:04.246018991 -0400
@@ -4,7 +4,7 @@
 # use the line below for pre-releases
 #global DIRVERSION %{version}%{PRERELEASE}
 %global _hardened_build 1
-%global _with_dvd 0
+%global _with_dvd 1

 Name: kodi
 Version: 17.4
ENDcat
cd ~/rpmbuild/SPECS
patch -b </tmp/re-enable_dvd_spec.patch
Install Kodi Build Dependencies
These steps install dependencies required to build Kodi.
sudo dnf builddep kodi
sudo dnf install doxygen giflib-devel
Generate the Patched Source Tree
These steps create the final patched source-tree that will be used to actually build Kodi.
cd ~/rpmbuild/SOURCES
./kodi-generate-tarball-xz.sh
Build Kodi RPMs
This step builds Kodi, and packages it in several installable RPMs. A summary of how long things took will be shown at the end. A log of the build process will be saved as ~/build_kodi.log .
time rpmbuild -ba ~/rpmbuild/SPECS/kodi.spec 2>&1 | tee ~/build_kodi.log
Install Kodi From Your Rebuilt RPM
The resulting installable RPMs are saved inside ~/rpmbuild/RPMS/x86_64 . These can either be installed on the local system, or any other Fedora 26 system that has been prepared to run Kodi. The following step installs Kodi onto the local system, along with any dependencies it has.
sudo dnf install ~/rpmbuild/RPMS/x86_64/kodi-17*x86_64.rpm
Prevent Kodi From Being Updated Automatically
Now that you are using your own build of Kodi, you will probably want to prevent it from being automatically updated whenever new installation RPMs become available in the RPMFusion repository (because they would remove your ability to playback DVD content). The following step prevents Kodi from being automatically updated. You will now be able to choose when to grab a new source release, and build/install it yourself.
sudo sh -c 'echo "exclude=kodi*" >>/etc/dnf/dnf.conf'
Post-Installation Configuration
The following steps enable Kodi to be started automatically, and enable things like power management (e.g. so Kodi can properly shutdown the system).
Create Systemd Service File For X-Windows / Kodi
By default Fedora uses Systemd to manage services and daemons. The following creates a Systemd service file that, once enabled, will cause the system to autostart X-Windows as well as Kodi as a standalone, fullscreen application whenever the system is booted. Because it is a manually-customized service file that was not installed as part of any package, it gets placed in "/etc/systemd/system" instead of "/lib/systemd/systemd".
sudo bash -c 'cat <<"ENDcat" >/etc/systemd/system/kodi.service
[Unit]
Description = kodi-standalone using xinit
After = remote-fs.target systemd-user-sessions.service

[Service]
User = kodi
Group = kodi
PAMName = login
Type = simple
ExecStart = /usr/bin/xinit /usr/bin/dbus-launch /usr/bin/kodi-standalone -- :0 -nolisten tcp
Restart = on-abort

[Install]
WantedBy = multi-user.target
ENDcat'
Install DBUS addon for X-Windows
X-Windows requires that an addon be installed in order to become DBUS-aware, which in-turn is required in order for Kodi to be properly started at boot-time. This step provides the /usr/bin/dbus-launch tool within in the Systemd service file from the previous step.
sudo dnf install dbus-x11
Load and Enable New Systemd Service File
Now that the new Systemd service file has been created, Systemd needs to rescan its configuration to pick up the new file. Afterwards, the service is enabled for future reboots.
sudo systemctl daemon-reload
sudo systemctl enable kodi
Reconfigure PolicyKit To Enable Poweroff, Suspend and Similiar Functions
In order for Kodi to be able to poweroff the system, enter suspend-mode or initiate hibernation, a PolicyKit Local Authority configuration file needs to be created.
sudo bash -c 'cat <<"ENDcat" >/etc/polkit-1/localauthority/50-local.d/kodi_shutdown.pkla
[Actions for kodi user]
Identity=unix-user:kodi
Action=org.freedesktop.devicekit.power.*;org.freedesktop.upower.*;org.freedesktop.consolekit.system.*;org.freedesktop.login1.*
ResultAny=yes
ENDcat'
Install UPower
UPower (formerly DeviceKit-power) facilitates managing power devices attached to the system. It is what allows Kodi to actually manipulate power-related functions such as shutting everything down.
sudo dnf install upower
Configure Xwrapper To Allow Non-Console Users To Start X-Server
In order for the X-Windows server to be started by a non-console user such as the Kodi account, a new Xwrapper configuration must be created. Also set the appropriate file permissions on the new configuration.
sudo bash -c 'cat <<"ENDcat" >/etc/X11/Xwrapper.config
allowed_users = anybody
ENDcat'
sudo chmod 644 /etc/X11/Xwrapper.config
Configure Optical Drive to Not Automatically Close
Sometimes you will find that when you eject your optical drive tray, it will try to immediately close again, giving you little time to insert/remove a disc. If this is a problem for you then apply the following steps to configure a Kernel parameter to disable optical drive auto-closing.
sudo sh -c 'echo "dev.cdrom.autoclose = 0" >>/etc/sysctl.d/50-cdrom_autoclose.conf'
sudo sysctl -p /etc/sysctl.d/50-cdrom_autoclose.conf
All Finished, and Last Tips
If all has gone well thus far, then the next time you restart the system it should boot all the way into Kodi (fullscreen standalone) without needing to log in first, or perform any other intervention. At this point you should be able to commence configuring your minimal Kodi install as desired. Enjoy!
- As previously mentioned, this method of installing Kodi avoids the need to log into the system for normal operation. However you may still reach the system remotely via SSH, whether or not Kodi is running at the time.
- If you have remotely accessed the system, then Kodi can be easily started / stopped with the following two commands (run as user kodi):
sudo systemctl start kodi
sudo systemctl stop kodi
ALTERNATIVE Login based startup
This is an alternative setup that is simpler, and allows SELinux to remain enabled. The software installation is the same, differences are:
- kodi does not need to be in video/audio groups (systemd-logind gives permissions)
- dbus-x11 is not required (systemd-logind supplies dbus)
- Xwrapper.config is not required (kodi.bin runs on the console)
- kodi.service not required (getty dropin is used)
- PolicyKit configuration not required (systemd-logind gives permission)
- UPower not required (systemd-logind gives permissions)
However, the following files do need to be created to support the alternative configuration...
Kodi directory
Add files in the kodi user directory to start Kodi when logged in on tty1:
sudo bash -c 'cat <<"ENDcat" > ~kodi/.xinitrc
/usr/bin/kodi-standalone
ENDcat'

sudo bash -c 'cat <<"ENDcat" >> ~kodi/.bash_profile
if [ -z "$DISPLAY" ] && [ "${XDG_VTNR:-0}" -eq 1 ]; then
  exec /usr/bin/xinit &>.xinit.log -- /usr/bin/X -s 0 -noreset -keeptty -nocursor -allowMouseOpenFail vt$XDG_VTNR
fi
ENDcat'
kodi-quit shutdown script
The following "clean shutdown" script requires kodi-eventclients to be installed:
sudo dnf install kodi-eventclients
Now add the shutdown script:
sudo bash -c 'cat <<"ENDcat" > /usr/local/bin/kodi-quit
#!/bin/bash
pid=$(pidof -s xinit)
kodi-send --action="Quit"
# wait for xinit to exit...
[ -n "$pid" ] && timeout 20 tail --pid $pid -f /dev/null
ENDcat'
sudo chmod +x /usr/local/bin/kodi-quit
systemd dropin for tty1
This file modifies the console login to auto-login the kodi user:
sudo mkdir /etc/systemd/system/[email protected]/
sudo bash -c 'cat <<"ENDcat" > /etc/systemd/system/[email protected]/kodi-login.conf
[Service]
# Autologin as kodi
ExecStart=
ExecStart=/sbin/agetty --autologin kodi --noclear %I $TERM
ExecStop=/usr/local/bin/kodi-quit

# don't hangup to give kodi time to quit
TTYVHangup=no
TTYVTDisallocate=no
ENDcat'
sudo systemctl daemon-reload
If converting from the original setup, remember to disable kodi.service...
sudo systemctl disable kodi
sudo systemctl stop kodi
Now restart tty1:
sudo systemctl restart getty@tty1
From now on, Kodi will start on boot, and restart if the Kodi app is quit.
Monitor hotplug
If the device is not always connected to a monitor, after a reboot the xserver will not have a known monitor and resolution to display on... connecting a monitor will not automatically result in the xserver displaying correctly on the new monitor. To resolve this, create a monitor hotplug script that will reload Kodi if a new monitor is connected.
NOTE: Replace "card0-HDMI-A-1" and "card0" below with the card/port name for whatever monitor you wish to trigger a Kodi restart on. You can use 'udevadm monitor -p' to watch for monitor hotplug events if you're not sure which card/port is being hotplugged.
sudo bash -c 'cat <<"ENDcat" > /usr/local/sbin/monitor_hotplug
#!/bin/bash

PORT=/sys/class/drm/card0-HDMI-A-1/status
[ -r $PORT ] || exit 0
dmode="$(cat $PORT)"
[ "$dmode" = connected ] || exit 0
logger -t monitor_hotplug "hotplug for HDMI-1"
[ -z "$(pgrep -x kodi-standalone)" ] && exit 0
/usr/bin/systemctl restart getty@tty1
ENDcat'
sudo chmod +x /usr/local/sbin/monitor_hotplug

sudo bash -c 'cat <<"ENDcat" > /etc/udev/rules.d/95-monitor-hotplug.rules
KERNEL=="card0", SUBSYSTEM=="drm", RUN+="/usr/local/sbin/monitor_hotplug"
ENDcat'
Additional Tips for Login based approach
The reason I use the ~kodi/.xinitrc file (rather than just adding kodi-standalone to the xinit line in ~kodi/.bash_profile) is I need to adjust the "Broadcast RGB" setting... the following modification to .xinitrc allows this:
#!/bin/bash

set_rgb() { # <Full, Automatic or "Limited 16:235">
  [ -x /usr/bin/xrandr -a -n "$1" ] || return
  local line
  while read line; do
    if [[ $line =~ 'connected primary' ]]; then
      /usr/bin/xrandr --output "${line%% *}" --set "Broadcast RGB" "$1"
    fi
  done <<< $(/usr/bin/xrandr)
}

set_rgb "Full"
exec /usr/bin/kodi-standalone
