Archive:UPnP/Media source
Kodi can use UPnP as a media sources from any device that has a UPnP server. UPnP media servers are available for most operating systems and many hardware platforms. Kodi itself can be a UPnP server.
Currently, due to technical limitations (dynamic file paths) UPnP file sources can't be scanned into the local library. However, since many UPnP servers can provide metadata as well as the files themselves, then this may not be an issue.
Setting up UPnP file sources in Kodi
UPnP file sources can be used in videos, music, and pictures. Configuring UPnP file sources in Kodi is as easy as setting up any other type of file source, such as SMB or NFS.
-
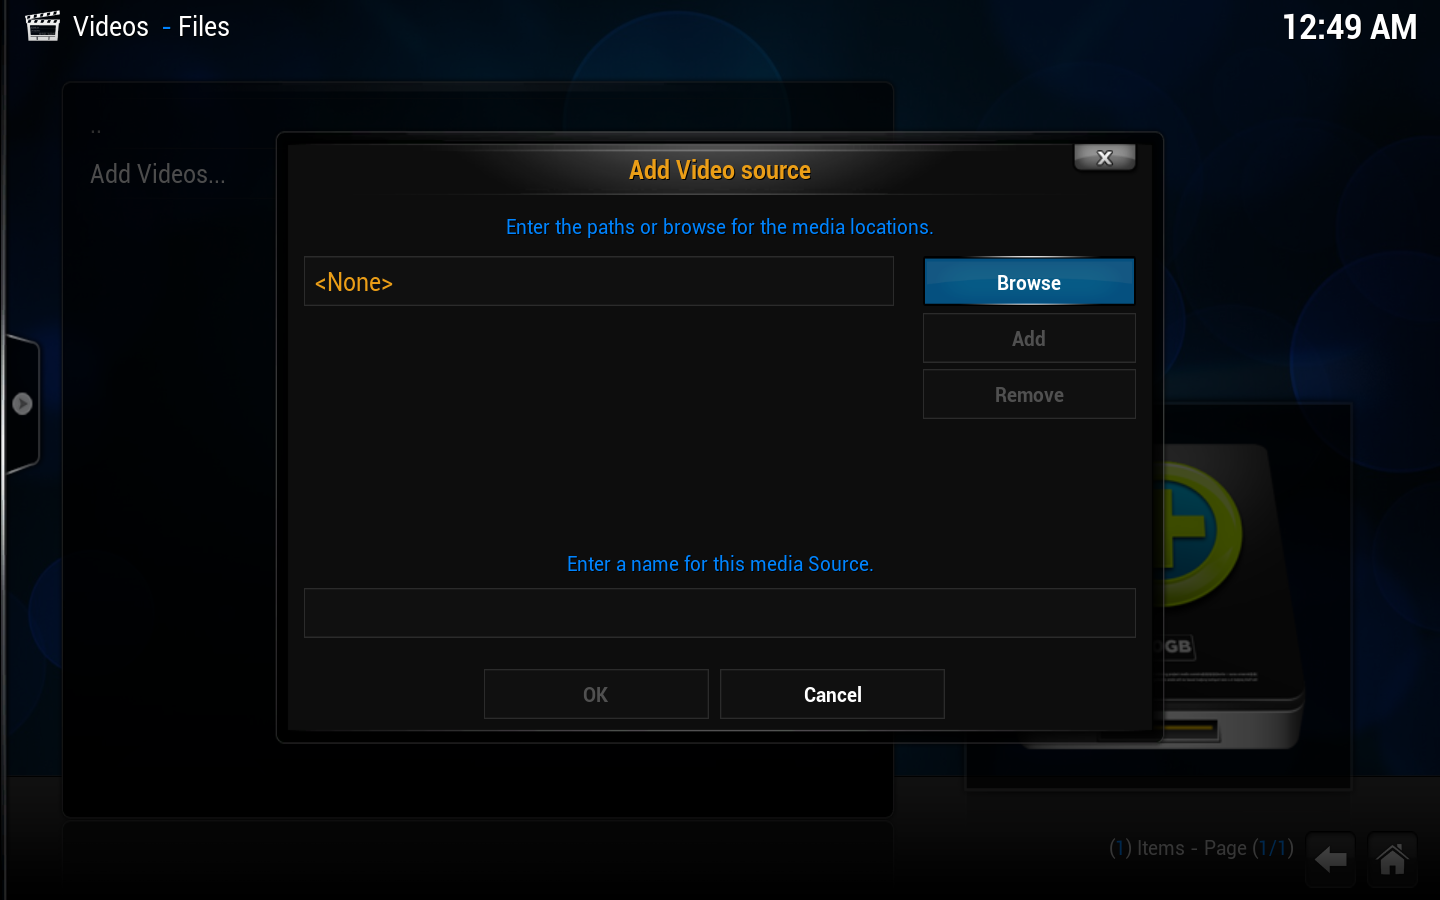 Step 1: Go into ether Videos, Music, or Picture file views, depending on the content you want to add, and use the "Add" button to bring up this window.
Step 2: Then click on the "Browse" button on the right hand side. -
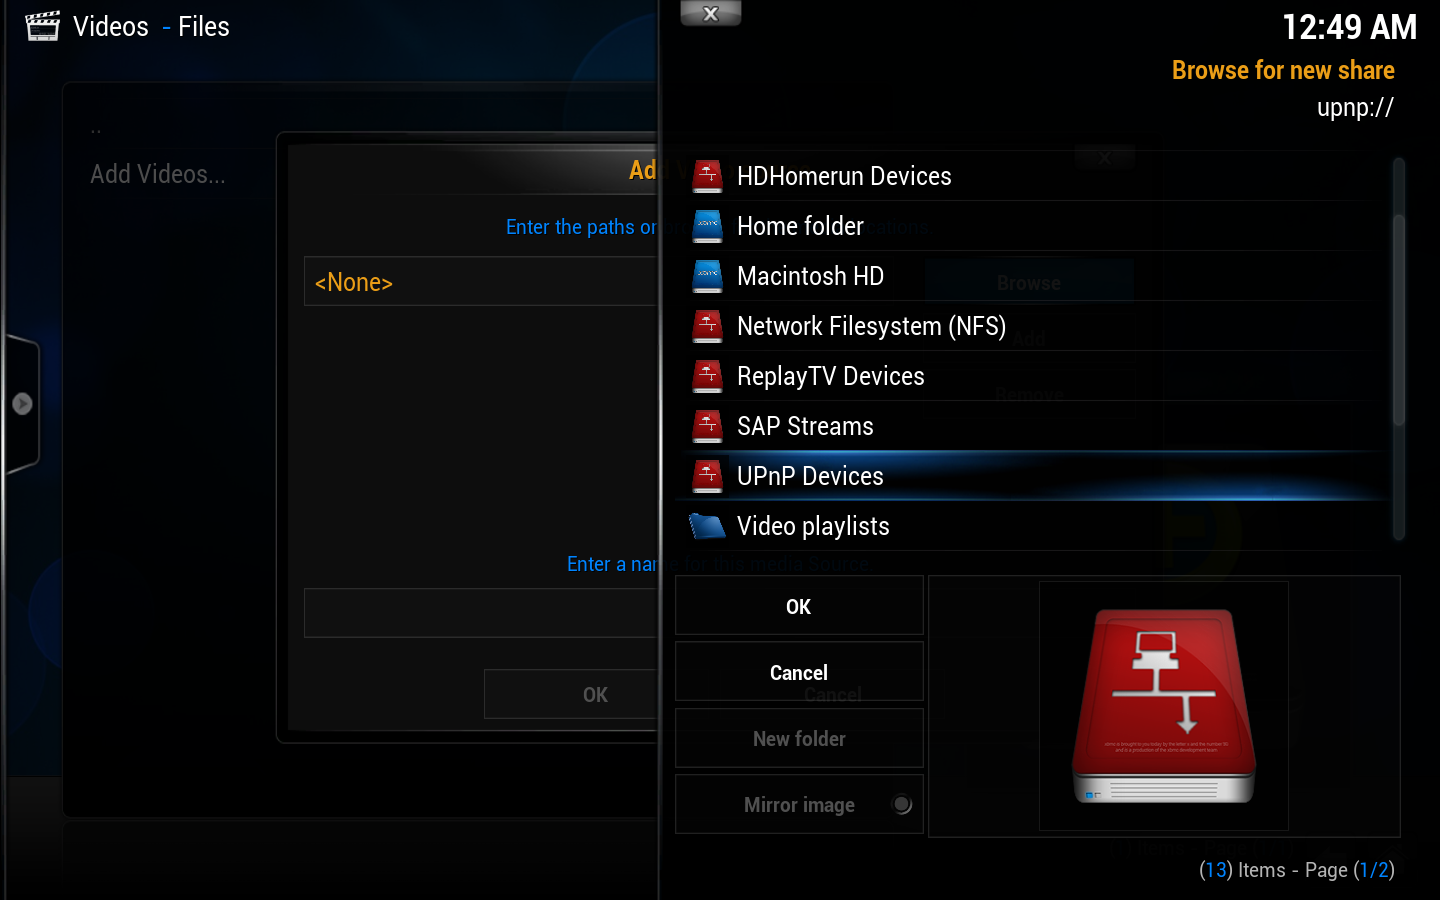 Step 3: This new window will pop up. Scroll down and select "UPnP Devices"
 -
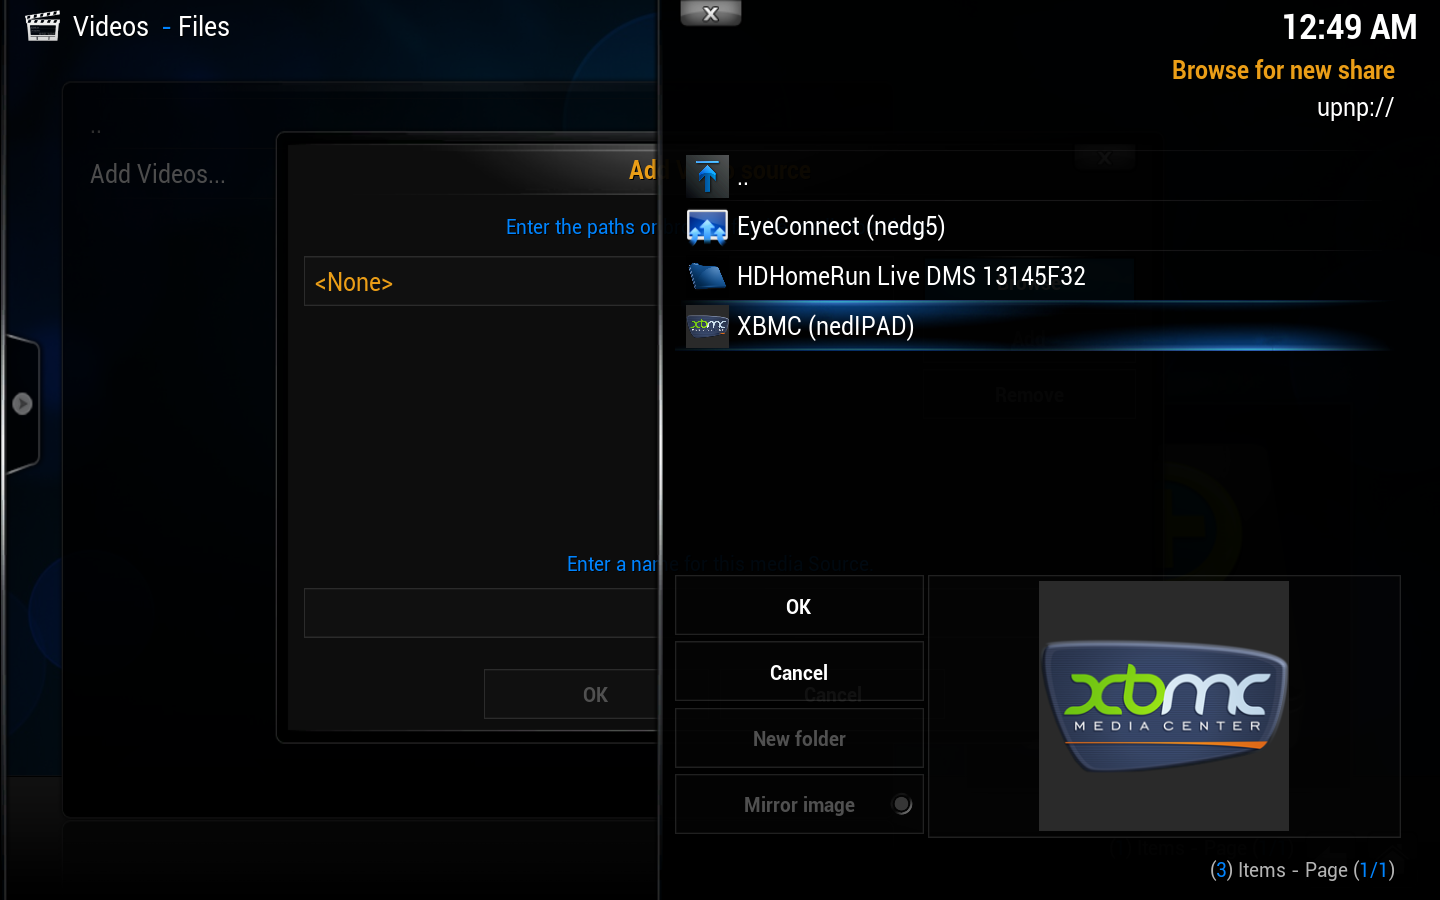 Step 4: All available UPnP servers on your network should show up here. If a source/server doesn't show up, it might be blocked by one of the other UPnP servers due to a misconfiguration. Select the source you wish to add.
 -
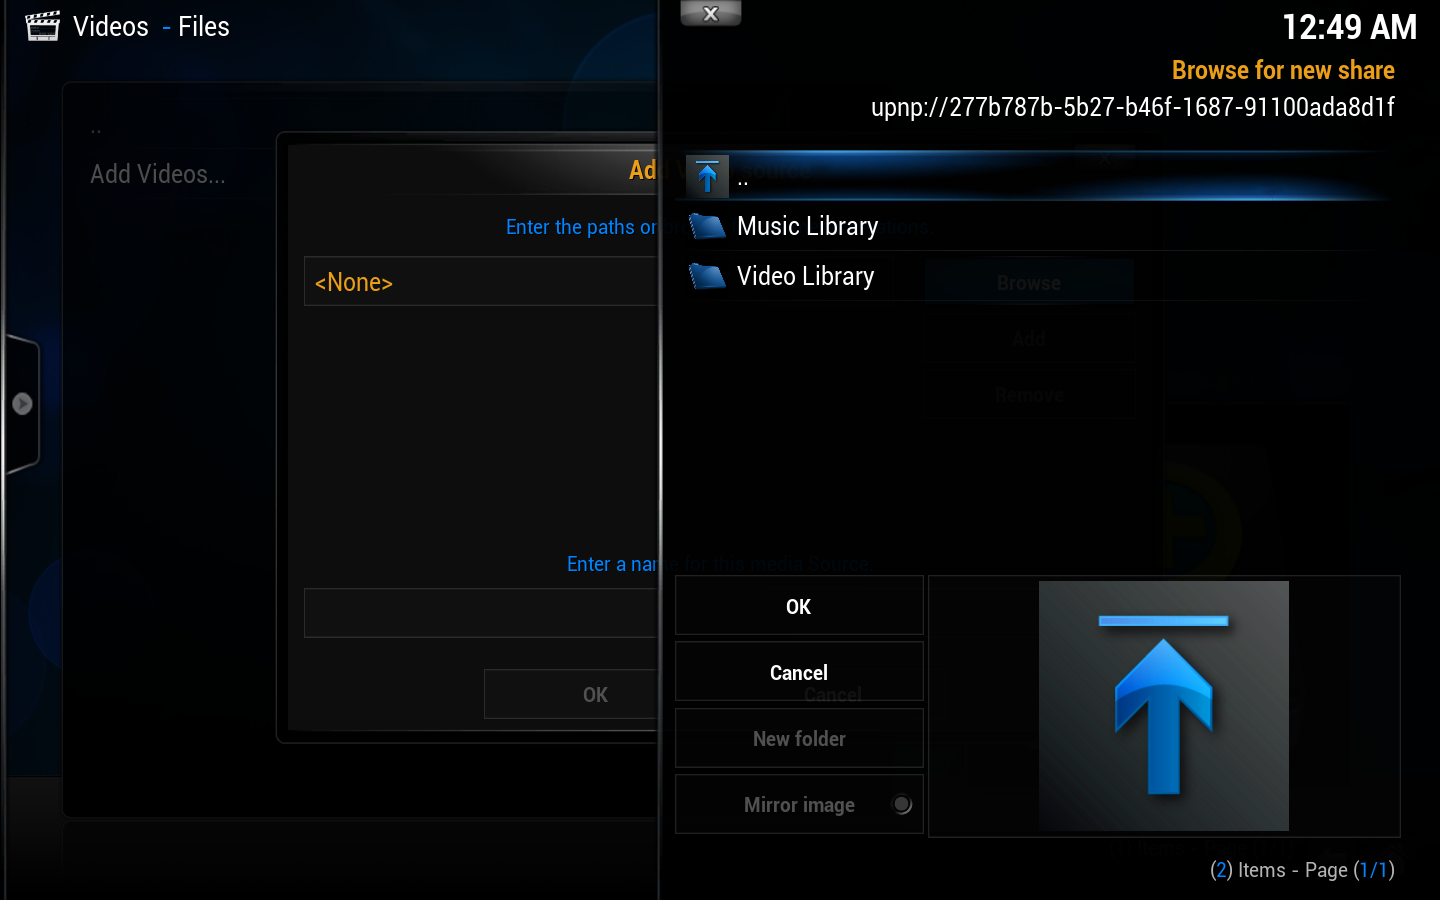 Step 5: The file source will open up and you'll see any folders inside. You will not see files at this point, which is normal. Select "OK".
 -
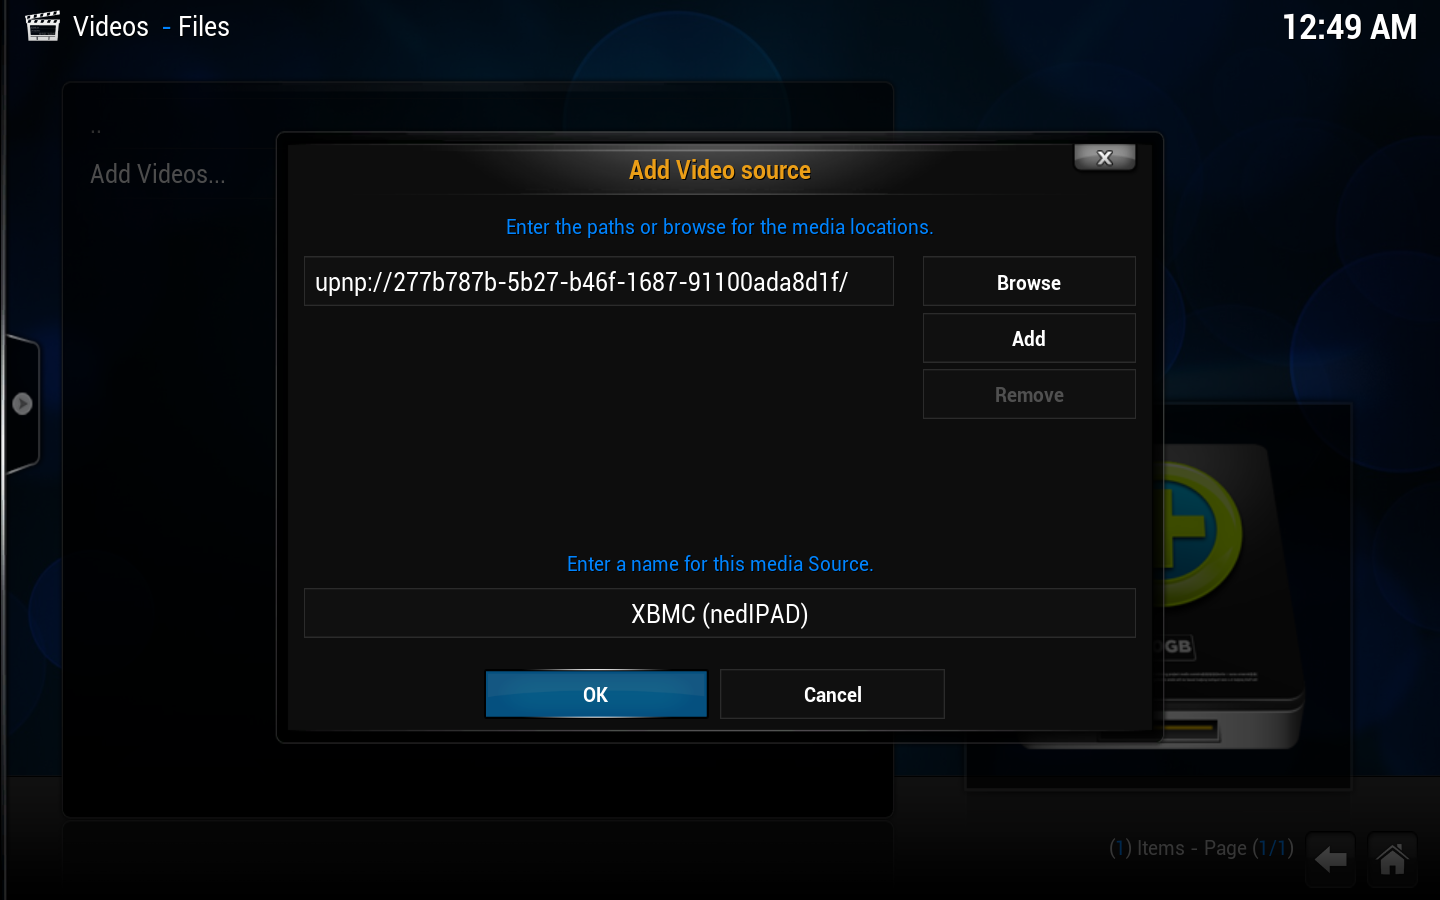 Step 6: You can now change the name of the file source if you wish. When you are done select "OK".
 -
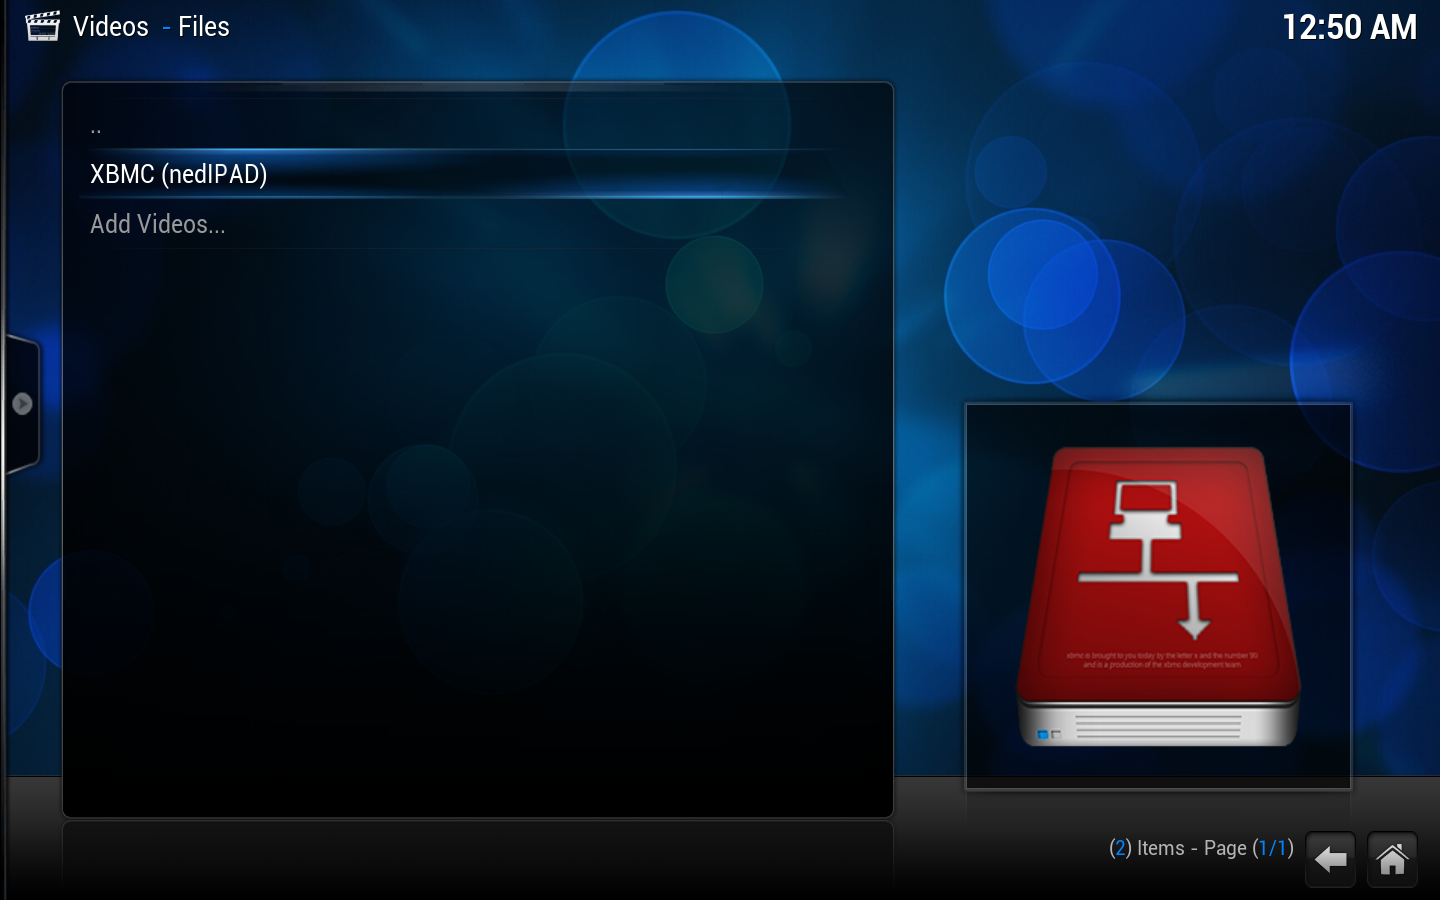 Step 7: The new UPnP file source is ready to use, next to the other sources (if you've added any) in the file view.


