HOW-TO:Set up subtitle services: Difference between revisions
Jump to navigation
Jump to search
No edit summary |
No edit summary |
||
| (22 intermediate revisions by 4 users not shown) | |||
| Line 1: | Line 1: | ||
{{ | {{mininav| [[Video library]] | [[Video playback|Playback]] | [[Subtitles]] }} | ||
<section begin="intro" />As per Kodi v13 "Gotham", subtitles support is now built into Kodi. And instead of downloading a full subtitle download add-on, you now install one (or more) specific subtitle services.<section end="intro" /> | |||
{{Note| | |||
* This guide is now based on the new default skin Estuary, which was introduced in Kodi v17 Krypton. Other skins may also have the option of changing subtitle services, but as this is a one-time setup, using Estuary will be preferable. | |||
* Activating the Subtitle search window via a keyboard or other user-defined remote control, you will need to update the [[keymap]] to use this command instead: <code>ActivateWindow(subtitlesearch)</code>}} | |||
== Steps == | |||
{{how-to | |||
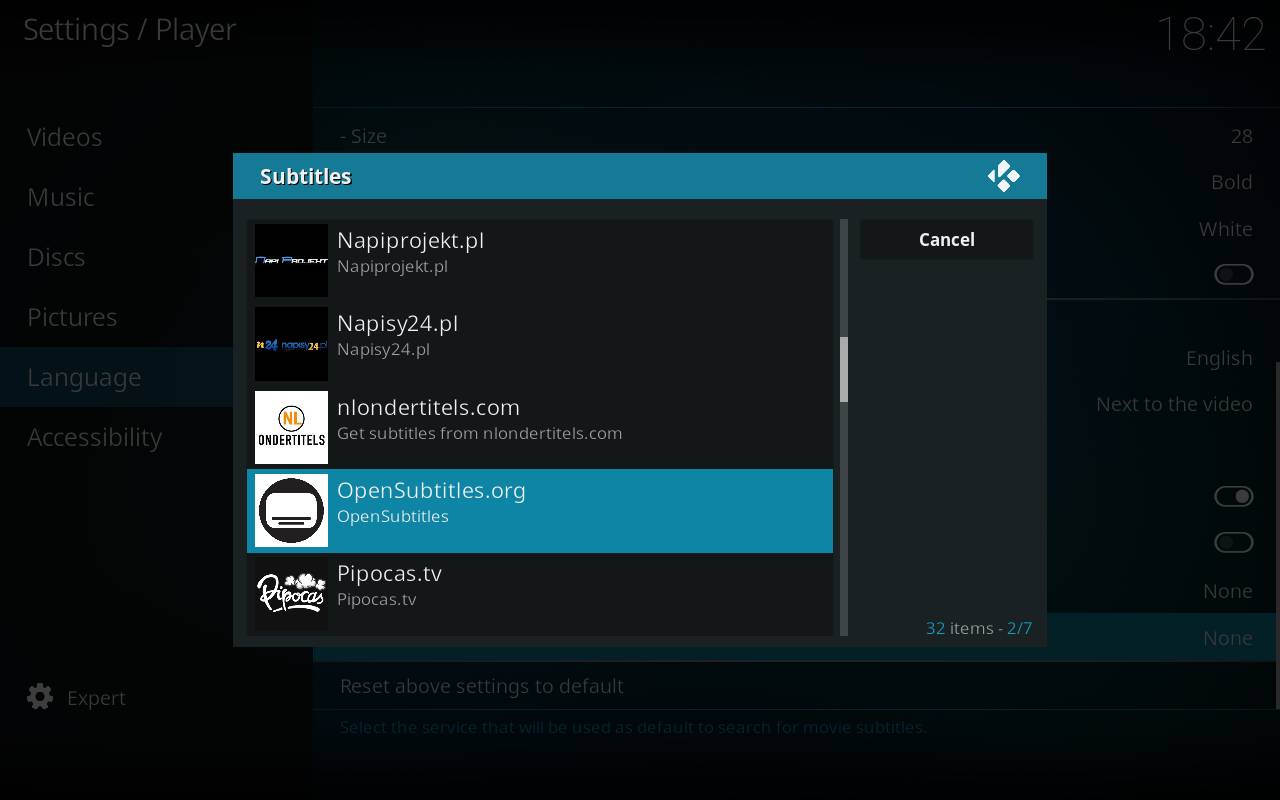
|Step1= [[File:Kodi_subtitles_1.jpg|right|640px]] From Kodi's home screen, go to {{highlight|bordered=yes|Settings -> Player settings -> Language}}. You can select separate subtitle services for movies and TV shows. You will also see the other subtitles settings. | |||
| Step2= [[File:Kodi_subtitles_2a.jpg|right|640px]] [[File:Kodi_subtitles_2b.jpg|right|640px]] Select the languages you want to get when searching for subtitles. For the time being there is no way of selecting order (or main language for that matter) so the search results will be shown in whatever order your service of choice (we’ll come to that) decides it fits. | |||
| Step3= [[File:Kodi_subtitles_1.jpg|right|640px]] Select either default Service for TV Episodes and Movies to select the default service or download extra services. | |||
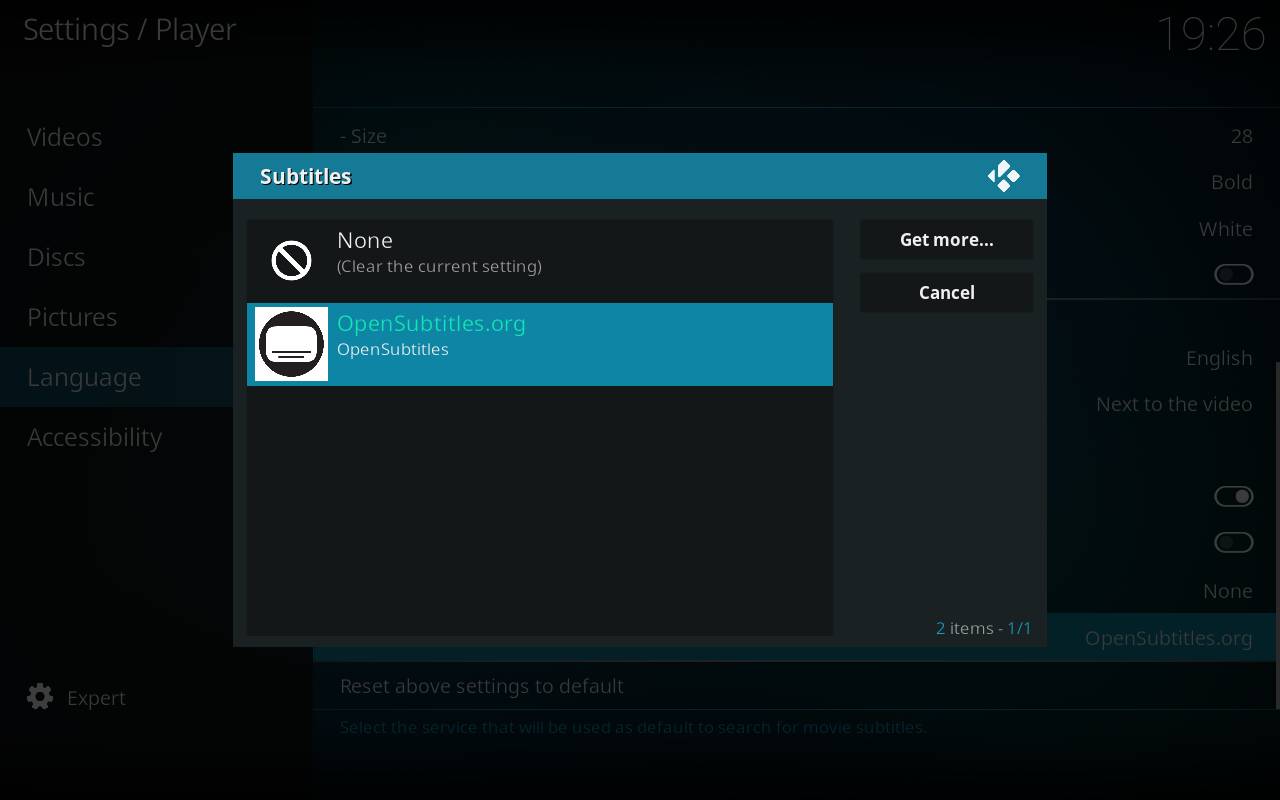
| Step4= [[File:Kodi_subtitles_3a.jpg|right|640px]] Here you can select the default service to use. If the list is still empty you can hit the {{highlight|bordered=yes|Get more}} button to download additional services. | |||
| Step5= [[File:Kodi_subtitles_3b.jpg|right|640px]] Here you see the available list of subtitle services to download. Simply click on it to install the currently selected. If no subtitle services show up in this list you need to check whether your Internet connection is (still) working. | |||
| Step6= [[File:Kodi_subtitles_3c.jpg|right|640px]] After you have installed several services you can select the default one to use. | |||
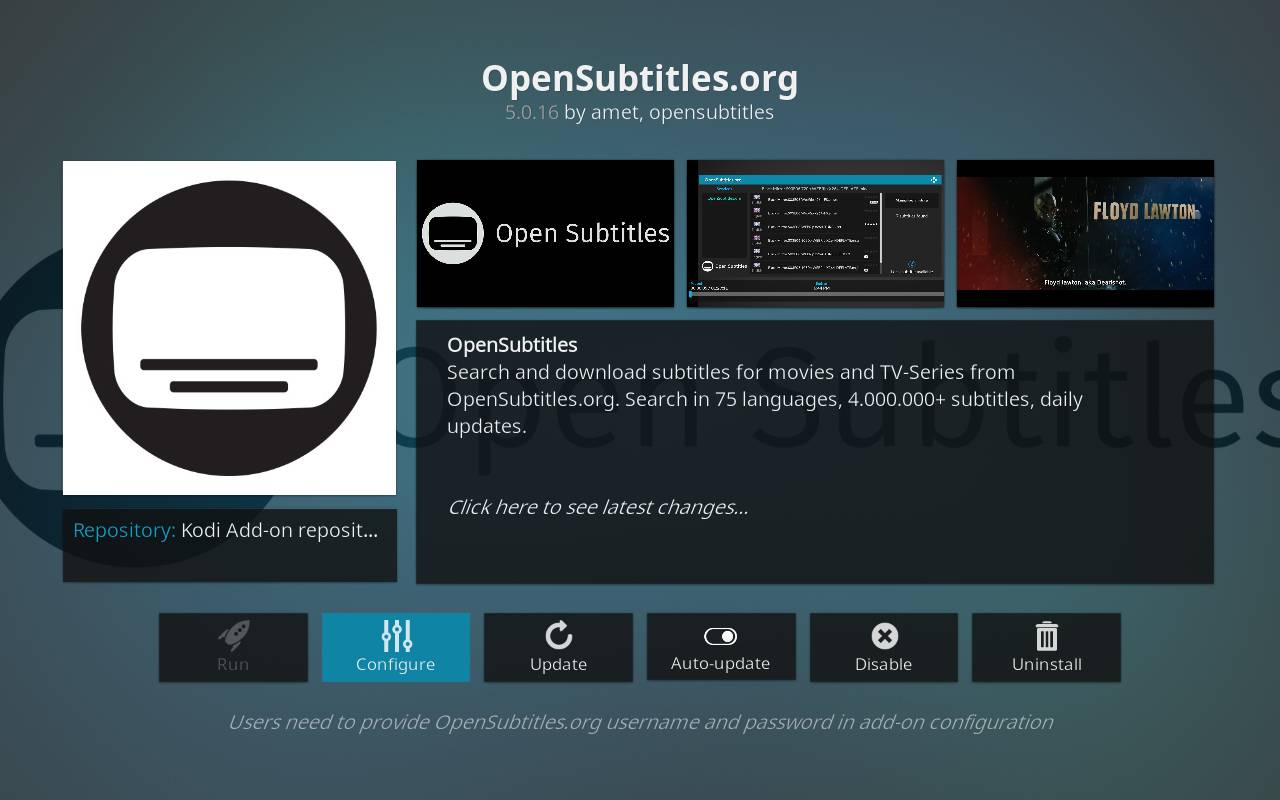
| Step7= [[File:Kodi_subtitles_4.jpg|right|640px]] Each subtitles module can have additional settings (f.e.: You have options to enter your login info). To change this, you need to go to each service options through {{highlight|bordered=yes|Add-ons -> My Add-ons -> Subtitles -> <installed subtitle service> -> Configure}} | |||
}} | |||
== Notes == | |||
* Credit goes to jurrabi for the original guide. | |||
{{Krypton updated}} | |||
[[Category:Subtitles]] | [[Category:Subtitles]] | ||
[[Category: | [[Category:Manual]] | ||
[[Category:How-to]] | |||
[[Category:Add-ons]] | |||
[[Category:Video library]] | |||
Latest revision as of 17:52, 1 July 2017
As per Kodi v13 "Gotham", subtitles support is now built into Kodi. And instead of downloading a full subtitle download add-on, you now install one (or more) specific subtitle services.
Note:
- This guide is now based on the new default skin Estuary, which was introduced in Kodi v17 Krypton. Other skins may also have the option of changing subtitle services, but as this is a one-time setup, using Estuary will be preferable.
- Activating the Subtitle search window via a keyboard or other user-defined remote control, you will need to update the keymap to use this command instead:
ActivateWindow(subtitlesearch)
Steps
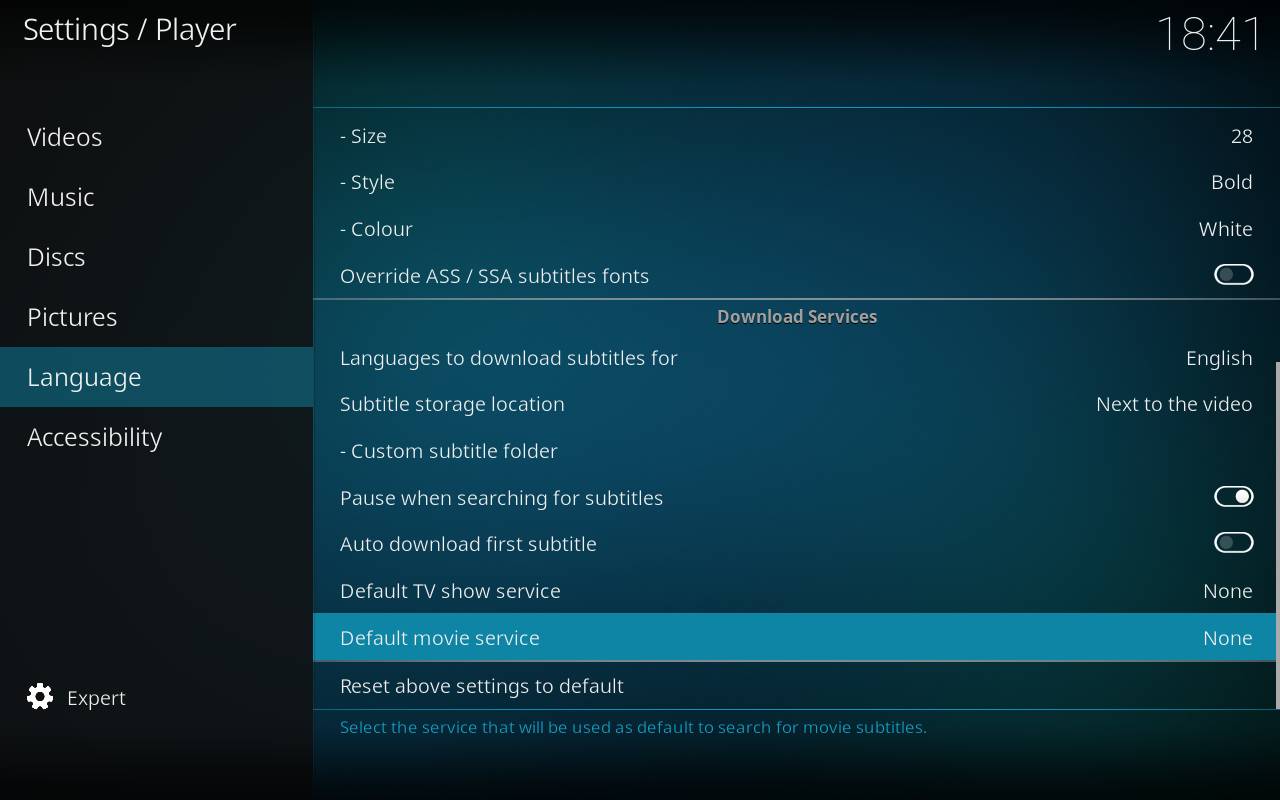
| 1 | From Kodi's home screen, go to Settings -> Player settings -> Language. You can select separate subtitle services for movies and TV shows. You will also see the other subtitles settings. |
|---|---|
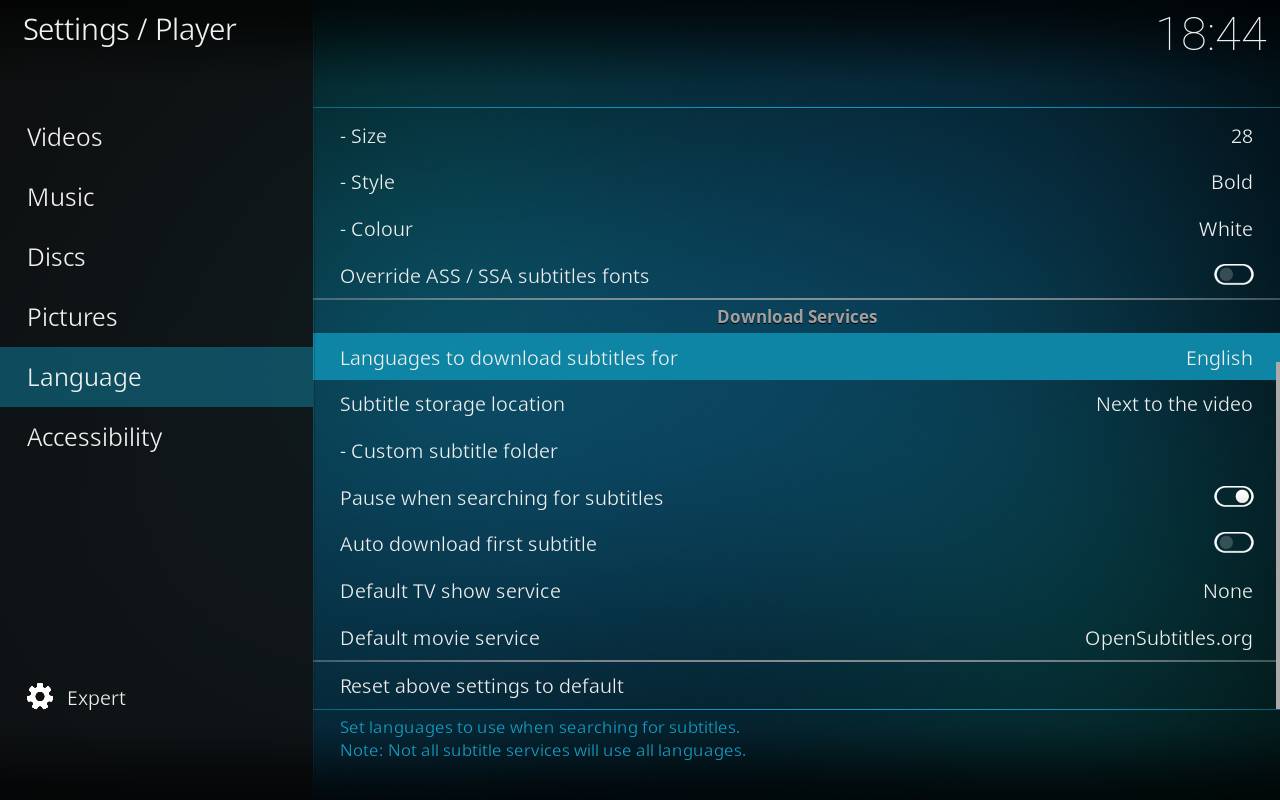
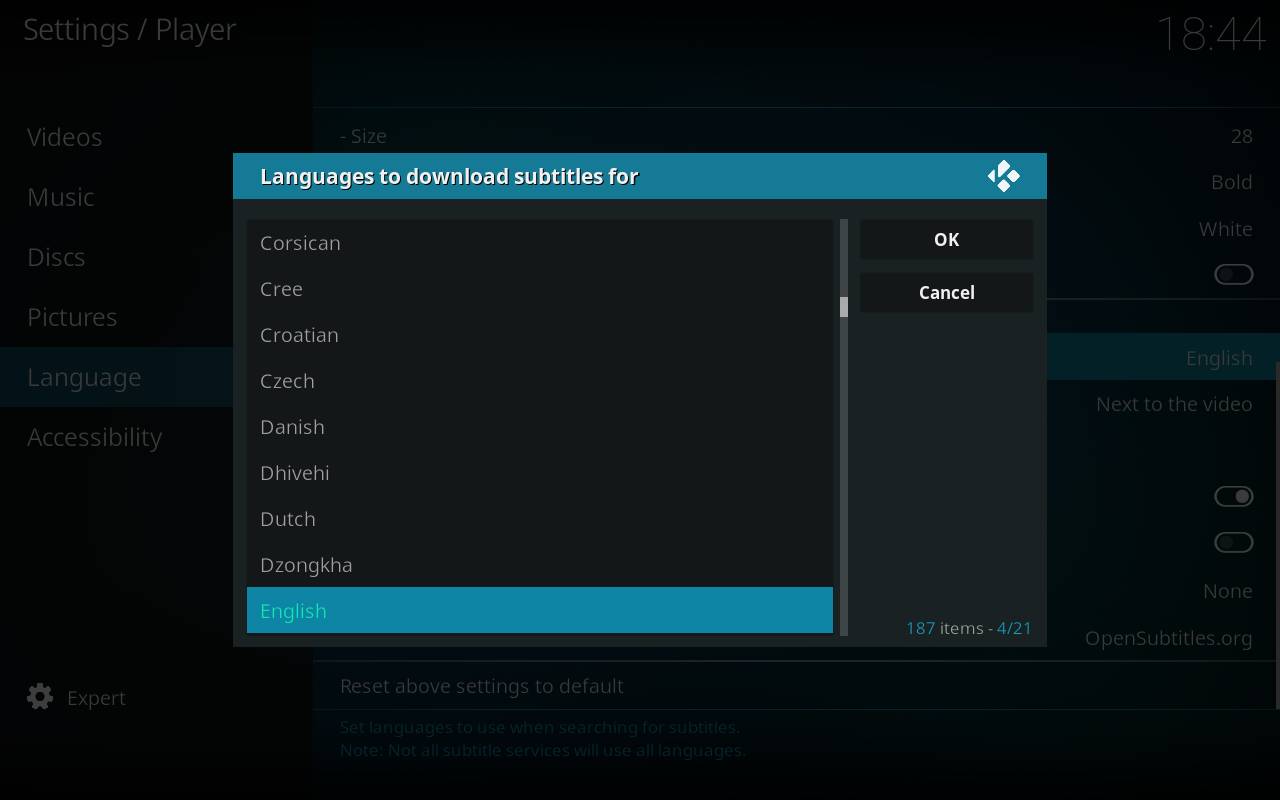
| 2 | Select the languages you want to get when searching for subtitles. For the time being there is no way of selecting order (or main language for that matter) so the search results will be shown in whatever order your service of choice (we’ll come to that) decides it fits. |
| 3 | Select either default Service for TV Episodes and Movies to select the default service or download extra services. |
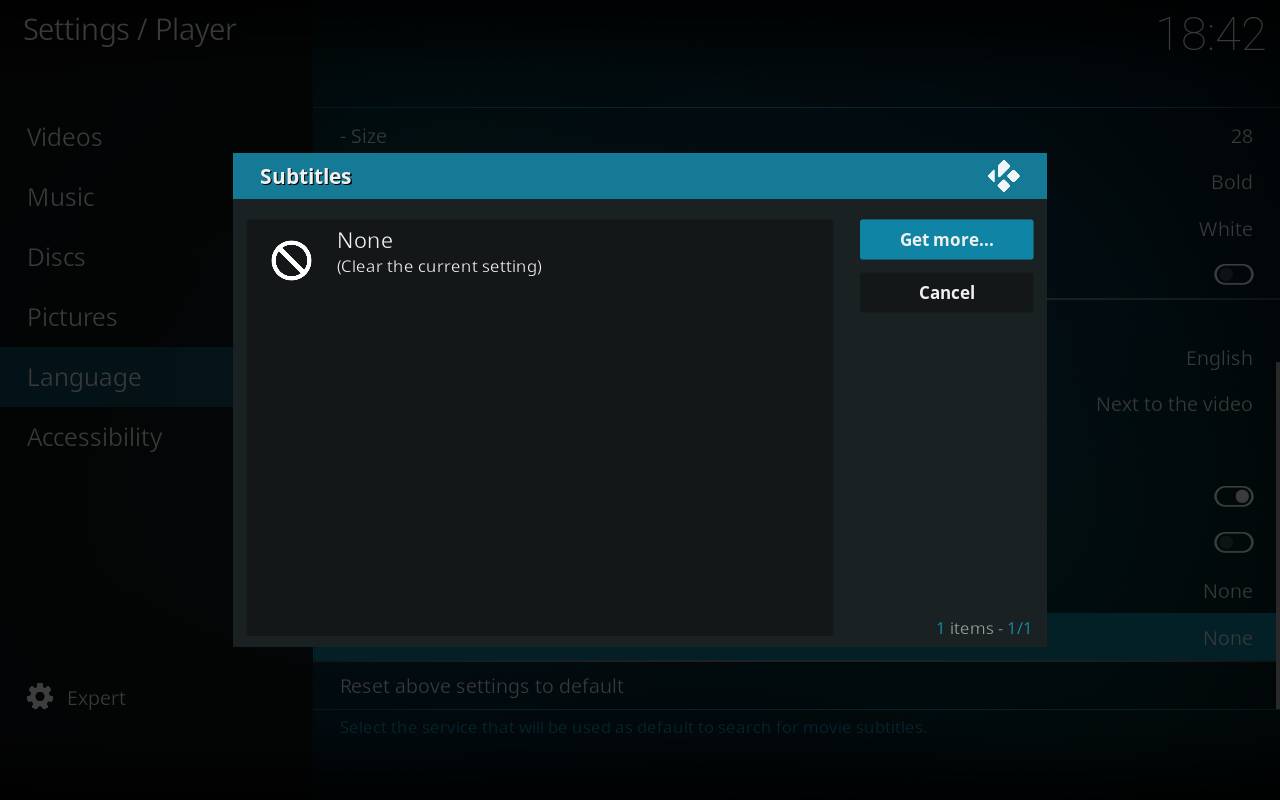
| 4 | Here you can select the default service to use. If the list is still empty you can hit the Get more button to download additional services. |
| 5 | Here you see the available list of subtitle services to download. Simply click on it to install the currently selected. If no subtitle services show up in this list you need to check whether your Internet connection is (still) working. |
| 6 | After you have installed several services you can select the default one to use. |
| 7 | Each subtitles module can have additional settings (f.e.: You have options to enter your login info). To change this, you need to go to each service options through Add-ons -> My Add-ons -> Subtitles -> <installed subtitle service> -> Configure
|
Notes
- Credit goes to jurrabi for the original guide.
