Archive:HOW-TO:Add local media sources on OUYA: Difference between revisions
Jump to navigation
Jump to search
| Line 6: | Line 6: | ||
No other app is needed beyond XBMC, [[development builds|Gotham]] Alpha 1 and libstagefright. | No other app is needed beyond XBMC, [[development builds|Gotham]] Alpha 1 and libstagefright. | ||
<gallery widths="600px" heights=" | <gallery widths="600px" heights="338px"> | ||
File:local_1.png | {{large|'''Step 1:'''}} In XBMC Go to Videos -> Files. | File:local_1.png | {{large|'''Step 1:'''}} In XBMC Go to Videos -> Files. | ||
File:local_2.png | {{large|'''Step 2:'''}} Select “Add Videos” -> “Browse” | File:local_2.png | {{large|'''Step 2:'''}} Select “Add Videos” -> “Browse” | ||
Revision as of 07:16, 7 August 2013
Setup Local Library
(Better Screenshots coming soon...)
Ouya has a bit different setup than normal Android devices with XBMC for adding local media, but is roughly the same. No other app is needed beyond XBMC, Gotham Alpha 1 and libstagefright.
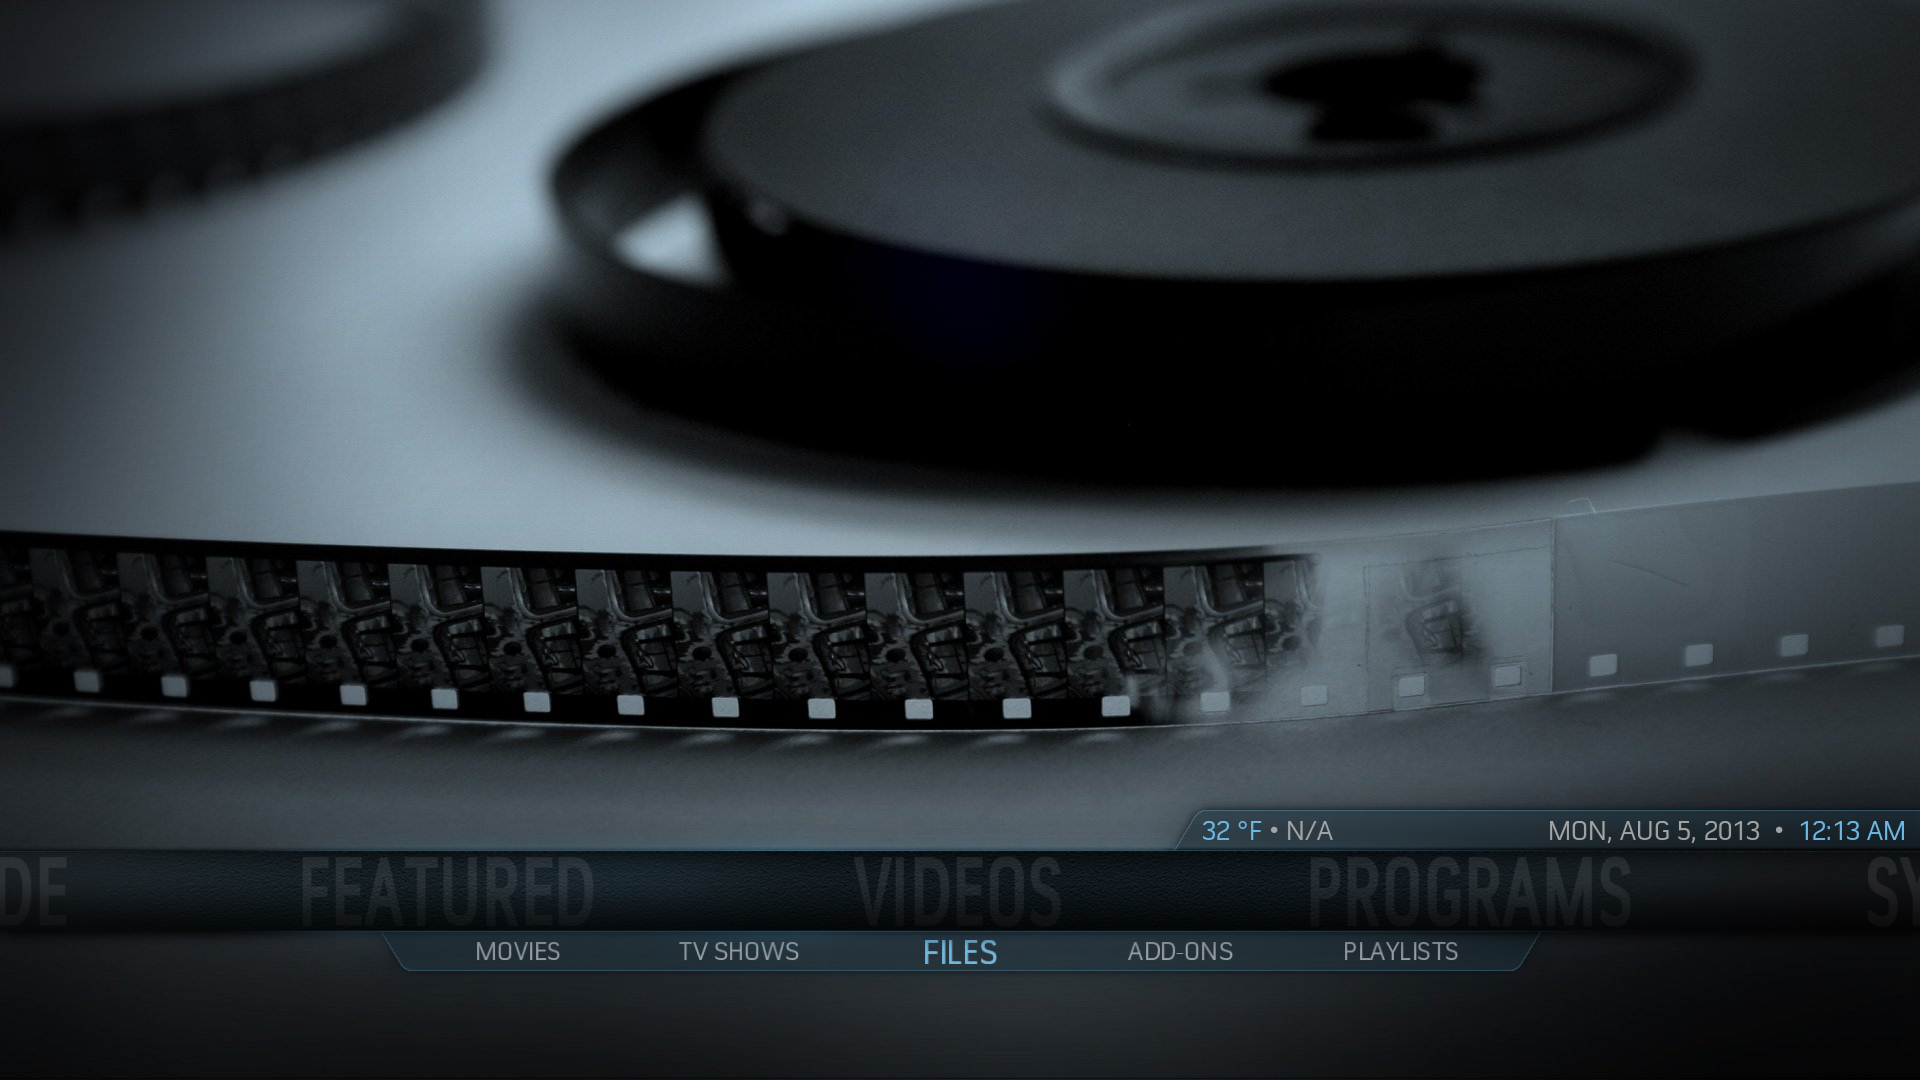
Step 1: In XBMC Go to Videos -> Files.
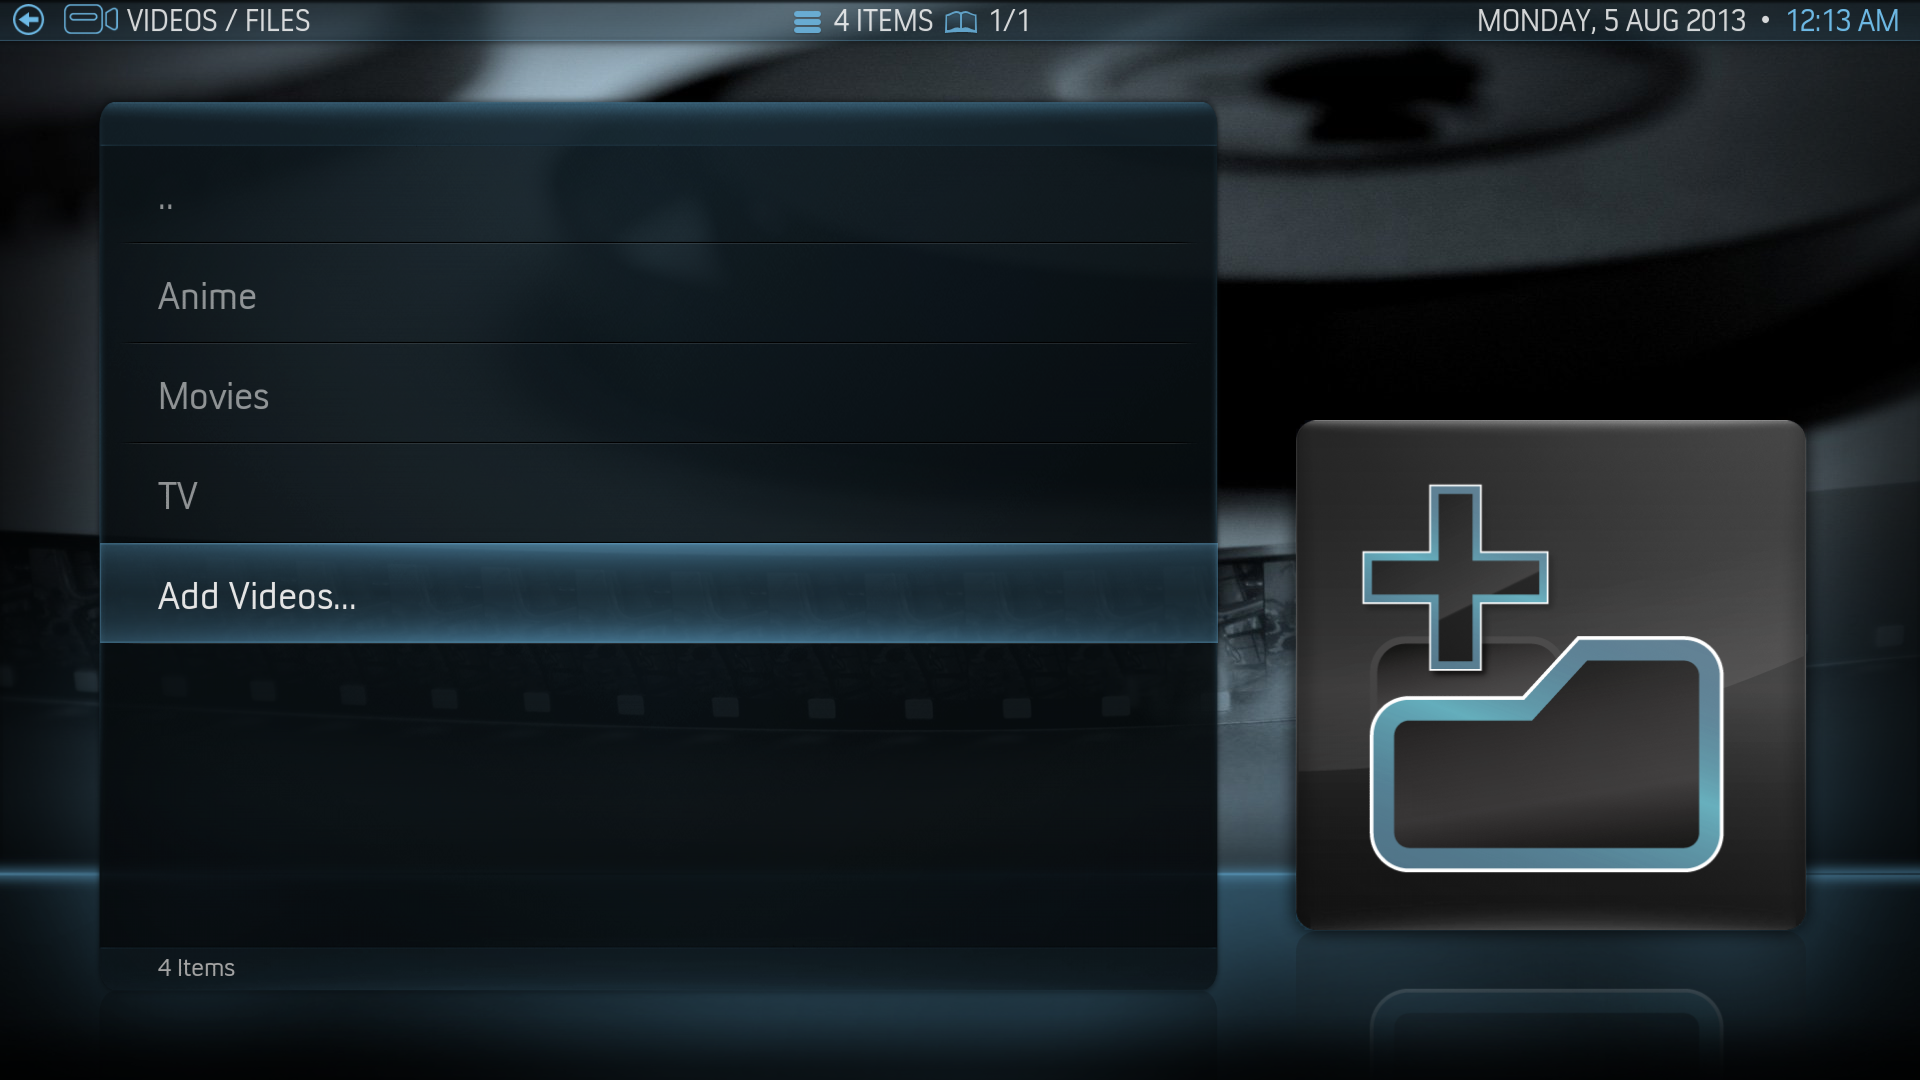
Step 2: Select “Add Videos” -> “Browse”
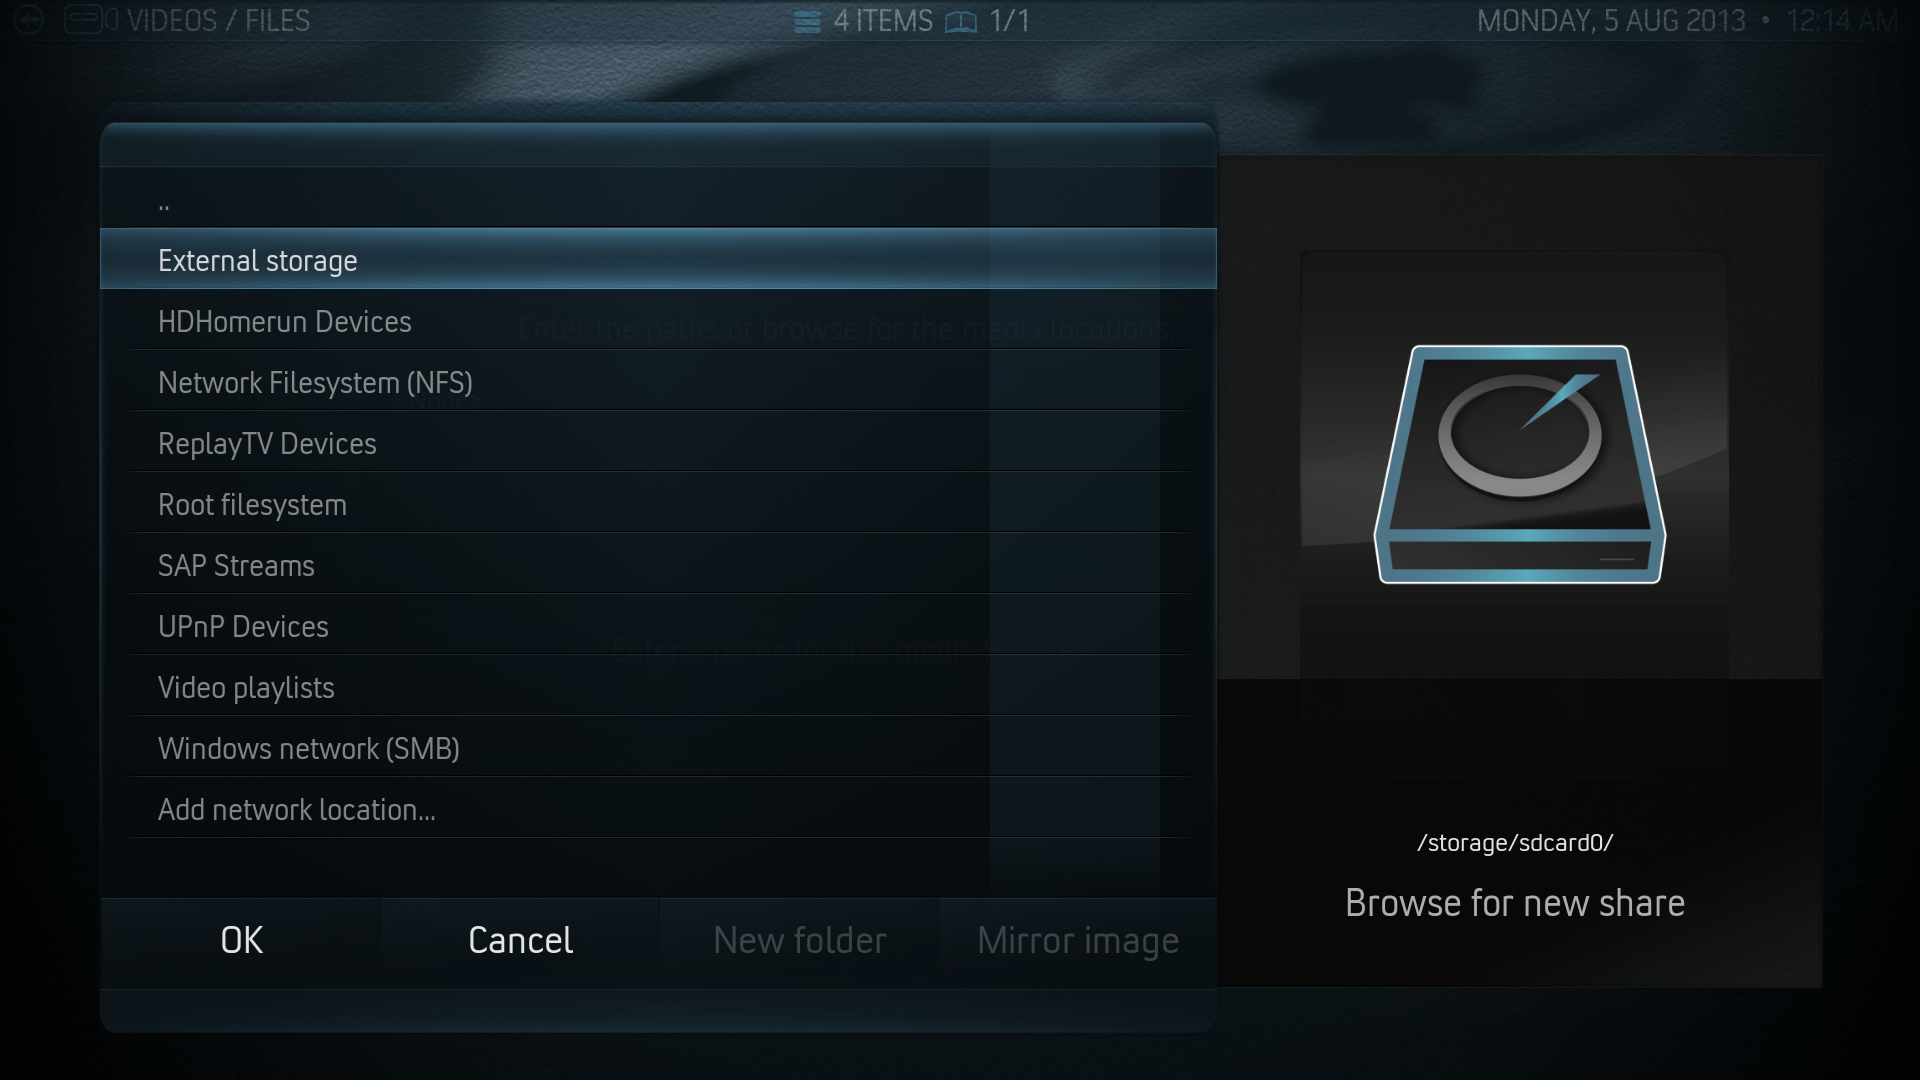
Step 3: (a) For internal SD Card select “External Storage” and then select the proper folder.
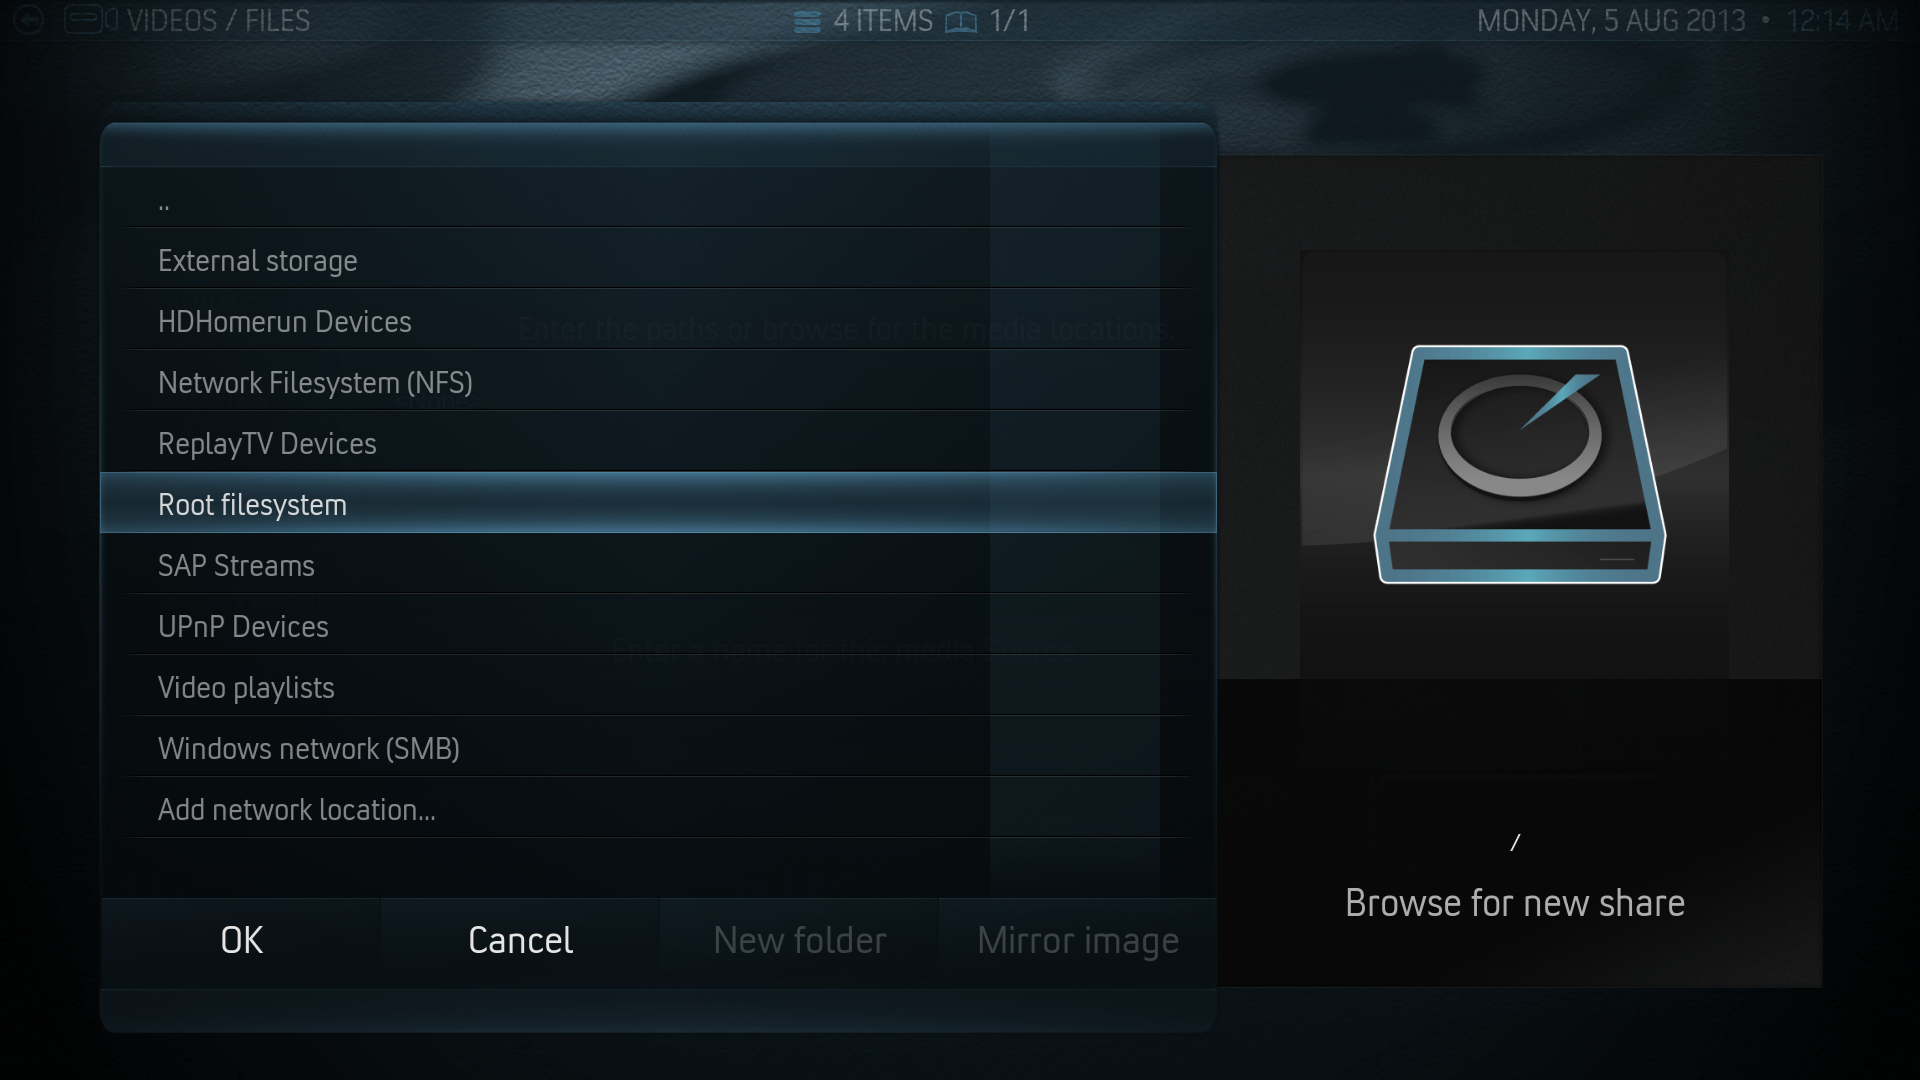

Step 3: (b) For external USB/HDD scroll down to “Root filesystem” -> “usbdrive” then select your folder.


Step 4: Select what is in the folder (TV/Music/Movies) and press “Okay”
Step 5: Update your library like normal....and you're done! You can now watch you videos from the library.