Archive:Chromebox: Difference between revisions
| Line 90: | Line 90: | ||
# Hit CTRL-ALT-F2 to open command prompt | # Hit CTRL-ALT-F2 to open command prompt | ||
# Login with user chronos (no password required) | # Login with user chronos (no password required) | ||
# Download and run the ChromeBox | # Download and run the ChromeBox setup script with the commands: | ||
#: <nowiki>curl -L -O http://goo.gl/3Tfu5W</nowiki> | #: <nowiki>curl -L -O http://goo.gl/3Tfu5W</nowiki> | ||
#: <nowiki>sudo bash 3Tfu5W </nowiki> | #: <nowiki>sudo bash 3Tfu5W </nowiki> | ||
Revision as of 20:18, 4 July 2014
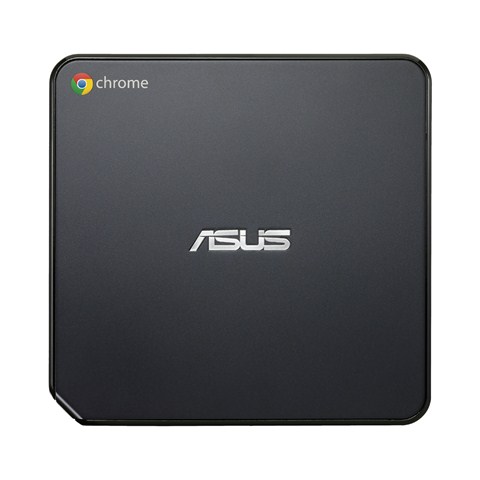
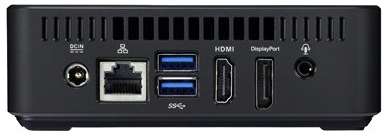
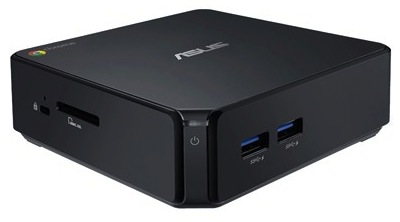
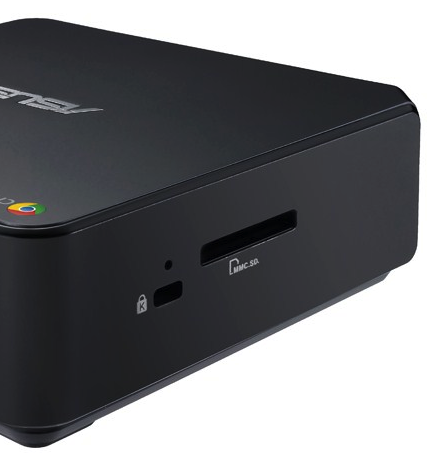
The ASUS Chromebox is a small lightweight intel PC that runs Chrome OS and can be made to boot into other linux versions. It features HDMI, Displayport, USB 3 ports, gig ethernet, SD card slot, and internal wireless-n networking. This page is a collection of links, information, tips, and guides related to running XBMC on the ASUS Chromebox line of computers.
Device Preparation
Put in Developer Mode
Putting the ChromeBox in developer mode will allow you to access the underlying Linux operating system features necessary for installing XBMC.
WARNING: This will erase all user data on the device.
With the device powered off:
- Insert a paperclip into the hole left of the SD card slot and press the recovery button
- Power on the device, then remove the paper clip
- When greeted with the recovery screen, press CTRL-D to enter developer mode
- Press the recovery button (with paperclip) to confirm.
After confirming, the device will reboot and wipe any existing user data - this will take ~5 minutes. Afterwards, the ChromeBox will be in developer mode (as opposed to standard/verified boot mode), and the developer boot screen will be shown at each boot.
The developer boot screen has some scary text about OS verification being off, with instructions to hit [SPACE] if you want to re-enable it. This will return the device from developer mode to standard/verified boot mode, so don't do that. The developer mode boot screen has a ~30s delay, followed by two beeps, before booting. You can skip the delay by pressing [CTRL-D] to immediately boot into ChromeOS.
Disable Firmware Write Protect
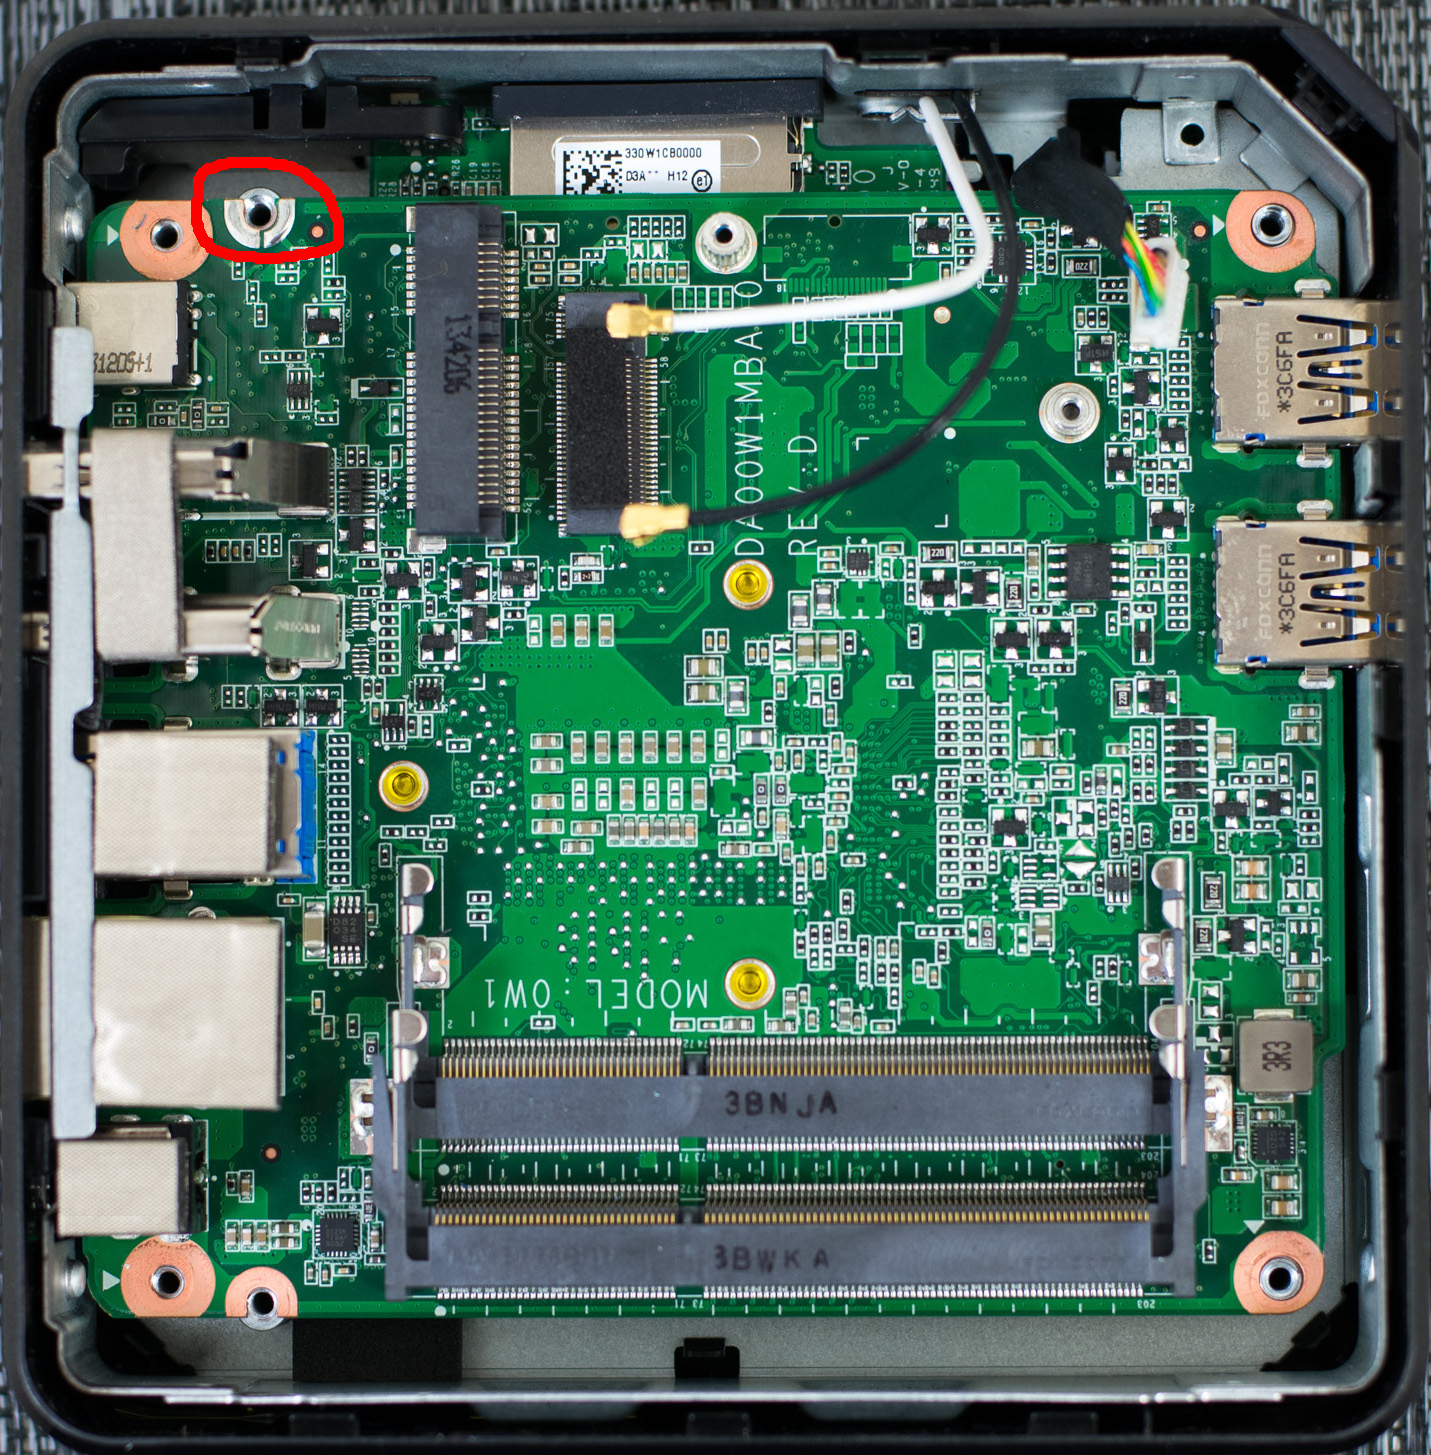
Disabling the firmware write protect will allow us to shorten the developer boot screen timeout (from 30s to ~1s) in a dial boot configuration, and optionally boot directly to the legacy BIOS (and into Ubuntu or OpenELEC). This is also necessary for standalone setups so that the stock firmware can be updated.
With the device powered off and unplugged:
- Remove (4) rubber feet from bottom of unit
- Remove (4) screws under rubber feet
- Separate two halves of unit. Tip: partially insert the screw removed from the notched end, but do not re-thread it. Use it to help separate the two halves.
- Remove write-protect screw circled below:
- Reassemble in reverse order
The write-protect screw can be left out permanently.
Perform a Factory Reset
A factory reset is not needed on a Standalone setup, but must be performed prior to any dual-boot installation.
Google's recovery tool seems to be picky about what kind/size of USB/SD media you use. I've had the best luck with 4GB/8GB media, but YMMV. Anecdotally, creating the recovery media from within ChromeOS seems to be the most reliable method.
- Create recovery media using step 2 of Google's instructions here: https://support.google.com/chromebook/answer/1080595?hl=en
- With the device powered off, use a paperclip to press the Recovery button and power on the device
- Insert the recovery media (USB or SD) when prompted
Note that this will re-partition the internal hard drive and restore the original copy of ChromeOS, erasing anything else on the drive. The ChromeBox will still be left in developer mode, and if you changed the boot options they will still be set.
If you're having trouble creating the recovery media using Google's recovery tool above, you can manually download the recovery image and write it to a USB stick:
- Download Recovery image: https://dl.google.com/dl/edgedl/chromeos/recovery/chromeos_5500.130.0_panther_recovery_stable-channel_mp.bin.zip
- Download Win32 Disk Imager: http://sourceforge.net/projects/win32diskimager/
- Unzip the recovery image; the file should be ~1.5 GB
- Rename the recovery image extension from .bin to .img
- Write the image to your USB media using Win32 Disk Imager
Installing XBMC
XBMC can be installed via OpenELEC or Ubuntu+XBMC, in either a standalone or dual boot configuration. This is accomplished via the ChromeBox E-Z Setup script.
To run the ChromeBox E-Z Setup script, perform the following steps:
- Power on and boot to ChromeOS. Do not log in, but ensure a network connection is established.
- Hit CTRL-ALT-F2 to open command prompt
- Login with user chronos (no password required)
- Download and run the ChromeBox setup script with the commands:
- curl -L -O http://goo.gl/3Tfu5W
- sudo bash 3Tfu5W
Full instructions and explanation of the script's usage can be found at the following forum thread: http://forum.xbmc.org/showthread.php?tid=194362
TODO: Add a brief summary of steps for each config for reference.
Playback / Performance Limitations
- Linux (general):
- - some users have reported intermittent video freezes (due to Intel Linux driver bug). Disable hardware acceleration under Settings-->Video-->Acceleration.
- - With the stock firmware, some kernels have high idle CPU usage on one core with 2GB RAM (single channel/sodimm); 4GB (2x2GB, or any dual-channel configuration) has no issue. Bug is not present in standalone setups running Coreboot firmware.
Known issues
- Some keyboards seem to have issues working on the dev boot screen (before the OS is booted), and therefore cannot be used to install XBMC on a ChromeBox. The Logitech K400 is one of these, so use another keyboard to install if yours doesn't appear to be working.
- Some MCE remote IR receivers do not currently work with USB 3.0 ports under Linux due to a bug in the mceusb kernel driver. OpenELEC includes a fix for this. The version of Ubuntu installed by the setup script in a dual boot setup also includes this fix.
- For standalone Ubuntu (or any other distro) installs, a custom kernel will need to be compiled with the fixed driver. The patch is available here, but the application of the patch and installation of the fixed driver is beyond the scope of this wiki. A user on ubuntuforums has made a precompiled fixed driver available with instructions here: http://ubuntuforums.org/showthread.php?t=2203116&p=13007838#post13007838
- It appears that the fix for MCE remotes will be included in the 3.16 kernel, so once that is available, MCE remotes should work out of the box for everyone.
- Suspend/resume is generally problematic with the stock firmware (dual boot setups), but seems to work reliably in standalone setups with the updated Coreboot firmware. Resume via USB is not currently working (linux kernel/USB3 issue), but wake-on-lan (eg, via YATSE) works perfectly well.
- Some USB3 external hard drives seem to have issues booting. Issue is under investigation.
Restoring the Stock Firmware
If you have used the ChromeBox Setup Script's Standalone setup option, or otherwise manually updated the ChromeBox's firmware with a custom Coreboot build, it is necessary to restore the stock firmware before performing a factory reset to re-load ChromeOS.
In order to do this, we will create a bootable USB stick with ChromiumOS (the open-source basis for ChromeOS) and use that to re-flash the stock firmware, which you backed up before flashing the Coreboot firmware. If you didn't make a backup, we can use a copy extracted from Google's recovery image, but an actual backup is preferred.
- Create ChromiumOS USB Stick
- Download the latest AMD64OS daily build from http://arnoldthebat.co.uk/wordpress/chromium-os/. Be sure it's the AMD64OS version, and the image version (.img.7z) and not the virtual machine version (.vdi.7z). Example: Camd64OS-20140527010101.img.7z
- Follow the instructions at the link above to extract and copy the image onto a USB disk. You will need at least a 4GB drive, and the contents of it will be erased. I recommend a USB2 device as USB3 devices seem to be flaky on the ChromeBox. Do NOT use the same USB stick that you used for your firmware backup
- Get a ChromiumOS Shell Prompt
- Connect the ChromiumOS USB stick to the ChromeBox, power on, and select the USB stick from the boot menu. Boot into ChromiumOS
- Open a shell the same way as in ChromeOS: [CTRL]-[ALT]-[F2] and login as user 'chronos'
- Copy firmware backup file
- If you have your firmware backup on USB, connect it now, then run the following commands from the shell prompt
- mkdir /tmp/usb
- sudo mount /dev/sdc /tmp/usb (If this fails, use /dev/sdc1 instead of /dev/sdc)
- cp /tmp/usb/stock-firmware.rom ./
- sudo umount /tmp/usb
- If you don't have a firmware backup, then run the following command to download one extracted from the recovery image
- curl -L -o stock-firmware.bin https://dl.dropboxusercontent.com/u/98309225/firmware-panther-factory-recovery.bin
- If you have your firmware backup on USB, connect it now, then run the following commands from the shell prompt
- Restore stock firmware
- After completing the above, then run the following commands from the shell prompt
- sudo flashrom -w stock-firmware.bin
- Assuming it is successful, then:
- sudo poweroff
- After completing the above, then run the following commands from the shell prompt
You can now remove the ChromiumOS USB drive (and firmware backup USB drive). Proceed to Perform_a_Factory_Reset above to restore/reload ChromeOS.
Old / Deprecated Content
The steps below are now performed automatically by the ChromeBox setup script, but may still be useful in troubleshooting or recovery.
Set Developer Boot Flags
Setting the following boot flags will allow you to boot either to a backup copy of ChromeOS on USB/SD (using CTRL-U) or to the legacy BIOS (using CTRL-L) and into Ubuntu or OpenELEC.
Important: These boot flags must be set before installing either Ubuntu or OpenELEC.
To set the developer mode boot flags, perform the following steps:
- Power on and boot to ChromeOS.
- Press CTRL-ALT-F2 to open a shell.
- Login as user chronos, no password is needed.
- Run the commands:
- sudo crossystem dev_boot_usb=1
- sudo crossystem dev_boot_legacy=1
Create a Backup Copy of ChromeOS (on USB/SD)
If you plan on wiping ChromeOS to install OpenELEC (vs dual booting), it's a good idea to have a backup copy of ChromeOS on USB that you can boot to if necessary. These instructions assume you have already put the ChromeBox into developer mode and set the developer boot flags as per above.
IMPORTANT: As part of creating the USB backup copy, the stock legacy BIOS will be restored, so you will need to (re)flash the fixed legacy BIOS after performing this step.
To create a bootable USB copy of ChromeOS, perform the following steps:
- Power on and boot to ChromeOS.
- Press CTRL-ALT-F2 to open a shell.
- Login as user chronos, no password is needed.
- Insert a USB stick or SD card (8GB minimum) and run the command:
- sudo fdisk -l | grep 'Disk /dev/sd'
- This will list all the drives your ChromeBox sees. The main internal HDD is /dev/sda, any connected USB/SD devices will be /dev/sdb, /dev/sdc, etc. Identify the device corresponding to the USB/SD card you inserted (compare sizes).
- Run the following command to copy/install ChromeOS to your USB/SD card:
- sudo chromeos-install --skip_src_removable --skip_dst_removable --skip_vblock --dst /dev/sdb (or whatever your device is from above step)
- When the process completes, your Chromebook will reboot. Now with the USB/SD card still inserted, Press CTRL-U to boot the USB/SD copy of ChromeOS. On first boot, it will want to repair itself and then reboot to the standard login screen.
- Lets confirm we're booted off of the external device.
- Press CTRL-ALT-F2 to open a shell.
- Login as user chronos, no password is needed.
- Run the command:
- rootdev -s -d
We should see the same device as identified in step 2 above, instead of /dev/sda for the internal HDD.
Now we have a backup ChromeOS install that we can boot into at will using CTRL-U on the dev boot screen
Update the Legacy BIOS
It is necessary to update the legacy BIOS to enable booting from USB/SD media, or if replacing ChromeOS with Ubuntu/OpenELEC, as the stock legacy BIOS is completely broken. If you are dual booting and using either the ChrUbuntu or ChrOpenELEC scripts to install, then this step is performed by those scripts and does not need to be done manually.
To update the legacy BIOS:
- Power on and boot to ChromeOS
- Hit CTRL-ALT-F2 to open a shell
- Login with user chronos (no password required)
- Download the updated legacy BIOS with the command:
- curl -L -O http://johnlewis.ie/asus-chromebox-SeaBIOS-new.bin
- Flash the new bios with the command:
- sudo flashrom -w -i RW_LEGACY:asus-chromebox-SeaBIOS-new.bin
This updated legacy BIOS has a ~5s wait on the 'Press ECS to show boot menu' screen. If you would prefer a shorter wait (~1.5s), use the following file/commands instead of those listed in steps 4/5 above:
- curl -L -O https://dl.dropboxusercontent.com/u/98309225/cbox-seabios-nowait.bin
- sudo flashrom -w -i RW_LEGACY:cbox-seabios-nowait.bin
The md5sum on cbox-seabios-nowait.bin is F1290EC96AC77026044E29E62B40F6CC
Set Firmware Boot Flags
With the firmware write-protect disabled, we can shorten the default developer-mode boot wait time (from 30s to ~1s) and set the ChromeBox to default to booting the legacy BIOS (and into Ubuntu or OpenELEC) instead of requiring CTRL-D or CTRL-L to be pressed each time.
Important: If you are going to wipe ChromeOS and have a dedicated OpenELEC/Ubuntu setup (and don't care to make a bootable USB copy of ChromeOS), then these boot flags must be set before installing either Ubuntu or OpenELEC. If you are going to be dual booting, then this step must be performed AFTER installation.
To set the firmware boot flags, perform the following steps:
- Power on and boot to ChromeOS
- Hit CTRL-ALT-F2 to get to command prompt
- Login with user chronos (no password required)
To shorten the boot wait time only, run the command:
- sudo set_gbb_flags.sh 0x1
- (This is the same as immediately pressing CTRL-D)
To shorten the boot wait time and set the default boot to the legacy BIOS:
- sudo set_gbb_flags.sh 0x489
- (This is the same as immediately pressing CTRL-L)
To set the default to legacy boot only (keeping the 30s timeout), run the command:
- sudo set_gbb_flags.sh 0x488
To reset these options to default, use:
- sudo set_gbb_flags.sh 0x0
