Adding videos to the library: Difference between revisions
No edit summary |
No edit summary |
||
| Line 1: | Line 1: | ||
{{ | {{XBMC wiki toc/v}} | ||
{| class=" | {{:Adding videos to the library/Contents}} | ||
To use your video files with "metadata" like summaries, cast info, DVD covers, thumbnails, and more, you need to add those video files to the '''[[video library]]'''. | |||
==Naming files== | |||
'''THIS IS THE MOST IMPORTANT STEP TO A SUCCESSFUL LIBRARY SCAN!''' | |||
In order for the media scrapers to pick up the correct information your file names must follow a certain format: | |||
*'''[[/Naming movies]]''' | |||
*'''[[/Naming TV shows]]''' | |||
===Supplemental tools=== | |||
Applications that can assist in renaming files, general file organization, manual data entry, and more: | |||
*[[TheRenamer]] - Windows | |||
*[[Ember Media Manager]] - Windows | |||
*[[ViMediaManager]] - Mac OS X | |||
*[[Add-on:XWMM]] - all platforms. Allows you to edit library entires from a web browser. | |||
==Adding media sources== | |||
[[Media Sources]] are the links that tell XBMC where your content is stored and what type of content is contained within each one. You can have multiple sources for each media type. | |||
<gallery widths=500px heights=313px> | |||
File:Quick-start-1.png|'''Step 1:''' Click "Videos" in the home screen menu. | |||
File:Quick-start-2.png|'''Step 2:''' Now click "Add Source". | |||
File:Quick-start-3.png|'''Step 3:''' The "Add Video Source" screen will be displayed. Then click the "Browse" button. | |||
File:Quick-start-4.png|'''Step 4:''' Now browse to where you keep your videos stored. Once you have found the folder you keep your videos in, click the "OK" button. If you keep them shared on a network drive, read the [[Configuring PC Shares]] article for more information about setting up a share on your computer first. | |||
File:Quick-start-5.png|'''Step 5:''' Name this Video Source however you like. If it is a movie folder, you will probably want to name it "Movies", and if it is a TV Show folder then you will probably want name it TV Shows. The name doesn't matter to XBMC. Then click "OK". | |||
File:Quick-start-6.png|'''Step 6:''' The set content window will display, this is where you tell XBMC what type of media is in the folder. Press the down arrow until you reach the correct type (in this example movies) | |||
File:Quick-start-7.png|'''Step 7:''' There are a number of options underneath, see [[#Set Content]] to check what options to enable. Then click "OK" | |||
File:Quick-start-8.png|'''Step 8:''' Press Yes the scan the content to the library (if no is pressed it can be scanned later). | |||
</gallery> | |||
You have set up a media source, content can be added to this folder then all you will have to do is tell XBMC to "refresh the library" or XBMC can be set to refresh library on start up (in XBMC's settings). | |||
==Set Content== | |||
This section is why keeping your TV Shows and Movies, or other type of content separate is important. When you click set content, you can set your video content as Music Videos, Movies, or TV Shows. Scroll through the options until you get to the correct one. Because in our example we're adding Movies, we will scroll to "Movies" and go through the Movie Settings. | |||
===Movie content options=== | |||
{| class="wikitable" | |||
|- | |- | ||
! '''''(Option)''''' | |||
! Movies are in separate folders that match the movie title | |||
! Scan Recursively | |||
! Selected Folder Contains a Single Movie | |||
|- | |- | ||
| | | style="text-align:center;"|'''''(Explanation)''''' | ||
# | | style="background:#FFFFFF; text-align:center;"|If you keep each of your movies in its own folder with the movie name in it | ||
# | | style="background:#FFFFFF; text-align:center;"|If your movies are categorised into sub folders (eg genres, a-z). | ||
| style="background:#FFFFFF;text-align:center;"|This option is intended exclusively for adding one movie at a time. | |||
|- | |||
# | | style="text-align:center;"|'''''(Example)''''' | ||
# | | style="background:#FFFFFF; text-align:center;"|'''''C:\Movies\Big Buck Bunny\Big Buck Bunny.avi''''' | ||
# | | style="background:#FFFFFF; text-align:center;"| | ||
<br> | |||
'''C:\Movies\Action\Big Buck Bunny.avi'''<br> | |||
'''C:\Movies\B\Big Buck Bunny\Big Buck Bunny.avi''' | |||
| style="background:#FFFFFF; text-align:center;"|''''C:\Movies\Big Buck Bunny\Big Buck Bunny.avi'''' | |||
|} | |} | ||
[[ | |||
If you keep all your movies in one big folder, like this:<br> | |||
''<div style="text-indent: 2em">'''''C:\Movies\Big Buck Bunny.avi'''''<br></div> | |||
''<div style="text-indent: 2em">'''''C:\Movies\Big Buck Bunny II: Rise of the Lepus.avi'''''<br></div> | |||
Then leave all options unticked. | |||
=== Options for content "None" === | |||
;Exclude folder from scans | |||
:Excludes the selected folder from scans, even if it's a subfolder of a folder that has contents set. | |||
=== Options After Selecting Scraper === | |||
;Run Automatic Scan | |||
:Runs a scan against the selected information source (scraper) on all video files contained in the selected folder after selecting 'OK' | |||
;Movies are in separate folders that match the movie title | |||
:Supports using folder.jpg/fanart.jpg as the movie art, as well as more .nfo file reading. If no local information is found, will use the folder name to search when scraping, rather than the filename. | |||
;Folder contains a single Video | |||
:The standard assumption is that the source contains multiple video files, this option dictates that the selected source or folder contains only one video. | |||
;Folder contains a single TV Show | |||
:The standard assumption is that the source contains multiple TV shows, this option dictates that the selected source or folder contains only one TV show. | |||
;Scan Recursively | |||
:Scans subfolders two levels down or more for video files. Note that TV Show scrapers always scan recursively. | |||
;Exclude path from library updates | |||
:Excludes the selected path from scans, even if it's a subfolder of a folder that has contents set. | |||
=== Scraper settings === | |||
Some scrapers like the IMDb scraper allow the user to change options related to that scraper, see more:<br /> | |||
* [[IMDb (Video Library)#IMDb scraper settings|IMDb scraper settings]]<br /> | |||
* [[TheTVDB.com (Video Library)#TheTVDB.com Scraper Settings|TheTVDB.com scraper settings]] | |||
=== Switching Scrapers / Removing Folder Contents from Library === | |||
Setting the content back to '''<None>''' after previously having selected a scraper for a source, will prompt users if they want to remove the contents from the Library.<br /> | |||
This is recommended if you wish to switch scrapers (first set content to '''<None>''' and then choose the new scraper).<br /> | |||
Setting content to '''<None>''' also removes the contents of the selected folder from the Library altogether. This is useful if you want to remove the contents of an entire folder from the Library as [[Video Library#Video Context Menu in Library Mode|The Context Menu]] will only remove single items. | |||
==Incorrect matches== | |||
:''See also: '''[[/Naming TV shows#Tweaking matches]]''''' | |||
After adding new video files, if you find that the information is incorrect, select the incorrect entry and press "'''i'''" to bring up the movie information and then select "'''Refresh'''". From here you can also do a manual title search lookup. Sometimes using a partial title in the manual search will help when a normal search brings up nothing. | |||
Another valid way of making sure your scraper finds its way to correct information for your newly added media is by the use of [[Import - Export Library#Video nfo Files|Nfo files]]. Nfo files can be used to [[Import - Export Library#Movies|provide data for a movie]] or influence the search behavior of scrapers (e.g by pointing it to a [[Import - Export Library#Video nfo files containing an URL|predefined URL]]). | |||
If you would like to remove the entire video database (for example after a bad scan, or you have problems with the library, or for whatever reason), then you can either rename the MyVideos*.db, in /[[userdata]]/Databases/ to something else (i.e. MyVideos*.db.backup) or delete it. Then restart, and the movie & TV show information gathering can be redone. | |||
You can also use [[Add-on:XWMM]] to edit library entires from a web browser. | |||
==Unmatched/missing videos== | |||
{{incomplete}} | |||
==Your own movies or home movie considerations== | |||
If you are here looking to see your home videos in the library there are some special considerations you should be aware of. It took 2 days to get it and it is quite simple in hindsight. This wiki page except for this section is mainly for movies that you are adding to your collection that are referenced somewhere by a scraper tool. Here is a list of links you need to know | |||
*adding a source and it looking for your home movies will not make them show up - because your home movie title is most likely not a famous movie title- and cannot be referenced online by the scraper you have chosen. See below for a scraper that 'just uses the filename'. | |||
*add source for a directory JUST FOR your home movies (the how to is near the top - scroll up) | |||
*Either install the brand new '[http://www.elbsolutions.com/xbmc/scraper/metadata.justUseFilename.org.zip justUseTheFilename]' scraper (manual install for now - working on it) or add nfo files for each file - just read [http://www.pcmediacenter.com.au/forum/topic/35089-home-videos-library-mode-using-nfo-files/ Two guys who have successfully done it - one by movie, other as tv show] | |||
*know [[Import/Export_library|how to make nfo files]] for either each directory or each movie to STOP a scrape from happening - read the [[Import/Export_library|how to]] to look for what to name them and know that all you really need for a movie version inside the nfo file is | |||
<source lang="xml"> | |||
<?xml version="1.0" encoding="utf-8"?> | |||
<movie> | |||
<title>Some title</title> | |||
<originaltitle>Some title just in case - you most likely dont need this either</originaltitle> | |||
<sorttitle>It will sort by this title if you include it</sorttitle> | |||
<genre>HomeMovies</genre> | |||
<id>-1</id> | |||
</movie> | |||
</source> | |||
* realize that xmbc will not look at your nfo files except ONCE. To get a refresh on a whole bunch of files, Exit the Library View (not sure where it is on the atv2 - just go to Files) and on the source you added for your home movies - set content and pick <None>, then do not delete the files, then click OK. Then set content again and re-choose the type as Movie. | |||
If you don't do this, then you will get some light porn artwork for 'Home Movie' and another one for 'ImportExport' which you dont want your kids to ask about. If you have a large collection, the artwork might get worse! | |||
==Off-line media in the library== | |||
If you want to catalog off-line media (such as DVDs or CDs) to the library see: '''[[Media stubs]]''' | |||
==Video guides== | |||
{{youtube|EkWYxqoOF3c}} | |||
==See also== | |||
*[[Thumbnails]] | |||
[[Category:How-to]] | |||
[[Category:Video]] | |||
Revision as of 05:02, 20 February 2012
Template:XBMC wiki toc/v Adding videos to the library/Contents
To use your video files with "metadata" like summaries, cast info, DVD covers, thumbnails, and more, you need to add those video files to the video library.
Naming files
THIS IS THE MOST IMPORTANT STEP TO A SUCCESSFUL LIBRARY SCAN!
In order for the media scrapers to pick up the correct information your file names must follow a certain format:
Supplemental tools
Applications that can assist in renaming files, general file organization, manual data entry, and more:
- TheRenamer - Windows
- Ember Media Manager - Windows
- ViMediaManager - Mac OS X
- Add-on:XWMM - all platforms. Allows you to edit library entires from a web browser.
Adding media sources
Media Sources are the links that tell XBMC where your content is stored and what type of content is contained within each one. You can have multiple sources for each media type.
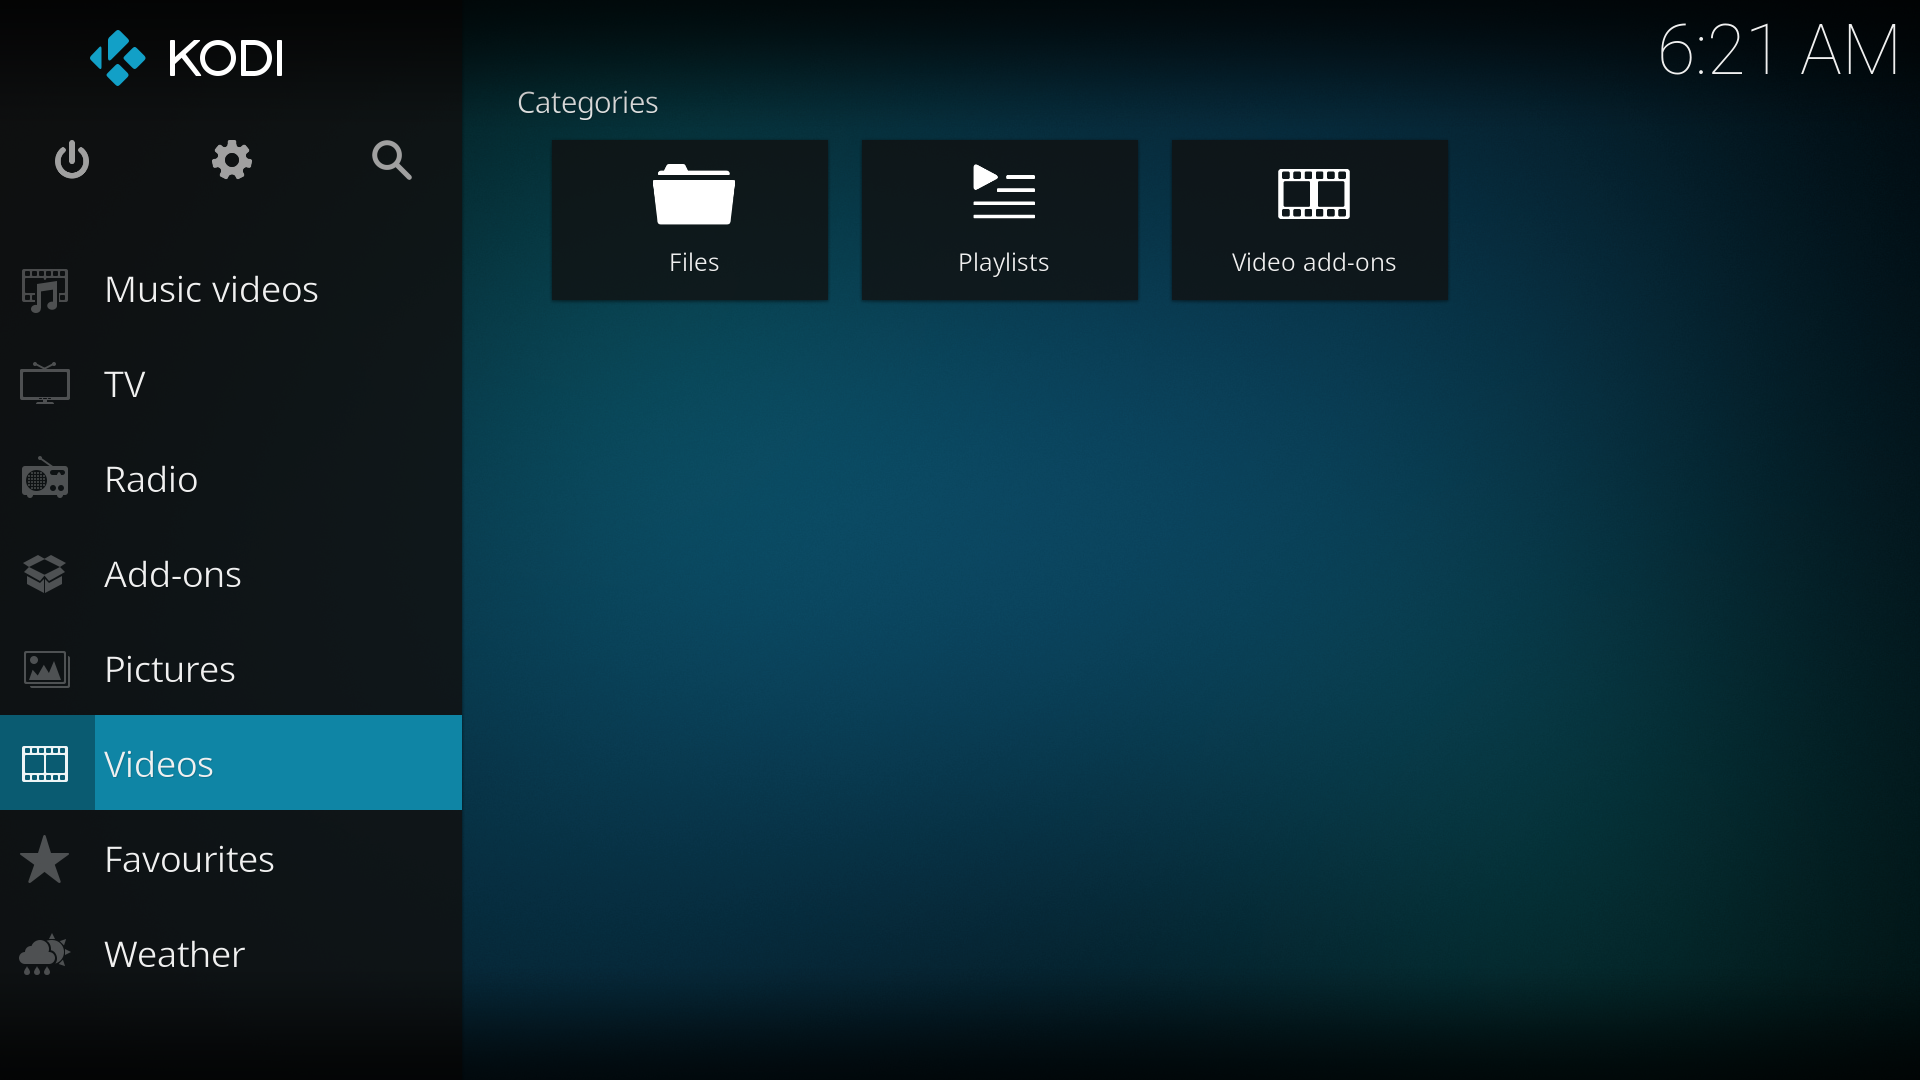
Step 1: Click "Videos" in the home screen menu.
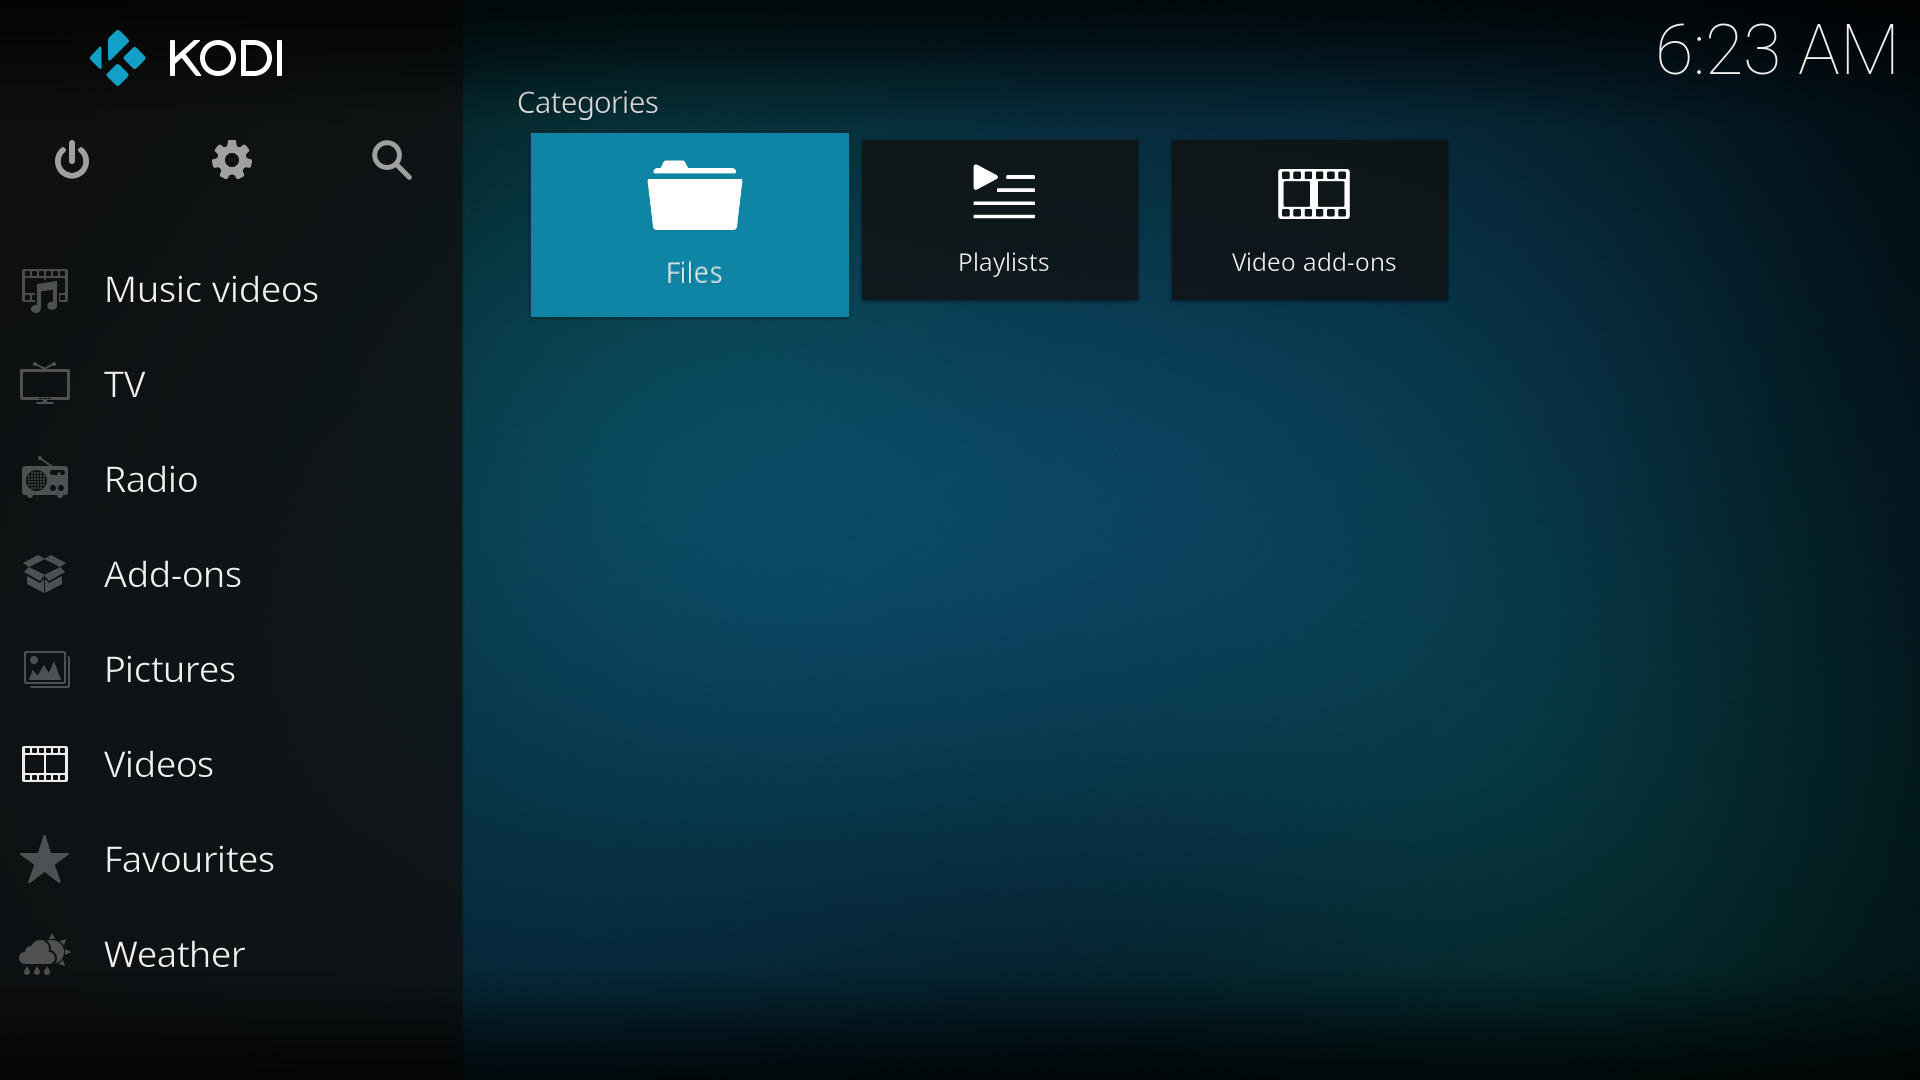
Step 2: Now click "Add Source".
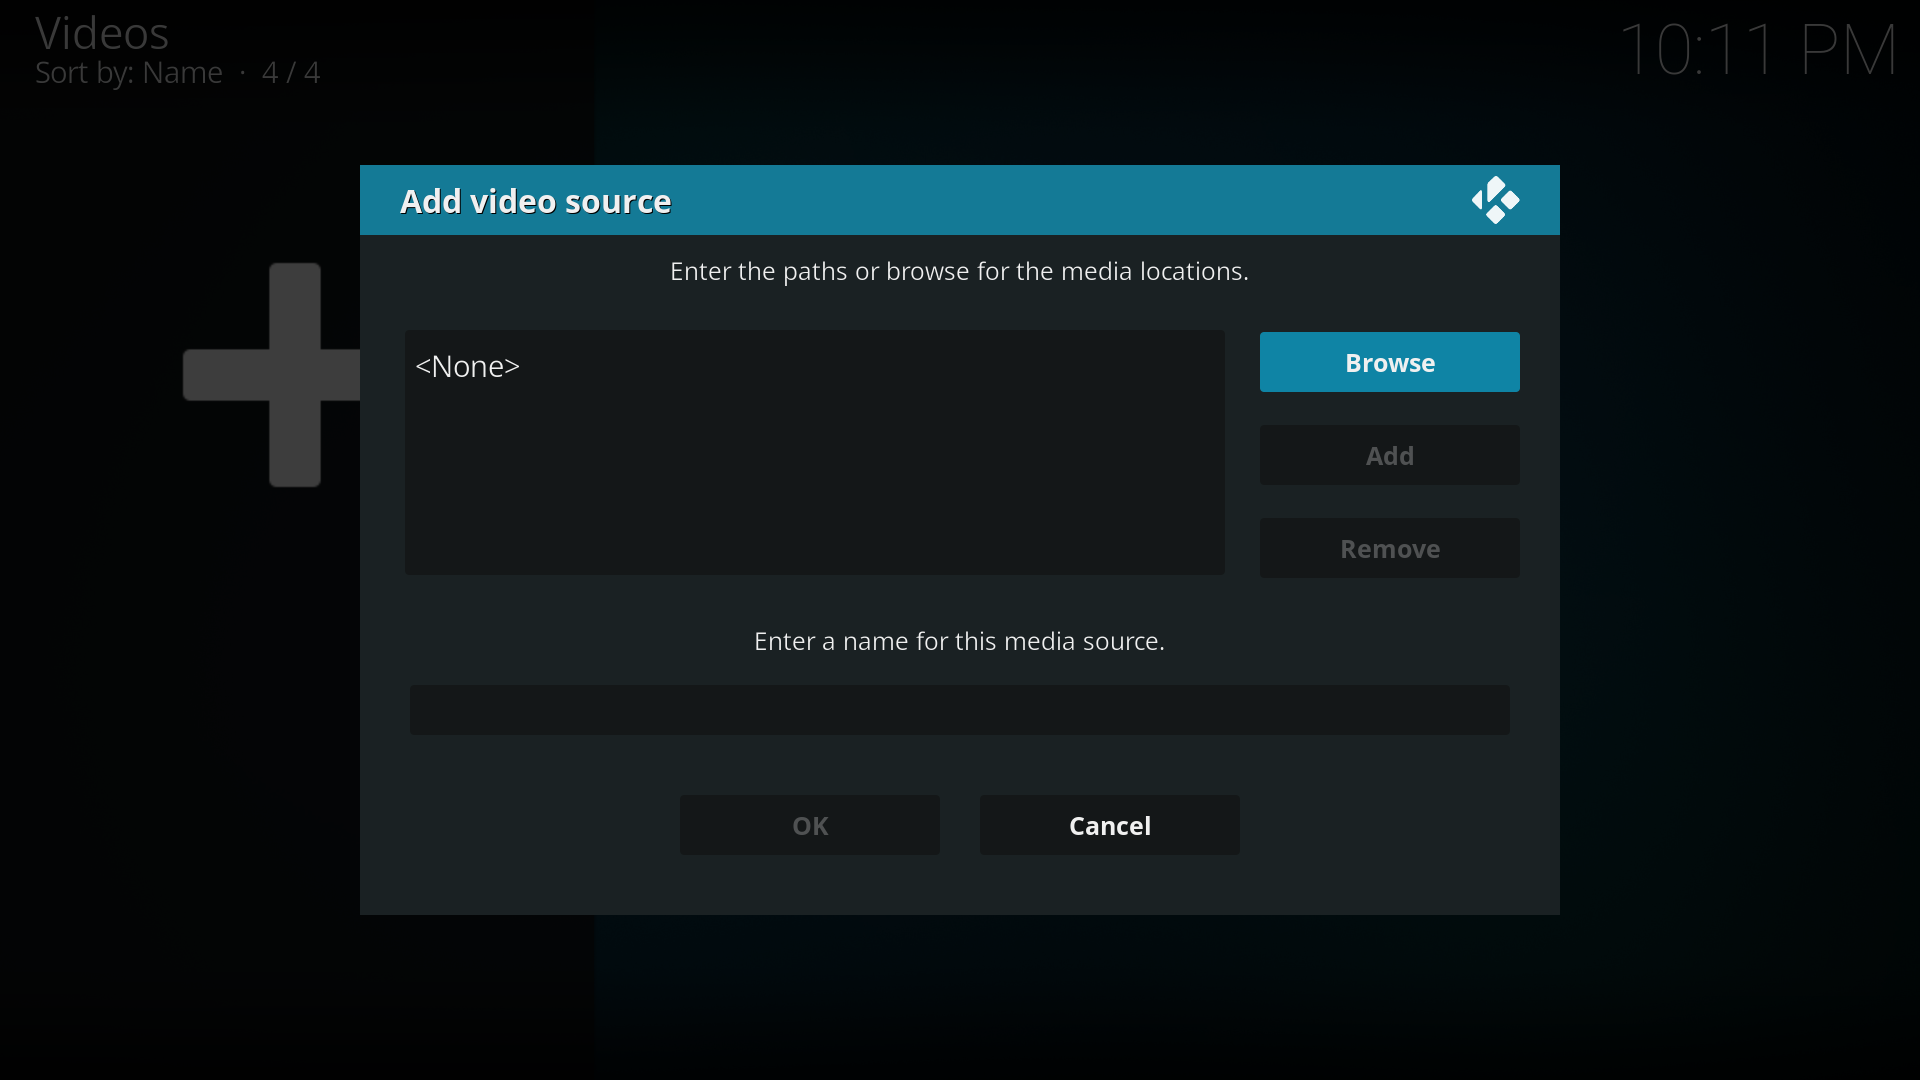
Step 3: The "Add Video Source" screen will be displayed. Then click the "Browse" button.
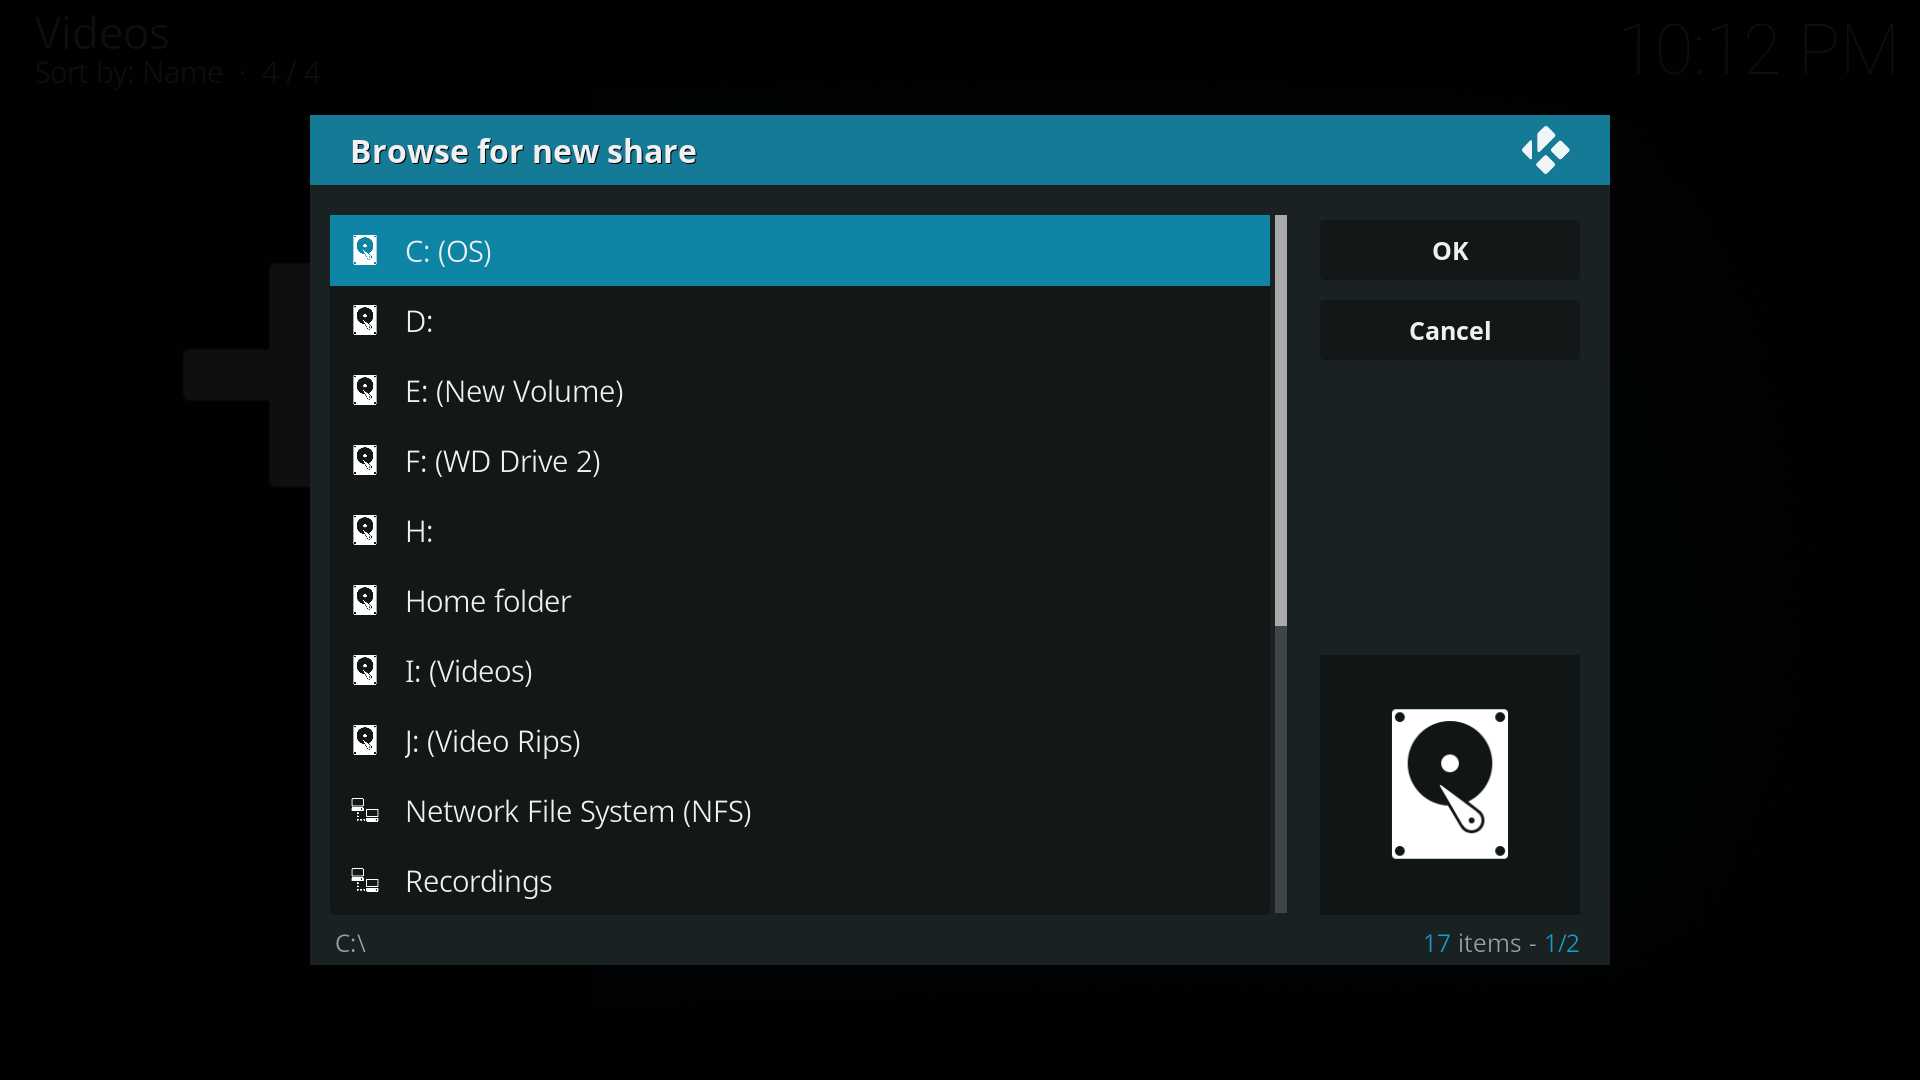
Step 4: Now browse to where you keep your videos stored. Once you have found the folder you keep your videos in, click the "OK" button. If you keep them shared on a network drive, read the Configuring PC Shares article for more information about setting up a share on your computer first.
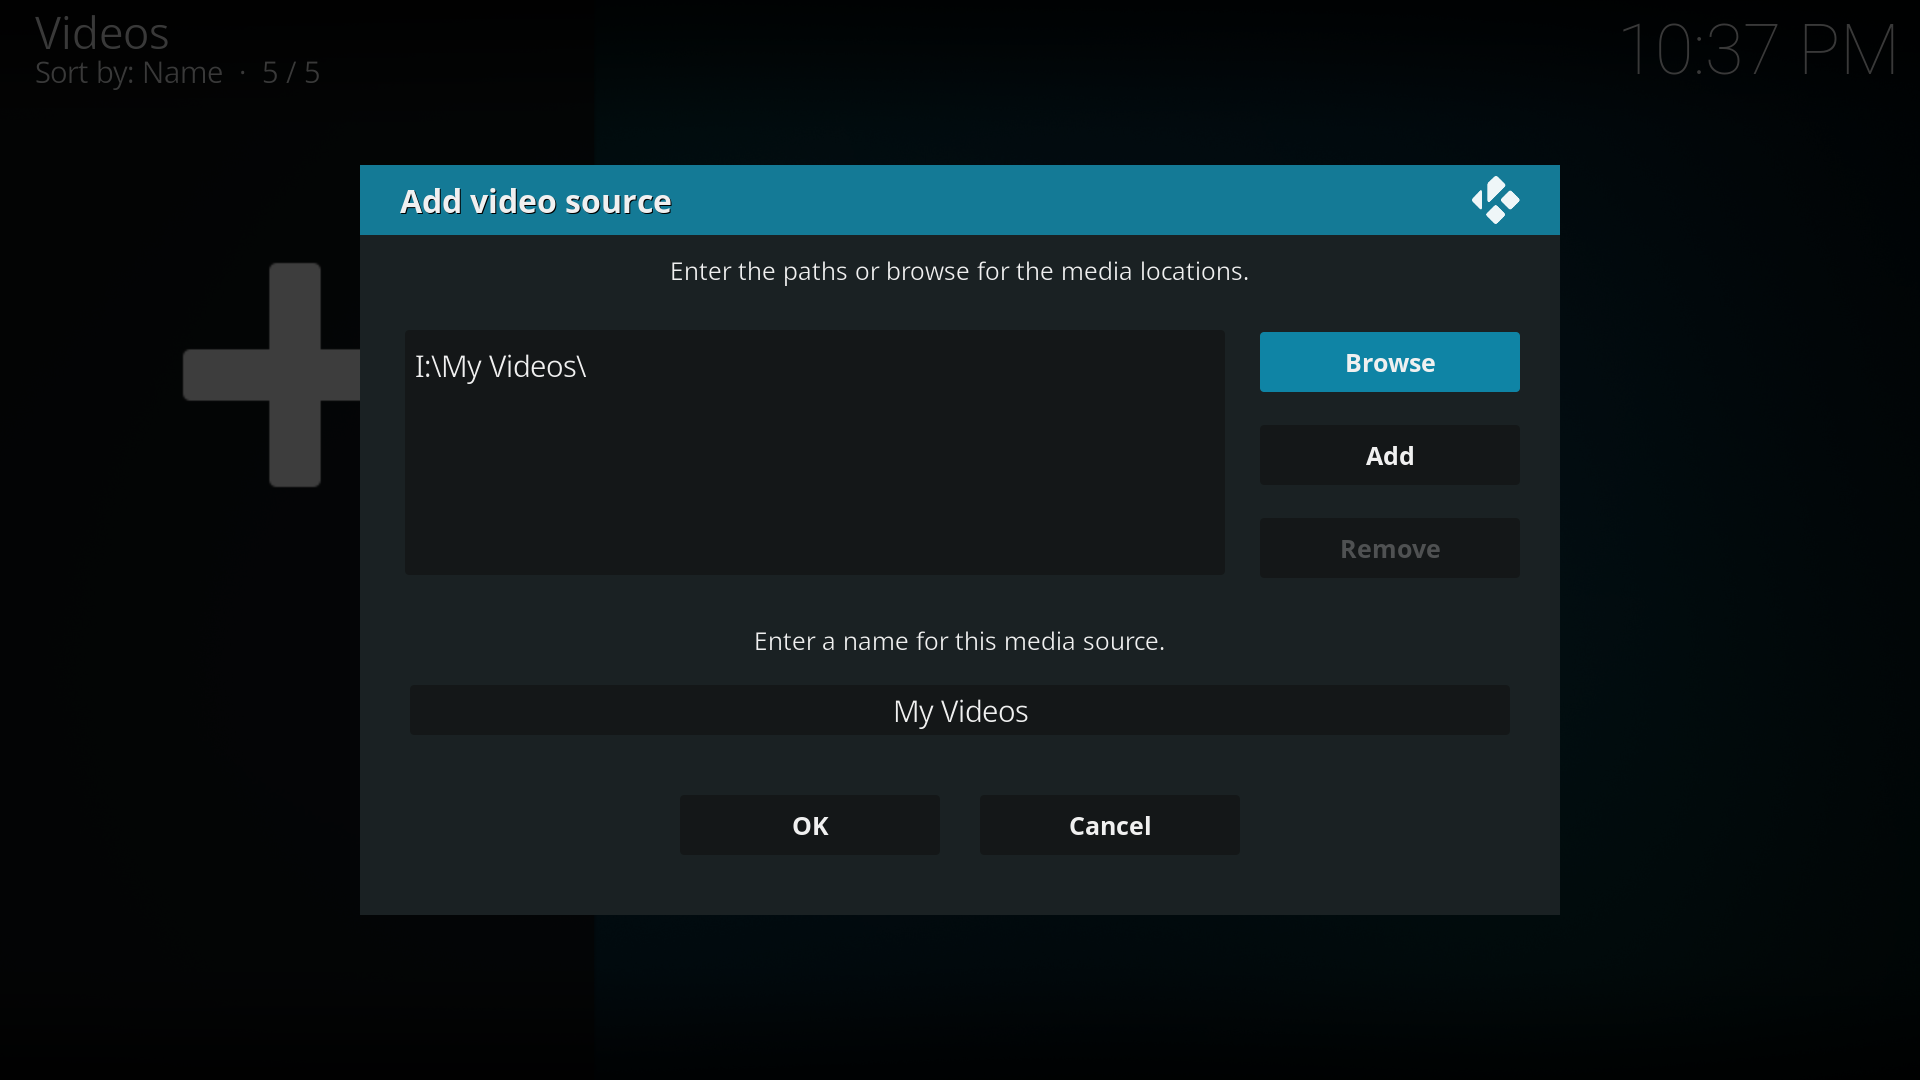
Step 5: Name this Video Source however you like. If it is a movie folder, you will probably want to name it "Movies", and if it is a TV Show folder then you will probably want name it TV Shows. The name doesn't matter to XBMC. Then click "OK".
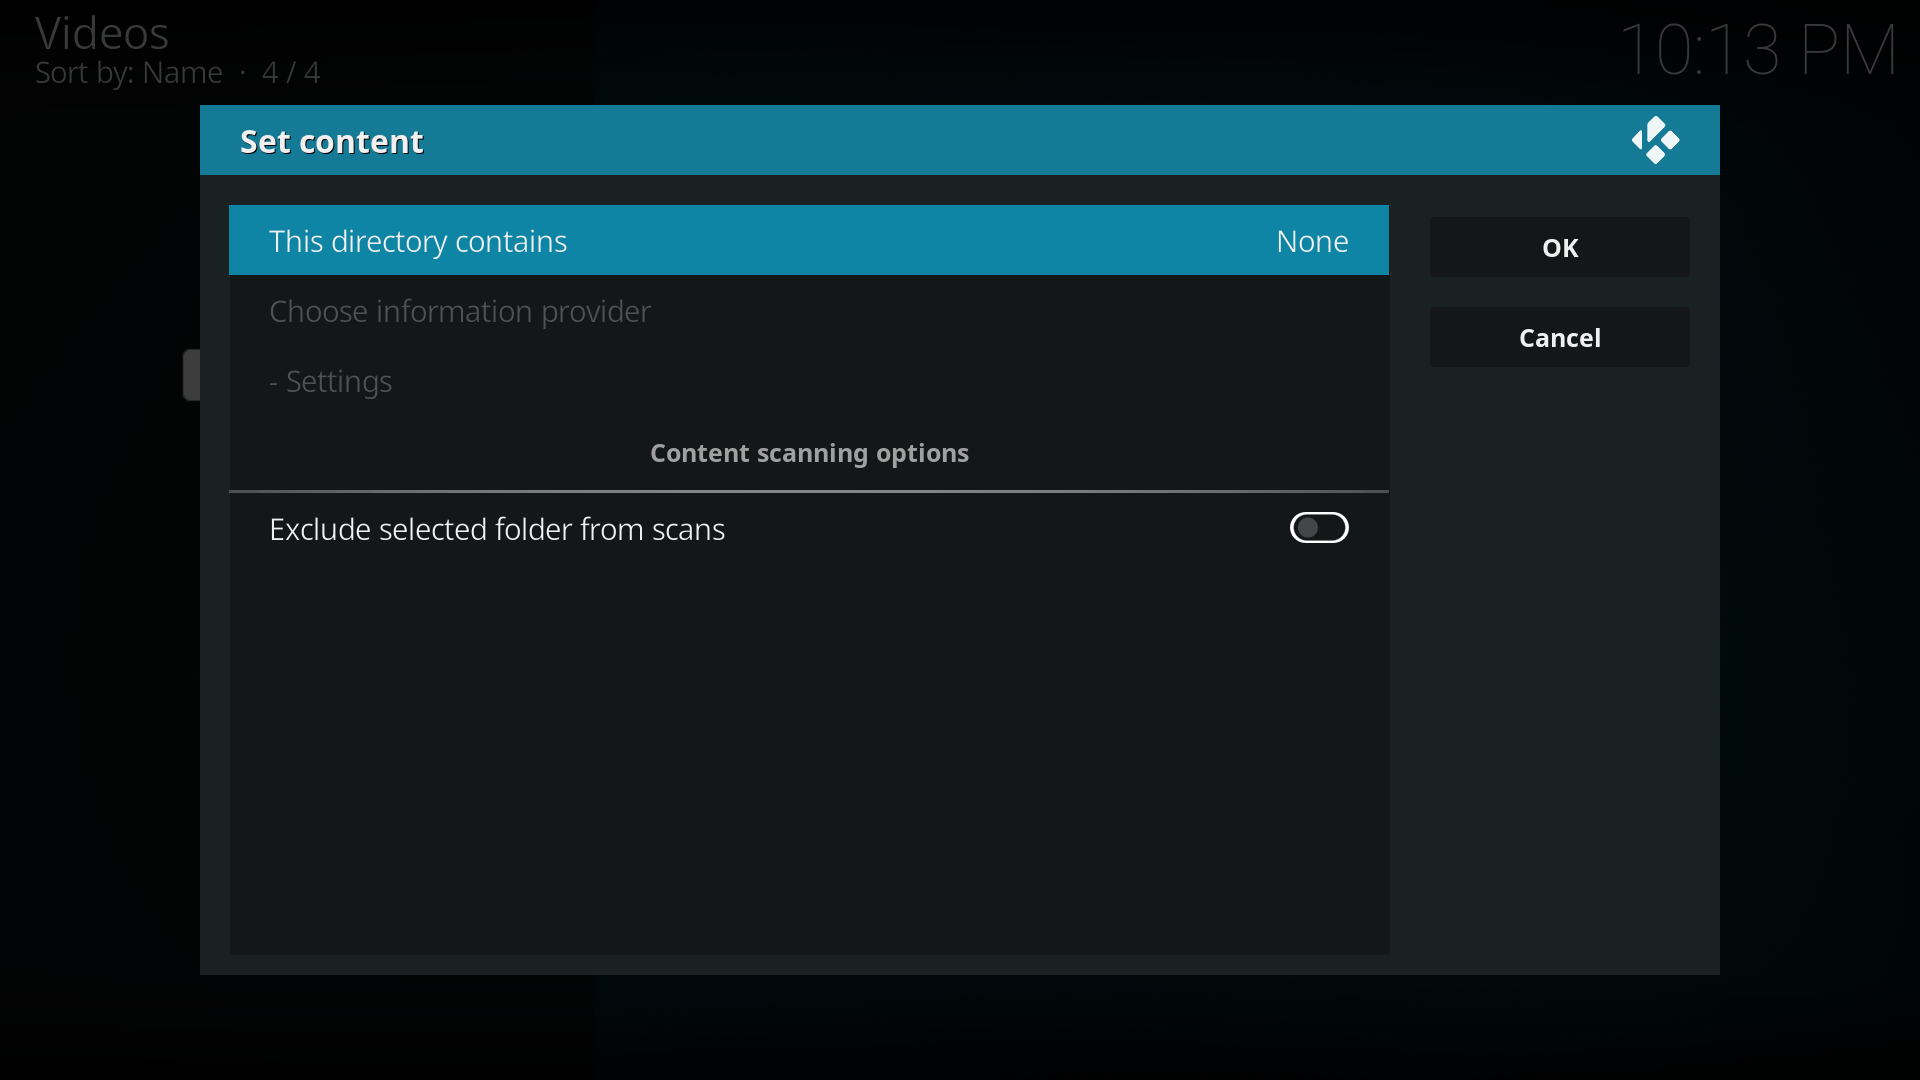
Step 6: The set content window will display, this is where you tell XBMC what type of media is in the folder. Press the down arrow until you reach the correct type (in this example movies)
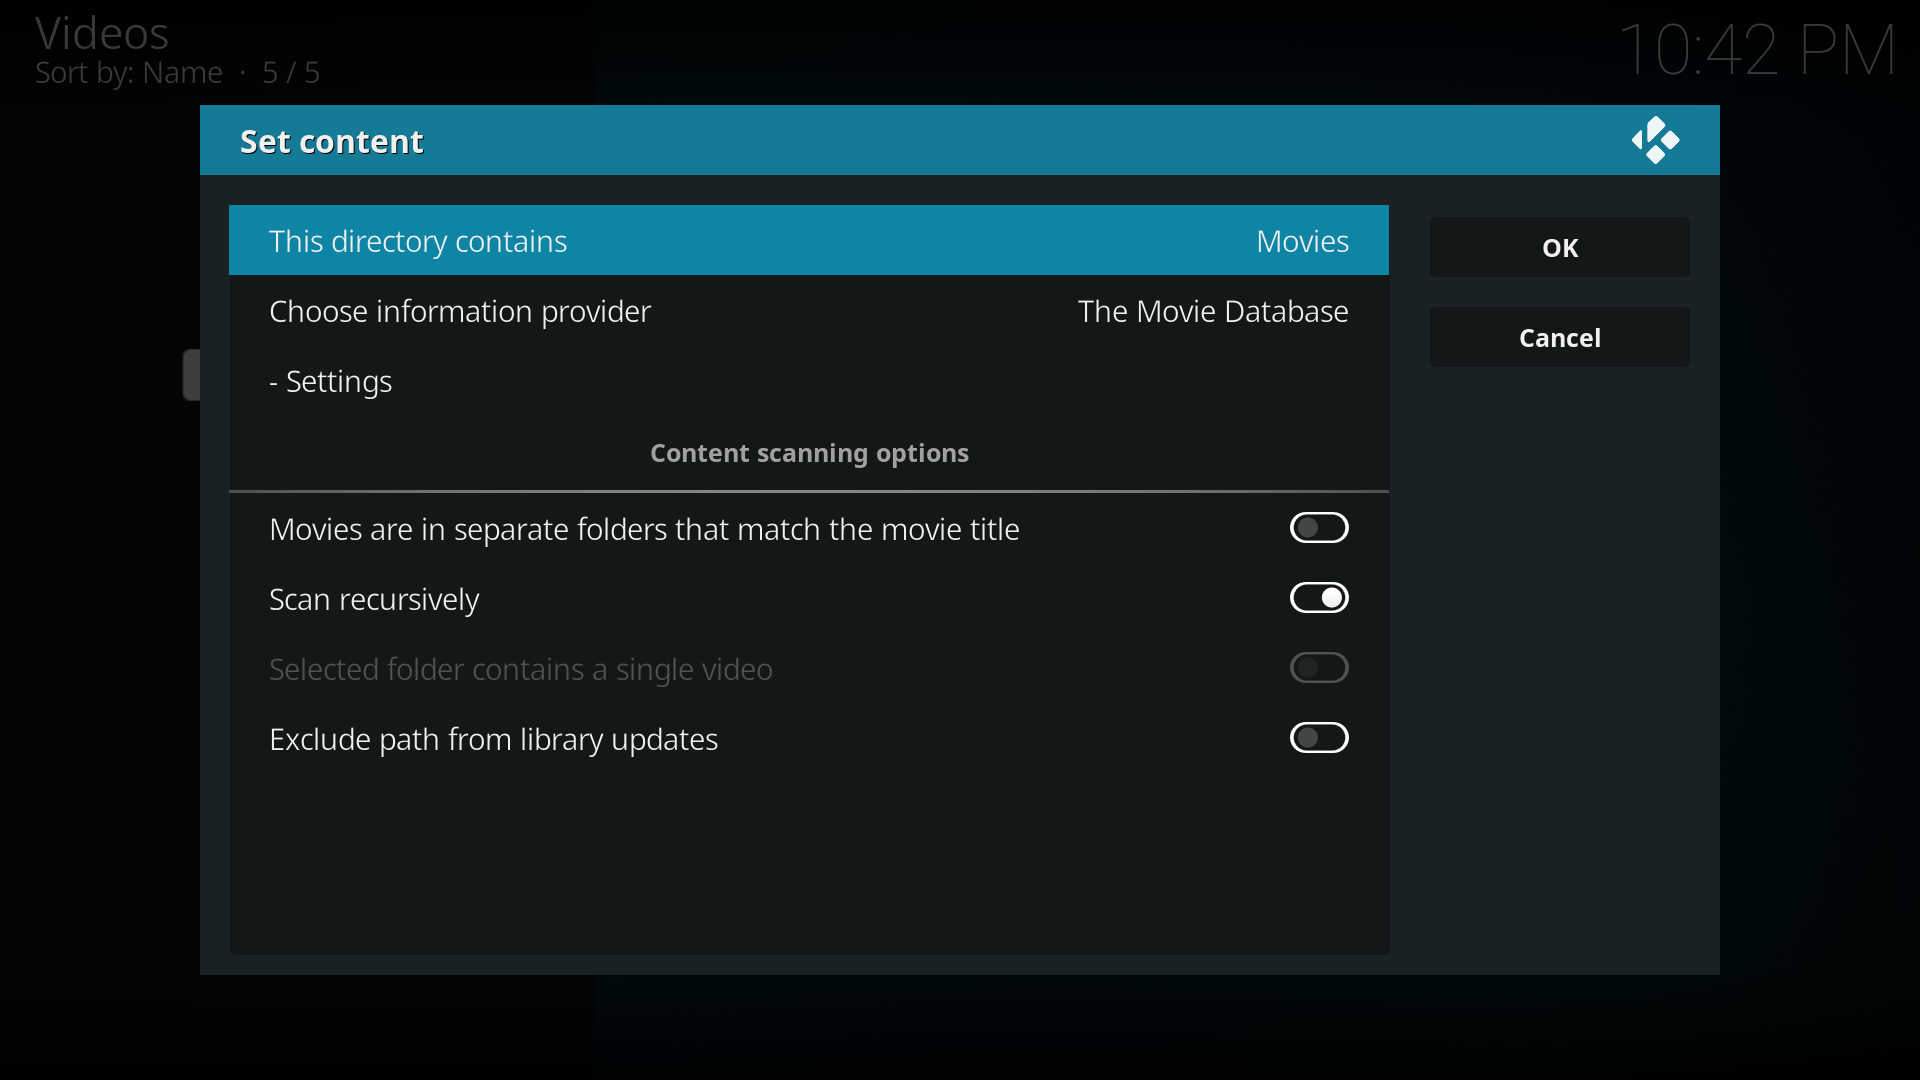
Step 7: There are a number of options underneath, see #Set Content to check what options to enable. Then click "OK"
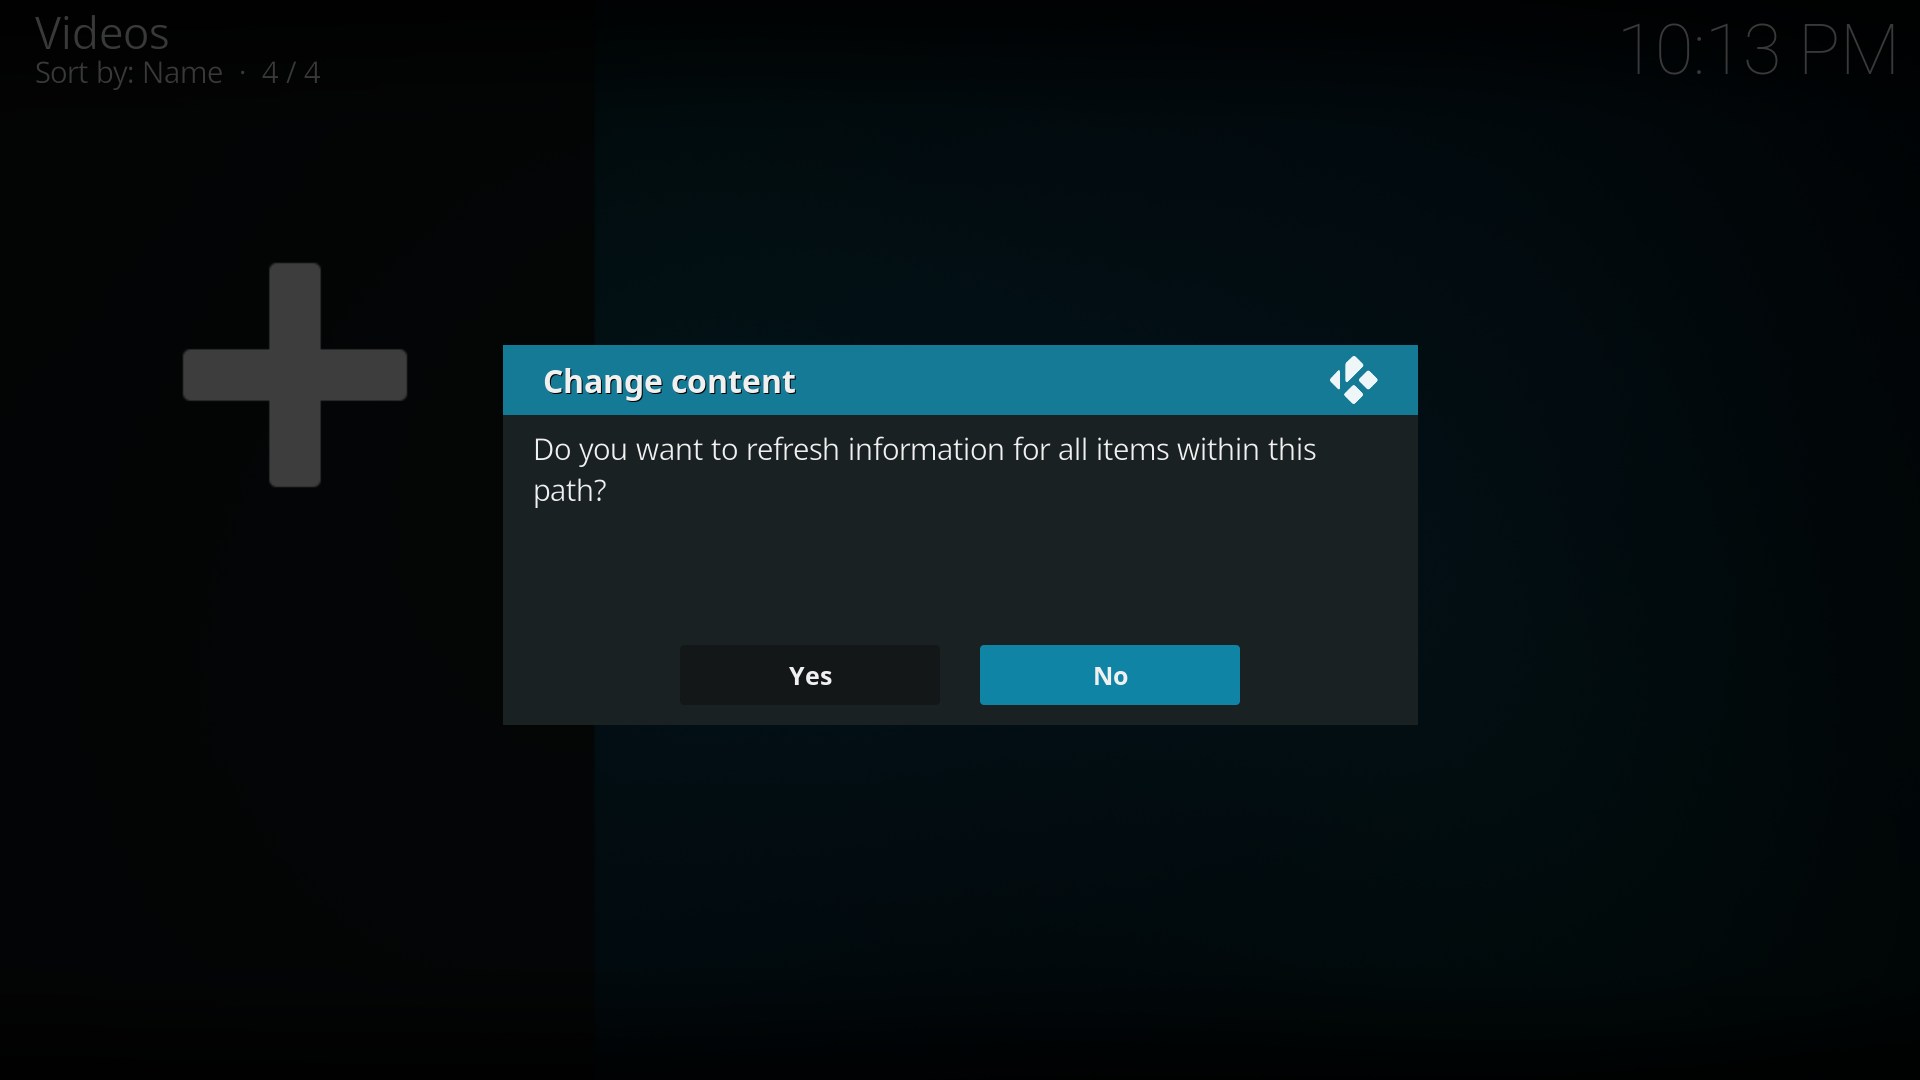
Step 8: Press Yes the scan the content to the library (if no is pressed it can be scanned later).


You have set up a media source, content can be added to this folder then all you will have to do is tell XBMC to "refresh the library" or XBMC can be set to refresh library on start up (in XBMC's settings).
Set Content
This section is why keeping your TV Shows and Movies, or other type of content separate is important. When you click set content, you can set your video content as Music Videos, Movies, or TV Shows. Scroll through the options until you get to the correct one. Because in our example we're adding Movies, we will scroll to "Movies" and go through the Movie Settings.
Movie content options
| (Option) | Movies are in separate folders that match the movie title | Scan Recursively | Selected Folder Contains a Single Movie |
|---|---|---|---|
| (Explanation) | If you keep each of your movies in its own folder with the movie name in it | If your movies are categorised into sub folders (eg genres, a-z). | This option is intended exclusively for adding one movie at a time. |
| (Example) | C:\Movies\Big Buck Bunny\Big Buck Bunny.avi |
|
'C:\Movies\Big Buck Bunny\Big Buck Bunny.avi' |
If you keep all your movies in one big folder, like this:
Then leave all options unticked.
Options for content "None"
- Exclude folder from scans
- Excludes the selected folder from scans, even if it's a subfolder of a folder that has contents set.
Options After Selecting Scraper
- Run Automatic Scan
- Runs a scan against the selected information source (scraper) on all video files contained in the selected folder after selecting 'OK'
- Movies are in separate folders that match the movie title
- Supports using folder.jpg/fanart.jpg as the movie art, as well as more .nfo file reading. If no local information is found, will use the folder name to search when scraping, rather than the filename.
- Folder contains a single Video
- The standard assumption is that the source contains multiple video files, this option dictates that the selected source or folder contains only one video.
- Folder contains a single TV Show
- The standard assumption is that the source contains multiple TV shows, this option dictates that the selected source or folder contains only one TV show.
- Scan Recursively
- Scans subfolders two levels down or more for video files. Note that TV Show scrapers always scan recursively.
- Exclude path from library updates
- Excludes the selected path from scans, even if it's a subfolder of a folder that has contents set.
Scraper settings
Some scrapers like the IMDb scraper allow the user to change options related to that scraper, see more:
Switching Scrapers / Removing Folder Contents from Library
Setting the content back to <None> after previously having selected a scraper for a source, will prompt users if they want to remove the contents from the Library.
This is recommended if you wish to switch scrapers (first set content to <None> and then choose the new scraper).
Setting content to <None> also removes the contents of the selected folder from the Library altogether. This is useful if you want to remove the contents of an entire folder from the Library as The Context Menu will only remove single items.
Incorrect matches
- See also: /Naming TV shows#Tweaking matches
After adding new video files, if you find that the information is incorrect, select the incorrect entry and press "i" to bring up the movie information and then select "Refresh". From here you can also do a manual title search lookup. Sometimes using a partial title in the manual search will help when a normal search brings up nothing.
Another valid way of making sure your scraper finds its way to correct information for your newly added media is by the use of Nfo files. Nfo files can be used to provide data for a movie or influence the search behavior of scrapers (e.g by pointing it to a predefined URL).
If you would like to remove the entire video database (for example after a bad scan, or you have problems with the library, or for whatever reason), then you can either rename the MyVideos*.db, in /userdata/Databases/ to something else (i.e. MyVideos*.db.backup) or delete it. Then restart, and the movie & TV show information gathering can be redone.
You can also use Add-on:XWMM to edit library entires from a web browser.
Unmatched/missing videos

|
INCOMPLETE: This page or section is incomplete. Please add information or correct uncertain data which is marked with a ? |
Your own movies or home movie considerations
If you are here looking to see your home videos in the library there are some special considerations you should be aware of. It took 2 days to get it and it is quite simple in hindsight. This wiki page except for this section is mainly for movies that you are adding to your collection that are referenced somewhere by a scraper tool. Here is a list of links you need to know
- adding a source and it looking for your home movies will not make them show up - because your home movie title is most likely not a famous movie title- and cannot be referenced online by the scraper you have chosen. See below for a scraper that 'just uses the filename'.
- add source for a directory JUST FOR your home movies (the how to is near the top - scroll up)
- Either install the brand new 'justUseTheFilename' scraper (manual install for now - working on it) or add nfo files for each file - just read Two guys who have successfully done it - one by movie, other as tv show
- know how to make nfo files for either each directory or each movie to STOP a scrape from happening - read the how to to look for what to name them and know that all you really need for a movie version inside the nfo file is
<?xml version="1.0" encoding="utf-8"?>
   <movie>
        <title>Some title</title>
        <originaltitle>Some title just in case - you most likely dont need this either</originaltitle>
        <sorttitle>It will sort by this title if you include it</sorttitle>
        <genre>HomeMovies</genre>
        <id>-1</id>
   </movie>
- realize that xmbc will not look at your nfo files except ONCE. To get a refresh on a whole bunch of files, Exit the Library View (not sure where it is on the atv2 - just go to Files) and on the source you added for your home movies - set content and pick <None>, then do not delete the files, then click OK. Then set content again and re-choose the type as Movie.
If you don't do this, then you will get some light porn artwork for 'Home Movie' and another one for 'ImportExport' which you dont want your kids to ask about. If you have a large collection, the artwork might get worse!
Off-line media in the library
If you want to catalog off-line media (such as DVDs or CDs) to the library see: Media stubs
Video guides