Add-on manager: Difference between revisions
>Gamester17 No edit summary |
(Updated for v19) |
||
| (268 intermediate revisions by 24 users not shown) | |||
| Line 1: | Line 1: | ||
{{mininav|[[Settings]]{{l2|[[Add-ons]]}} }} | |||
<section begin="intro" />The ''Add-on manager's'' purpose is to manage the various add-ons to the Kodi application. It can be browsed like any other section and the various installed/uninstalled, enabled/disabled add-ons. In the Add-on manager you can also change the settings for auto update, notifications and search for installed add-ons by bringing up the slide in submenu (press left {{keypress|left}} to show/hide). The Add-on manager is not where you go to run add-ons, but only to install and configure them.<section end="intro" /> | |||
= | == How to access the Add-on browser == | ||
<gallery widths=400px heights=225px> | |||
File:add-ons-accessing-1.png|'''Step 1:''' From the Home screen, navigate to the '''Add-ons''' menu item. Then select '''Enter add-on browser'''. | |||
File:V19Add-ons-accessing-4.png|'''Step 2:''' The '''Add-on browser''', displaying four to six options (explained below). | |||
</gallery> | |||
{{note|You may also enter into the '''Add-on manager''' (see below) by just selecting '''Add-ons''' as show in '''Step 1'''}} | |||
=== | == How to access the Add-on manager == | ||
<gallery widths=400px heights=225px> | |||
File:Add-ons-accessing-1.png|Select '''Add-ons''' from then menu on the Home screen. | |||
File:v19Add-on_manager_main.png|From there you can select which add-on category you want to view. | |||
File:v19Addon_manager_browser_access.png|You will also no longer be able to access the '''Add-on browser''', as shown above from the Home menu, once you have installed your first add-on. Instead you will have to enter the '''Add-on manager''' and select the '''BOX''' icon in the upper left corner. | |||
</gallery> | |||
== | == Add-on manager options == | ||
;My add-ons | |||
:All installed add-ons, disabled or not, can be found in "My add-ons". This includes both a per-category listing as well as a single unified list of all installed add-ons. | |||
;Available updates | |||
:When an update to an add-on is available it will show up here. By default, add-ons are set to update automatically, so this should normally be empty unless you have changed your preferences to prevent automatic update installs. | |||
;Recently updated | |||
:Shows as list of recently updated add-ons. | |||
;Install from repository | |||
:Allows you to install new add-ons from the installed repositories. ''Kodi.tv add-on repository'' is the official add-on repository that is already included in Kodi, but other add-on repository sources can also be installed. (see [[Unofficial repositories#How to install additional add-on repositories|How to install additional add-on repositories]] for more info) | |||
;Install from ZIP file | |||
:Allows the installation of an add-on or repository from a ZIP file, either from the hard drive or LAN. | |||
;Search | |||
:Allows you to search add-ons in the installed repositories and your installed add-ons. | |||
=== Lefthand sidebar menu === | |||
[[File:v19Add-on_manager_sidebar_menu.png|500px|right]] | |||
---- | |||
{{center|'''View options'''}} | |||
;View | |||
: The view mode that items are displayed as. Similar to other areas of the interface, such as the video and audio libraries. Common view modes include lists, icons, and variations on those. | |||
;Order | |||
: This allows you to order add-ons/repositories by '''Ascending''' or '''Descending'''. | |||
;Sort by | |||
:This will allow you to sort add-ons by '''Name''' or '''Last used'''. | |||
;Search | |||
:Allows you to search add-ons in the installed repositories and your installed add-ons. | |||
;Check for updates | |||
:This will search for updates for all add-ons. | |||
;Settings | |||
:This will take you '''Add-ons''' settings page in '''Settings/System''' (see below). | |||
;Get more | |||
:This will allow you to download and install other add-ons from a particular category. | |||
{{note|Not all options will appear depending on what part of the Add-ons section you are in.}} | |||
---- | |||
{{center|'''Settings/System/Add-ons settings'''}} | |||
<section begin="update options" /> | |||
;Updates | |||
: Choose how updates are handled. Options are as follows: | |||
:* '''Install updates automatically''' At least once a day, add-ons that are listed in a repo will automatically be updated if an update is available. If the '''"Notifications"''' option is also enabled, then the user will receive an on-screen notification about the available update and install. | |||
:* '''Notify, but don't install updates''' The same as above, but the update itself will not automatically install. The user will get a notification of available updates, and an "Available updates" folder will appear in the add-on manager list, allowing the user to manually apply updates either for all add-ons or per-add-on. | |||
:* '''Never check for updates''' Kodi will not check for updates nor will it install any known pending updates. The user will also not get any notifications, because Kodi won't know about any pending updates. | |||
<section end="update options" /> | |||
;Show notifications | |||
:If '''"Install updates automatically"''' or '''"Notify, but don't install updates"''' are selected for '''Updates''', then selecting this will also show a notification in the Kodi GUI if add-on updates are found. | |||
;Manage dependencies | |||
:This will all you to individually update dependencies which are need by other add-ons. | |||
;Running | |||
:This will allow you to what add-ons are running. | |||
;Unknown sources | |||
:This will allow you to install or block add-ons from unknown sources. You will need to enable this for installing any add-on/repository not in the Kodi Add-on repository. | |||
;Update official add-ons from | |||
:'''Official repositories only:''' add-ons from official repositories will be prevented from being auto-updated from private repositories (default). | |||
:'''Any repositories:''' is useful for cases such as updating from an add-ons beta repository. Please bear in mind this is a less secure option and enabling it could cause incompatibility issues. | |||
;Reset above settings to default | |||
:This will reset all the Add-on settings to their defaults. | |||
{{-}} | |||
== How to install add-ons from a repository == | |||
<section begin="HOW-TO install" /> | |||
For this example a skin is being installed, the same method is used for other add-ons. | |||
;{{highlight| Select ''Install from repository'' -> Select the repository {{small|(if no other repositories are installed it will automatically open the Kodi Add-on repository)}} -> Select the add-on category -> Select the add-on -> Select ''Install''|bordered=yes}} | |||
<big>To access the Add-on browser see: '''[[Add-on_manager#How_to_access_the_Add-on_browser|How to access the Add-on browser]]'''</big> | |||
<gallery widths=500px heights=313px> | |||
File:v19Installaddon1.png|'''Step 1:''' Select '''Install from repository'''. If no other repositories are installed then this will open directly into the '''Kodi Add-on Repository'''. If other repositories then a different window will open allowing you the choice of which repository you want to use. | |||
File:v19Installaddon3a.png|'''Step 2''' Select the add-on category, in this case '''Look and feel''' (applies to Kodi Jarvis and up only). | |||
File:v19Installaddon3b.png|'''Step 3:''' Select the add-on sub-category, in this case '''Skin'''. | |||
File:v19Installaddon4.png|'''Step 4:''' Select the add-on you want to install, in this case the skin '''Aeon Nox: SiLVO'''. | |||
File:v19Installaddon5.png|'''Step 5:''' A summary dialog will be brought up allowing you to see various properties of the add-on. Select '''Install''' to begin automatic downloading and installation. | |||
File:v19Installaddon5.1.png|'''Step 6:''' Once you select install, Kodi will begin downloading your add-on and you will see the download progress beside the add-on's name. | |||
File:v19Installaddon6.png|'''Step 7:''' Once the add-on and it's dependencies are installed you will be able to use that add-on. In the case of skin installation you'll be asked if you want to change to the installed skin immediately. | |||
</gallery> | |||
When the add-on has finished downloading Kodi will enable it and depending on the add-on ask if you want to start using it. Add-ons will then appear in their appropriate section (e.g. skins in the appearance section of settings, movie scrapers in the options of scrapers when adding a new movie source) | |||
<section end="HOW-TO install" /> | |||
== How to install from a ZIP file == | |||
<section begin="HOW-TO zip" /> | |||
'''Install from zip file''' allows you to install add-ons or repositories which may not be available in the '''Kodi add-on repository'''. To install a add-on or repository from a zip file you will need to enable '''Unknown Source''' from '''Settings/System/Add-ons'''. This can be done at the time of installation. | |||
{{note|By enabling '''Unknown Sources''', Add-ons will be given access to your personal data stored on your device. By allowing, you agree that you are solely responsible for any loss of data, unwanted behavior, or damage to your device.}} | |||
<big>To access the Add-on browser see: '''[[Add-on_manager#How_to_access_the_Add-on_browser|How to access the Add-on browser]] or [[Add-on_manager#How_to_access_the_Add-on_manager|How to access the Add-on manager]]'''</big> | |||
<gallery widths=500px heights=313px> | |||
File:v19Addon_install_from_zip.png|'''Step 1:''' Select '''Install from zip file''' | |||
File:v19Addon_install_from_zip_1.png|'''Step 2:''' If you have not enabled '''Unknown Sources''', you will notified that it is disabled. If you wish to enable select '''Settings''', if you do not wish to enable select '''OK'''. If you have already enabled '''Unknown sources''' skip to '''Step 6''''. | |||
File:v19Addon_unknown_sources.png|'''Step 3:''' When you select '''Settings''' you will be taken to the Add-ons settings window. Enable '''Unknown sources''' if you wish to install your add-on or repository from a zip file. | |||
File:v19Addon_unknown_sources_1.png|'''Step 4:''' After you enable '''Unknown sources''' you will be presented with a '''Warning'''. Make sure you read and understand this warning, then select '''Yes''' if you wish to proceed. | |||
File:v19Addon_install_from_zip.png|'''Step 5:''' If you have selected '''Yes''' and enabled '''Unknown sources''' you can then navigate back to the '''Add-on browser''' and once again select '''Install from zip file''' | |||
File:v19Addon_unknown_sources_2.png|'''Step 6:''' You will now be presented with a warning about your add-on not being updated unless the update is hosted in a repository on a remote server. | |||
File:v19Addon_install_from_zip_3.png|'''Step 7:''' You will now be presented with a browser window where you can navigate to where your zip file is stored. Your zip file can be stored anywhere your device has access to and can be either on local storage or a network share. | |||
File:v19Addon_install_from_zip_2.png|'''Step 8:''' Once you have navigated to the zip file you want installed, select it then select '''OK'''. After your add-on and any dependencies have finished installing you will be able to use it. {{note|If you have issues with the add-on installing or after installing it does not work as intended, you will need to contact the '''Add-on Author'''.}} | |||
</gallery> | |||
<section end="HOW-TO zip" /> | |||
== Repositories == | |||
Repositories are storage locations from where add-ons can be retrieved from. They allow the user to browse for more add-ons of all types, as well as allowing Kodi to check them for updates to add-ons, so they don't have to be manually installed. Kodi comes with one official add-on repositories installed by default, ''Kodi.tv add-on repository''. However others can be added. | |||
To install a new repository you must first find the ZIP file to install the repository, a list of [[unofficial add-on repositories]] (third-party add-on repositories) is semi-maintained on the wiki - other repositories may exist. Then follow the instructions at [[Add-ons#How to install from a ZIP file|How to install from a ZIP file]]. | |||
== Updating == | |||
There are several ways to update add-ons, depending on your settings in '''Settings→System settings→Add-ons'''. | |||
'''<big>Automatic updates</big>''' | |||
The first method, and easiest, is if you have '''Install updates automatically''' (default) enabled. With this method, any add-on installed that's in an installed repository will automatically update when there is a new one available. | |||
'''<big>Check available updates</big>''' | |||
The second method is if you have '''Notify, but don't install updates''' selected. Assuming that you have '''Show notifications''' also enabled in the settings, you will be notified when a update is available and you can use the following method to update. {{note|If you don't have '''Show notifications''' enabled you can still use this method, but you will not know when a update has become available}}. | |||
<gallery widths=500px heights=313px> | |||
File:v19Estuary_home_available_updates.png|'''Step 1:''' From the Home screen, naviagate to '''Add-ons''', then select '''Available updates'''. | |||
File:v19Addon_update.png|'''Step 2:''' Select the add-on you want to update. | |||
File:v19Addon_update_download.png|'''Step 3:''' The add-ons will then download and install. When finished you will be notified that the add-ons have been updated. | |||
</gallery> | |||
'''<big>Update all</big>''' | |||
The third method is to update all add-ons. To do this, access the <big>[http://kodi.wiki/view/Add-on_manager#How_to_access_the_Add-on_manager Add-on Mangager]</big>. | |||
<gallery widths=500px heights=313px> | |||
File:v19Addons_update_all.png|Then at the top of the menu bar, select the update all icon (shown above). The number of available updates will appear next to the icon. | |||
</gallery> | |||
'''<big>Manually updating</big>''' | |||
The forth method is to update manually. | |||
<gallery widths=500px heights=313px> | |||
File:v19Addon_update_manual.png|From the Home screen, select '''Add-ons''', then in the '''Add-ons manager''' select the correct category for your add-on or go to '''My add-ons''' (this can also be done from the Home screen) and select '''All'''. Navigate to your add-on and select it. Then select '''Versions'''. | |||
File:v19Addon_update_select_version.png|Select the desired version and it will install. | |||
</gallery> | |||
'''<big>Update from ZIP file</big>''' | |||
If you installed a add-on from a zip file and/or it isn't in a repository, then you will need to update from a zip file. To do this see <big>[[Add-on_manager#How_to_install_from_a_ZIP_file|How to install from a ZIP file]]</big>. Updating from a zip is the same method, just choose the new file to install. | |||
== See also == | |||
* [[:Category:All add-ons]] | |||
* [[Unofficial add-on repositories]] - Third-party add-on repositories | |||
'''Development:''' | |||
* [[Add-on development]] | |||
* [[Python development]] | |||
* [[Skinning]] | |||
* [[Add-on repositories]] | |||
* [[Official add-on repository]] | |||
{{Updated|19}} | |||
[[Category:Add-ons]] | [[Category:Add-ons]] | ||
[[Category: | [[Category:Settings]] | ||
[[Category:Manual]] | |||
Latest revision as of 09:46, 21 March 2021
The Add-on manager's purpose is to manage the various add-ons to the Kodi application. It can be browsed like any other section and the various installed/uninstalled, enabled/disabled add-ons. In the Add-on manager you can also change the settings for auto update, notifications and search for installed add-ons by bringing up the slide in submenu (press left ← to show/hide). The Add-on manager is not where you go to run add-ons, but only to install and configure them.
How to access the Add-on browser
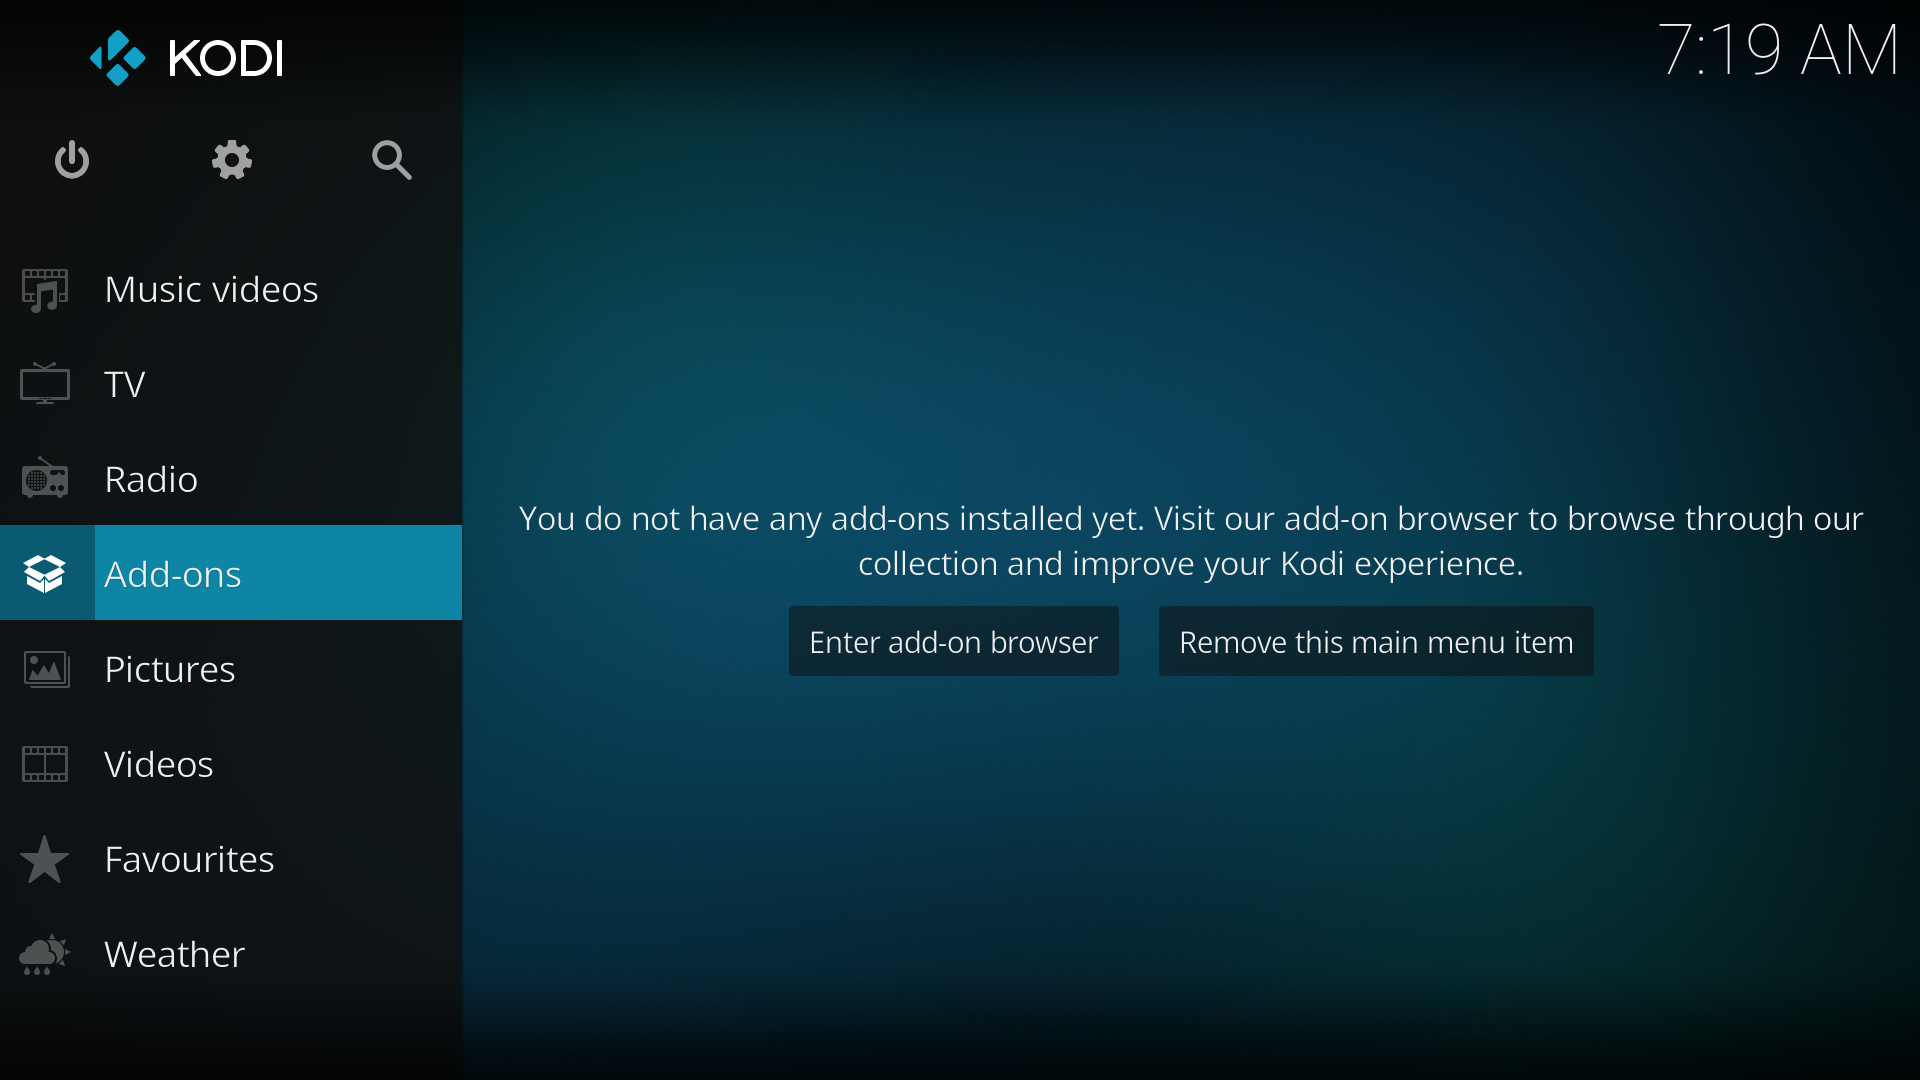
Step 1: From the Home screen, navigate to the Add-ons menu item. Then select Enter add-on browser.
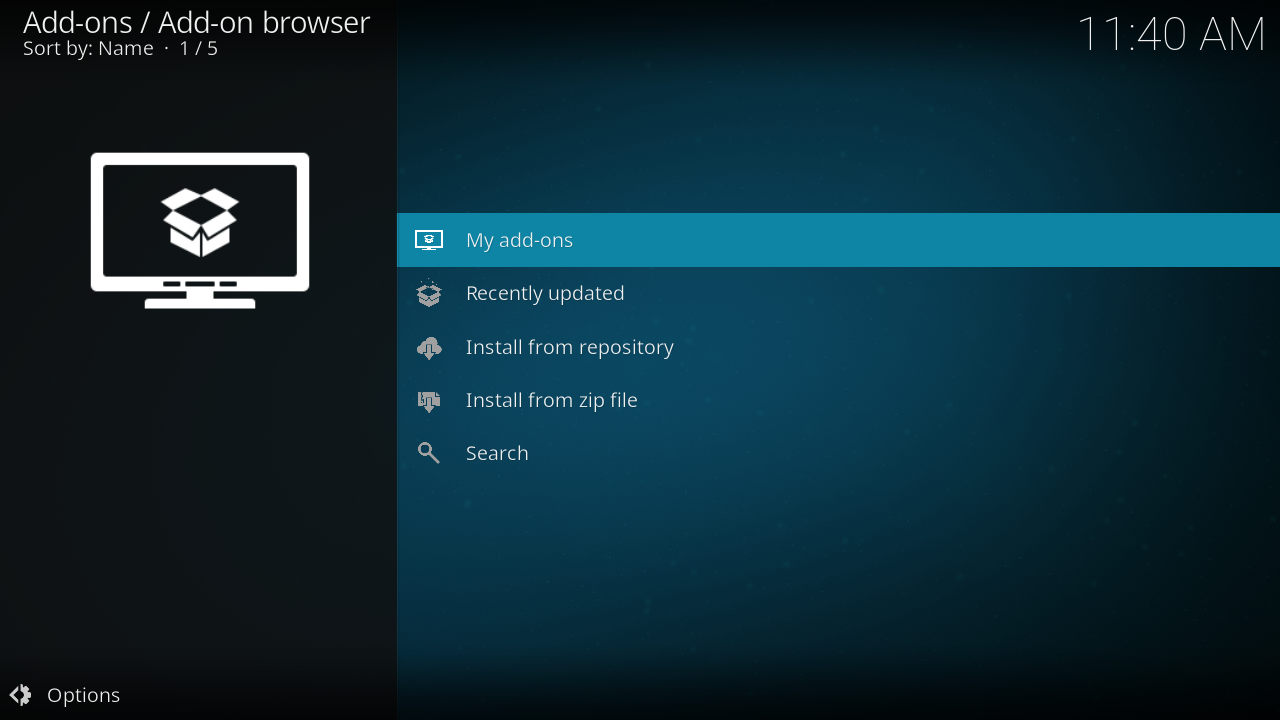
Step 2: The Add-on browser, displaying four to six options (explained below).


Note: You may also enter into the Add-on manager (see below) by just selecting Add-ons as show in Step 1
How to access the Add-on manager
Select Add-ons from then menu on the Home screen.

From there you can select which add-on category you want to view.
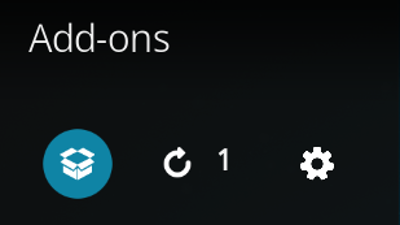
You will also no longer be able to access the Add-on browser, as shown above from the Home menu, once you have installed your first add-on. Instead you will have to enter the Add-on manager and select the BOX icon in the upper left corner.


Add-on manager options
- My add-ons
- All installed add-ons, disabled or not, can be found in "My add-ons". This includes both a per-category listing as well as a single unified list of all installed add-ons.
- Available updates
- When an update to an add-on is available it will show up here. By default, add-ons are set to update automatically, so this should normally be empty unless you have changed your preferences to prevent automatic update installs.
- Recently updated
- Shows as list of recently updated add-ons.
- Install from repository
- Allows you to install new add-ons from the installed repositories. Kodi.tv add-on repository is the official add-on repository that is already included in Kodi, but other add-on repository sources can also be installed. (see How to install additional add-on repositories for more info)
- Install from ZIP file
- Allows the installation of an add-on or repository from a ZIP file, either from the hard drive or LAN.
- Search
- Allows you to search add-ons in the installed repositories and your installed add-ons.

- View
- The view mode that items are displayed as. Similar to other areas of the interface, such as the video and audio libraries. Common view modes include lists, icons, and variations on those.
- Order
- This allows you to order add-ons/repositories by Ascending or Descending.
- Sort by
- This will allow you to sort add-ons by Name or Last used.
- Search
- Allows you to search add-ons in the installed repositories and your installed add-ons.
- Check for updates
- This will search for updates for all add-ons.
- Settings
- This will take you Add-ons settings page in Settings/System (see below).
- Get more
- This will allow you to download and install other add-ons from a particular category.
Note: Not all options will appear depending on what part of the Add-ons section you are in.
- Updates
- Choose how updates are handled. Options are as follows:
- Install updates automatically At least once a day, add-ons that are listed in a repo will automatically be updated if an update is available. If the "Notifications" option is also enabled, then the user will receive an on-screen notification about the available update and install.
- Notify, but don't install updates The same as above, but the update itself will not automatically install. The user will get a notification of available updates, and an "Available updates" folder will appear in the add-on manager list, allowing the user to manually apply updates either for all add-ons or per-add-on.
- Never check for updates Kodi will not check for updates nor will it install any known pending updates. The user will also not get any notifications, because Kodi won't know about any pending updates.
- Show notifications
- If "Install updates automatically" or "Notify, but don't install updates" are selected for Updates, then selecting this will also show a notification in the Kodi GUI if add-on updates are found.
- Manage dependencies
- This will all you to individually update dependencies which are need by other add-ons.
- Running
- This will allow you to what add-ons are running.
- Unknown sources
- This will allow you to install or block add-ons from unknown sources. You will need to enable this for installing any add-on/repository not in the Kodi Add-on repository.
- Update official add-ons from
- Official repositories only: add-ons from official repositories will be prevented from being auto-updated from private repositories (default).
- Any repositories: is useful for cases such as updating from an add-ons beta repository. Please bear in mind this is a less secure option and enabling it could cause incompatibility issues.
- Reset above settings to default
- This will reset all the Add-on settings to their defaults.
How to install add-ons from a repository
For this example a skin is being installed, the same method is used for other add-ons.
- Select Install from repository -> Select the repository (if no other repositories are installed it will automatically open the Kodi Add-on repository) -> Select the add-on category -> Select the add-on -> Select Install
To access the Add-on browser see: How to access the Add-on browser
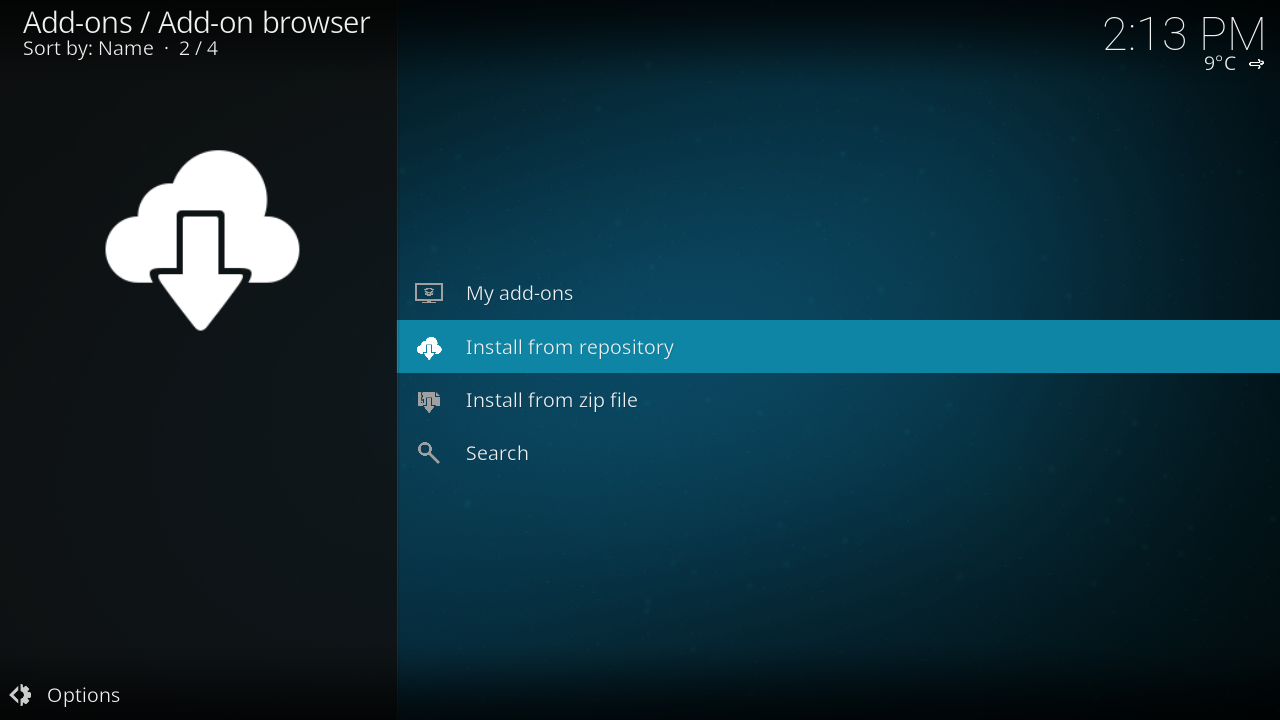
Step 1: Select Install from repository. If no other repositories are installed then this will open directly into the Kodi Add-on Repository. If other repositories then a different window will open allowing you the choice of which repository you want to use.
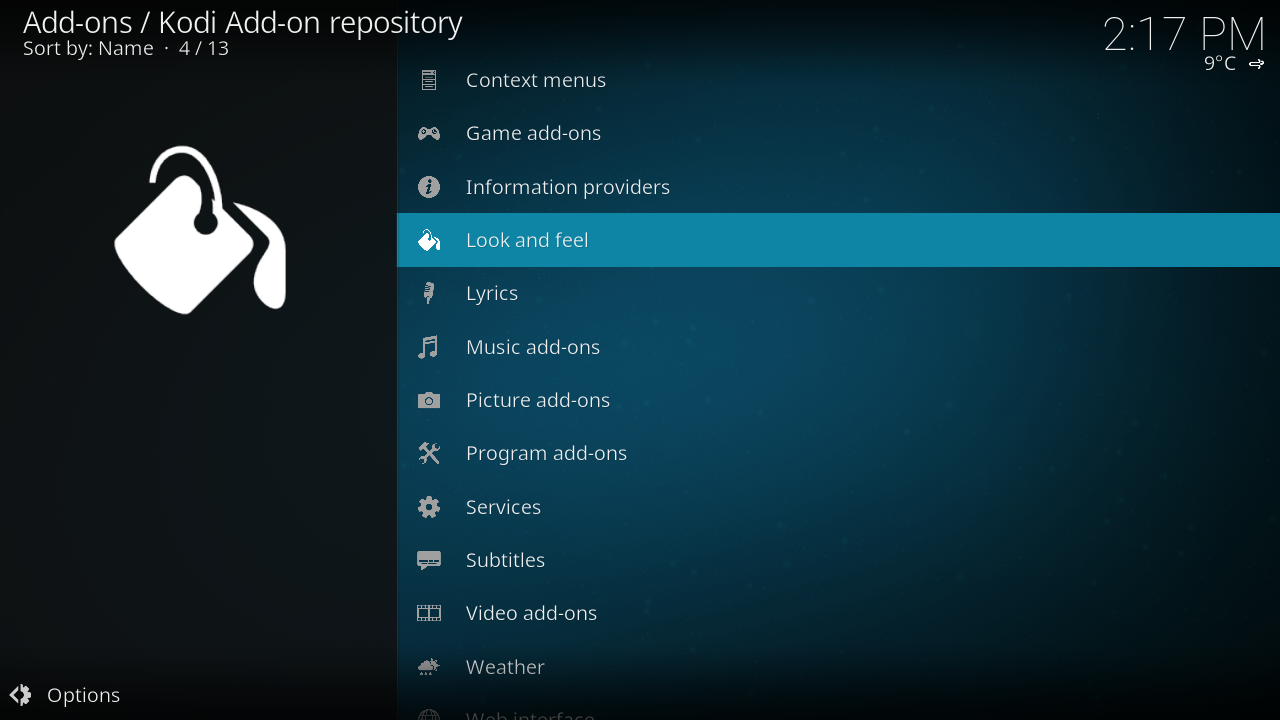
Step 2 Select the add-on category, in this case Look and feel (applies to Kodi Jarvis and up only).
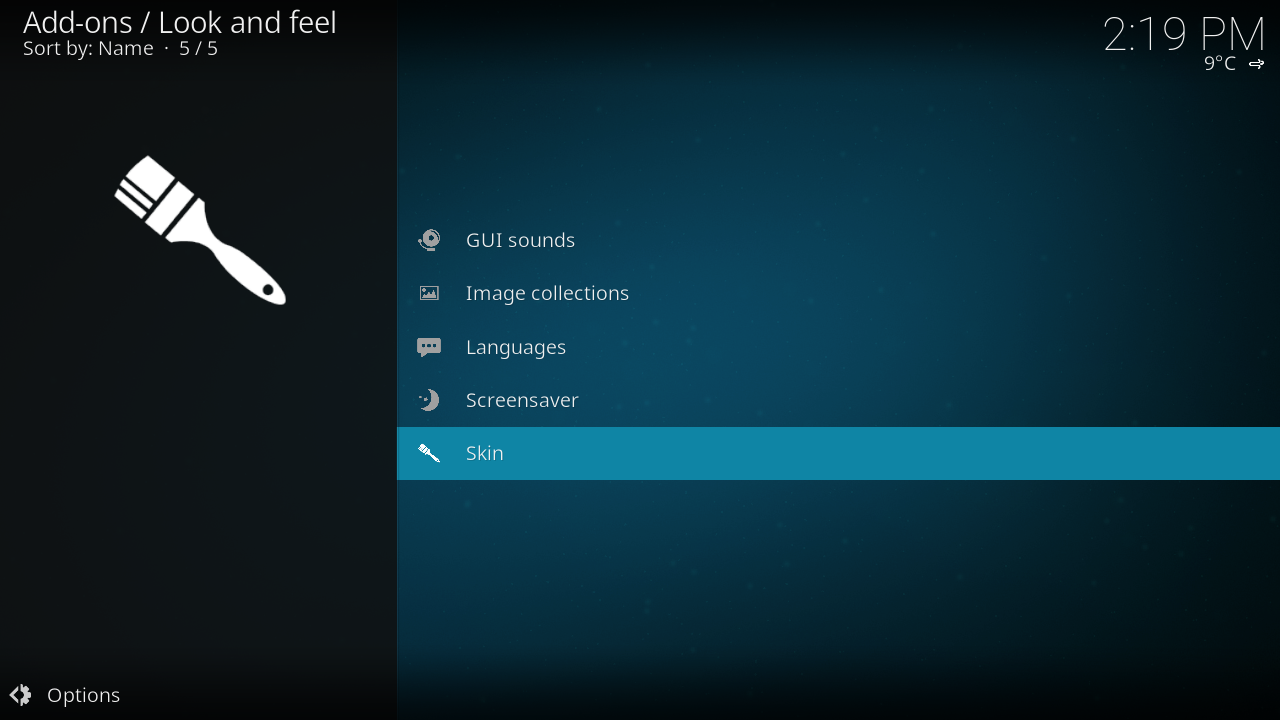
Step 3: Select the add-on sub-category, in this case Skin.

Step 4: Select the add-on you want to install, in this case the skin Aeon Nox: SiLVO.
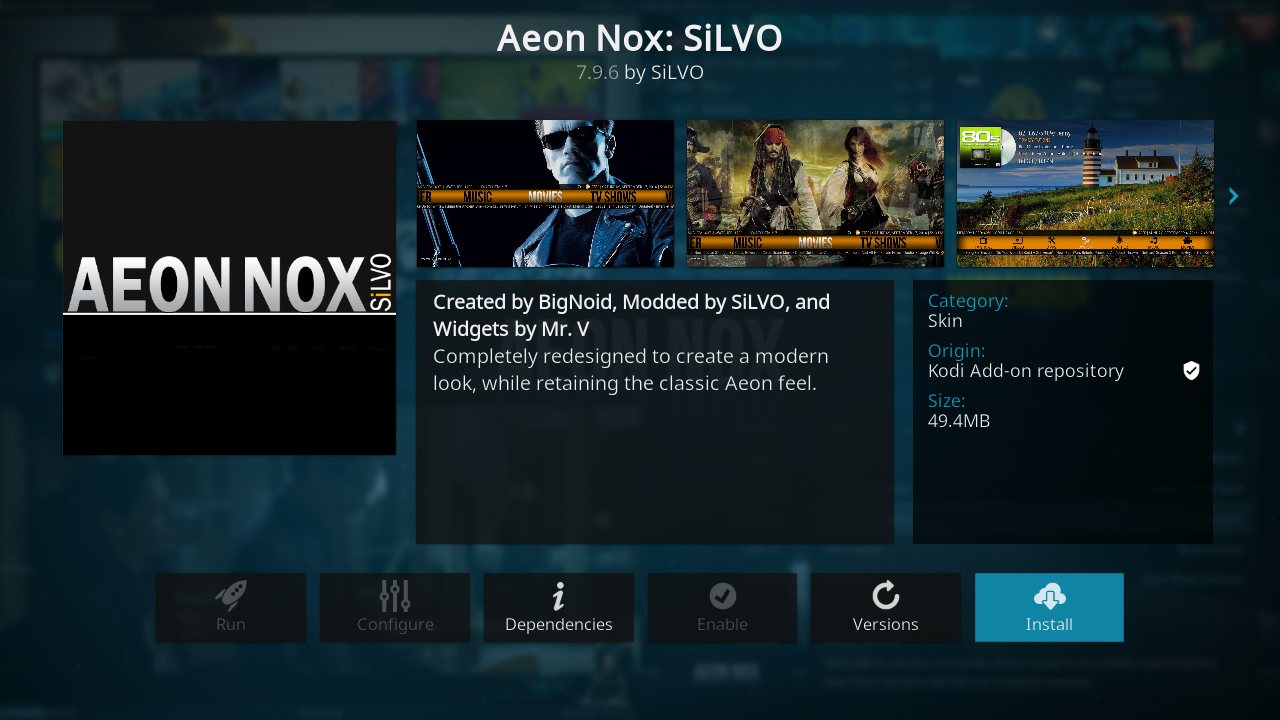
Step 5: A summary dialog will be brought up allowing you to see various properties of the add-on. Select Install to begin automatic downloading and installation.
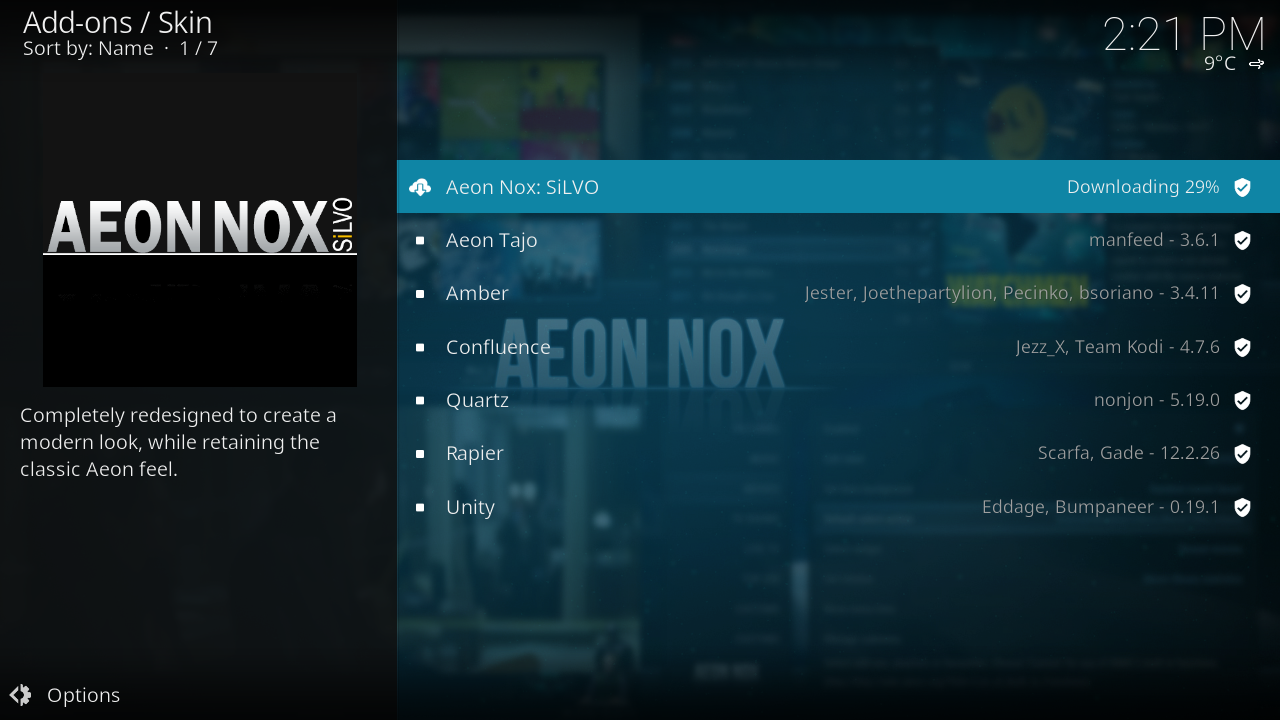
Step 6: Once you select install, Kodi will begin downloading your add-on and you will see the download progress beside the add-on's name.
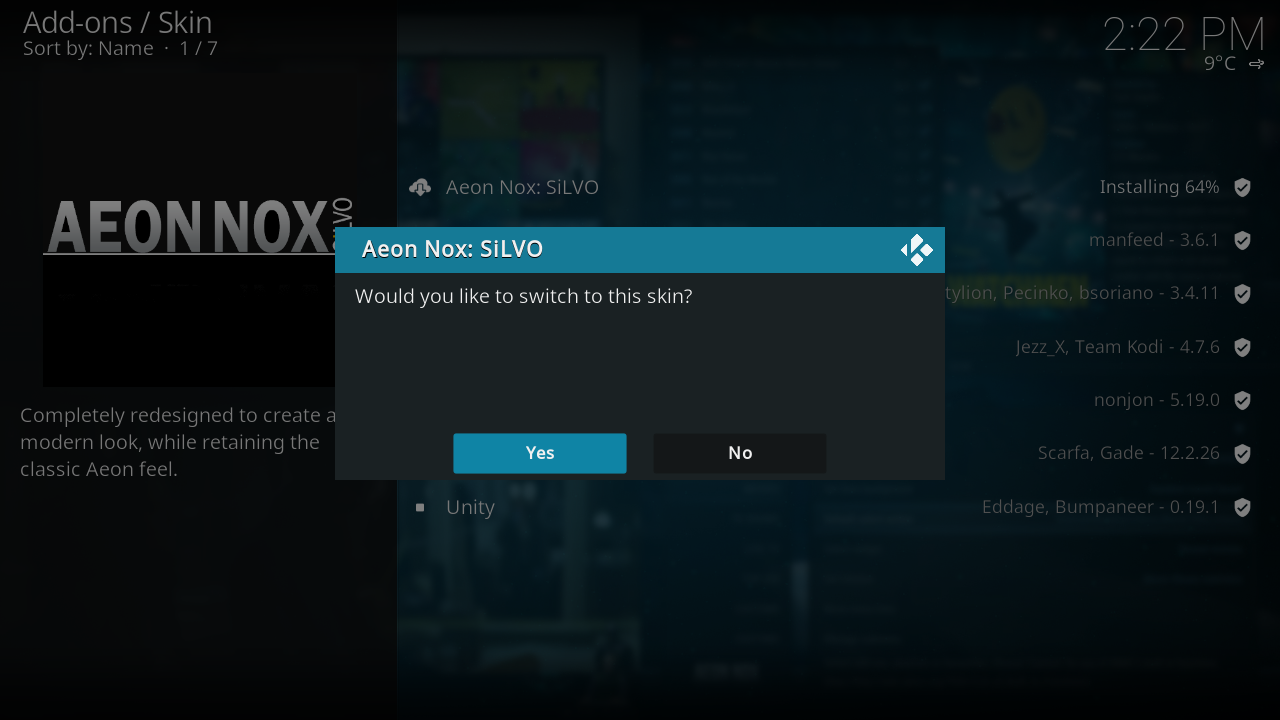
Step 7: Once the add-on and it's dependencies are installed you will be able to use that add-on. In the case of skin installation you'll be asked if you want to change to the installed skin immediately.


When the add-on has finished downloading Kodi will enable it and depending on the add-on ask if you want to start using it. Add-ons will then appear in their appropriate section (e.g. skins in the appearance section of settings, movie scrapers in the options of scrapers when adding a new movie source)
How to install from a ZIP file
Install from zip file allows you to install add-ons or repositories which may not be available in the Kodi add-on repository. To install a add-on or repository from a zip file you will need to enable Unknown Source from Settings/System/Add-ons. This can be done at the time of installation.
Note: By enabling Unknown Sources, Add-ons will be given access to your personal data stored on your device. By allowing, you agree that you are solely responsible for any loss of data, unwanted behavior, or damage to your device.
To access the Add-on browser see: How to access the Add-on browser or How to access the Add-on manager
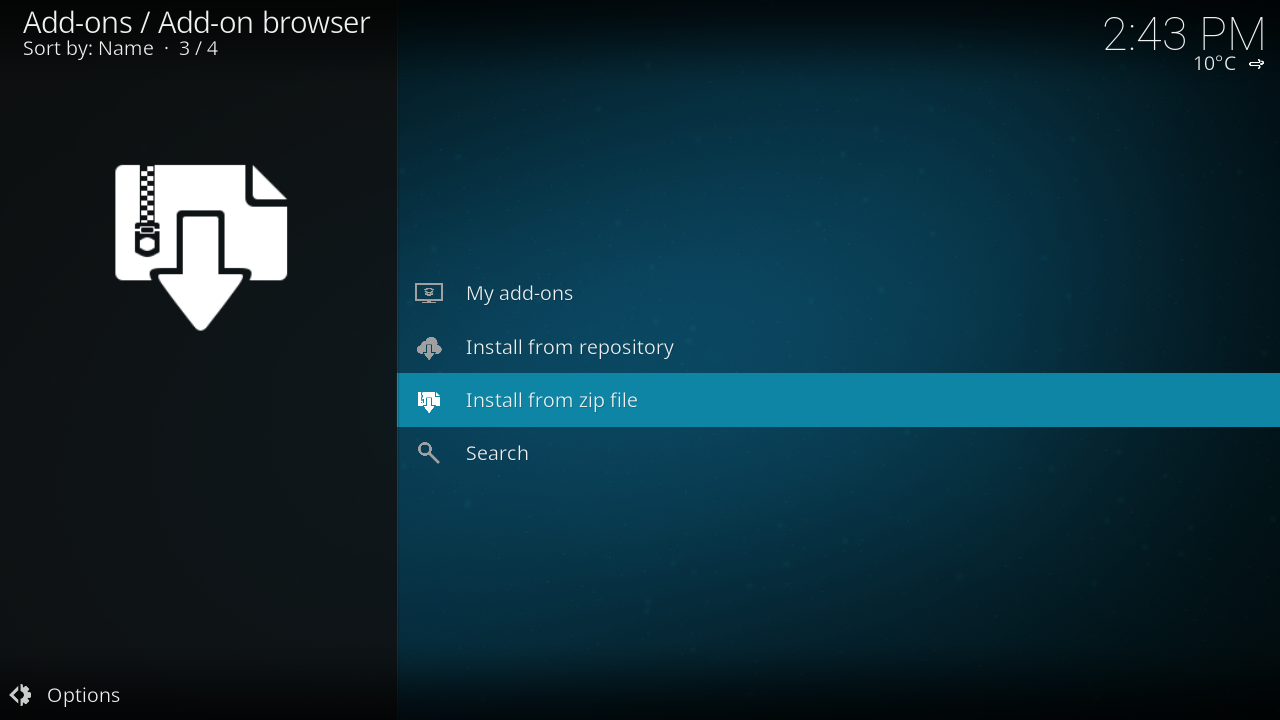
Step 1: Select Install from zip file
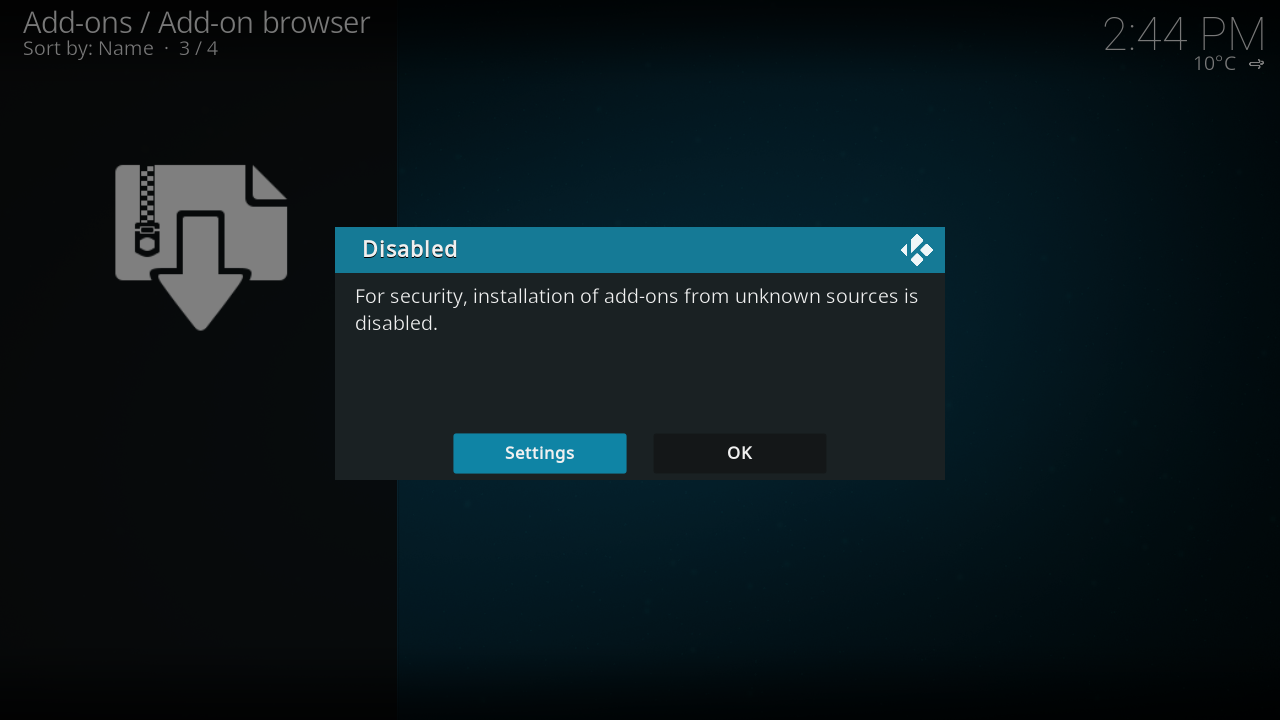
Step 2: If you have not enabled Unknown Sources, you will notified that it is disabled. If you wish to enable select Settings, if you do not wish to enable select OK. If you have already enabled Unknown sources skip to Step 6'.
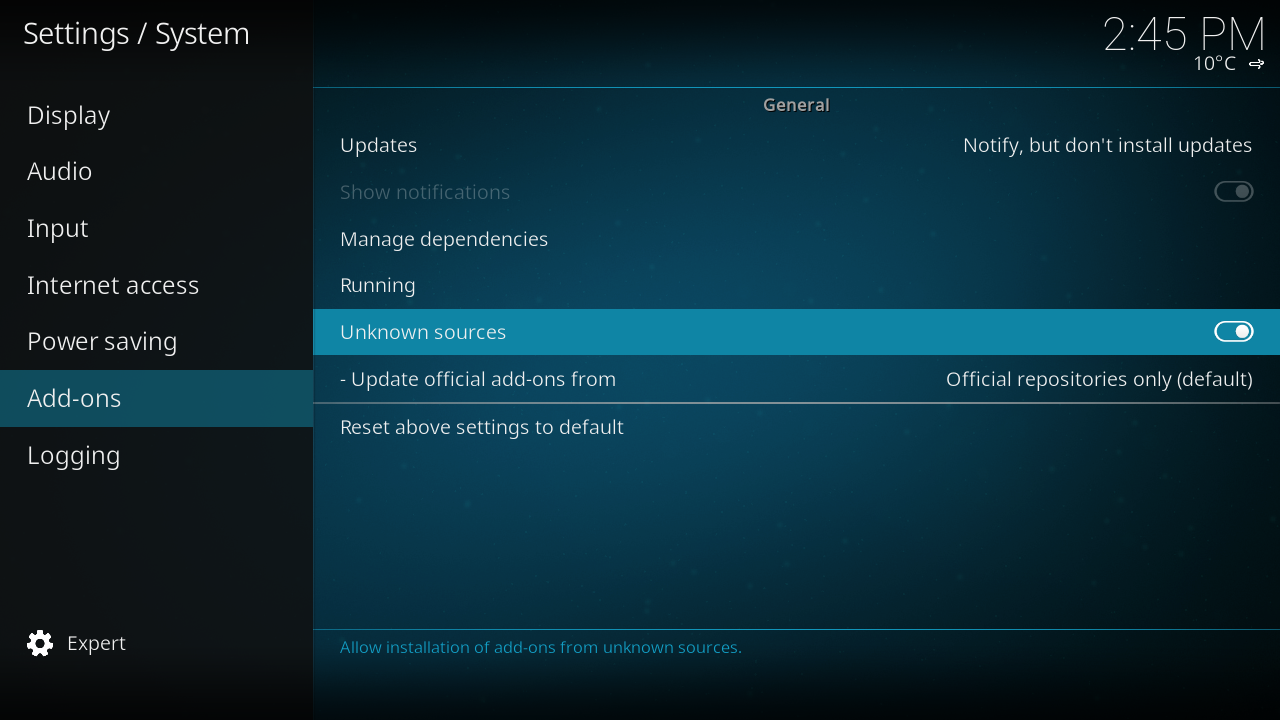
Step 3: When you select Settings you will be taken to the Add-ons settings window. Enable Unknown sources if you wish to install your add-on or repository from a zip file.
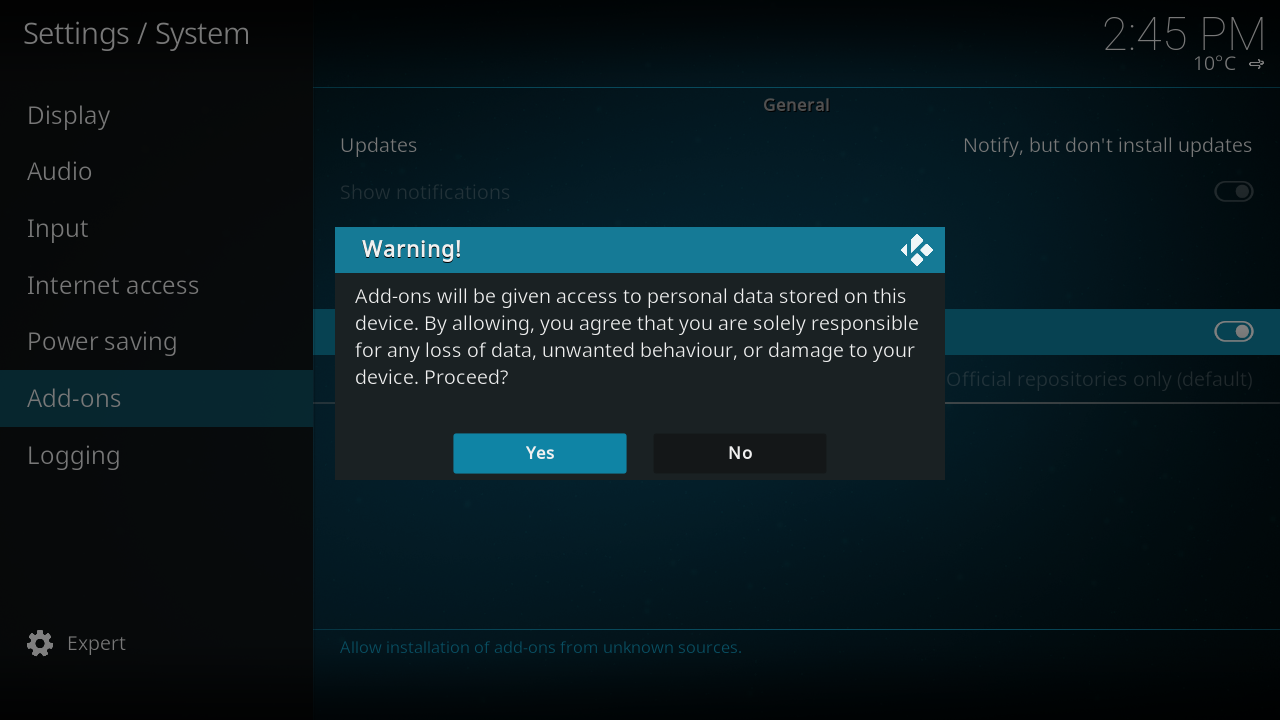
Step 4: After you enable Unknown sources you will be presented with a Warning. Make sure you read and understand this warning, then select Yes if you wish to proceed.
Step 5: If you have selected Yes and enabled Unknown sources you can then navigate back to the Add-on browser and once again select Install from zip file
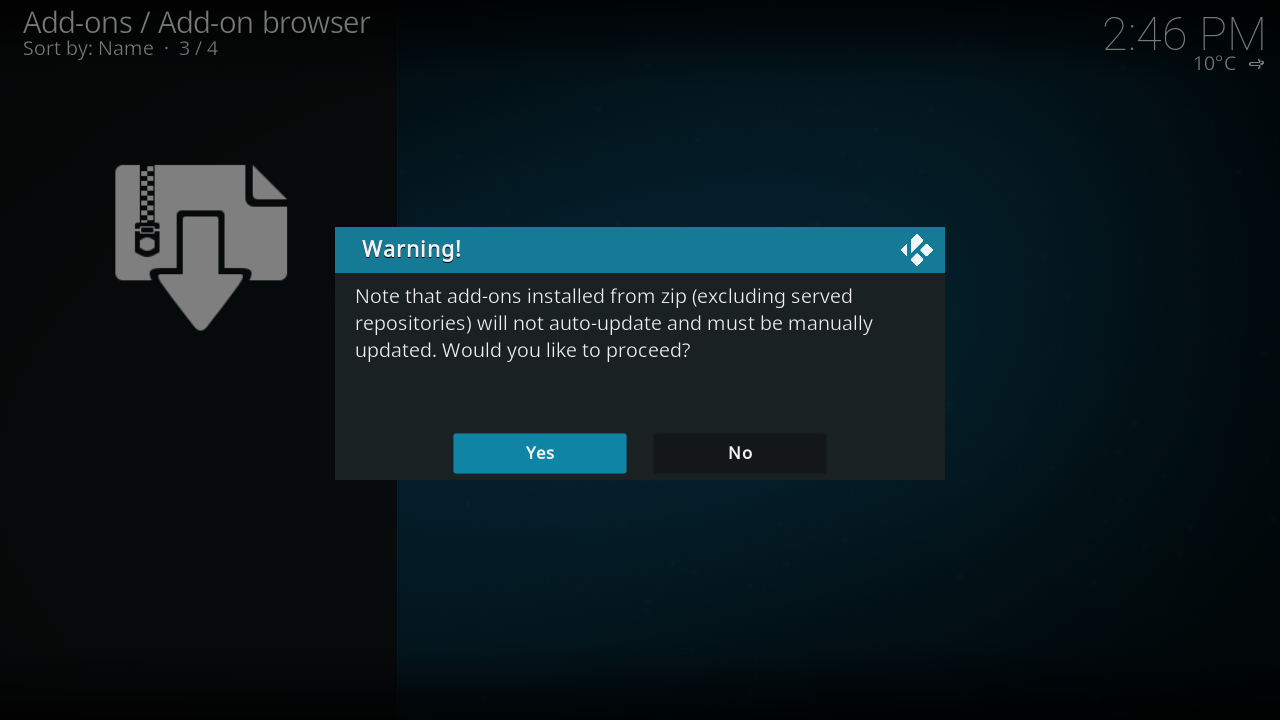
Step 6: You will now be presented with a warning about your add-on not being updated unless the update is hosted in a repository on a remote server.
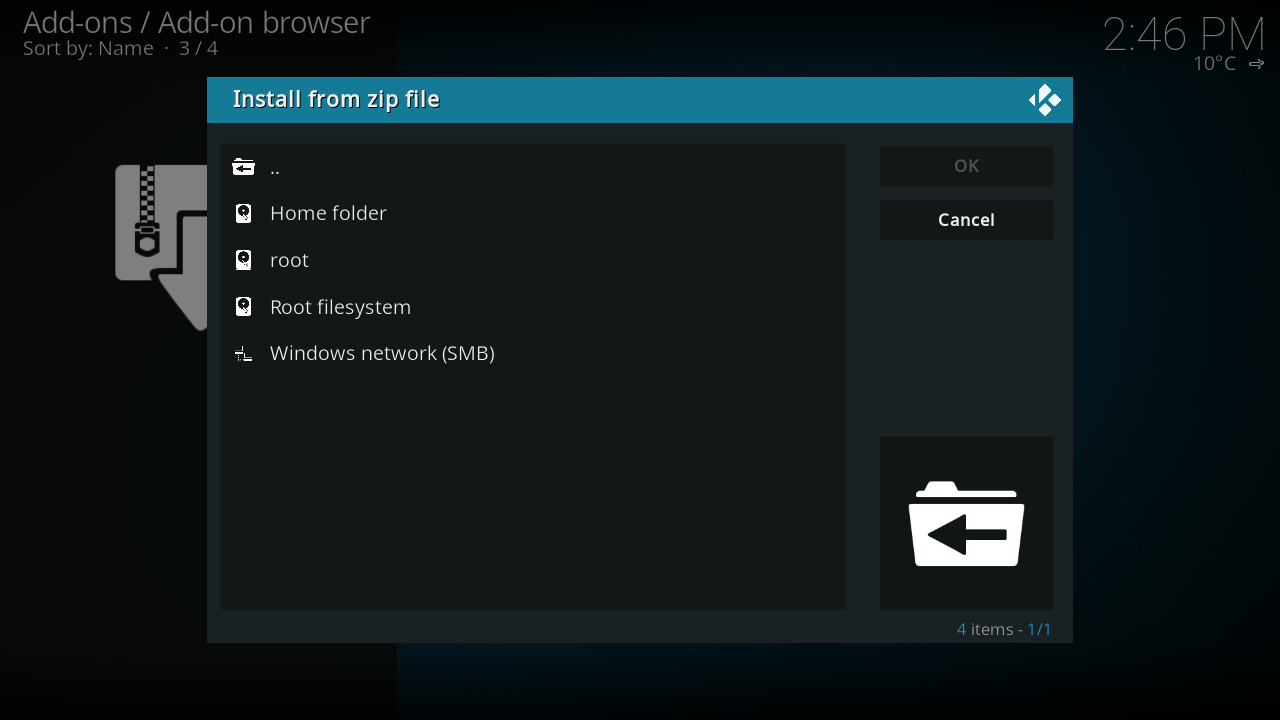
Step 7: You will now be presented with a browser window where you can navigate to where your zip file is stored. Your zip file can be stored anywhere your device has access to and can be either on local storage or a network share.
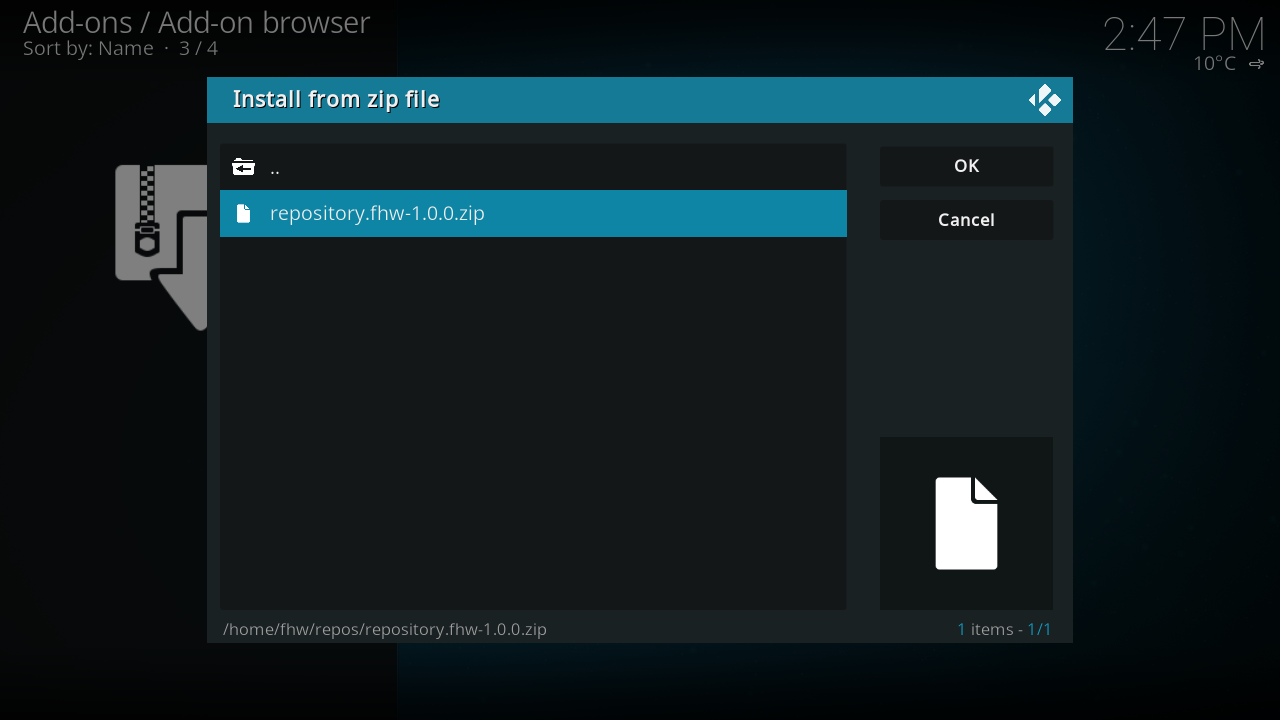
Step 8: Once you have navigated to the zip file you want installed, select it then select OK. After your add-on and any dependencies have finished installing you will be able to use it. Note: If you have issues with the add-on installing or after installing it does not work as intended, you will need to contact the Add-on Author.


Repositories
Repositories are storage locations from where add-ons can be retrieved from. They allow the user to browse for more add-ons of all types, as well as allowing Kodi to check them for updates to add-ons, so they don't have to be manually installed. Kodi comes with one official add-on repositories installed by default, Kodi.tv add-on repository. However others can be added.
To install a new repository you must first find the ZIP file to install the repository, a list of unofficial add-on repositories (third-party add-on repositories) is semi-maintained on the wiki - other repositories may exist. Then follow the instructions at How to install from a ZIP file.
Updating
There are several ways to update add-ons, depending on your settings in Settings→System settings→Add-ons.
Automatic updates
The first method, and easiest, is if you have Install updates automatically (default) enabled. With this method, any add-on installed that's in an installed repository will automatically update when there is a new one available.
Check available updates
The second method is if you have Notify, but don't install updates selected. Assuming that you have Show notifications also enabled in the settings, you will be notified when a update is available and you can use the following method to update. Note: If you don't have Show notifications enabled you can still use this method, but you will not know when a update has become available.
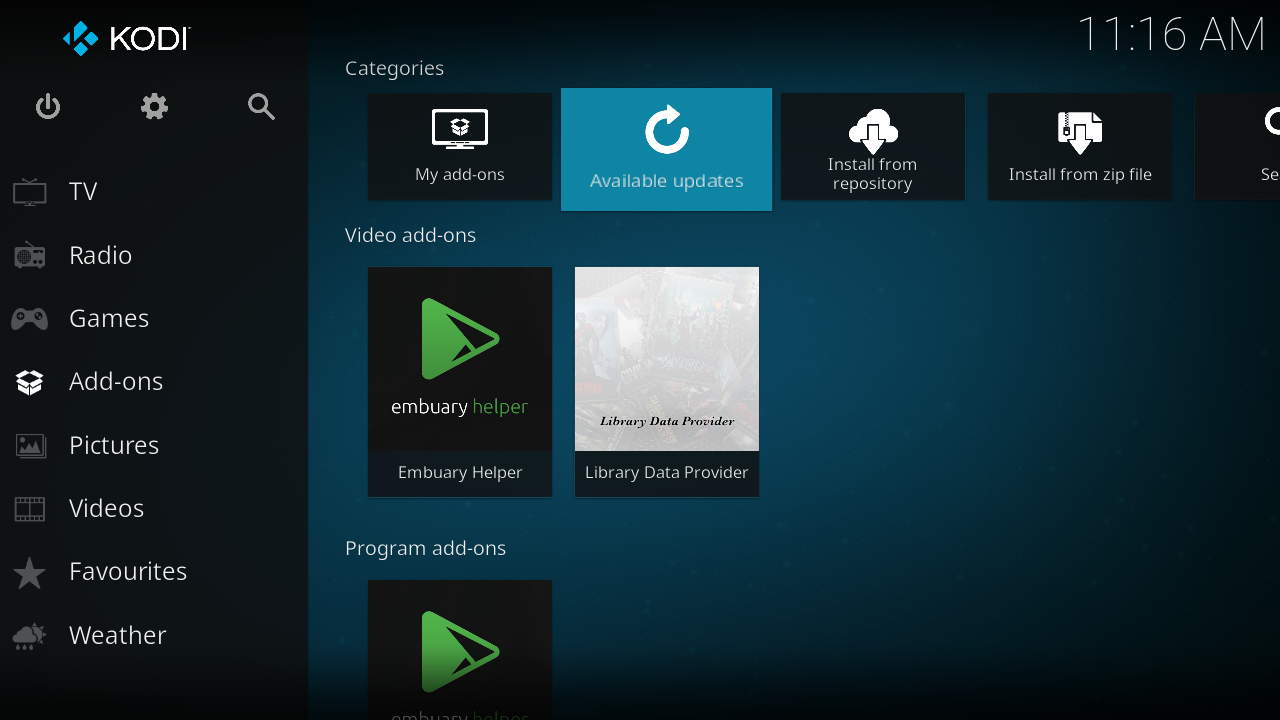
Step 1: From the Home screen, naviagate to Add-ons, then select Available updates.
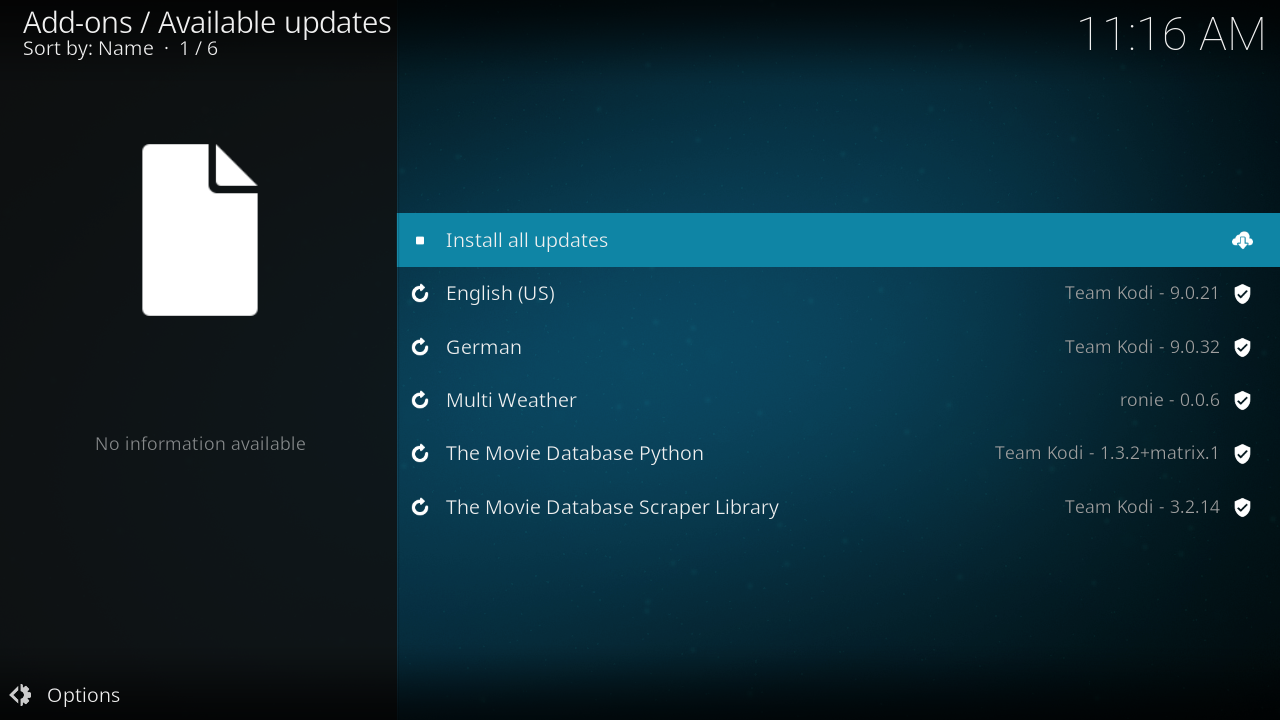
Step 2: Select the add-on you want to update.
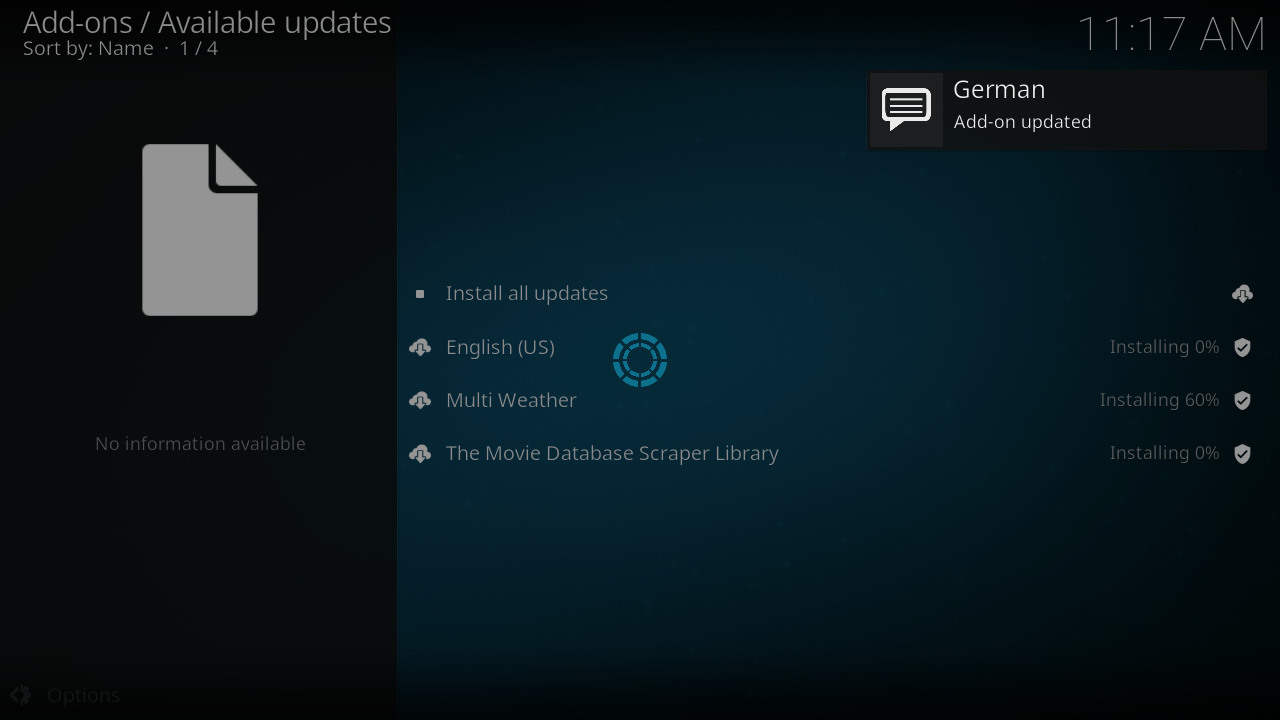
Step 3: The add-ons will then download and install. When finished you will be notified that the add-ons have been updated.


Update all
The third method is to update all add-ons. To do this, access the Add-on Mangager.
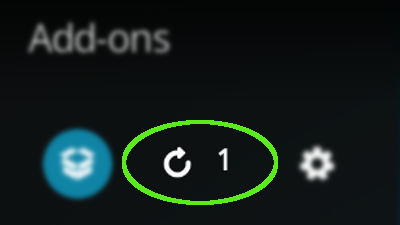
Then at the top of the menu bar, select the update all icon (shown above). The number of available updates will appear next to the icon.

Manually updating
The forth method is to update manually.
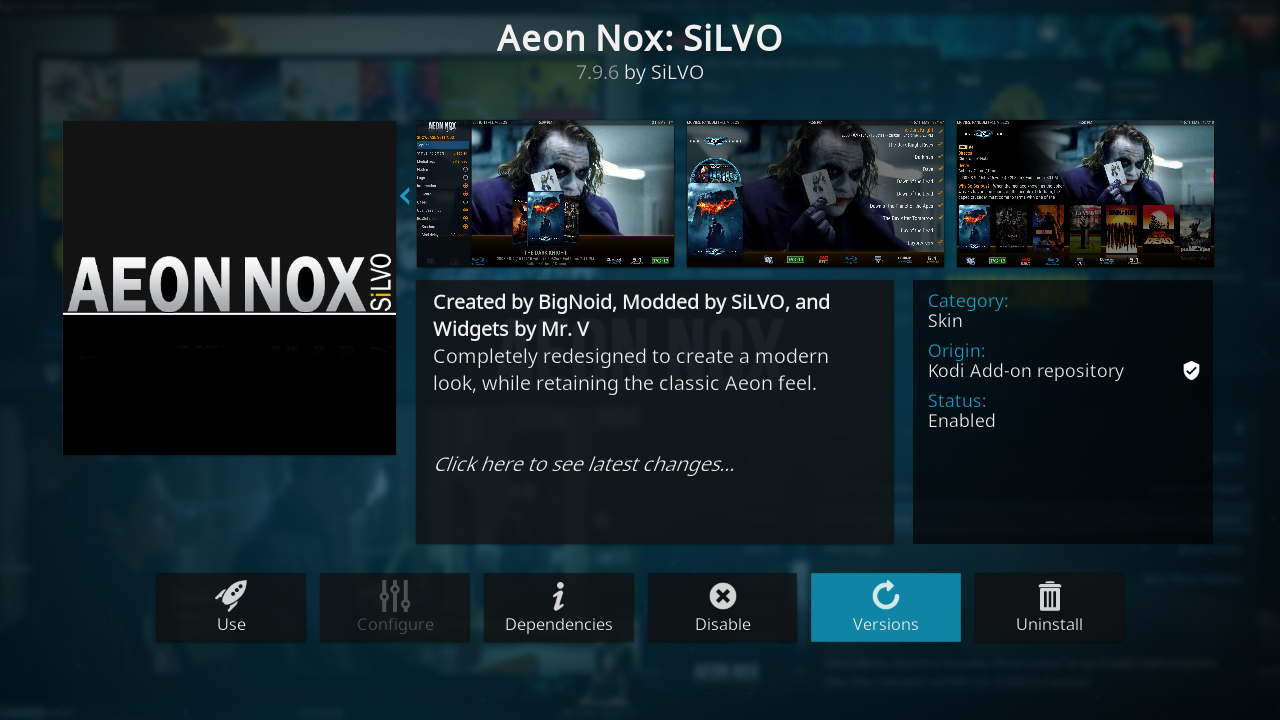
From the Home screen, select Add-ons, then in the Add-ons manager select the correct category for your add-on or go to My add-ons (this can also be done from the Home screen) and select All. Navigate to your add-on and select it. Then select Versions.
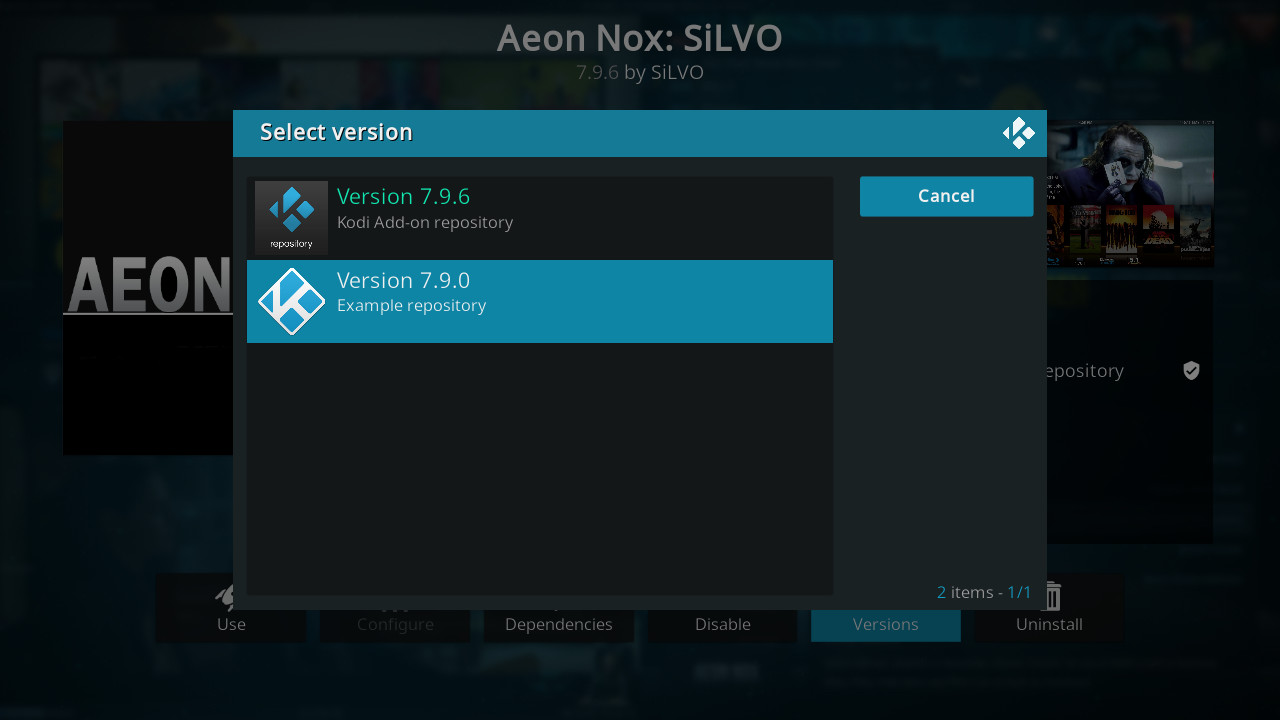
Select the desired version and it will install.


Update from ZIP file
If you installed a add-on from a zip file and/or it isn't in a repository, then you will need to update from a zip file. To do this see How to install from a ZIP file. Updating from a zip is the same method, just choose the new file to install.
See also
- Category:All add-ons
- Unofficial add-on repositories - Third-party add-on repositories
Development: