NOTE: AT PRESENT, THE FOLLOWING TAG MUST BE PRESENT IN ADVANCEDSETTINGS.XML FOR THE PROFILES TO FUNCTION: <profilesupport>true</profilesupport>
XBMC supports multiple user profiles, much the same as setting up individual users on your home computer. These individual profiles allow you to customize the environment for multiple users, allowing for such functionality as:
- Customized view settings such as skins for each user
- The ability to lock folders, such as network shares on a per-user basis
- Unique RSS feeds for each user
- Unique keymapping for each user
All options stored in The UserData Folder can be customized per profile, allowing for an amazing amount of flexibility.
Note: There are many references to the Master Code below. See Master Lock for more information.
Look here for more information on how to manually edit your profiles.
Profile Settings
|
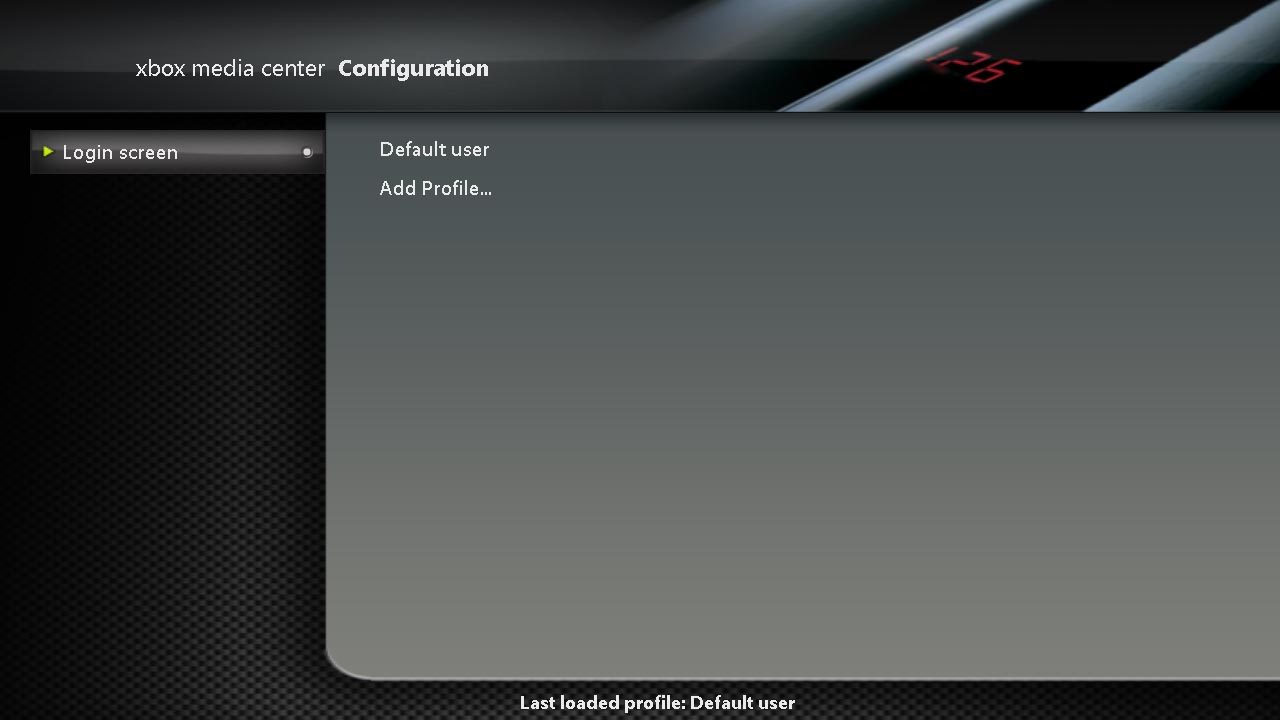
Selecting Profiles from the main settings window will bring you to the screen pictured to the left. In this screen you have the following options:
- Login Screen
- Enables/Disables the login screen
- Add Profile
- Add a new profile
- Default User / any available profile name
- Select the given profile. In order to edit a profile, highlight it, open the context menu by pressing the white button and choose Edit Profile.
Note that at the bottom of the screen, the currently selected profile is displayed.
|
|
Adding a Profile
In order to add a profile, simply choose Add Profile... .
|
|
First, you will be prompted to enter a name for your profile. Enter the name for your profile. Then, it will prompt you for your profile directory. This is where your personalized settings will be stored. Choose New Folder and add a folder with the same name as your profile. Then select the new directory and choose OK.
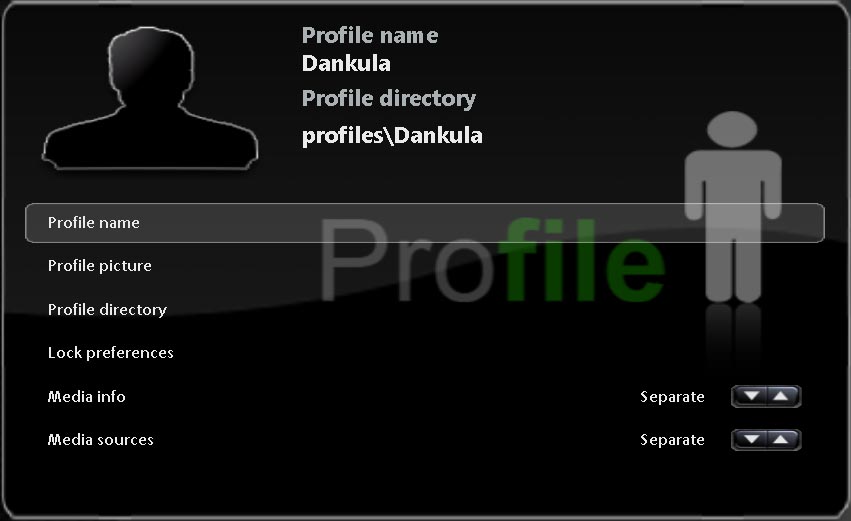
You should then see a screen much like the one to the left.
The following options are available:
- Profile Name
- Change the name of your profile
- Profile Picture
- Allows you to associate a picture with your profile
- Profile Directory
- Allows you to choose the folder in which your individual settings are stored
- Lock Preferences
- Allows you to lock many of your preferences. This is detailed below.
- Media Info
- Allows you to have separate information saved for your media, i.e. IMdB, AllMusic, etc. The options are
- Separate - Profiles have separate media info with full control
- Shares with Default - Shares media info with the default user with full control
- Shares with Default (Read Only) - Shares media info with the default user, and is locked by the master code
- Separate (Locked) - Profile has separate media info, but you can only change it by enabling master mode.
- Media Sources
- Allows you to have separate media sources for the profiles. The options are
- Separate - Profiles have separate media sources with full control
- Shares with Default - Shares media sources with the default user with full control
- Shares with Default (Read Only) - Shares media sources with the default user, and is locked by the master code
- Separate (Locked) - Profiles have separate media sources, but you can only change them by enabling master mode.
|
The Profile Lock Preferences
- Profile Lock
- Allows you to set a password for the profile. Locking a profile is essentially the same as setting a password on your computer; it disallows other users from using your profile, modifying your settings and viewing your media shares if they are configured separately from other users. The options are:
- Numeric Password - Enter a Numeric Password using the On Screen Keyboard
- Gamepag Button Combo - Enter a series of buttons using the Gamepad
- Full-Text Password - Enter a plain-text password using the On Screen Keyboard
- Lock Music Section
- Lock Video Section
- Lock Pictures Section
- Lock Programs and Scripts Section
- Lock File Manager
- Lock Settings
- Restricts access for the selected profile to the selected sections when selected
|

|


