Profiles: Difference between revisions
>Neeltje57 m (changed toc) |
mNo edit summary |
||
| (79 intermediate revisions by 14 users not shown) | |||
| Line 1: | Line 1: | ||
__TOC__ | __TOC__ | ||
{{-}} | |||
<section begin=intro />Profiles allow users to save all of settings as a profile and change them at the touch of a button. It also allows you to grant access to specific folders and network shares based on the profile being used. This is ideal for systems that have multiple users. It works much the same as setting up individual users on your home computer.<section end=intro /> | |||
{{note|While profiles do allow to share the same Kodi instance with multiple users, they are not a security feature. The web interface, for example, may still allow to change the active profile without entering a password.}} | |||
==Adding a | These individual profiles allow you to customize the environment for multiple users, allowing for such functionality as: | ||
In order to add a profile, | * Customized view settings such as skins for each user | ||
* The ability to lock folders, such as network shares on a per-user basis | |||
* Separate media [[Databases|libraries]] for each user | |||
* Unique RSS feeds for each user | |||
* Unique [[Keymap|keymapping]] for each user | |||
* Unique network settings | |||
All options stored in the [[Userdata|userdata folder]] can be customized per profile, allowing for an amazing amount of flexibility. | |||
;Profile Name | |||
: | {{-}} | ||
;Profile | |||
: | == Adding a profile == | ||
;Profile | |||
: | |||
;Lock | In order to add a profile, follow the steps below | ||
:Allows you to lock many of your preferences. This is detailed below. | |||
;Media Info | <gallery mode="packed" widths=500px heights=283px> | ||
File:Estuary_Profiles_Adding_Profile_1.jpg| '''Step 1:''' Select "Add profile" | |||
File:Estuary_Profiles_Adding_Profile_2.jpg| '''Step 2:''' Enter a name for the profile | |||
File:Estuary_Profiles_Adding_Profile_3.jpg| '''Step 3:''' Select a directory for your profile at which your personalized settings will be stored.<br />'''OK''' will choose the 'default' folder which will be stored under the [[Userdata|userdata]]-folder and will have the same name as the profile name. <br />'''New folder''' will give you the option to specify a self-created folder for your profile which you need to select after a name for it was given. The folder for the profile will then be found under: userdata -> profiles -> <created folder name> | |||
File:Estuary_Profiles_Adding_Profile_4.jpg| '''Step 4:''' Select specific profile settions which are explained below | |||
File:Estuary_Profiles_Adding_Profile_5.jpg| '''Step 5:''' Choose to copy settings from the defaul user ot start with default settings | |||
File:Estuary_Profiles_Adding_Profile_6.jpg| '''Step 6:''' Choose to copy media sources from the default user or start fresh. | |||
</gallery> | |||
=== Specific profile settings === | |||
; Profile Name | |||
: The name of the profile you entered above | |||
; Profile picture | |||
: Browse to some icon you would like to select as a profile picture | |||
; Profile directory | |||
: The path to the profile directory you might have created above | |||
; Lock prefences | |||
: Allows you to lock many of your preferences. This is detailed below. | |||
; Media Info | |||
:Allows you to have separate information saved for your media, i.e. IMdB, AllMusic, etc. The options are | :Allows you to have separate information saved for your media, i.e. IMdB, AllMusic, etc. The options are | ||
::* '''Separate''' - Profiles have separate media info with full control | |||
::* '''Shares with Default''' - Shares media info with the default user with full control | |||
::* '''Shares with Default (Read Only)''' - Shares media info with the default user, and is locked by the master code | |||
::* '''Separate (Locked)''' - Profile has separate media info, but you can only change it by enabling master mode. | |||
;Media | |||
; Media sources | |||
:Allows you to have separate media sources for the profiles. The options are | :Allows you to have separate media sources for the profiles. The options are | ||
::* '''Separate''' - Profiles have separate media sources with full control | |||
::* '''Shares with Default''' - Shares media sources with the default user with full control | |||
::* '''Shares with Default (Read Only)''' - Shares media sources with the default user, and is locked by the master code | |||
::* '''Separate (Locked)''' - Profiles have separate media sources, but you can only change them by enabling master mode. | |||
{{-}} | |||
<br> | |||
== Deleting a profile == | |||
In order to delete an unused profile, simply navigate to {{button|Settings}}->{{button|Profile Settings}}->{{button|Profiles}}, then navigate to the profile you want to delete and bring up the context menu using either {{button|guide}} on a remote or {{button|c}} on a normal keyboard. Then select {{button|Delete}} like shown in the screenshot below: | |||
<br> | |||
[[File:Profles-delete_profile-v17.jpg|500px]]<br /> | |||
{{-}} | |||
== Switching profiles == | |||
Switching profiles from a currently running Kodi instance can be done in different ways: | |||
You are able to switch a profile while navigating to the profiles-section, selecting the specific profile you want to use, bring up the context menu using either {{button|guide}} on a remote or {{button|c}} on a normal keyboard and select {{button|Load}} like shown in the screenshot below:<br /> | |||
<br /> | |||
[[File:Profiles-load_profile-v17.jpg|500px]]<br /> | |||
<br /> | |||
The other way is to log-off from the current Kodi session and log-in to another profile:<br /> | |||
<br /> | |||
<gallery mode="packed" widths=500px heights=283px> | |||
File:Profiles-switch_profile-v17.jpg| '''Step 1:''' Log off from the current profile | |||
File:Profiles-switch_profile2-v17.jpg| ''' Step 2:''' Log in to another profile | |||
</gallery> | |||
Another way of switching profiles is to bind ''load profile'' to a key in [[Keymaps|keymaps.xml]] by using the [[List_of_built-in_functions|built-in function]] LoadProfile. If you only have two profiles you can use the same key to switch back and forth. e.g. LoadProfile bound to {{keypress|y}}<br /> | |||
Switch from User1 to User2 (Users1's keymap.xml): <y>LoadProfile(User2)<y/><br /> | |||
Switch from User2 to User1 (Users2's keymap.xml): <y>LoadProfile(User1)<y/><br /> | |||
Keymap.xml example: | |||
<syntaxhighlight lang=xml> | |||
<keymap> | |||
<global> | |||
<keyboard> | |||
<y>LoadProfile(User2)</y> | |||
</keyboard> | |||
</global> | |||
</keymap> | |||
</syntaxhighlight> | |||
{{-}} | |||
== profiles.xml and profiles folder == | |||
It is important to mention that this section exists so that users have some documentation to refer to in the event of profile related issues occur like profile corruption. This '''does not''' constitute a invitation to novice users to start messing around with said files/folders and cause inadvertent problems that would not otherwise exist. | |||
{{notice|'''Do not edit the any of the xml files''' in question unless '''indicated by a Kodi developer''' or for '''backup''' purposes only|WARNING}} | |||
=== profiles.xml === | |||
A ''profile.xml'' file exists after the very first installation of Kodi at its userdata-folder and unless you have created additional profiles it won't have any other information as for the '''Master user''' (Kodis default user). If you create other/additional profiles, that file will be populated with additional informations about the created profile. | |||
The example below shows a profile.xml file containing the '''Master user''' and the user '''Test''' as an additional profile. In that case it will show that the '''Master user''' uses a lockcode which '''Test''' doesn't use. As you can see the given password is shown in plain text. So please be aware that a locked profile doesn't provide any kind of security if other users have access to the underlying file system. | |||
For the lock preferences and the Master lock, please visit: [[Settings/Interface/Master_lock|Settings -> Interface settings -> Master lock]] | |||
{| class="mw-collapsible mw-collapsed wikitable" | |||
|- | |||
! Example profiles.xml file | |||
|- | |||
| | |||
<syntaxhighlight lang=xml enclose="div"> | |||
<profiles> | |||
<lastloaded>0</lastloaded> | |||
<useloginscreen>false</useloginscreen> | |||
<nextIdProfile>2</nextIdProfile> | |||
<profile> | |||
<id>0</id> | |||
<name>Master user</name> | |||
<directory pathversion="1">special://masterprofile/</directory> | |||
<thumbnail pathversion="1" /> | |||
<hasdatabases>true</hasdatabases> | |||
<canwritedatabases>true</canwritedatabases> | |||
<hassources>true</hassources> | |||
<canwritesources>true</canwritesources> | |||
<lockaddonmanager>false</lockaddonmanager> | |||
<locksettings>false</locksettings> | |||
<lockfiles>false</lockfiles> | |||
<lockmusic>false</lockmusic> | |||
<lockvideo>false</lockvideo> | |||
<lockpictures>false</lockpictures> | |||
<lockprograms>false</lockprograms> | |||
<lockmode>1</lockmode> | |||
<lockcode>c4ca4238a0b923820dcc509a6f75849b</lockcode> | |||
<lastdate /> | |||
</profile> | |||
<profile> | |||
<id>1</id> | |||
<name>TEST</name> | |||
<directory pathversion="1">profiles/Test/</directory> | |||
<thumbnail pathversion="1" /> | |||
<hasdatabases>true</hasdatabases> | |||
<canwritedatabases>true</canwritedatabases> | |||
<hassources>true</hassources> | |||
<canwritesources>true</canwritesources> | |||
<lockaddonmanager>false</lockaddonmanager> | |||
<locksettings>false</locksettings> | |||
<lockfiles>false</lockfiles> | |||
<lockmusic>false</lockmusic> | |||
<lockvideo>false</lockvideo> | |||
<lockpictures>false</lockpictures> | |||
<lockprograms>false</lockprograms> | |||
<lockmode>0</lockmode> | |||
<lockcode>-</lockcode> | |||
<lastdate /> | |||
</profile> | |||
</profiles> | |||
</syntaxhighlight> | |||
|} | |} | ||
== | === Profiles folder contents === | ||
Any additional user(s) will have their own folder under '''userdata -> profiles -> <profile-name>''' which contains all informations about add-on data, databases, keymaps, thumbnails and such seperately from the ''Master user''. If you have selected "Copy default" at the steps above, the settings or media sources will be copied from the default Kodi user. | |||
By default (no sources set neither on the master user nor on an additional profile) an additional profile folder contains similar folders as the userdata folder. For an explanation about the files and folders which are located under the <profile_name>-folder, please see: [[Userdata#UserData_folder_contents|Userdata folder contents]] | |||
== Troubleshooting == | |||
<br /> | |||
'''Q: I installed skins and add-ons on the 'Master User' but I can't install it on the additional profile. Why?''' | |||
A: Already installed skins or add-ons are marked as "disabled" under: {{button|Add-ons -> My add-ons -> <specific add-on section>}} and don't need to be installed again. After you enabled a specific add-on or a skin, those add-ons are available again and skins could be used from the {{button|Settings -> Interface settins -> Skin}} menu. | |||
'''Q: After I created a profile, the Kodi screen stays black if I try to load it for the first time. Why?''' | |||
A: That was a bug and it's already fixed in Kodi 18 alpha versions. After you have restarted Kodi Krypton, Kodi should behave normal and should display the GUI as expected. | |||
=== Missing texts/different skins not loading while using profiles === | |||
{{note|This will be obsolete after the release of Kodi 18.7.}} | |||
That's a known issue and there's a workaround for that: | |||
- create a [[Autoexec.py|autoexec.py]] file at your [[Userdata|userdata]] folder and under each {{button|<profile-name>}}-folder under {{button|userdata -> profiles -> <profile-name>}} (the path to that folder differs from the OS in use)<br /> | |||
- fill each autoexec.py with the following content: | |||
= | <syntaxhighlight lang=python> | ||
import xbmc | |||
xbmc.executebuiltin('ReloadSkin()') | |||
</syntaxhighlight> | |||
That will cause a skin reload at every profile switch. Depending on your hardware in use you mostly won't notice it and the texts will be visible again and/or different skins for different profiles will load fine. For some hardware, like the RPi, it will be noticeable and also might take a little while. | |||
== See also == | |||
* [[Settings/Interface/Master_lock]] | |||
{{Krypton updated}} | |||
[[ | [[Category:Manual]] | ||
[[Category:Settings]] | |||
[[Category:General topics]] | |||
Latest revision as of 23:33, 29 January 2021
Profiles allow users to save all of settings as a profile and change them at the touch of a button. It also allows you to grant access to specific folders and network shares based on the profile being used. This is ideal for systems that have multiple users. It works much the same as setting up individual users on your home computer.
Note: While profiles do allow to share the same Kodi instance with multiple users, they are not a security feature. The web interface, for example, may still allow to change the active profile without entering a password.
These individual profiles allow you to customize the environment for multiple users, allowing for such functionality as:
- Customized view settings such as skins for each user
- The ability to lock folders, such as network shares on a per-user basis
- Separate media libraries for each user
- Unique RSS feeds for each user
- Unique keymapping for each user
- Unique network settings
All options stored in the userdata folder can be customized per profile, allowing for an amazing amount of flexibility.
Adding a profile
In order to add a profile, follow the steps below
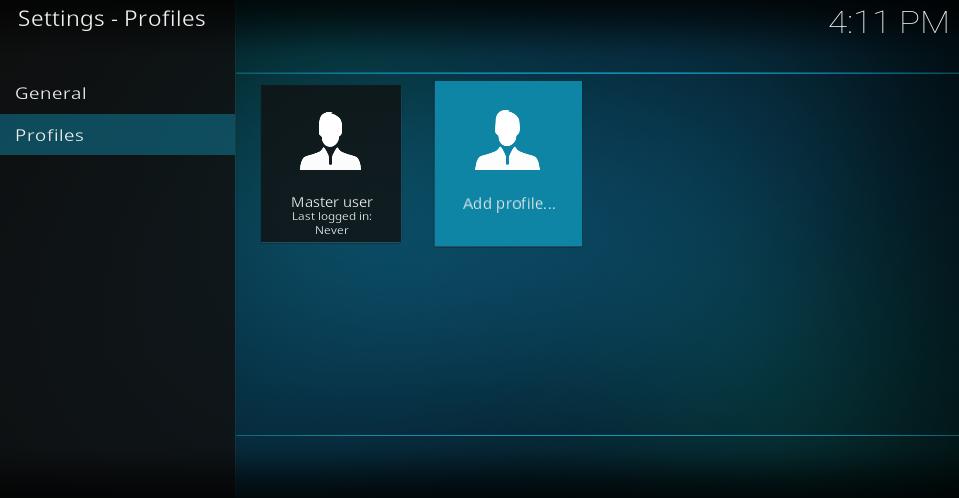
Step 1: Select "Add profile"
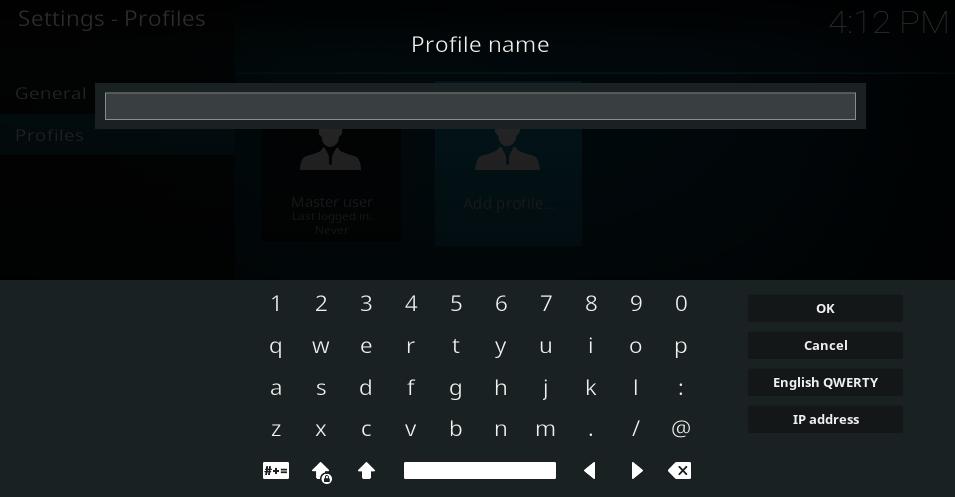
Step 2: Enter a name for the profile
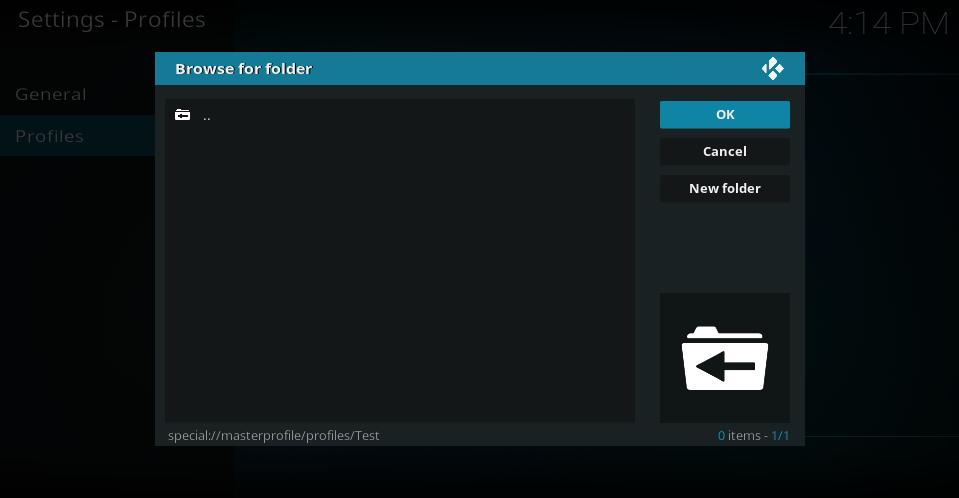
Step 3: Select a directory for your profile at which your personalized settings will be stored.
OK will choose the 'default' folder which will be stored under the userdata-folder and will have the same name as the profile name.
New folder will give you the option to specify a self-created folder for your profile which you need to select after a name for it was given. The folder for the profile will then be found under: userdata -> profiles -> <created folder name>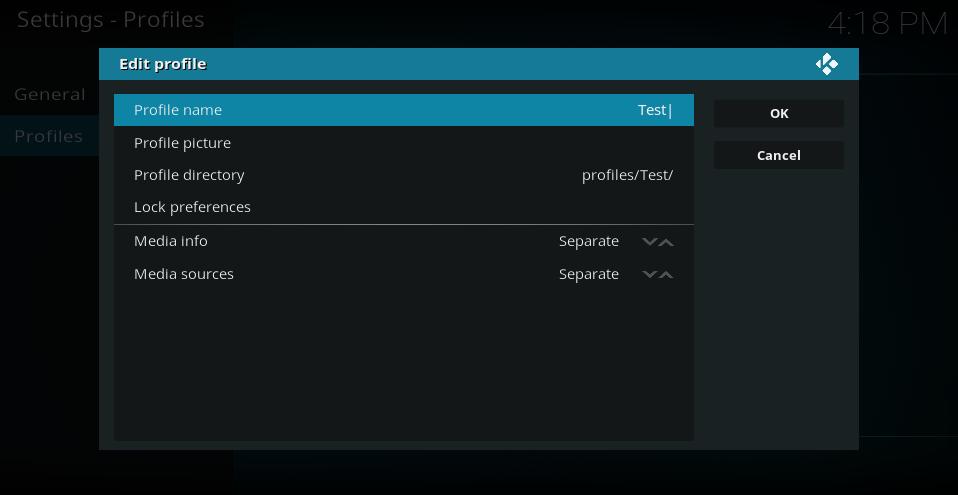
Step 4: Select specific profile settions which are explained below
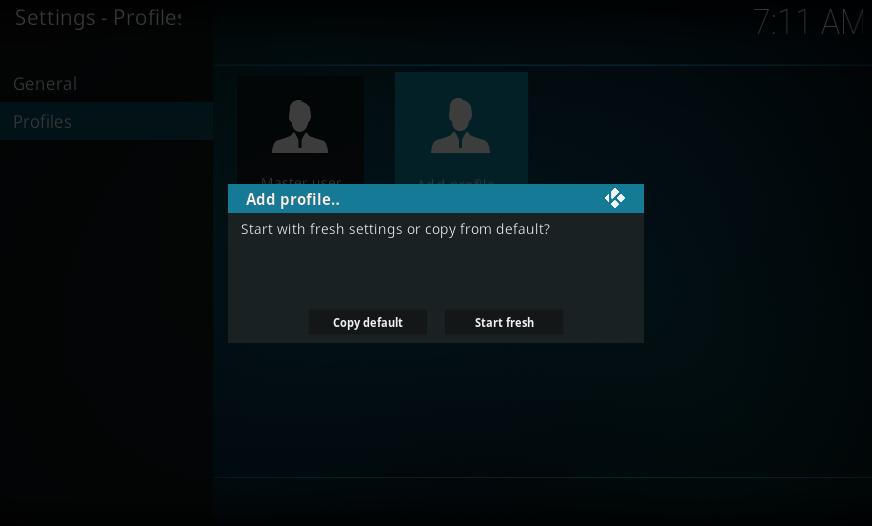
Step 5: Choose to copy settings from the defaul user ot start with default settings
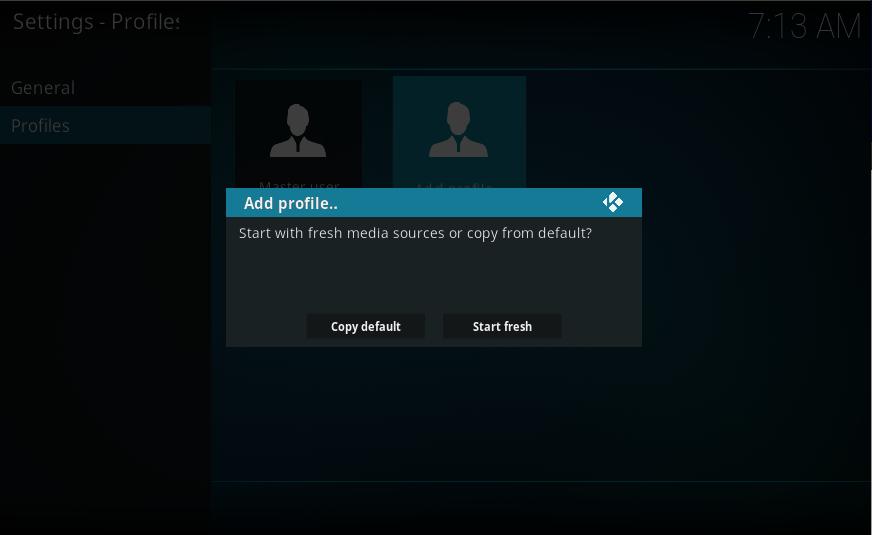
Step 6: Choose to copy media sources from the default user or start fresh.


Specific profile settings
- Profile Name
- The name of the profile you entered above
- Profile picture
- Browse to some icon you would like to select as a profile picture
- Profile directory
- The path to the profile directory you might have created above
- Lock prefences
- Allows you to lock many of your preferences. This is detailed below.
- Media Info
- Allows you to have separate information saved for your media, i.e. IMdB, AllMusic, etc. The options are
- Separate - Profiles have separate media info with full control
- Shares with Default - Shares media info with the default user with full control
- Shares with Default (Read Only) - Shares media info with the default user, and is locked by the master code
- Separate (Locked) - Profile has separate media info, but you can only change it by enabling master mode.
- Media sources
- Allows you to have separate media sources for the profiles. The options are
- Separate - Profiles have separate media sources with full control
- Shares with Default - Shares media sources with the default user with full control
- Shares with Default (Read Only) - Shares media sources with the default user, and is locked by the master code
- Separate (Locked) - Profiles have separate media sources, but you can only change them by enabling master mode.
Deleting a profile
In order to delete an unused profile, simply navigate to Settings->Profile Settings->Profiles, then navigate to the profile you want to delete and bring up the context menu using either guide on a remote or c on a normal keyboard. Then select Delete like shown in the screenshot below:

Switching profiles
Switching profiles from a currently running Kodi instance can be done in different ways:
You are able to switch a profile while navigating to the profiles-section, selecting the specific profile you want to use, bring up the context menu using either guide on a remote or c on a normal keyboard and select Load like shown in the screenshot below:

The other way is to log-off from the current Kodi session and log-in to another profile:
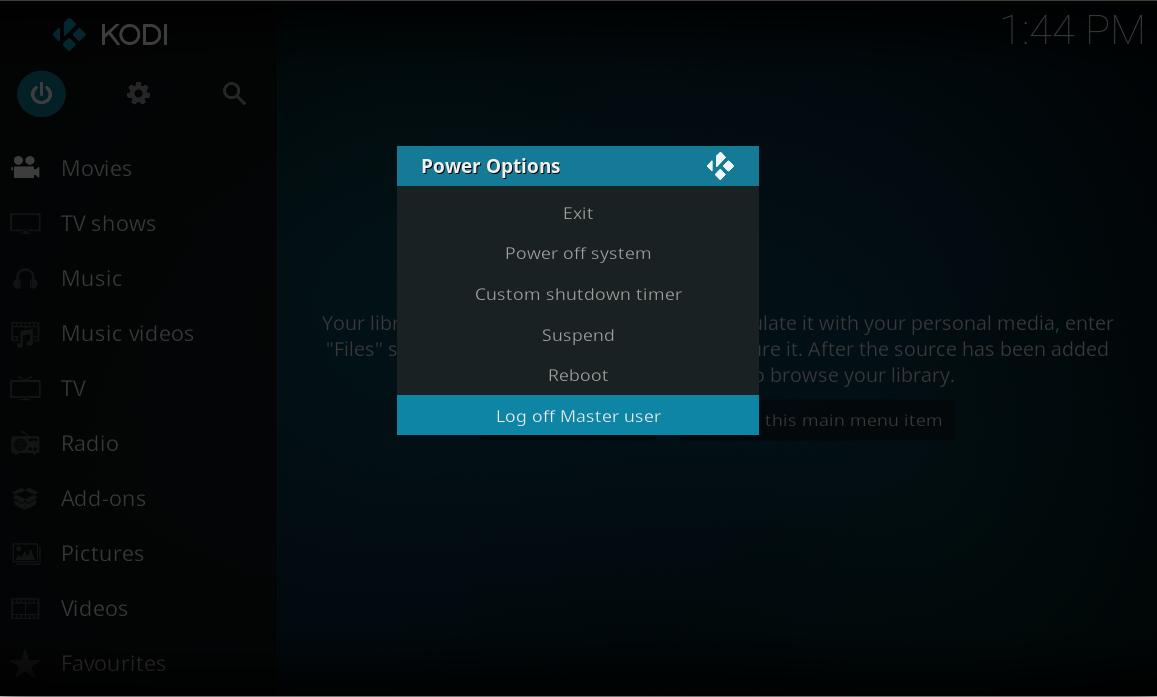
Step 1: Log off from the current profile
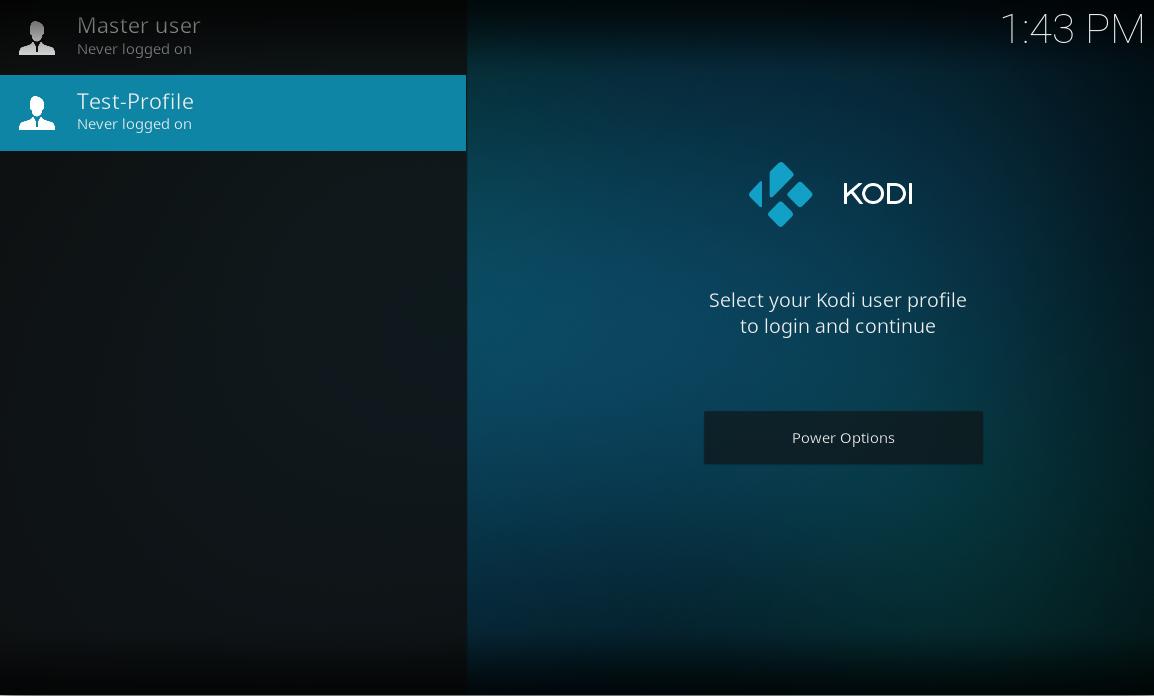
Step 2: Log in to another profile


Another way of switching profiles is to bind load profile to a key in keymaps.xml by using the built-in function LoadProfile. If you only have two profiles you can use the same key to switch back and forth. e.g. LoadProfile bound to y
Switch from User1 to User2 (Users1's keymap.xml): <y>LoadProfile(User2)<y/>
Switch from User2 to User1 (Users2's keymap.xml): <y>LoadProfile(User1)<y/>
Keymap.xml example:
<keymap>
  <global>
    <keyboard>
      <y>LoadProfile(User2)</y>
    </keyboard>
  </global>
</keymap>
profiles.xml and profiles folder
It is important to mention that this section exists so that users have some documentation to refer to in the event of profile related issues occur like profile corruption. This does not constitute a invitation to novice users to start messing around with said files/folders and cause inadvertent problems that would not otherwise exist.

|
WARNING: Do not edit the any of the xml files in question unless indicated by a Kodi developer or for backup purposes only |
profiles.xml
A profile.xml file exists after the very first installation of Kodi at its userdata-folder and unless you have created additional profiles it won't have any other information as for the Master user (Kodis default user). If you create other/additional profiles, that file will be populated with additional informations about the created profile.
The example below shows a profile.xml file containing the Master user and the user Test as an additional profile. In that case it will show that the Master user uses a lockcode which Test doesn't use. As you can see the given password is shown in plain text. So please be aware that a locked profile doesn't provide any kind of security if other users have access to the underlying file system.
For the lock preferences and the Master lock, please visit: Settings -> Interface settings -> Master lock
| Example profiles.xml file |
|---|
<profiles> <lastloaded>0</lastloaded> <useloginscreen>false</useloginscreen> <nextIdProfile>2</nextIdProfile> <profile> <id>0</id> <name>Master user</name> <directory pathversion="1">special://masterprofile/</directory> <thumbnail pathversion="1" /> <hasdatabases>true</hasdatabases> <canwritedatabases>true</canwritedatabases> <hassources>true</hassources> <canwritesources>true</canwritesources> <lockaddonmanager>false</lockaddonmanager> <locksettings>false</locksettings> <lockfiles>false</lockfiles> <lockmusic>false</lockmusic> <lockvideo>false</lockvideo> <lockpictures>false</lockpictures> <lockprograms>false</lockprograms> <lockmode>1</lockmode> <lockcode>c4ca4238a0b923820dcc509a6f75849b</lockcode> <lastdate /> </profile> <profile> <id>1</id> <name>TEST</name> <directory pathversion="1">profiles/Test/</directory> <thumbnail pathversion="1" /> <hasdatabases>true</hasdatabases> <canwritedatabases>true</canwritedatabases> <hassources>true</hassources> <canwritesources>true</canwritesources> <lockaddonmanager>false</lockaddonmanager> <locksettings>false</locksettings> <lockfiles>false</lockfiles> <lockmusic>false</lockmusic> <lockvideo>false</lockvideo> <lockpictures>false</lockpictures> <lockprograms>false</lockprograms> <lockmode>0</lockmode> <lockcode>-</lockcode> <lastdate /> </profile> </profiles> |
Profiles folder contents
Any additional user(s) will have their own folder under userdata -> profiles -> <profile-name> which contains all informations about add-on data, databases, keymaps, thumbnails and such seperately from the Master user. If you have selected "Copy default" at the steps above, the settings or media sources will be copied from the default Kodi user.
By default (no sources set neither on the master user nor on an additional profile) an additional profile folder contains similar folders as the userdata folder. For an explanation about the files and folders which are located under the <profile_name>-folder, please see: Userdata folder contents
Troubleshooting
Q: I installed skins and add-ons on the 'Master User' but I can't install it on the additional profile. Why?
A: Already installed skins or add-ons are marked as "disabled" under: Add-ons -> My add-ons -> <specific add-on section> and don't need to be installed again. After you enabled a specific add-on or a skin, those add-ons are available again and skins could be used from the Settings -> Interface settins -> Skin menu.
Q: After I created a profile, the Kodi screen stays black if I try to load it for the first time. Why?
A: That was a bug and it's already fixed in Kodi 18 alpha versions. After you have restarted Kodi Krypton, Kodi should behave normal and should display the GUI as expected.
Missing texts/different skins not loading while using profiles
Note: This will be obsolete after the release of Kodi 18.7.
That's a known issue and there's a workaround for that:
- create a autoexec.py file at your userdata folder and under each <profile-name>-folder under userdata -> profiles -> <profile-name> (the path to that folder differs from the OS in use)
- fill each autoexec.py with the following content:
import xbmc
xbmc.executebuiltin('ReloadSkin()')
That will cause a skin reload at every profile switch. Depending on your hardware in use you mostly won't notice it and the texts will be visible again and/or different skins for different profiles will load fine. For some hardware, like the RPi, it will be noticeable and also might take a little while.
See also