Archive:Install Kodi on Apple TV 2: Difference between revisions
No edit summary |
|||
| Line 39: | Line 39: | ||
#:<pre>apt-get update</pre> | #:<pre>apt-get update</pre> | ||
#:<pre>apt-get install org.xbmc.xbmc-atv2</pre> | #:<pre>apt-get install org.xbmc.xbmc-atv2</pre> | ||
#:<pre>reboot</pre> | #:<pre>reboot</pre> | ||
| Line 47: | Line 44: | ||
==Installing from NitoTV== | ==Installing from NitoTV== | ||
After installing NitoTV: | |||
:#Scroll right to the NitoTV menu on the Apple TV and choose the first option "''Install Software''". | :#Scroll right to the NitoTV menu on the Apple TV and choose the first option "''Install Software''". | ||
:#Scroll down the list until you see "''XBMC-ATV2''" and click on that. | :#Scroll down the list until you see "''XBMC-ATV2''" and click on that. | ||
:#From that menu press "''install''" and your Apple TV will install XBMC and then do a '''SOFT''' reboot (no tethered boot required). | :#From that menu press "''install''" and your Apple TV will install XBMC and then do a '''SOFT''' reboot (no tethered boot required). | ||
:#XBMC will now be in your Apple TV menu, scroll right to it, click and enjoy. | :#XBMC will now be in your Apple TV menu, scroll right to it, click and enjoy. | ||
And you're done! You should now be running XBMC v11 (Eden) for Apple TV 2. See [[IOS FAQ#XBMC_Version|here]] to verify your XBMC version. | And you're done! You should now be running XBMC v11 (Eden) for Apple TV 2. See [[IOS FAQ#XBMC_Version|here]] to verify your XBMC version. | ||
{{-}} | {{-}} | ||
= ATV 5.x = | = ATV 5.x = | ||
==Installing from the command line== | ==Installing from the command line== | ||
:''This is the same build installed from the nitoTV menu, if installed.'' | |||
#Open up your [[XBMC for iOS specific FAQ#SSH|terminal/ssh application]] and enter the following command to log in to your ATV2. Note, you need to replace "YOUR.ATV2.IP.ADDRESS" with the IP address of the Apple TV: | #Open up your [[XBMC for iOS specific FAQ#SSH|terminal/ssh application]] and enter the following command to log in to your ATV2. Note, you need to replace "YOUR.ATV2.IP.ADDRESS" with the IP address of the Apple TV: | ||
#:<pre>ssh [email protected]</pre> | #:<pre>ssh [email protected]</pre> | ||
| Line 83: | Line 69: | ||
#:<pre>apt-get install org.xbmc.xbmc-atv2</pre> | #:<pre>apt-get install org.xbmc.xbmc-atv2</pre> | ||
#:<pre>mkdir -p /Applications/XBMC.frappliance</pre> | #:<pre>mkdir -p /Applications/XBMC.frappliance</pre> | ||
#:<pre>reboot</pre> | #:<pre>reboot</pre> | ||
And you're done! You should now be running XBMC v11 (Eden) for Apple TV 2. See [[IOS FAQ#XBMC_Version|here]] to verify your XBMC version. | And you're done! You should now be running XBMC v11 (Eden) for Apple TV 2. See [[IOS FAQ#XBMC_Version|here]] to verify your XBMC version. | ||
= Updating = | |||
Either update through NitoTV or issue the following commands to update: | |||
#Open up your [[XBMC for iOS specific FAQ#SSH|terminal/ssh application]] and enter the following command to log in to your ATV2: | |||
#:<pre>ssh [email protected]</pre> | |||
#::'''EXAMPLE:''' <code>ssh [email protected].1.5</code> | |||
#You will be asked for a password: ''default password is '''alpine''''' | |||
#Continue to enter the following commands: | |||
#:<pre>apt-get update</pre> | |||
#:<pre>apt-get install org.xbmc.xbmc-atv2</pre> | |||
=Nightly builds= | =Nightly builds= | ||
Revision as of 01:23, 5 July 2012
| Which version of Apple TV software do you have? | |
|---|---|
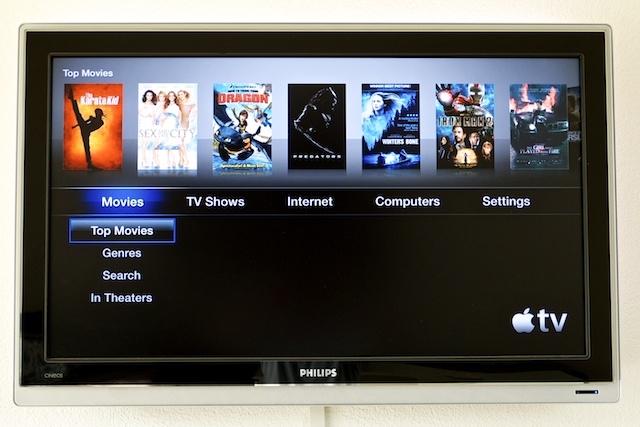
If you have a jailbroken Apple TV 2 running versions 4.1 to 4.4.4: |
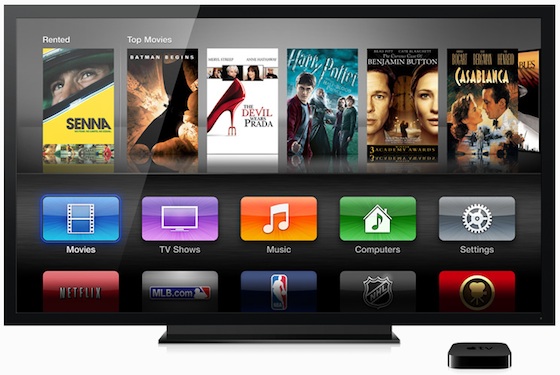
If you have a jailbroken Apple TV 2 running versions 5.0 and up: |
The current stable release of XBMC for iOS is v11 (Eden).
- Requirements
- If you have a jailbroken Apple TV 2 running versions 4.1 to 4.4.4 then use these instructions
- If you have a jailbroken Apple TV 2 running versions 5.0 and up then use these instructions
- If you haven't updated your ATV, it is highly recommended to stay on ATV software version on or before 4.3 due to 4.3 being more efficient and giving XBMC more system resources.
- Look here to find out which version you are currently running.
- If you have any issues, be sure to read the iOS FAQ!
ATV 4.x
Installing from the command line
- This is the same build installed from the nitoTV menu, if installed.
- Open up your terminal/ssh application and enter the following command to log in to your ATV2. Note, you need to replace "YOUR.ATV2.IP.ADDRESS" with the IP address of the Apple TV:
ssh [email protected]
- EXAMPLE:
ssh [email protected]
- EXAMPLE:
- You will be asked for a password: default password is alpine
- Continue to enter the following commands:
apt-get install wget
wget -O- http://apt.awkwardtv.org/awkwardtv.pub | apt-key add -
echo "deb http://apt.awkwardtv.org/ stable main" > /etc/apt/sources.list.d/awkwardtv.list
echo "deb http://mirrors.xbmc.org/apt/atv2 ./" > /etc/apt/sources.list.d/xbmc.list
apt-get update
apt-get install org.xbmc.xbmc-atv2
reboot
And you're done! You should now be running XBMC v11 (Eden) for Apple TV 2. See here to verify your XBMC version.
Installing from NitoTV
After installing NitoTV:
- Scroll right to the NitoTV menu on the Apple TV and choose the first option "Install Software".
- Scroll down the list until you see "XBMC-ATV2" and click on that.
- From that menu press "install" and your Apple TV will install XBMC and then do a SOFT reboot (no tethered boot required).
- XBMC will now be in your Apple TV menu, scroll right to it, click and enjoy.
And you're done! You should now be running XBMC v11 (Eden) for Apple TV 2. See here to verify your XBMC version.
ATV 5.x
Installing from the command line
- This is the same build installed from the nitoTV menu, if installed.
- Open up your terminal/ssh application and enter the following command to log in to your ATV2. Note, you need to replace "YOUR.ATV2.IP.ADDRESS" with the IP address of the Apple TV:
ssh [email protected]
- EXAMPLE:
ssh [email protected]
- EXAMPLE:
- You will be asked for a password: default password is alpine
- Continue to enter the following commands:
apt-get install wget
wget -O- http://apt.awkwardtv.org/awkwardtv.pub | apt-key add -
echo "deb http://apt.awkwardtv.org/ stable main" > /etc/apt/sources.list.d/awkwardtv.list
echo "deb http://mirrors.xbmc.org/apt/atv2 ./" > /etc/apt/sources.list.d/xbmc.list
apt-get update
mkdir -p /Applications/AppleTV.app/Appliances
apt-get install org.xbmc.xbmc-atv2
mkdir -p /Applications/XBMC.frappliance
reboot
And you're done! You should now be running XBMC v11 (Eden) for Apple TV 2. See here to verify your XBMC version.
Updating
Either update through NitoTV or issue the following commands to update:
- Open up your terminal/ssh application and enter the following command to log in to your ATV2:
ssh [email protected]
- EXAMPLE:
ssh [email protected]
- EXAMPLE:
- You will be asked for a password: default password is alpine
- Continue to enter the following commands:
apt-get update
apt-get install org.xbmc.xbmc-atv2
Nightly builds
Nightly builds are unstable test builds that have the latest bug fixes and feature additions. Nightly builds work with both ATV2 software version 4.x and 5.x. They are not fully tested, so anticipate issues and be sure to backup your userdata folder.
- Change history: trac timeline or commit history
NOTE: You MUST install the stable version (see above) before you can install a nightly build. You only need to install the stable version once and you don't need to uninstall previous versions to upgrade (or downgrade) XBMC.
- Open http://mirrors.xbmc.org/nightlies/darwin/atv2/ in a web browser and copy the url of the most recent file in that listing.
- EXAMPLE:
http://mirrors.xbmc.org/nightlies/darwin/atv2/xbmc-20111202-6729214-master-atv2.deb
- EXAMPLE:
- Open up your terminal/ssh application and enter the following command to log in to your ATV2:
ssh [email protected]
- EXAMPLE:
ssh [email protected]
- EXAMPLE:
- You will be asked for a password: default password is alpine
- Continue to enter the following commands:
rm -f *xbmc*.deb
wget URL-FROM-STEP-ONE-HERE
- EXAMPLE:
wget http://mirrors.xbmc.org/nightlies/darwin/atv2/xbmc-20111202-6729214-master-atv2.deb
- EXAMPLE:
dpkg -i *xbmc*.deb
rm *xbmc*.deb
And you're done! You should now have the latest nightly build of XBMC for ATV2. See here to verify your XBMC version.
Uninstalling
Uninstalling just XBMC
SSH into your Apple TV (Using the same instructions from above to login). Then run:
apt-get remove org.xbmc.xbmc-atv2
It will ask you if you want to continue:
The following packages will be REMOVED:
  org.xbmc.xbmc-atv2
0 upgraded, 0 newly installed, 1 to remove and 5 not upgraded.
After this operation, 0B of additional disk space will be used.
Do you want to continue [Y/n]?
Just enter "Y" to accept and continue.
Removing settings
XBMC will uninstall from your Apple TV but will leave certain things (databases and everything in your userdata folder) behind to make it easier if you wanted to reinstall. To delete those also run:
rm -Rf /private/var/mobile/Library/Preferences/XBMC
This will then be completely clear and XBMC will be removed.
Deleting XBMC dependencies
XBMC has three dependencies that it installs along with itself when you first install XBMC (org.xbmc.xbmc-seatbeltunlock, gawk, bsdiff). After uninstalling XBMC you can also uninstall these 3 dependencies by running this command:
apt-get remove org.xbmc.xbmc-seatbeltunlock && apt-get remove gawk && apt-get remove bsdiff

