This category contains the settings for the playback of videos
Actions
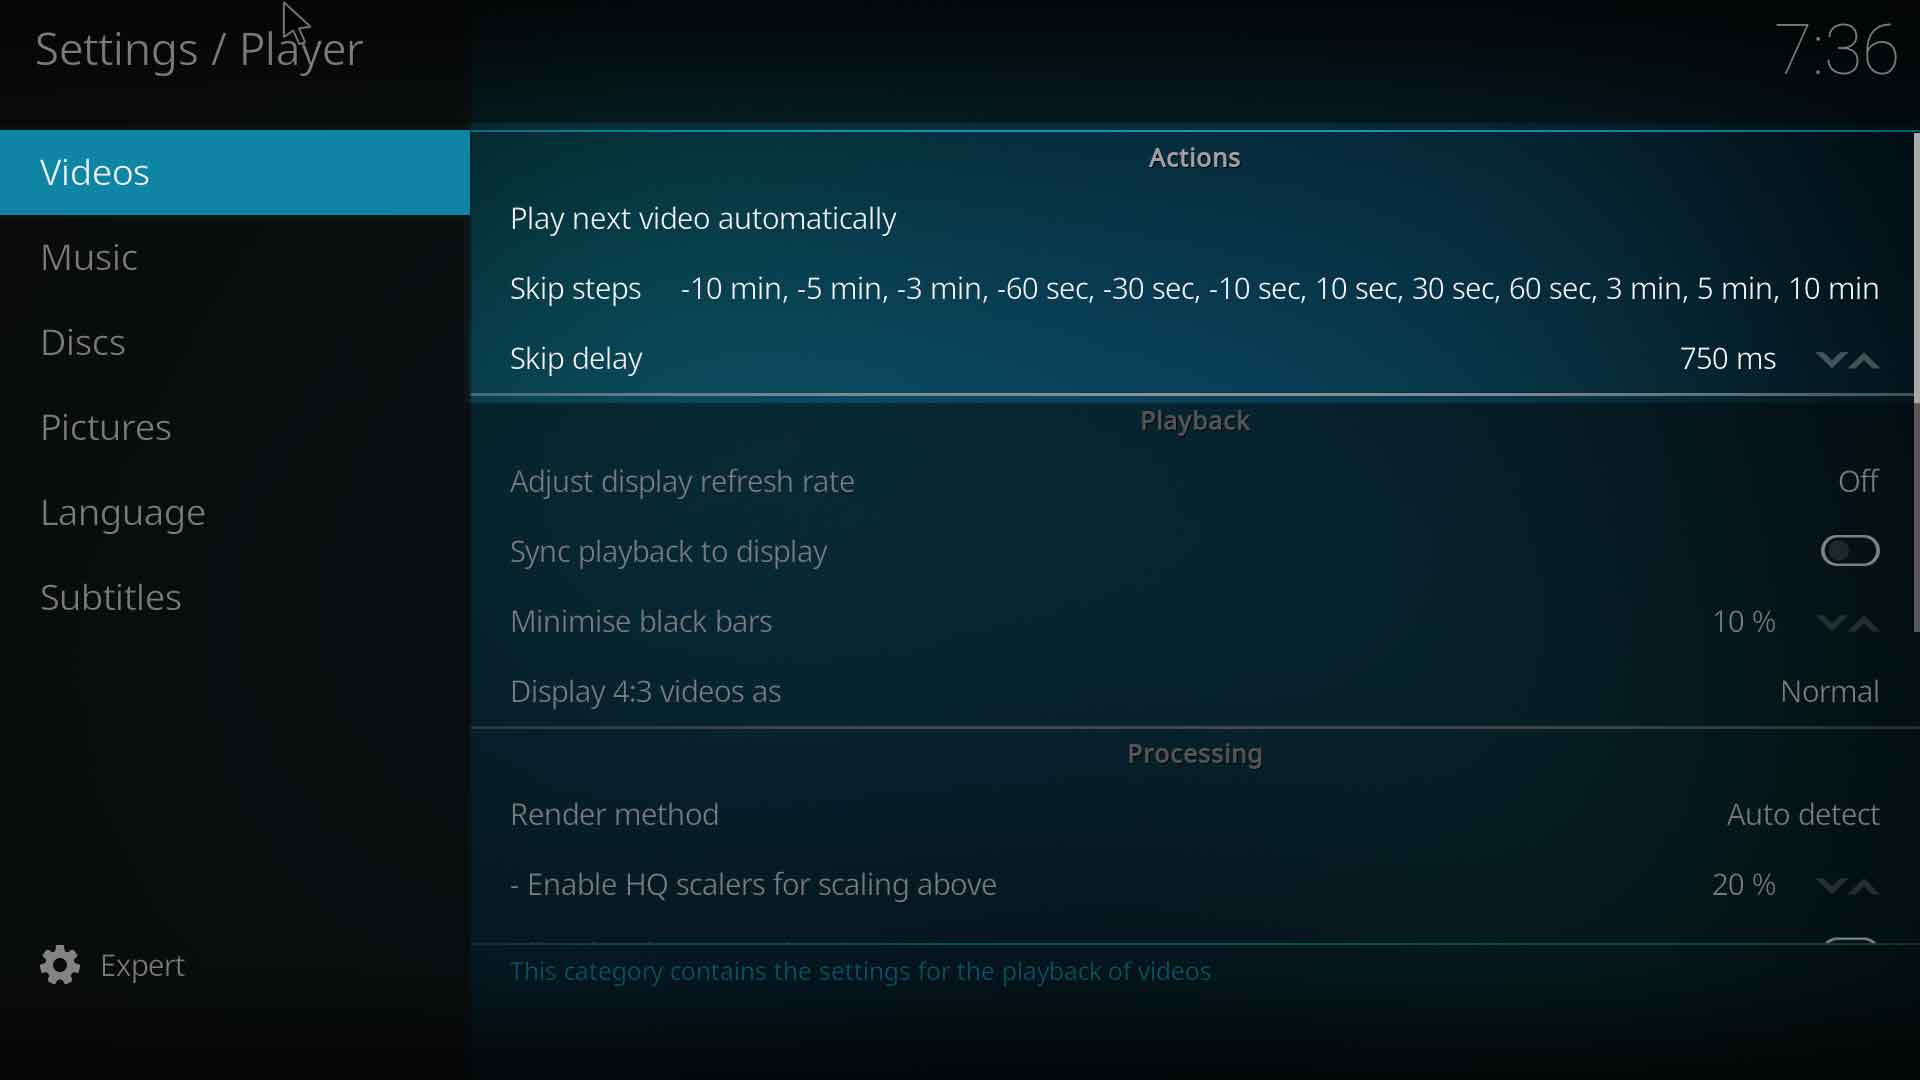
Play next video automatically
| Settings level:
|
Basic
|
| Description:
|
A multiselect window gives the option to define which kind of video item will be played next automatically. Available options are: Music Videos, TV shows, Episodes, Movies and Uncategorized.
|
- See also: Playlists
Skip steps
| Settings level:
|
Standard
|
| Description:
|
Defines the amount of time each press of the Skip button will skip forward or backwards. A (-) will define backwards and no (-) will define forward. You can set multiple times so each press will skip more time in the video. So if, for example you use 10 sec, 30 sec, 60 sec when press the Skip button once it will skip 10 seconds foward, double pressing the Skip button will skip 30 seconds and triple pressing the Skip button will skip 60 seconds.
|
- See also: Skip steps
Skip delay
| Settings level:
|
Standard
|
| Description:
|
Defines how much time it takes before the skip step occurs. The range is none (which will cause the skip step to happen immediately) & 250 - 3000ms (milliseconds).
|
Playback
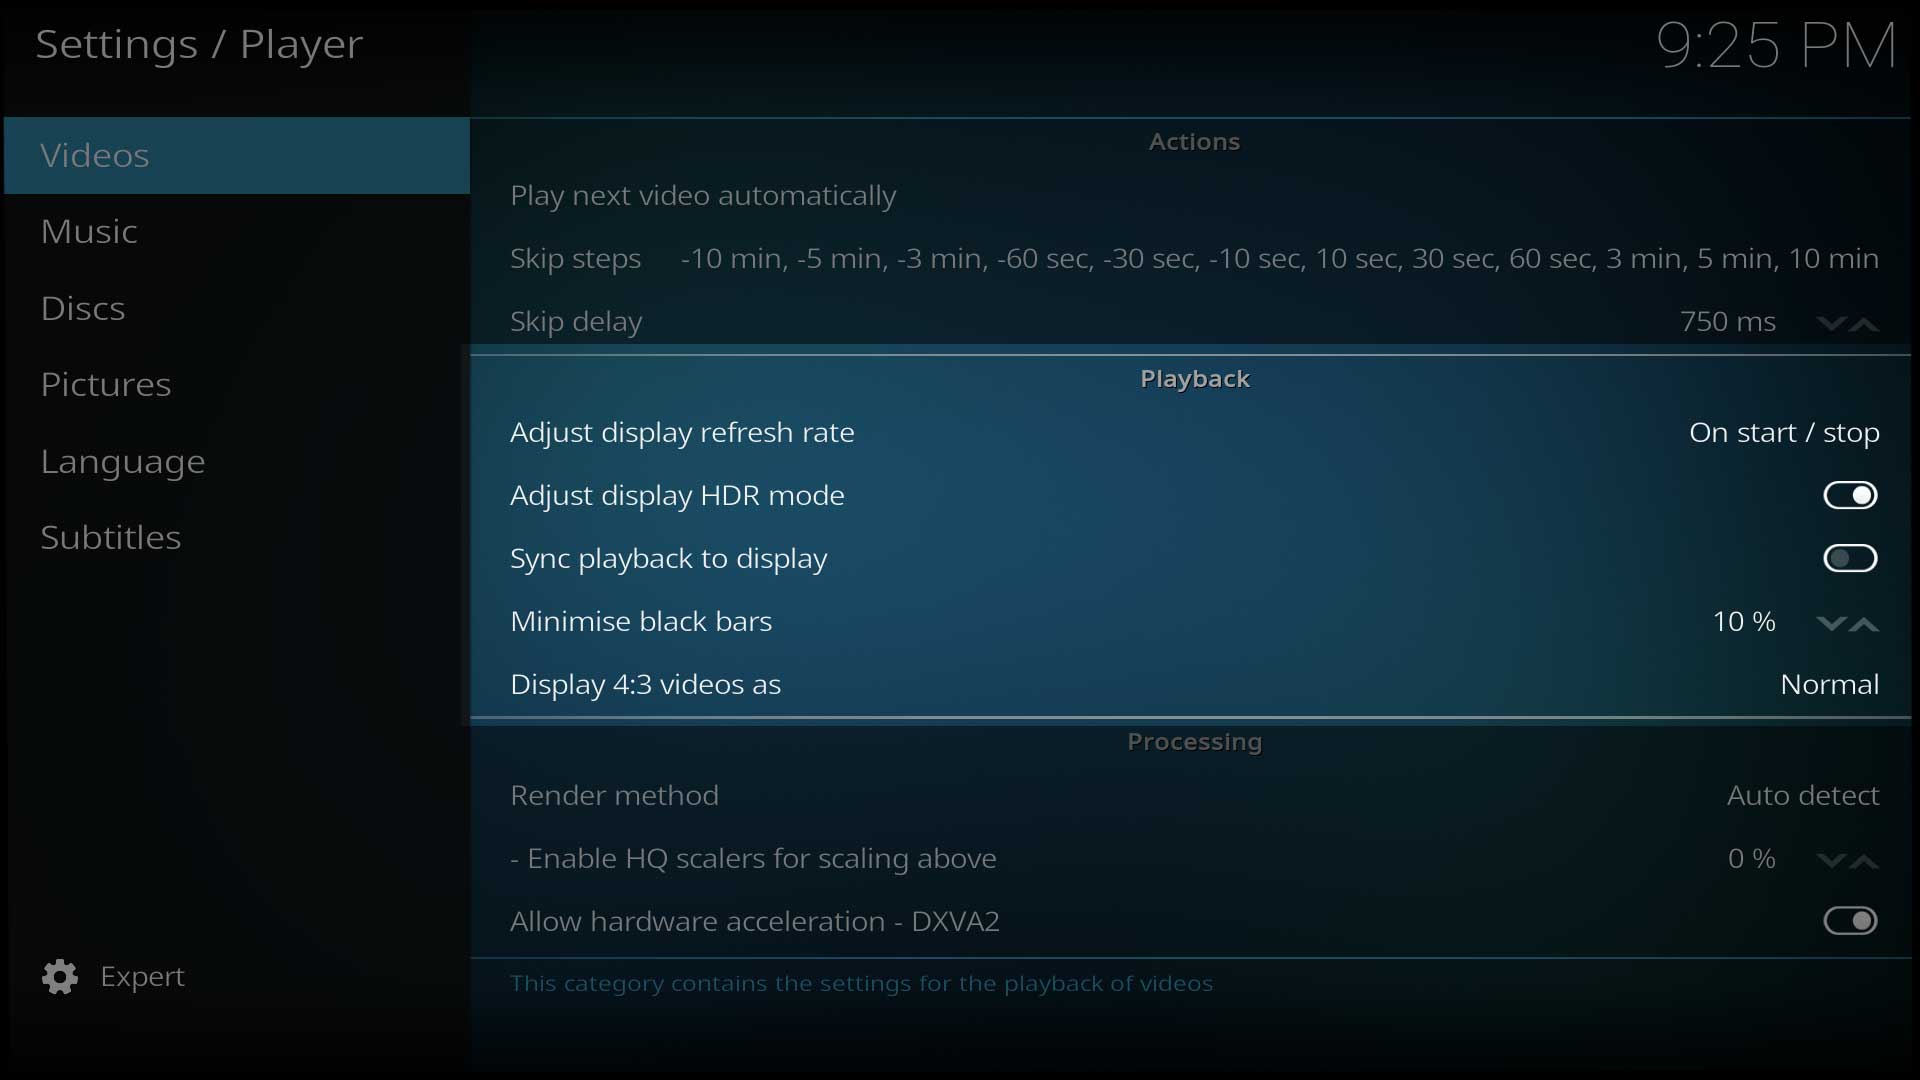
Adjust display refresh rate
| Settings level:
|
Standard
|
| Description:
|
This setting will switch the output refresh rate to the best refresh rate that is supported by the display AND by the hardware Kodi is running on (as reported by EDID) when playing a video file. It will automatically set the refresh rate which is best matched with the video that is playing. This potentially allows for perfectly smooth video reproduction, as video material can be recorded in a variety of frame rates (23.976fps, 24fps, 25fps, 29.97fps, 30 fps, etc.) which need to be properly matched by the refresh rate of the display, in order to be displayed smoothly. [1]
Using this setting may cause the TV or monitor to blank for a few seconds while adjustments are made. This is the TV adjusting itself and not Kodi.
Four settings are available:
- Off - The default setting. No adjustments are made and output is at a fixed display refresh rate, usually the rate set in the GPU
- Always - Adjustments are made whenever a frame rate change is detected by Kodi (not recommended)
- On start/stop - When required, adjusts the refresh rate when starting and stopping video playback
- On start - When required, adjusts the refresh rate on start of video playback only. On some systems this may cause stuttering when navigating the menu system after playback stops.
|
Sync playback to display
| Settings level:
|
Standard
|
| Description:
|
This setting enables a syncing of the video to the refresh rate of the monitor by altering the playback speed so that it matches the display refresh rate. When used in conjunction with the previous setting it allows a "fine tune" syncing.
For example if you have a 50Hz only display but watch 24p content, the 24p content will look horrible if played at 50Hz. If you Sync Playback to Display it will play the 24Hz back at 25Hz (a simple division of 50Hz) which will look much nicer at 50Hz as there are no repeated frames (and thus no stutter) but the audio sync is out and needs to be adjusted either by re-sampling or by dupe/dropping.
Using this setting will disable Audio Passthrough.
|
Minimise black bars
| Settings level:
|
Advanced
|
| Description:
|
Allow video player to try to fit video to screen by ignoring aspect ratio by a certain amount.
|
Display 4:3 videos as
| Settings level:
|
Advanced
|
| Description:
|
Determines the zoom level that 4:3 videos are shown on widescreen displays.
|
Processing
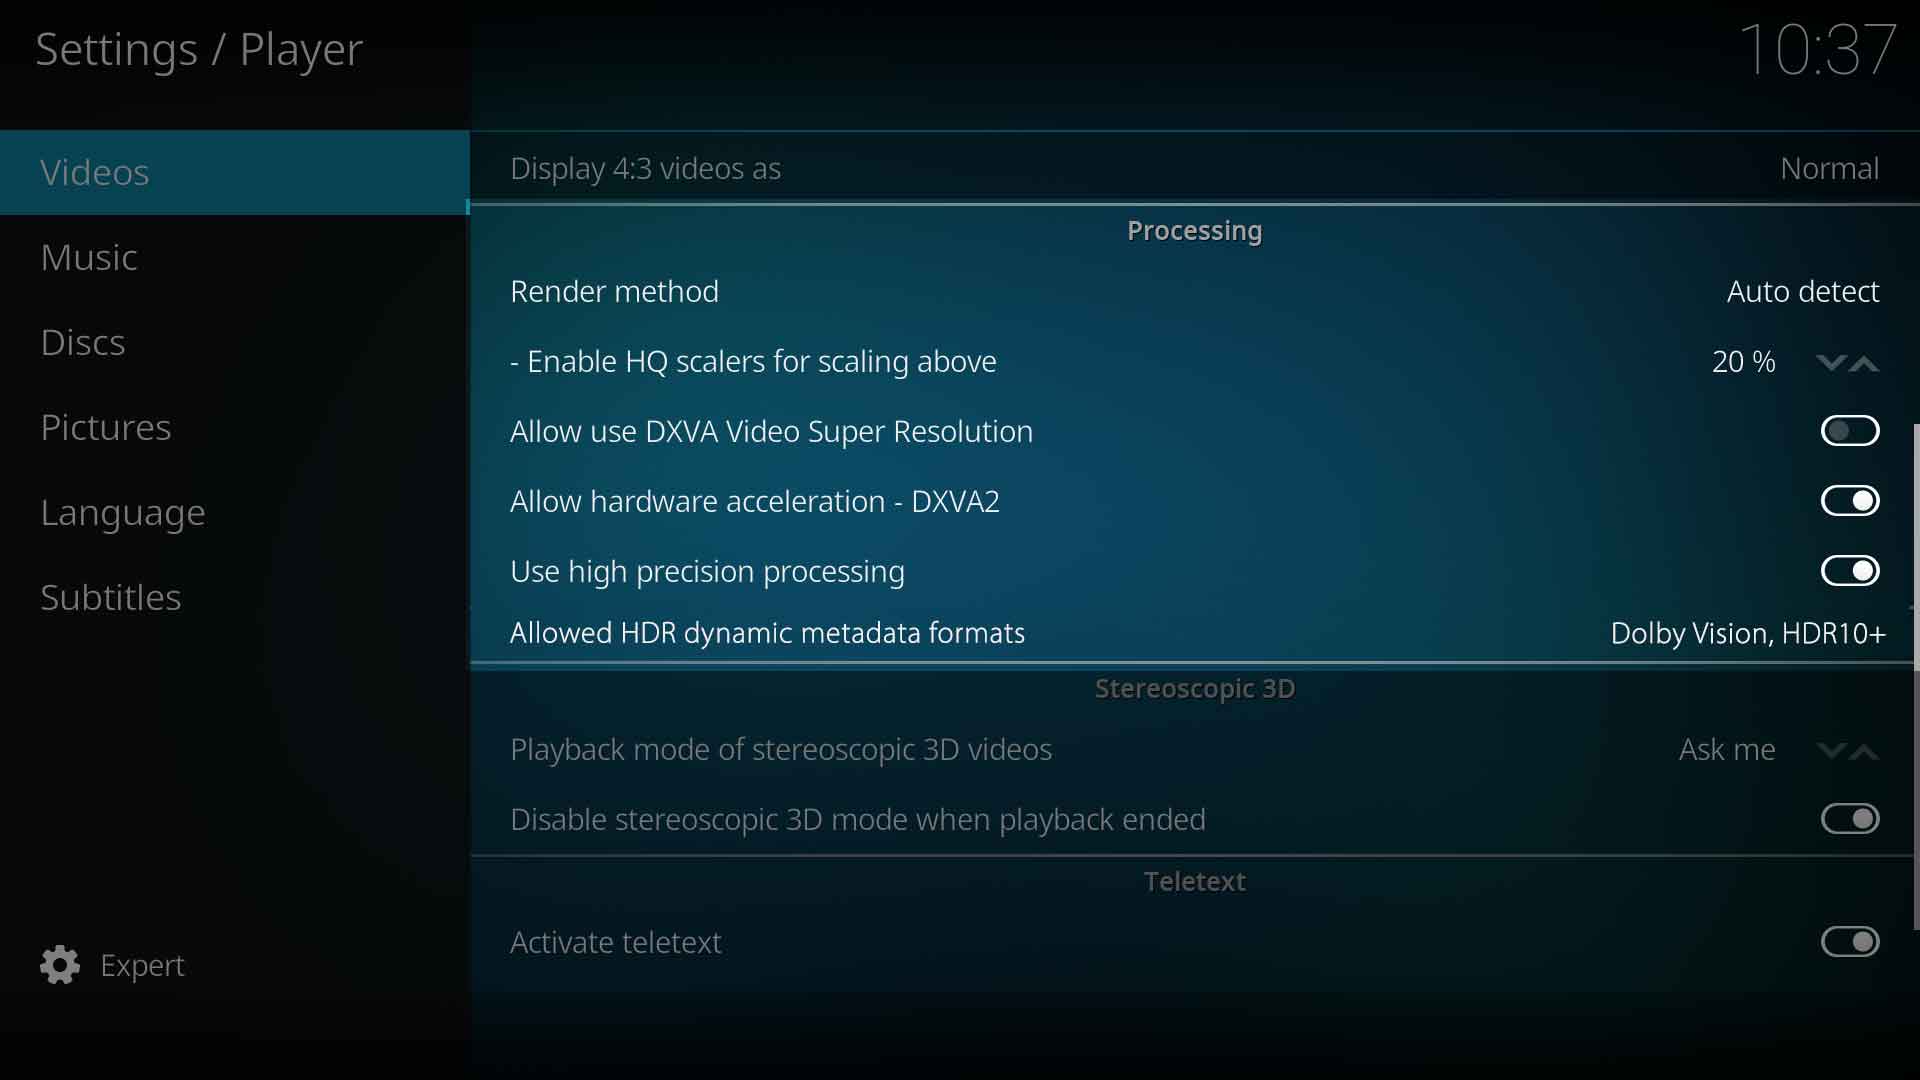
Render method
| Settings level:
|
Advanced
|
| Description:
|
Controls the method used by the player to process and display the video, (which is called rendering).
|
Enable HQ scalers for scaling above
| Settings level:
|
Advanced
|
| Description:
|
Use high quality scalers when upscaling a video by at least this percentage. A value below 5% makes little sense as video is processed with high GPU load without any visible picture quality improvements
|
Platform Specific Hardware Acceleration settings
- The following settings will show up for the Processing section for their respective platforms:
| Windows specific settings (click 'expand' to view)
|
- Allow hardware acceleration DXVA2
| Settings level:
|
Advanced
|
| Description:
|
Enable DXVA2 hardware decoding of video files.
|
|
| Linux specific settings (click 'expand' to view)
|
- Allow hardware acceleration - VDPAU
| Settings level:
|
Advanced
|
| Description:
|
Enable VDPAU hardware decoding of video files, mainly used for NVIDIA graphics and in some circumstances AMD graphics.
|
- Prefer VDPAU video mixer
| Settings level:
|
Advanced
|
| Description:
|
Bypassing VDPAU mixer saves resources on low power systems but slightly reduces picture quality.
|
- Use MPEG-2 VDPAU
| Settings level:
|
Expert
|
| Description:
|
Enable this option to use hardware acceleration for the MPEG-(1/2) codec. If disabled the CPU will be used instead. Older Radeon cards tend to segfault with this enabled.
|
- Use MPEG-4 VDPAU
| Settings level:
|
Expert
|
| Description:
|
Enable this option to use hardware acceleration for the MPEG-4 codec. If disabled the CPU will be used instead. Some ION hardware has problems with this being enabled by default.
|
- Allow hardware acceleration - VAAPI
| Settings level:
|
Advanced
|
| Description:
|
Enable VAAPI hardware decoding of video files, mainly used for Intel graphics and in some circumstances AMD graphics.
|
- Use MPEG-2 VAAPI
| Settings level:
|
Expert
|
| Description:
|
Enable this option to use hardware acceleration for MPEG-(1/2) codecs. If disabled the CPU will be used instead. Some MPEG-2 videos might have green artifacts.
|
- Use MPEG-4 VAAPI
| Settings level:
|
Expert
|
| Description:
|
Enable this option to use hardware acceleration for MPEG-4 codec. If disabled the CPU will be used instead.
|
- Use VC-1 VAAPI
| Settings level:
|
Expert
|
| Description:
|
Enable this option to use hardware acceleration for VC-1 based codecs. If disabled the CPU will be used instead. Especially VC-1 interlaced fails hard on Intel hardware.
|
- Use VP8 VAAPI
| Settings level:
|
Expert
|
| Description:
|
Enable this option to use hardware acceleration for the VP8 coded. If disabled the CPU will be used instead
|
- Use VP9 VAAPI
| Settings level:
|
Expert
|
| Description:
|
Enable this option to use hardware acceleration for the VP9 coded. If disabled the CPU will be used instead
|
|
| Mac OS specific settings (click 'expand' to view)
|
- Allow hardware acceleration - VTBDecoder
| Settings level:
|
Advanced
|
| Description:
|
Enable VTB hardware decoding of video files.
|
|
Stereoscopic 3D
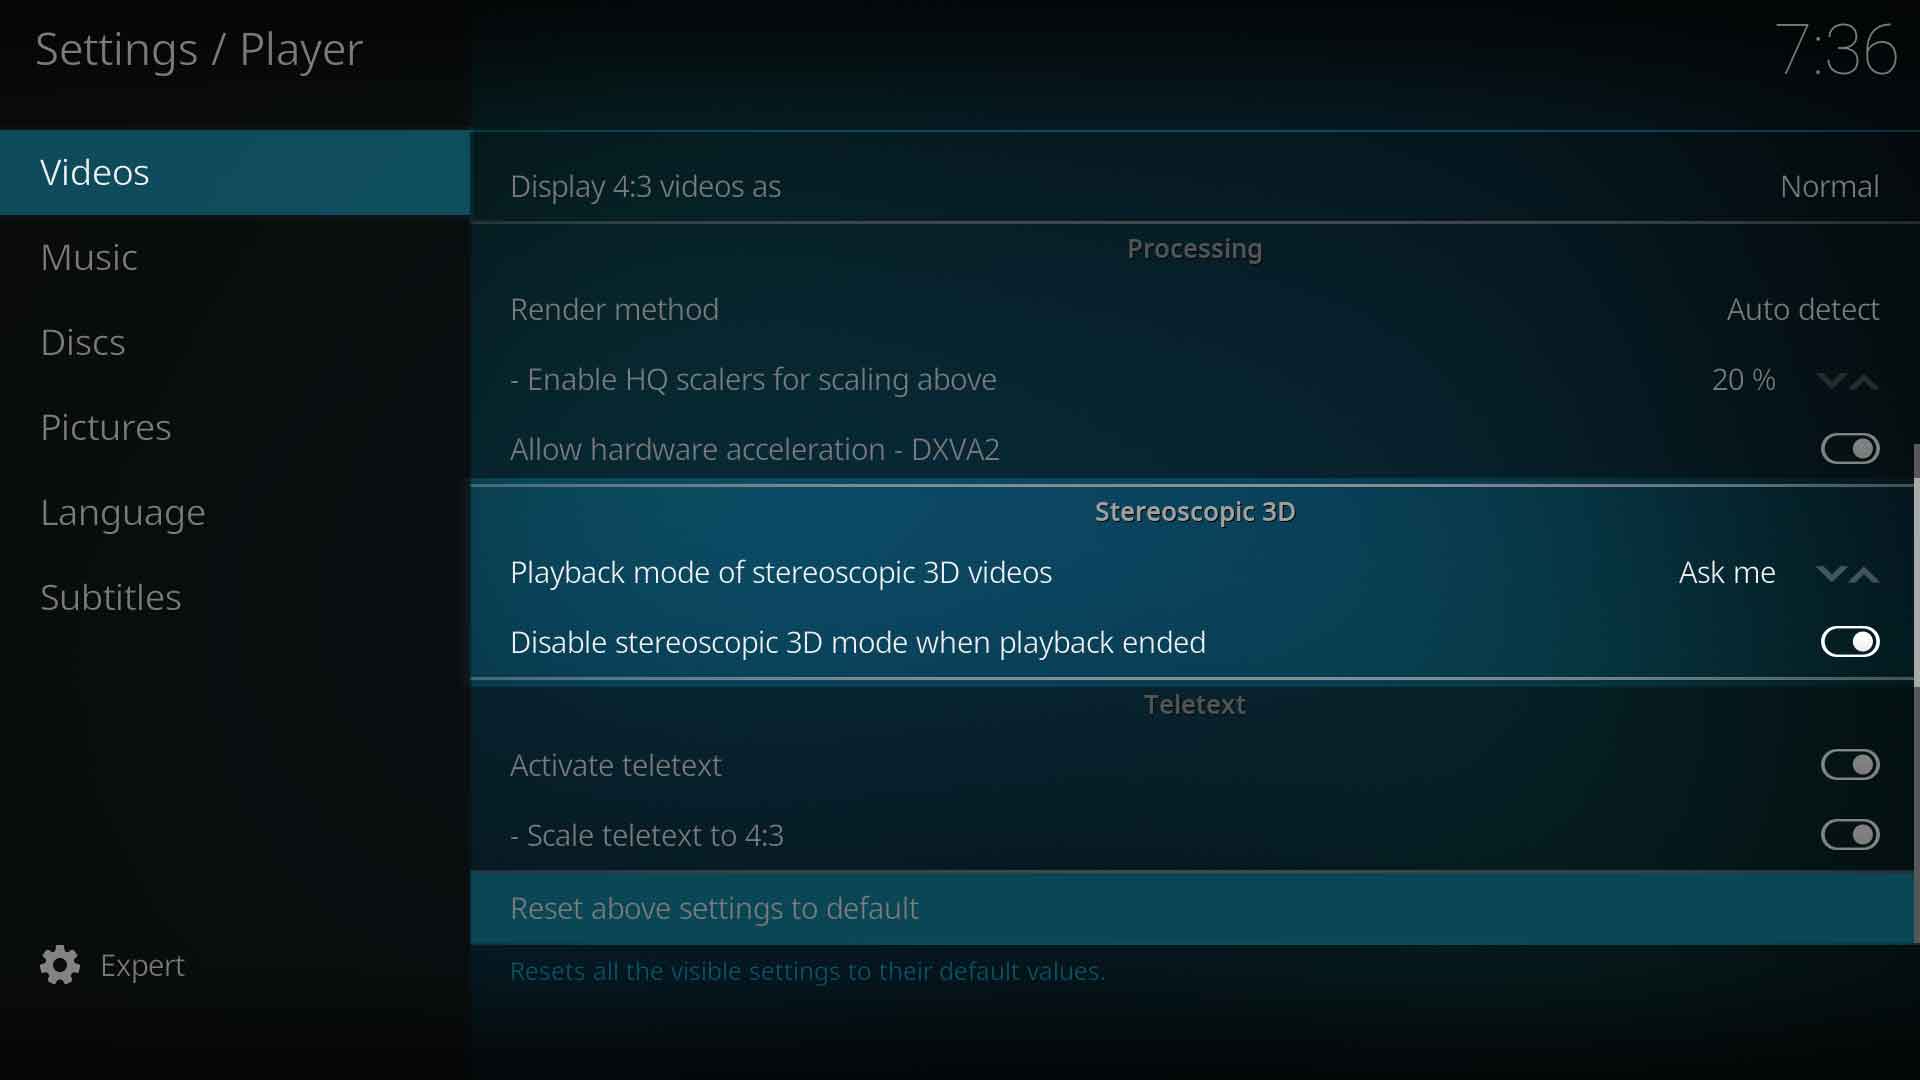
Playback mode of stereoscopic videos
| Settings level:
|
Advanced
|
| Description:
|
Select in which mode stereoscopic 3D videos will be played. [Ask me] Will show a dialogue to select the desired mode for each playback. [Preferred mode] Will use the preferred mode specified in the "system->Video hardware" section of the settings. [Monoscopic/2D] will play the video in mono/2D. [Ignore] Disables any stereoscopic 3D processing and handling.
|
Disable stereoscopic mode when playback is stopped
| Settings level:
|
Advanced
|
| Description:
|
While enabled, GUI and some TVs will switch back to 2D mode, beween videos in a playlist or when playback ended. While disabled, GUI and TV will stay in stereoscopic 3D mode. For video playlists with mixed stereoscopic 3D and 2D content, then the GUI will also stay in stereoscopic 3D mode even when a non-stereoscopic 2D video is playing.
|
Teletext
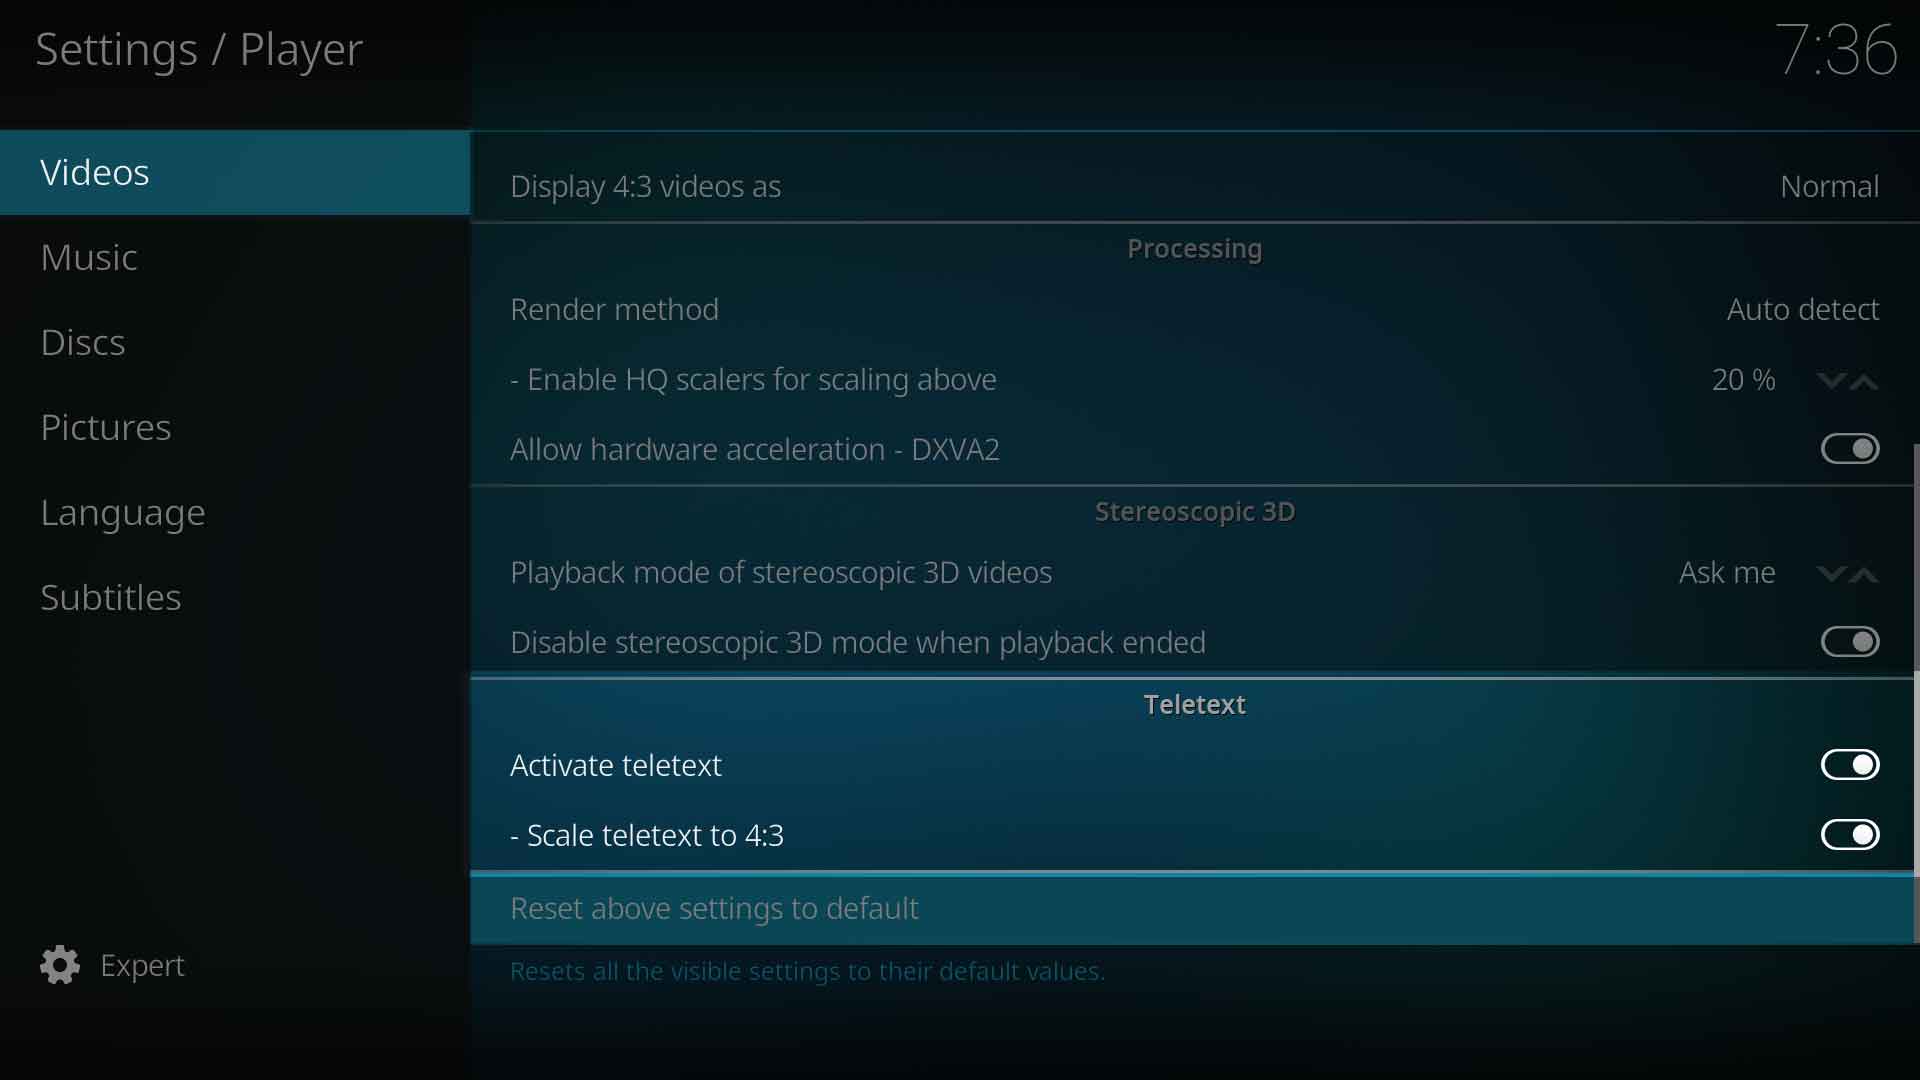
Activate Teletext
| Settings level:
|
Advanced
|
| Description:
|
Enables Teletext when watching a live TV stream.
|
Scale Teletext to 4:3
| Settings level:
|
Advanced
|
| Description:
|
When selected, scales Teletext to 4:3 ratio.
|
References


