Weather: Difference between revisions
No edit summary |
(Add Artwork section) |
||
| Line 36: | Line 36: | ||
:'''[[Add-on:Oz_Weather | Oz Weather]]''' | :'''[[Add-on:Oz_Weather | Oz Weather]]''' | ||
= Artwork = | |||
The default skin Estuary supports fanart backgrounds that can be installed from the repository. Other skins may additionaly support a users own collection of weather fanart. | |||
To install a weather fanart pack in Estuary, go to {{highlight|Settings > Interface > Skin > Configure skin... > Artwork}} and select '''Choose weather fanart pack'''. If none are available, use the ''Get more'' button to download packs. | |||
: See '''[[Add-on:Estuary/Settings#Artwork_Settings|Estuary Artwork Settings]]''' | |||
By installing a different Weather Icon pack, the default weather icons can also be changed. These can be installed from {{highlight|Settings > Add-ons > Install from repository > Look and feel > Image collections}} and scrolling to the end of the list for ''Weather Icons'' | |||
Installing either of these may require a restart of {{Kodi}} if they do not display immediately. | |||
| Line 43: | Line 56: | ||
{{updated|19}} | {{updated|19}} | ||
[[Category: | [[Category:Weather_add-ons|*]] | ||
[[Category:Karellen]] | [[Category:Karellen]] | ||
[[Category:Settings]] | [[Category:Settings]] | ||
[[Category:First time user]] | [[Category:First time user]] | ||
Revision as of 21:01, 7 January 2021
Kodi uses add-ons to provide weather information. You can select from various global and regional weather add-ons and customize various location options.
Installation
The installation of a Weather add-on is required if you would like to use the Weather feature of Kodi. The settings page for Weather can be accessed using either of two methods and both methods will access the same settings page as shown in the following images.
- If there is no Weather add-on installed, select Weather from the Main menu, or
- Use the Settings menu to access the Weather Settings page
To install the Weather add-on, follow these steps:
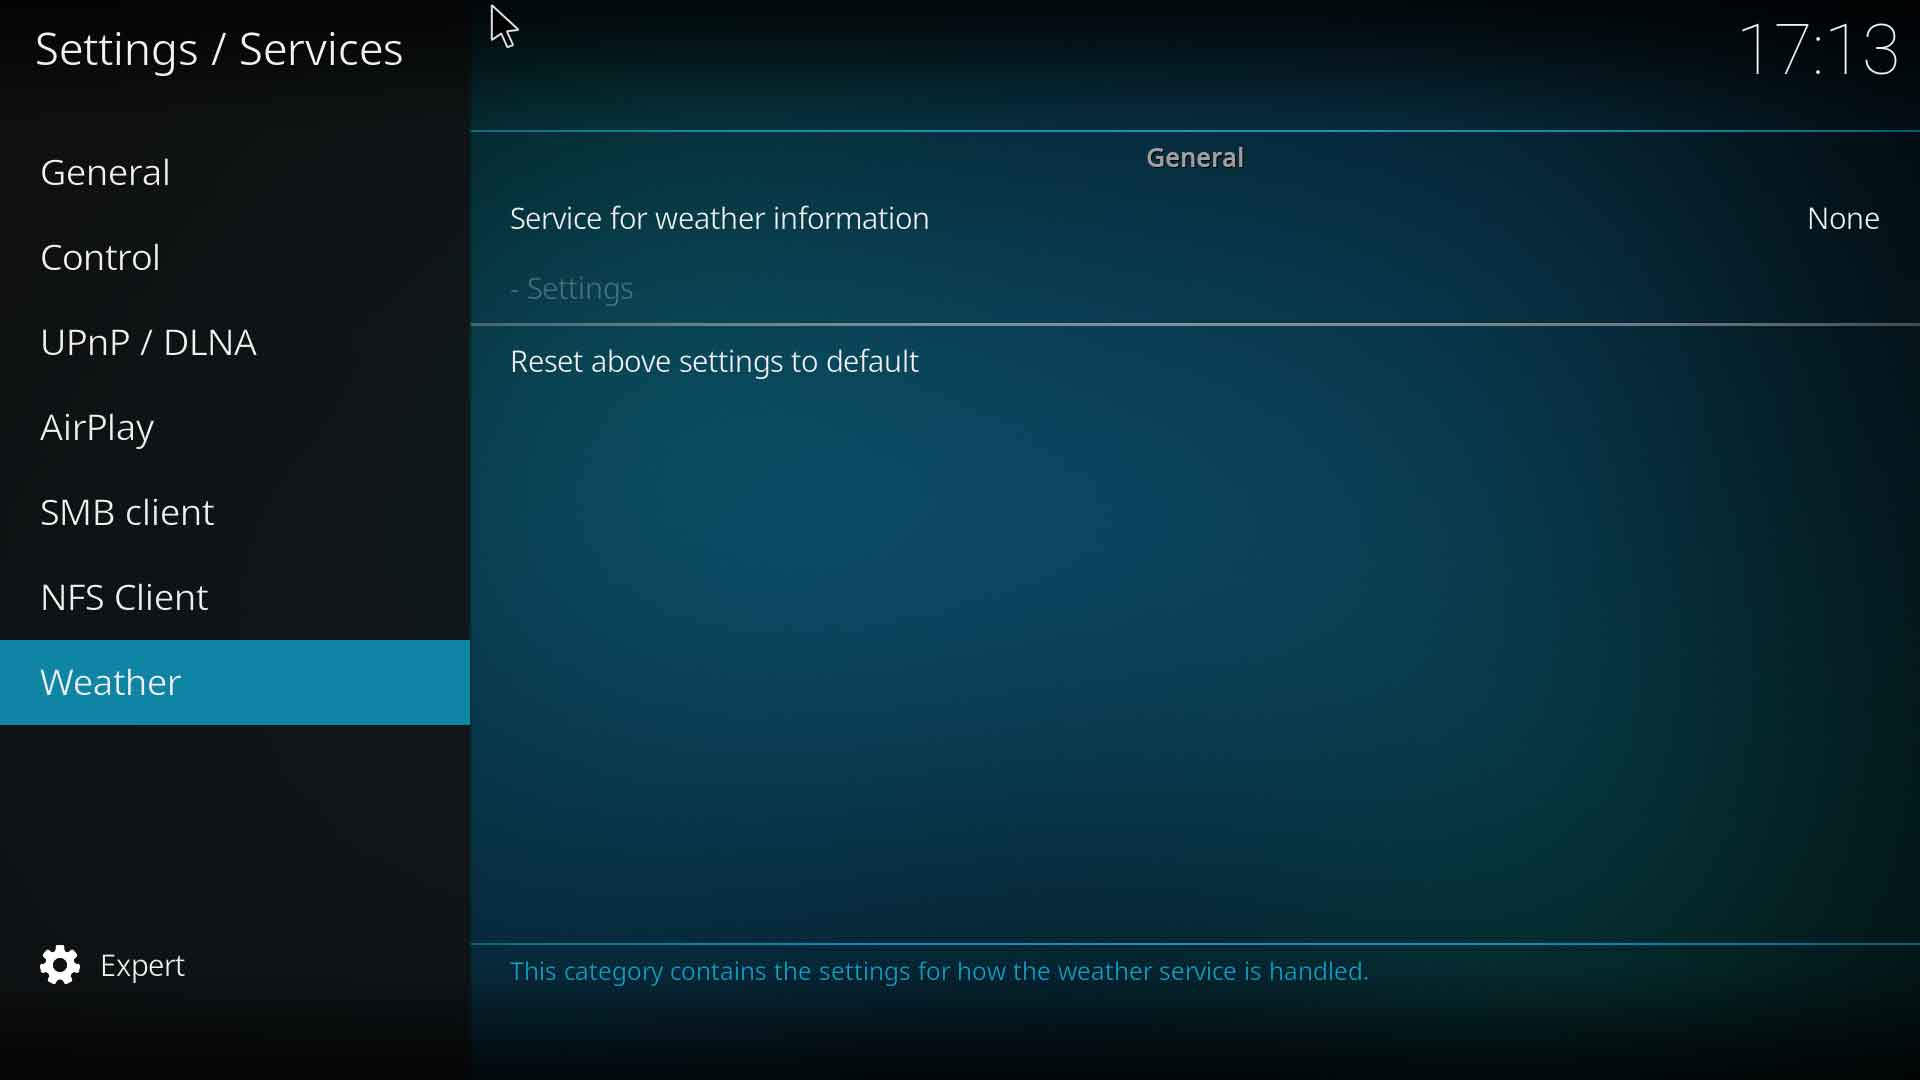
Step 1: Access the Weather Settings page as shown in the image.
Select Service for weather information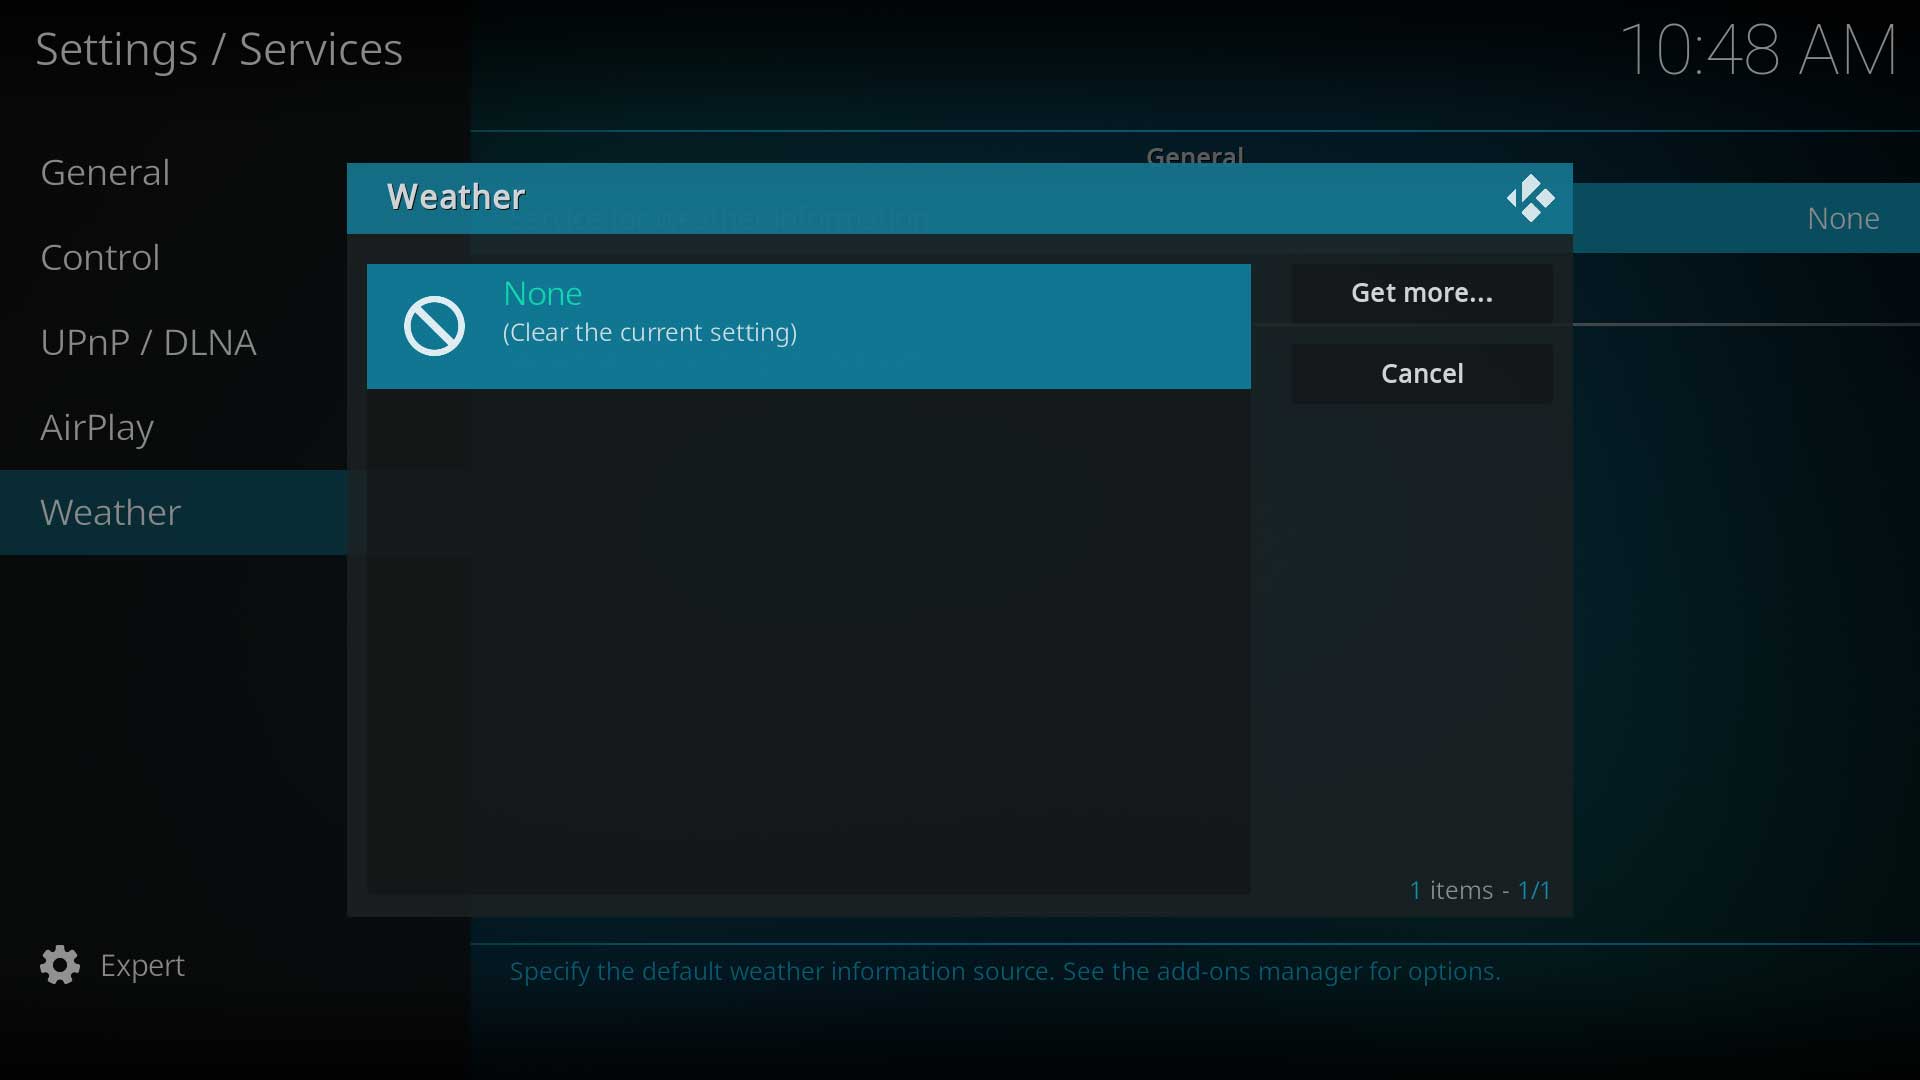
Step 2: If no add-ons are listed, select Get more...
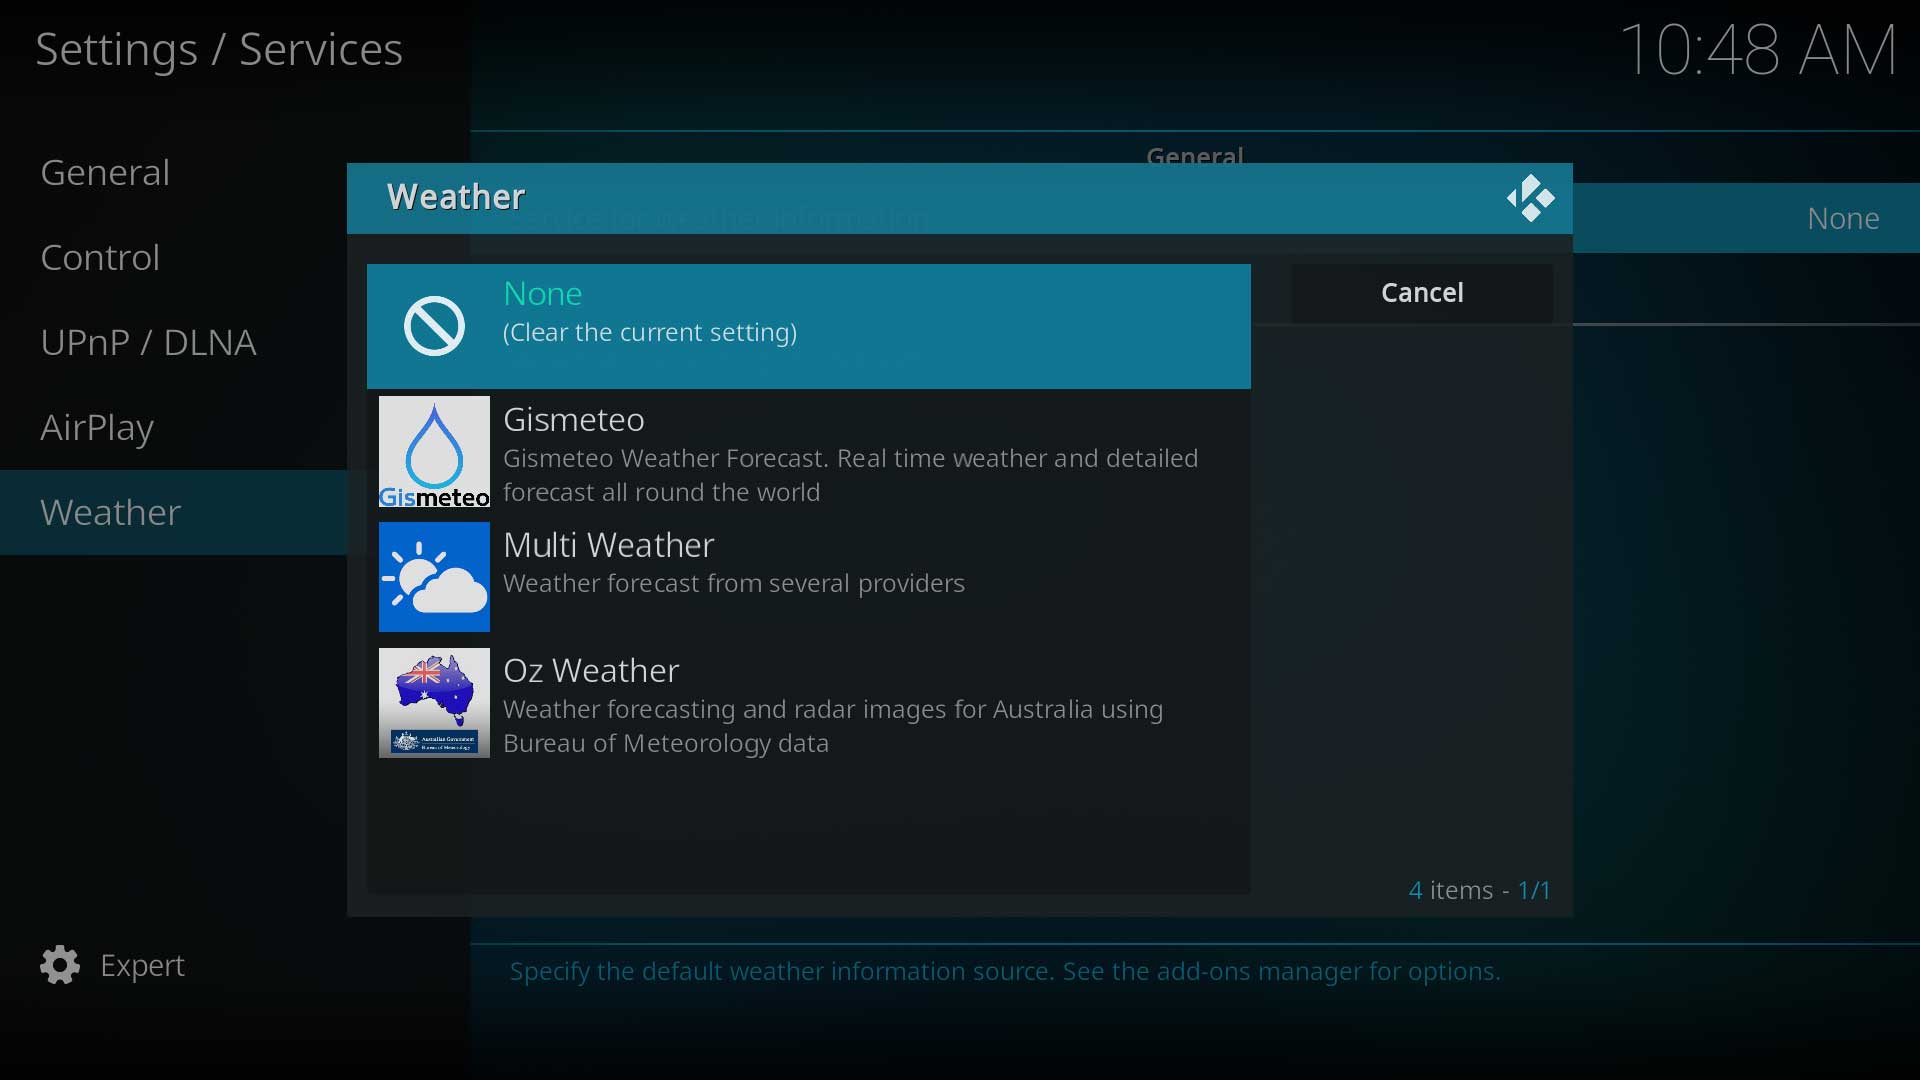
Step 3: From the Get more... screen select your preferred provider


- 4. Once you have selected the Weather add-on, enter the Settings option shown in Step 1 (greyed out until add-on is installed) and enter the required location and service details
- 5. Once complete, you will be able to access the weather information from the Kodi Main Menu. The current weather is also displayed on various pages throughout Kodi.
Celsius and Fahrenheit
To change between celsius and fahrenheit go to Settings->Interface Settings->Regional then select your location under Region default format or change the Temperature unit to your preference.
Available Add-ons
Links to the wiki pages of currently available Weather Add-ons...
Artwork
The default skin Estuary supports fanart backgrounds that can be installed from the repository. Other skins may additionaly support a users own collection of weather fanart.
To install a weather fanart pack in Estuary, go to Settings > Interface > Skin > Configure skin... > Artwork and select Choose weather fanart pack. If none are available, use the Get more button to download packs.
By installing a different Weather Icon pack, the default weather icons can also be changed. These can be installed from Settings > Add-ons > Install from repository > Look and feel > Image collections and scrolling to the end of the list for Weather Icons
Installing either of these may require a restart of Kodi if they do not display immediately.
| Return to top |
|---|