Archive:UPnP/Media source: Difference between revisions
(→Compatible UPnP MediaServers (UPnP-servers): I doubt this list has been touched in a long time, and it is waaaay tooo masive. Feel free to add various options back via Supplemental tools pages) |
Greenbutton (talk | contribs) (THe steps below don't work if UPnP isn't enabled... I just made that clear.) |
||
| (19 intermediate revisions by 6 users not shown) | |||
| Line 1: | Line 1: | ||
{{ | {{mininav|[[UPnP]]}} | ||
<section begin="intro" />Kodi can use UPnP as a [[media sources]] from any device that has a UPnP server. UPnP media servers are available for most operating systems and many hardware platforms. Kodi itself can be a [[UPnP server]].<section end="intro" /> | |||
UPnP media | |||
Currently, due to technical limitations (dynamic file paths) UPnP file sources can't be scanned into the local library. However, since many UPnP servers can provide metadata as well as the files themselves, then this may not be an issue. | |||
== Setting up UPnP file sources in Kodi == | |||
UPnP file sources can be used in videos, music, and pictures. Configuring UPnP file sources in Kodi is as easy as setting up any other type of file source, such as [[SMB]] or [[NFS]]. | |||
<b>Before you begin...</b> you need to enable UPnP support for your client. Go into Settings > Services > UPnP/DLNA and turn on the switch for "Enable UPnP Support". After that's done, follow the steps below to add each UPnP source. | |||
UPnP | |||
<gallery widths=500px heights=313px> | <gallery widths=500px heights=313px> | ||
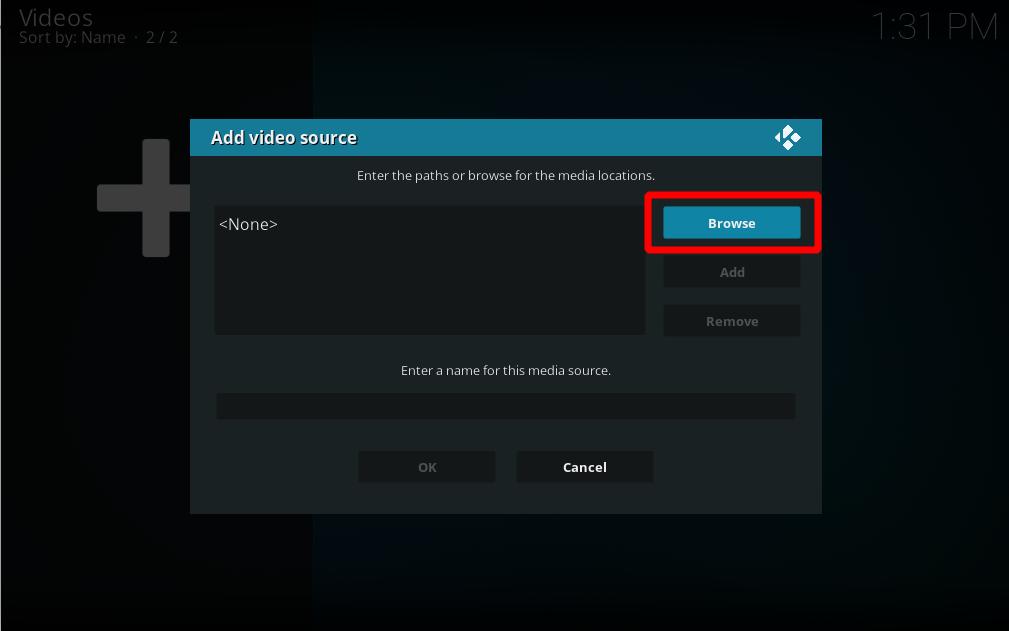
File: | File:Share-upnp-library.jpg|'''Step 1:''' Go into ether Videos, Music, or Picture file views, depending on the content you want to add, and use the "Add" button to bring up this window.<br />'''Step 2:''' Then click on the "Browse" button on the right hand side. | ||
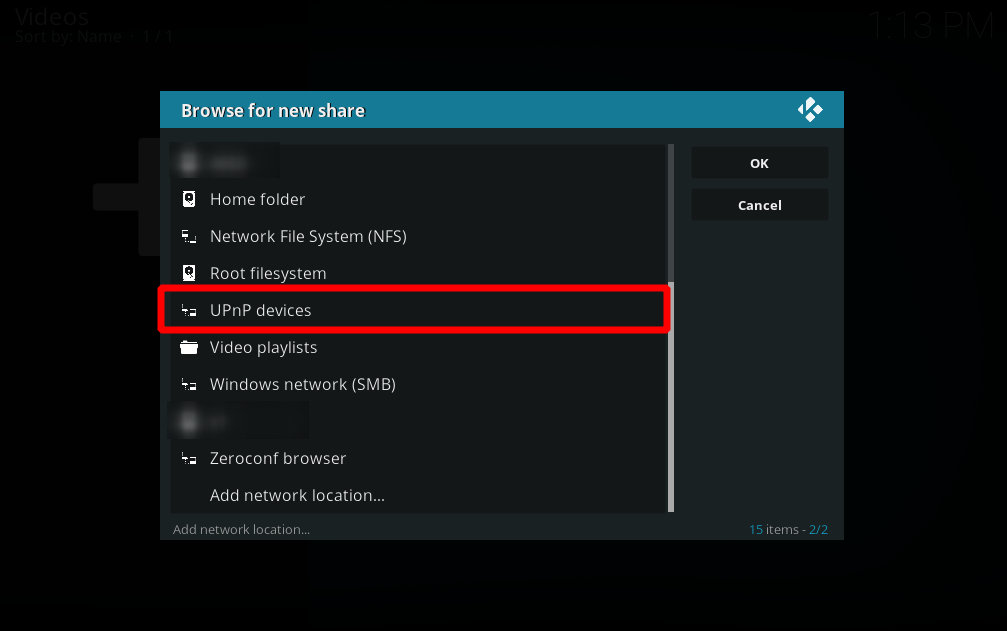
File: | File:Share-upnp-library2.png|'''Step 3:''' This new window will pop up. Scroll down and select "UPnP Devices" | ||
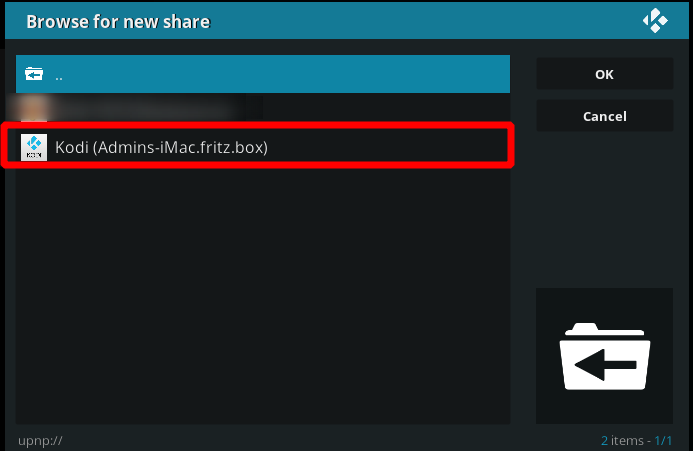
File: | File:Share-upnp-library3.png|'''Step 4:''' All available UPnP servers on your network should show up here. If a source/server doesn't show up, it might be blocked by one of the other UPnP servers due to a misconfiguration. Select the source you wish to add. | ||
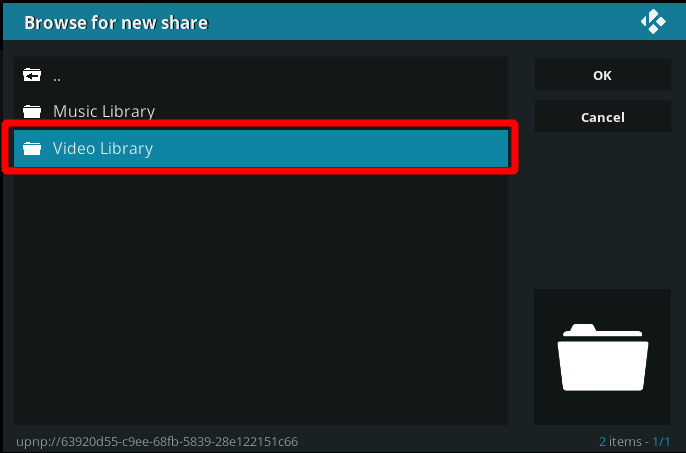
File: | File:Share-upnp-library4.png|'''Step 5:''' At this window please select the kind of content you want to add. In that case, we choose "Video Library". | ||
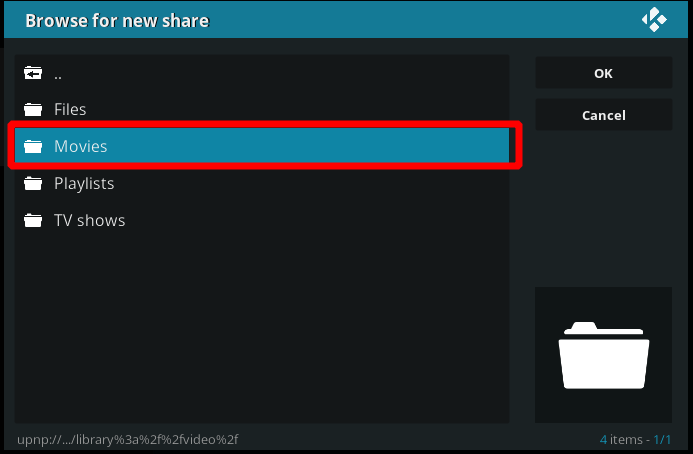
File: | File:Share-upnp-library5.png|'''Step 6:''' This window will let you select if you would like to add "Files", "Movies", "Playlists" or "TV shows". Please choose what you want to add. In our case here, we select "Movies". | ||
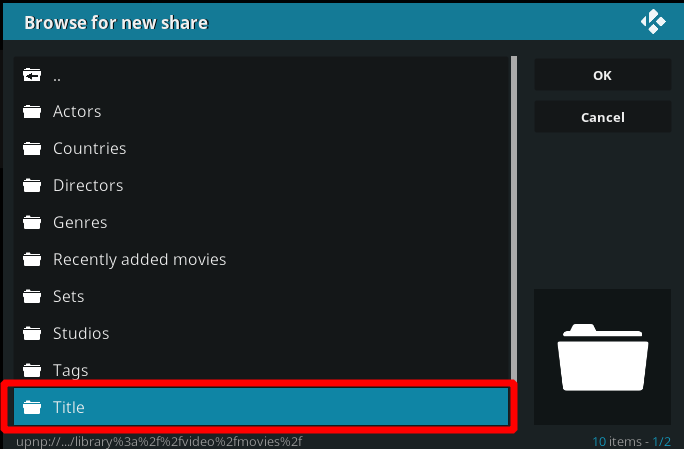
File: | File:Share-upnp-library6.png|'''Step 7:''' Now please select "Title". You can of course select something else according to what you want to add. It's easily possible to only add a specific genre via UPnP in that way for example. | ||
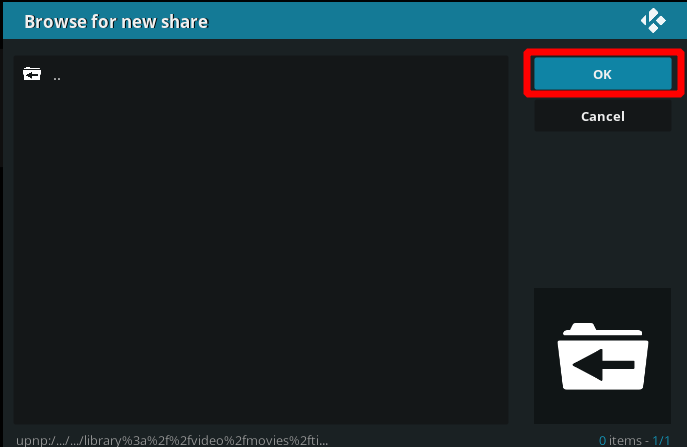
File:Share-upnp-library7.png|'''Step 8:''' The next window looks a bit confusing. Don't worry if you don't see any files. That's normal. Please select "OK" | |||
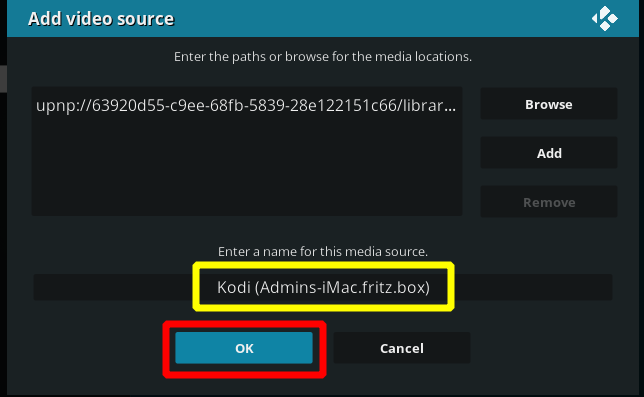
File:Share-upnp-library8.png|'''Step 9:''' At this window you are able to give the source a specific name if you want (yellow square). If you choose to do so, select "OK" after you are done. | |||
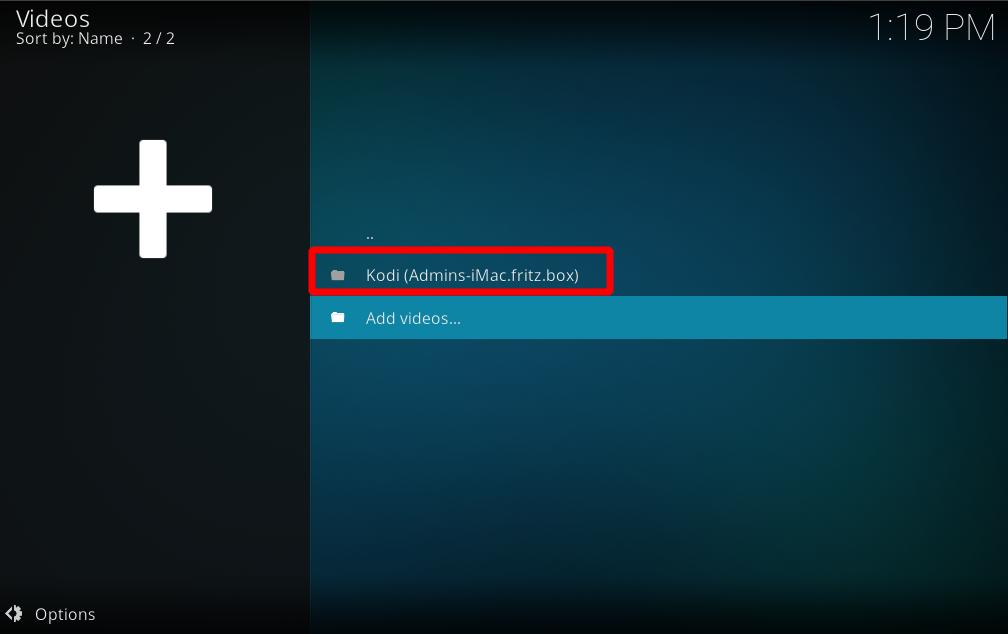
File:Share-upnp-library9.jpg|'''Step 10:''' Now, we're done and you will see the source added under the "Videos" location from the Kodi main menu. You should now be able to see the same video which are shown on the UPnP server. | |||
</gallery> | </gallery> | ||
[[Category:File | {{Krypton updated}} | ||
[[Category: | |||
[[Category:File sharing]] | |||
[[Category:Manual]] | |||
[[Category:UPnP]] | |||
Revision as of 14:30, 24 March 2019
Kodi can use UPnP as a media sources from any device that has a UPnP server. UPnP media servers are available for most operating systems and many hardware platforms. Kodi itself can be a UPnP server.
Currently, due to technical limitations (dynamic file paths) UPnP file sources can't be scanned into the local library. However, since many UPnP servers can provide metadata as well as the files themselves, then this may not be an issue.
Setting up UPnP file sources in Kodi
UPnP file sources can be used in videos, music, and pictures. Configuring UPnP file sources in Kodi is as easy as setting up any other type of file source, such as SMB or NFS.
Before you begin... you need to enable UPnP support for your client. Go into Settings > Services > UPnP/DLNA and turn on the switch for "Enable UPnP Support". After that's done, follow the steps below to add each UPnP source.
