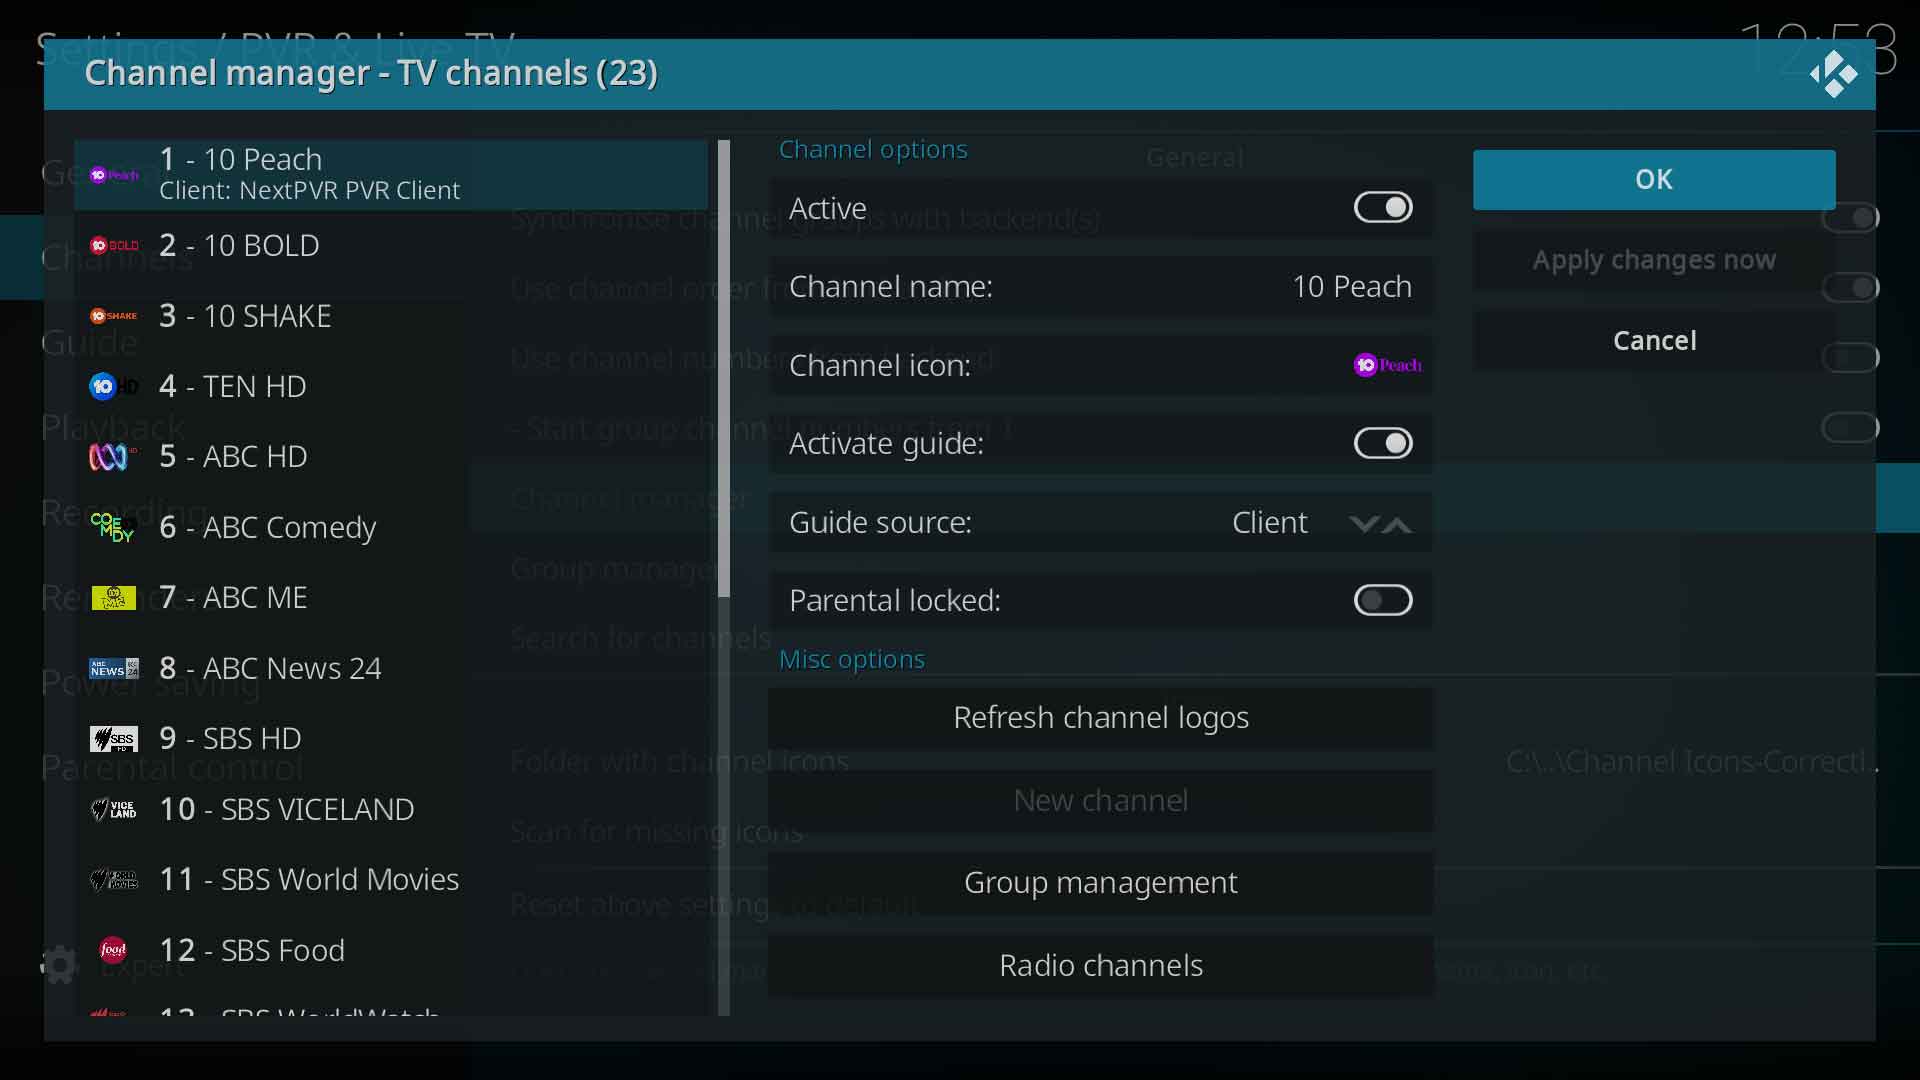
Settings/Live TV/Channel manager
Jump to navigation
Jump to search
Introduction
The channel manager allows you to control how channels are displayed in Kodi.
Description
In this screen, a channel can be edited as follows:
- Active - Mark a channel as inactive. Will be hidden from lists and the epg
- Channel name - Change the display name of the channel
- Channel icon - Manually attach an icon to the channel which will display in views throughout Kodi
- Activate guide - Disable guide data for the channel. It won't appear in the EPG
- Guide source - Nominate where the guide data comes from
- Parental locked - See... Parental locks
- Refresh channel logos - Reapply the channel logos for all channels from the folder specified in Folder with channel icons
- New channel - Add a new channel, but relies on the backend to allow this feature
- Group Management - See... Group manager
- Radio channels - Change the channel list to display Radio channels
Usage
The screen is divided into two columns:
- The column on the left contains the list of all channels, either TV or radio.
- The column on the right contains the action buttons
To use:
- Move the cursor to the left column using the left/right arrows and select a channel that requires editing using the up/down arrows
- Once the channel is highlighted, move the cursor to the right column using the left/right arrows
- From the right column, select the required action
- Once an action has been performed, the edited channel will become fully highlighted, indicating unsaved changes
- Repeat as necessary
- Once complete, move to the right side and select Apply changes now, then OK to exit
| Return to top |
|---|
