Media stubs: Difference between revisions
(Page cleared for overhaul) |
(Page Overhaul) |
||
| Line 1: | Line 1: | ||
{{Mininav|[[Video library]]|[[Video management|Management]] }} | |||
= Introduction = | |||
<section begin="intro" />If you have a collection of DVD's and Bluray disks but do not want to rip them to a hard drive, then a Media Stub File allows you to add the collection of disks to the {{kodi}} Video Library. It is a simple text based file that is added to your Source in exactly the same way as any other Movie or TV Show, which is then scanned or scraped into the library.<section end="intro" /> | |||
= Creating = | |||
The Media Stub File is a simple text file with the extension '''''.disc''''' instead of .txt extension. Once the file is saved correctly, {{kodi}} will see this file as an unplayable media file. | |||
#Create a blank text file and rename the filename in accordance with proper Movie and TV Show '''''[[Naming_video_files|Naming Conventions]]'''''. | |||
#Rename the extension to '''''.disc''''' | |||
#Place the file in the Source as you would any other movie in your Source. | |||
*Example 1- Media Stub file in a movie folder with local artwork, actors, Extras, NFO File, theme etc. | |||
*Example 2- Media Stub file without local information and ready for scraping. | |||
<gallery mode="packed" heights="500px"> | |||
MediaStubs02.jpg | |||
</gallery> | |||
= Usage = | |||
Once the title is scanned into the library, it will be visible in the same way as any other title in the library. To view the title for playback... | |||
#Select Play | |||
#A box will display requesting you to insert the disk (as shown in the below image) | |||
#Once the disk is inserted, the '''Play''' button will become active. | |||
#Press '''Play''' to commence playback. | |||
<gallery mode="packed-overlay" heights="283px"> | |||
MediaStubs01.jpg|Messages will differ based upon the contents of the Stub File | |||
</gallery> | |||
== Messages == | |||
The basic Stub File will display the default message '''Please insert the following disc: <movie name>''' | |||
It is possible to add messages to the pop up box as shown in the above image. The above image uses the following code placed inside the stub file. Longer messages will automatically scroll. | |||
<syntaxhighlight lang=xml enclose="div"> | |||
<discstub> | |||
<title>Rogue Assassin aka WAR</title> | |||
<message>Released as Rogue Assassin in Australia, but as WAR globally | |||
Bluray located in Storage 3, Drawer 2 | |||
Add what you like to the message.</message> | |||
</discstub> | |||
</syntaxhighlight> | |||
*The ''<discstub></discstub>'' tag is required if using either of the next two tags | |||
*The ''<title></title>'' tag is optional and can be used to display an alternate name | |||
*The ''<message></message>'' tag is optional. Use only one set of <message> tags as multiples are ignored. | |||
= Modifying Extensions = | |||
This modification requires inserting the following code into the '''''[[Advancedsettings.xml]]''''' file. | |||
{{#lst:Advancedsettings.xml|discstubextensions}} | |||
{{top}} | |||
{{updated|18}} | |||
[[Category:FAQ]] | |||
[[Category:Index]] | |||
[[Category:How-to]] | |||
[[Category:Guides]] | |||
[[Category:Manual]] | |||
[[Category:Karellen]] | |||
[[Category:Video library]] | |||
[[Category:General topics]] | |||
[[Category:First time user]] | |||
[[Category:Quick Start Guide]] | |||
Revision as of 02:02, 14 July 2018
Introduction
If you have a collection of DVD's and Bluray disks but do not want to rip them to a hard drive, then a Media Stub File allows you to add the collection of disks to the Kodi Video Library. It is a simple text based file that is added to your Source in exactly the same way as any other Movie or TV Show, which is then scanned or scraped into the library.
Creating
The Media Stub File is a simple text file with the extension .disc instead of .txt extension. Once the file is saved correctly, Kodi will see this file as an unplayable media file.
- Create a blank text file and rename the filename in accordance with proper Movie and TV Show Naming Conventions.
- Rename the extension to .disc
- Place the file in the Source as you would any other movie in your Source.
- Example 1- Media Stub file in a movie folder with local artwork, actors, Extras, NFO File, theme etc.
- Example 2- Media Stub file without local information and ready for scraping.

Usage
Once the title is scanned into the library, it will be visible in the same way as any other title in the library. To view the title for playback...
- Select Play
- A box will display requesting you to insert the disk (as shown in the below image)
- Once the disk is inserted, the Play button will become active.
- Press Play to commence playback.
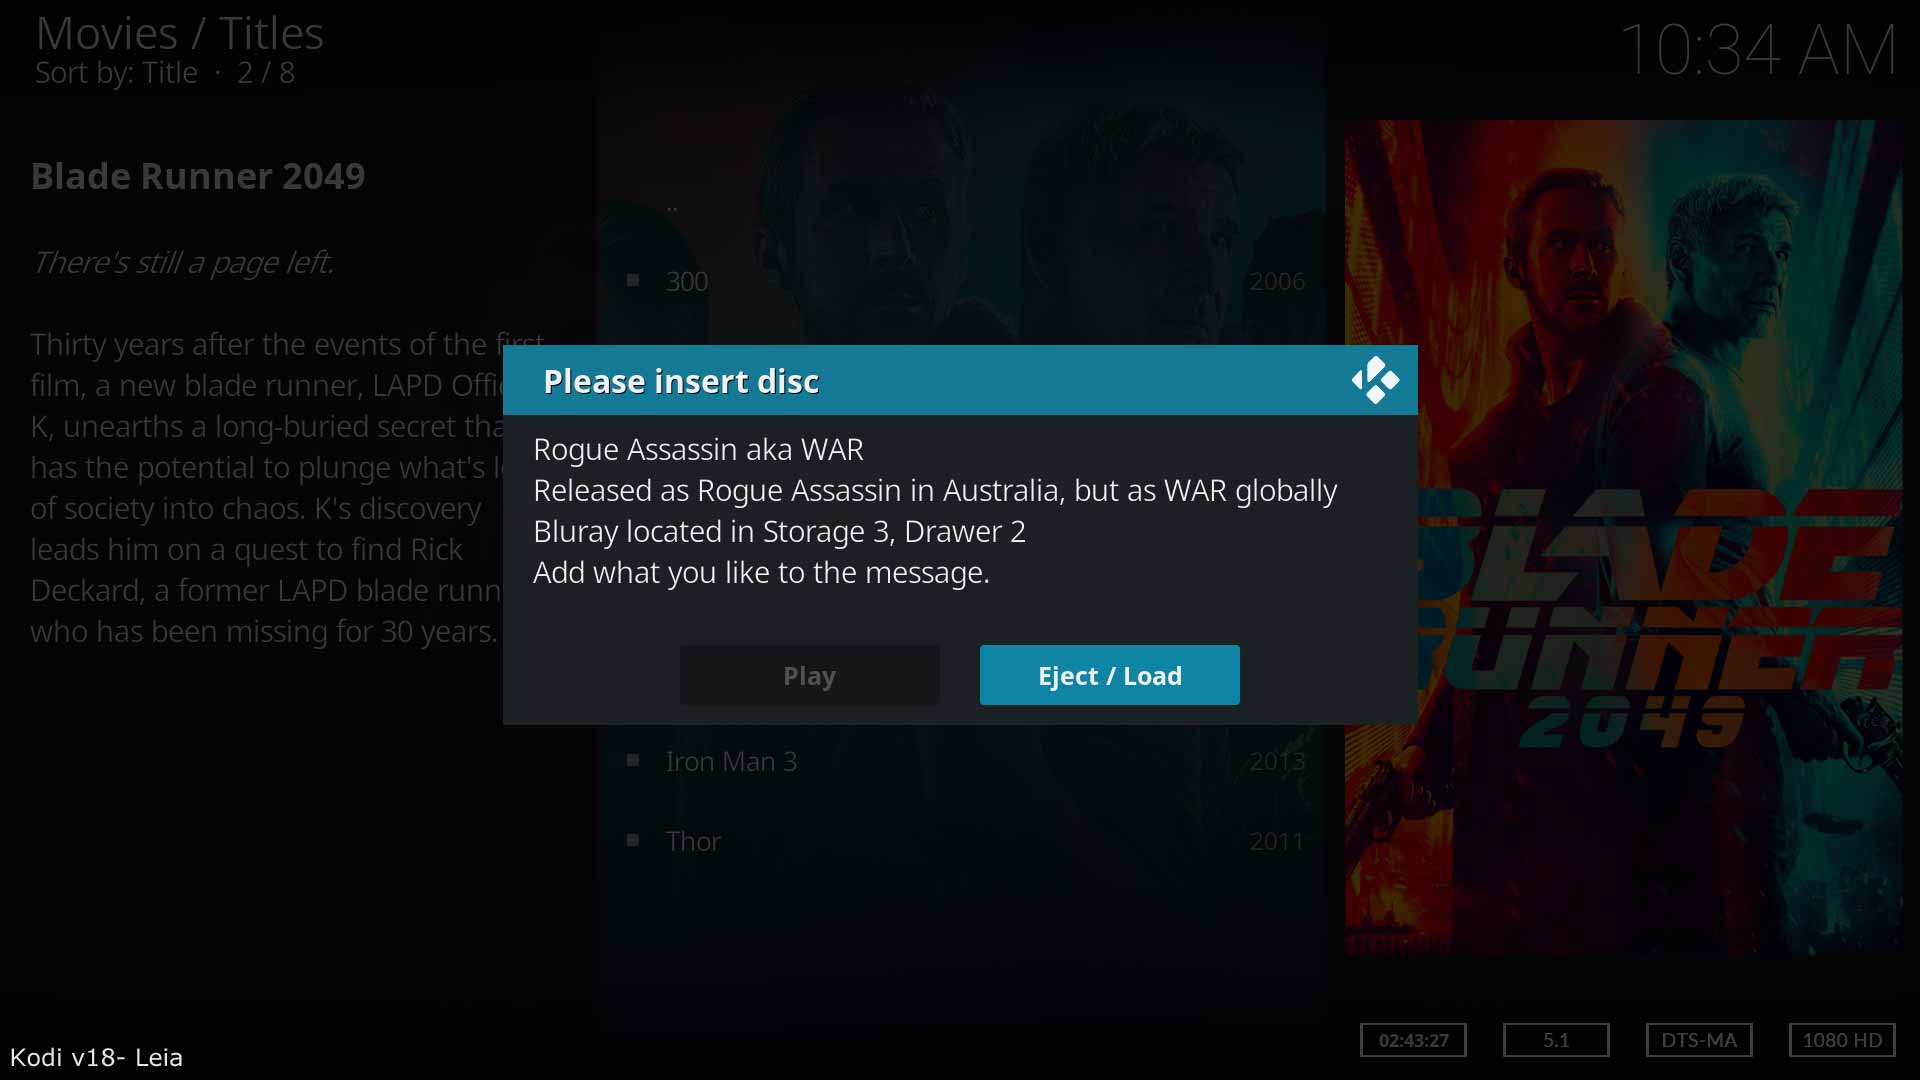
Messages will differ based upon the contents of the Stub File

Messages
The basic Stub File will display the default message Please insert the following disc: <movie name>
It is possible to add messages to the pop up box as shown in the above image. The above image uses the following code placed inside the stub file. Longer messages will automatically scroll.
<discstub>
  <title>Rogue Assassin aka WAR</title>
  <message>Released as Rogue Assassin in Australia, but as WAR globally
Bluray located in Storage 3, Drawer 2
Add what you like to the message.</message>
</discstub>
- The <discstub></discstub> tag is required if using either of the next two tags
- The <title></title> tag is optional and can be used to display an alternate name
- The <message></message> tag is optional. Use only one set of <message> tags as multiples are ignored.
Modifying Extensions
This modification requires inserting the following code into the Advancedsettings.xml file.
The default filename extension for Disc Stubs is:
.disc
Using the following tags, it is possible to <add> additional or <remove> existing disc stub extensions to better suit your requirements.
<discstubextensions>
  <add>.disk|.stub</add>
  <remove>.disc</remove>
</discstubextensions>
| Return to top |
|---|