Archive:Share libraries using UPnP: Difference between revisions
Jump to navigation
Jump to search
(Update Server paths for v17) |
Greenbutton (talk | contribs) (These instructions didn't include the client-side step of "enabling UPnP on the client". I added that. Without that, the rest of hte client-side instructions don't work. (Kodi 18)) |
||
| (One intermediate revision by one other user not shown) | |||
| Line 6: | Line 6: | ||
# For {{kodi}} device A (the "server") go to: | # For {{kodi}} device A (the "server") go to: | ||
#* | #* {{highlight|bordered=yes|[[Settings/Services/UPnP_DLNA#General|Settings → Service Settings → UPnP/DLNA]]}} | ||
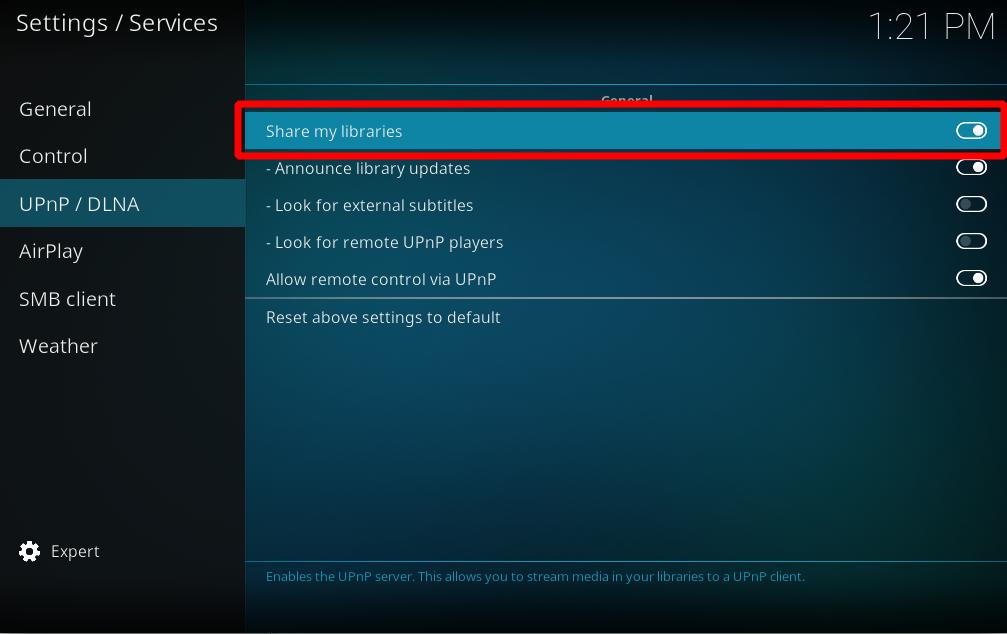
# Enable the UPnP server ('''Share my libraries''')<br />[[File:Share-upnp-library1.jpg|500px]]<br /><br /> | |||
# For {{kodi}} device B (the "client") you will need to (1) enable UPnP support in {{highlight|bordered=yes|[[Settings/Services/UPnP_DLNA#General|Settings → Service Settings → UPnP/DLNA]]}} and then (2) add device A as a [[UPnP/Media source|media source]]: {{highlight|'''Videos''' → '''Files''' → '''Add Videos...''' → '''Browse''' → ''(scroll down to)'' '''UPnP Devices'''}}<br />[[File:Share-upnp-library2.png|500px]]<br /><br /> | |||
# Enable the UPnP server ('''Share | |||
# For {{kodi}} device B (the "client") you will add device A as a [[UPnP/Media source|media source]]: {{highlight|'''Videos''' → '''Files''' → '''Add Videos...''' → '''Browse''' → ''(scroll down to)'' '''UPnP Devices'''}}<br />[[File: | |||
# A shows up there. Open the share and then hit '''OK'''. | # A shows up there. Open the share and then hit '''OK'''. | ||
# Give the new video source from A a name. | # Give the new video source from A a name. | ||
# You should now be able to see everything as it is set up on A on B. | # You should now be able to see everything as it is set up on A on B. | ||
{{big|For a detailed description how to add UPnP sources, please visit: [[UPnP/Media_source|UPnP Media Source]]}} | |||
== Other guides == | == Other guides == | ||
Revision as of 18:22, 24 March 2019
- For a more complex method of sharing using MySQL see MySQL
UPnP sharing between two Kodi devices is the easiest way to share a library. You can also share multiple libraries, one from each Kodi device, to all the other devices on the same network. UPnP also takes care of file sharing, so you do not need to do anything extra even if your files are added locally to Kodi.
- For Kodi device A (the "server") go to:
- Enable the UPnP server (Share my libraries)
- For Kodi device B (the "client") you will need to (1) enable UPnP support in Settings → Service Settings → UPnP/DLNA and then (2) add device A as a media source: Videos → Files → Add Videos... → Browse → (scroll down to) UPnP Devices

- A shows up there. Open the share and then hit OK.
- Give the new video source from A a name.
- You should now be able to see everything as it is set up on A on B.


For a detailed description how to add UPnP sources, please visit: UPnP Media Source
Other guides
Video guides
- UPnP sharing (as seen in XBMC v12, Frodo)