HOW-TO:Change skins: Difference between revisions
(How to change skin.) |
No edit summary |
||
| (24 intermediate revisions by 6 users not shown) | |||
| Line 1: | Line 1: | ||
<section begin="intro"/>Many of us have been tempted by the allure of | {{mininav||[[Skins]]|page={{FULLPAGENAME}} }} | ||
<section begin="intro"/>Many of us have been tempted by the allure of Kodi's beauty. There are some excellent skin designers out there who have gone to great lengths to create and share beautiful ways of viewing and navigating our media collections. As default, Kodi comes with the excellent skin Estuary, but there are plenty more to choose from.<section end="intro"/> | |||
== | == Installing a new skin== | ||
<gallery widths=500px heights=313px> | |||
# | File:Estuary_home_blank.png|'''Step 1:''' Start from the Home screen | ||
File:Estuary_home_settings_icon.png|'''Step 2:''' Navigate to the top of the menu and select '''System Settings''' (the gear) icon. | |||
File:SettingsOverview-leia.png|'''Step 3:''' Select '''Interface'''. | |||
File:Interface_settings_skin.png|'''Step 4:''' In the Interface setttings, select '''Skin''', then '''Skin''' under '''Look and feel'''. | |||
File:Skin_get_more.png|'''Step 5: '''There are only 2 skins installed, '''Estuary''' (the default skin) and '''Estouchy'''.<br> To install another skin select '''Get more...''' | |||
File:Skin_get_more_browse.png|'''Step 6:''' In the new window, select the skin to install | |||
File:Skin_get_more_downloading.png|'''Step 7:''' After you have select the skin it will begin downloading and installing skin dependencies and the skin. | |||
File:Skin_get_more_switch_skin.png|'''Step 8:''' Once installed, you will be asked if you want to start using that skin.<br> If you do then select '''Yes''' | |||
File:Skin_get_more_new_skin.png|'''Step 9:''' Enjoy your new skin!!! | |||
</gallery> | |||
== Installing a skin from a zip file. == | |||
Although there are many skins already available to you from Kodi Add-on repository, there are even more that you may want to try out, including modified versions of the ones available in the Official Kodi repository. Some of those skins can be found in the [http://forum.kodi.tv/forumdisplay.php?fid=67 Skin Support] section of the Kodi forum as well as Work in Progress skins which can be found in the [https://forum.kodi.tv/forumdisplay.php?fid=160 Skinning/WIP Skins] sub-section of the Kodi forum. | |||
To install these skins you will need to install them from a zip file. See: '''''[[Add-on_manager#How_to_install_from_a_ZIP_file|How to install from a ZIP file]]''''' | |||
{{top}} | |||
{{Updated|19}} | |||
[[Category:Skins|*]] | |||
[[Category:Manual]] | |||
[[Category:Add-ons]] | |||
Revision as of 19:26, 23 December 2020
Many of us have been tempted by the allure of Kodi's beauty. There are some excellent skin designers out there who have gone to great lengths to create and share beautiful ways of viewing and navigating our media collections. As default, Kodi comes with the excellent skin Estuary, but there are plenty more to choose from.
Installing a new skin
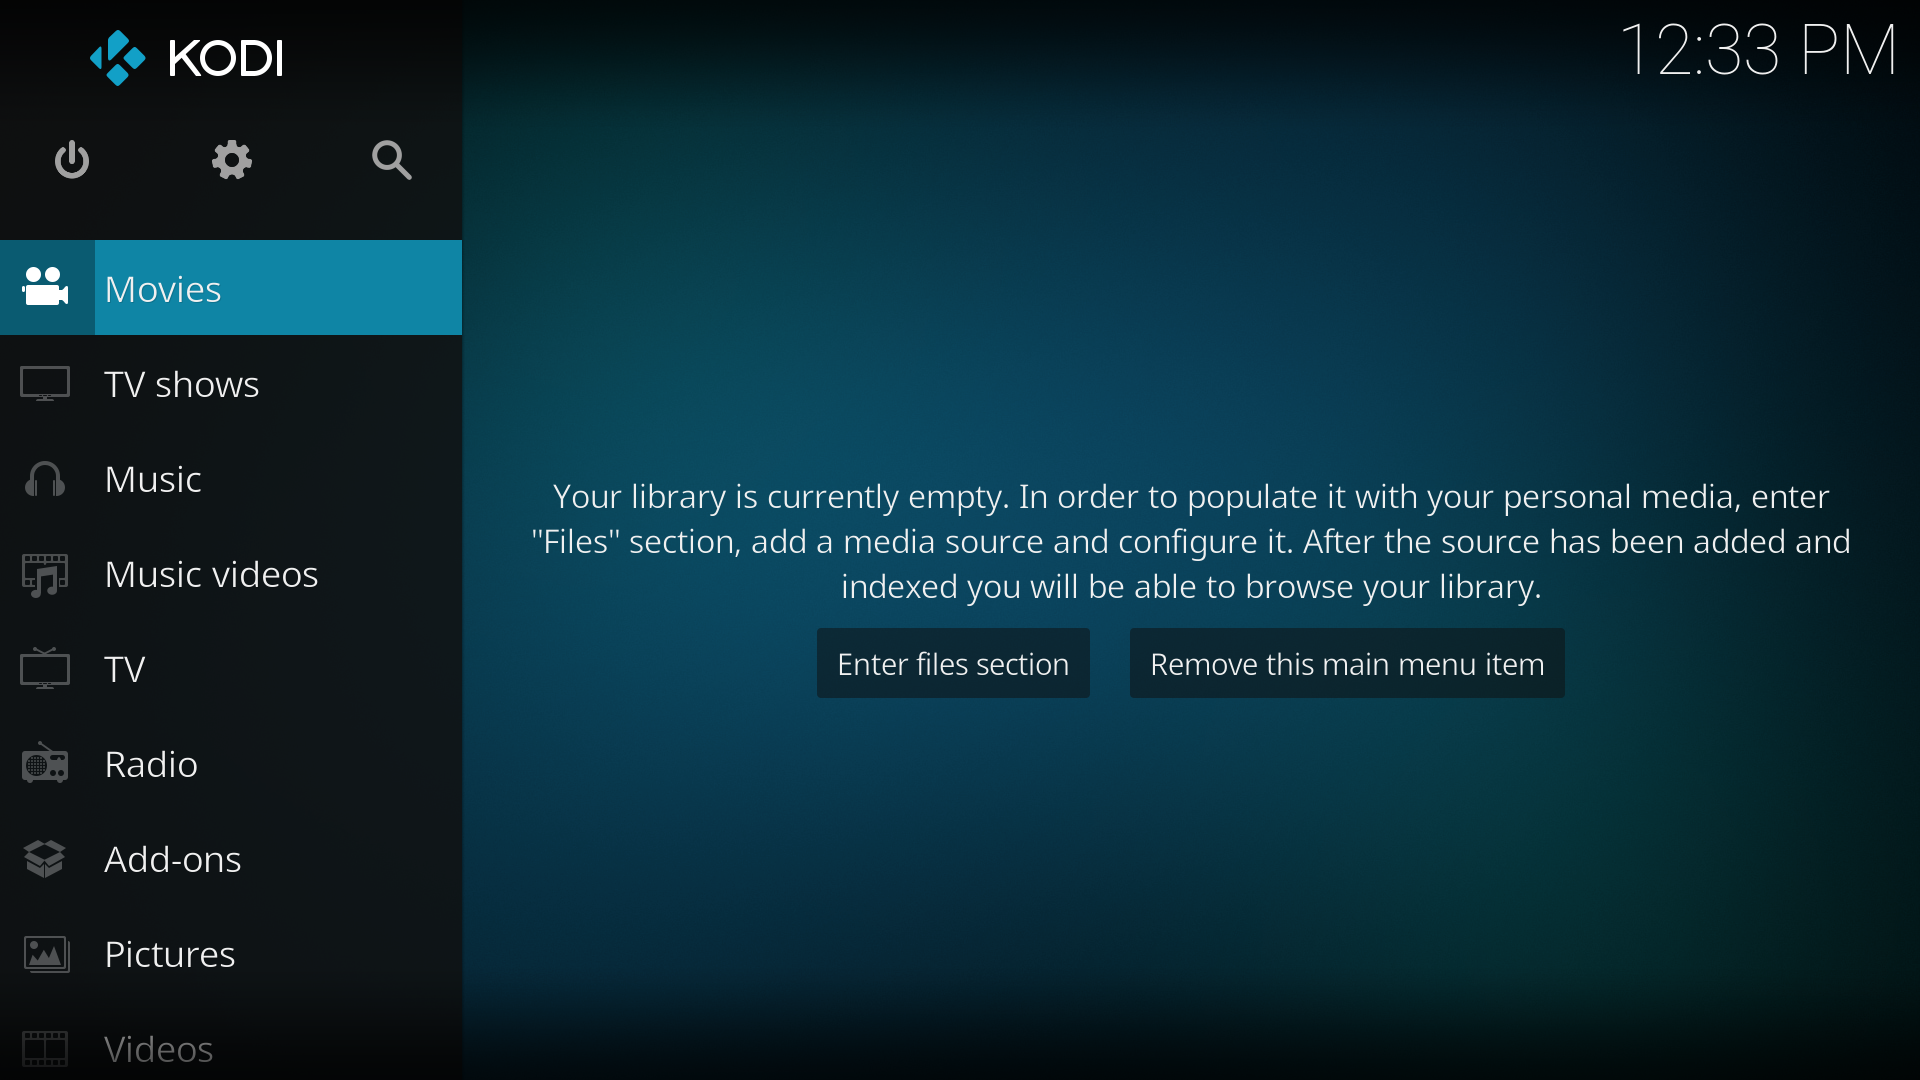
Step 1: Start from the Home screen

Step 2: Navigate to the top of the menu and select System Settings (the gear) icon.
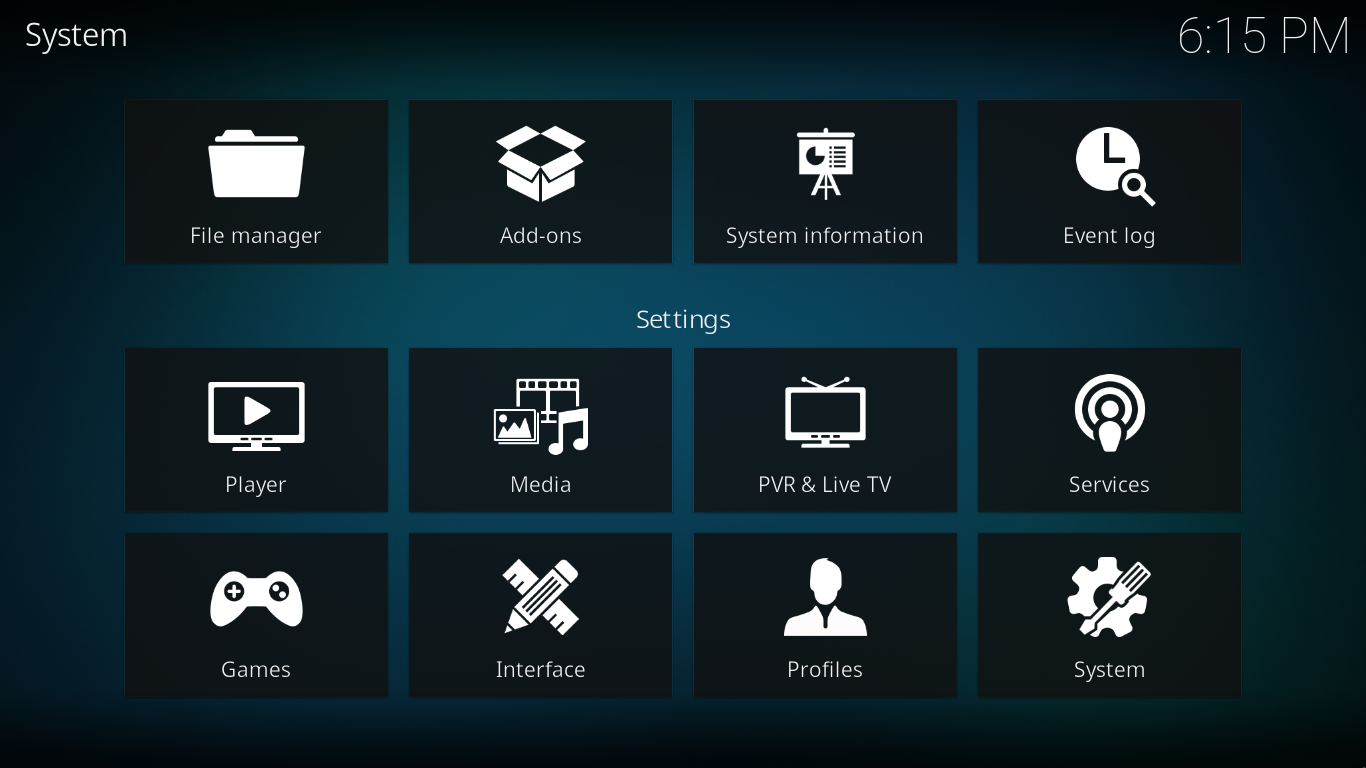
Step 3: Select Interface.
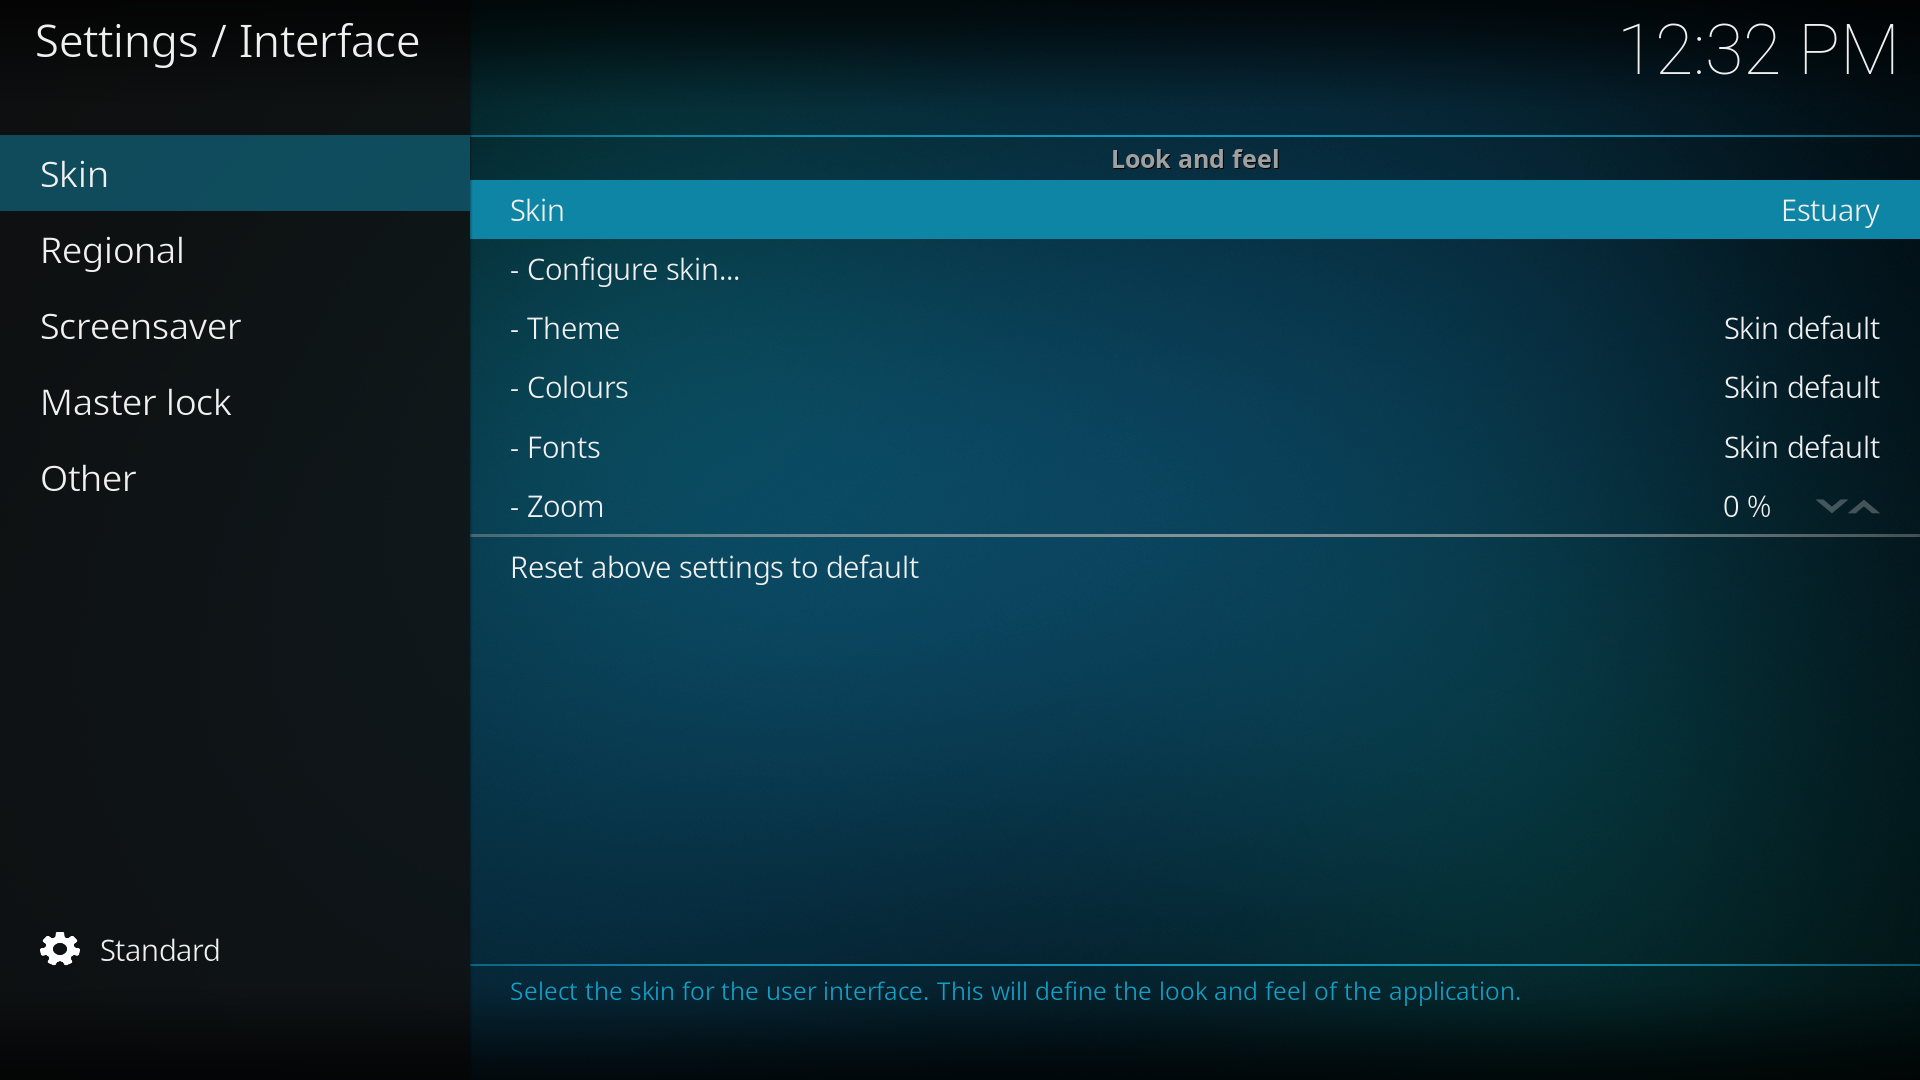
Step 4: In the Interface setttings, select Skin, then Skin under Look and feel.
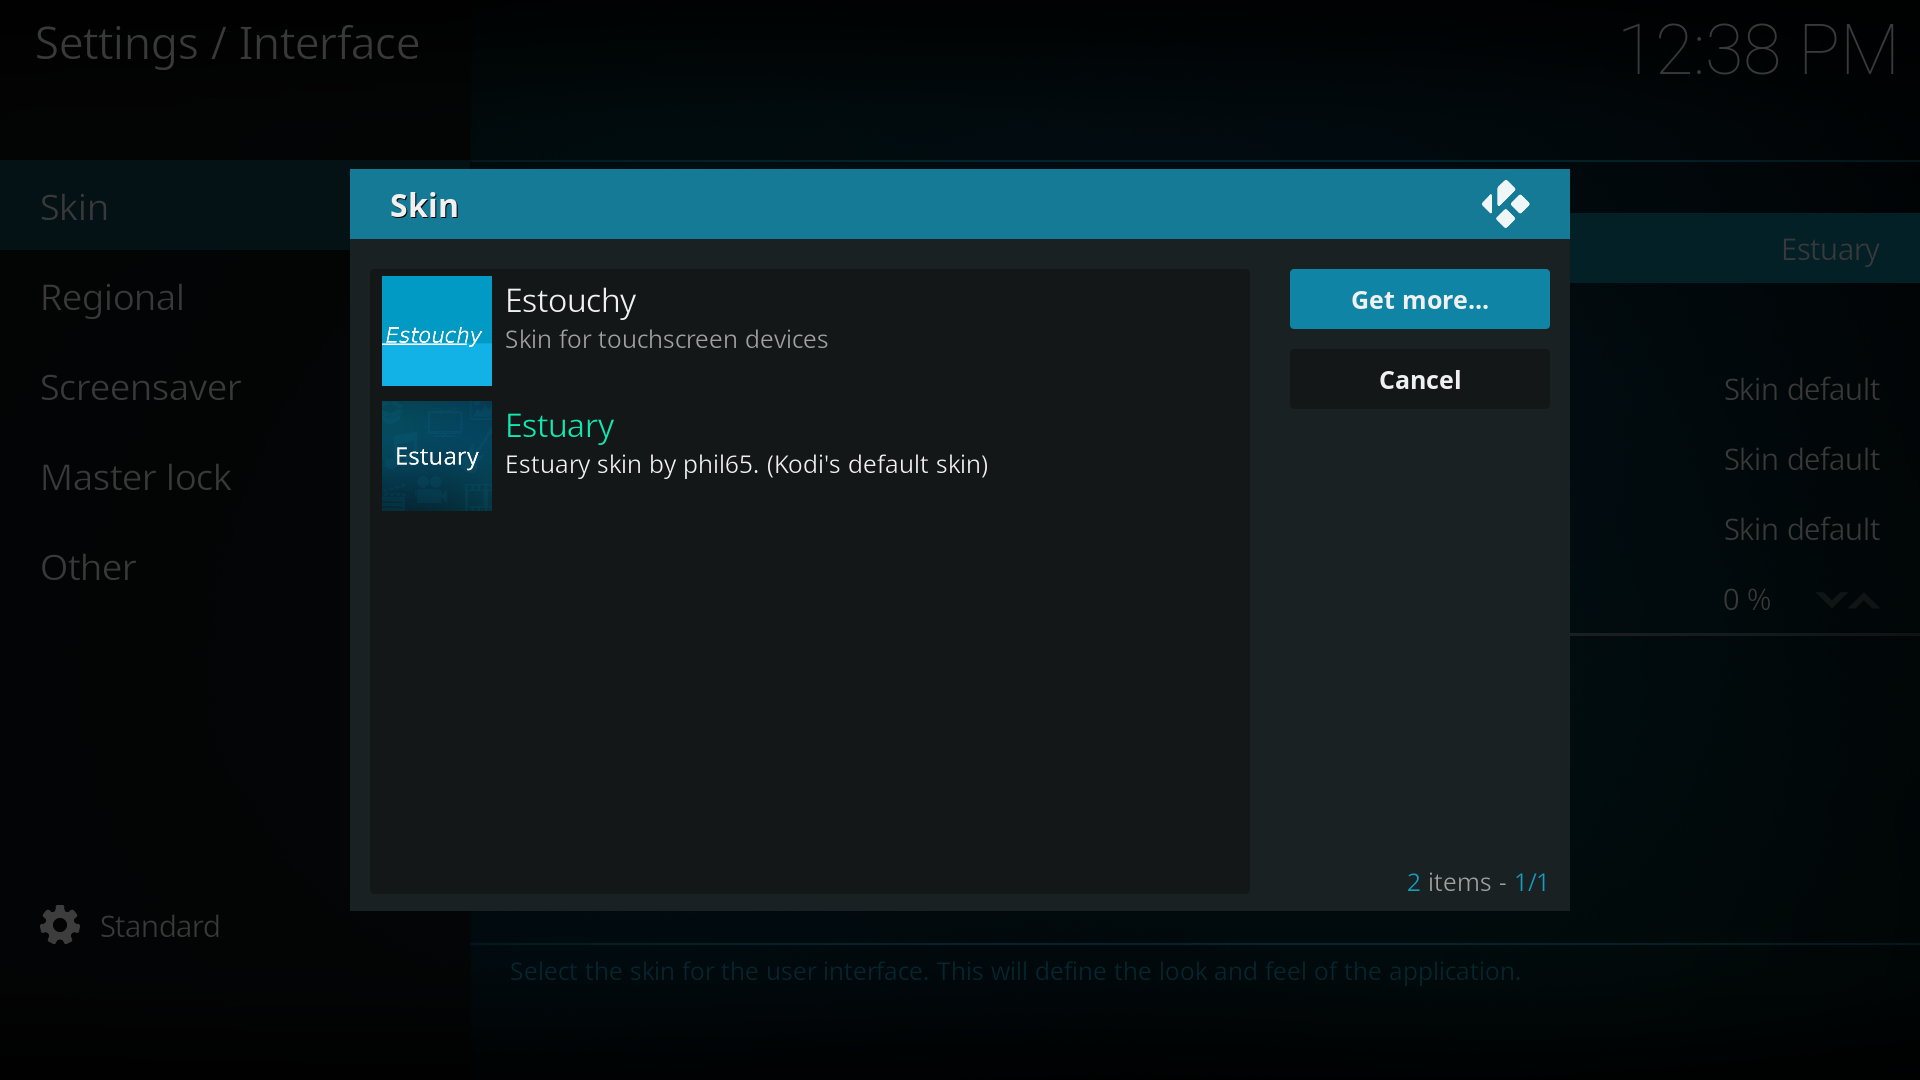
Step 5: There are only 2 skins installed, Estuary (the default skin) and Estouchy.
To install another skin select Get more...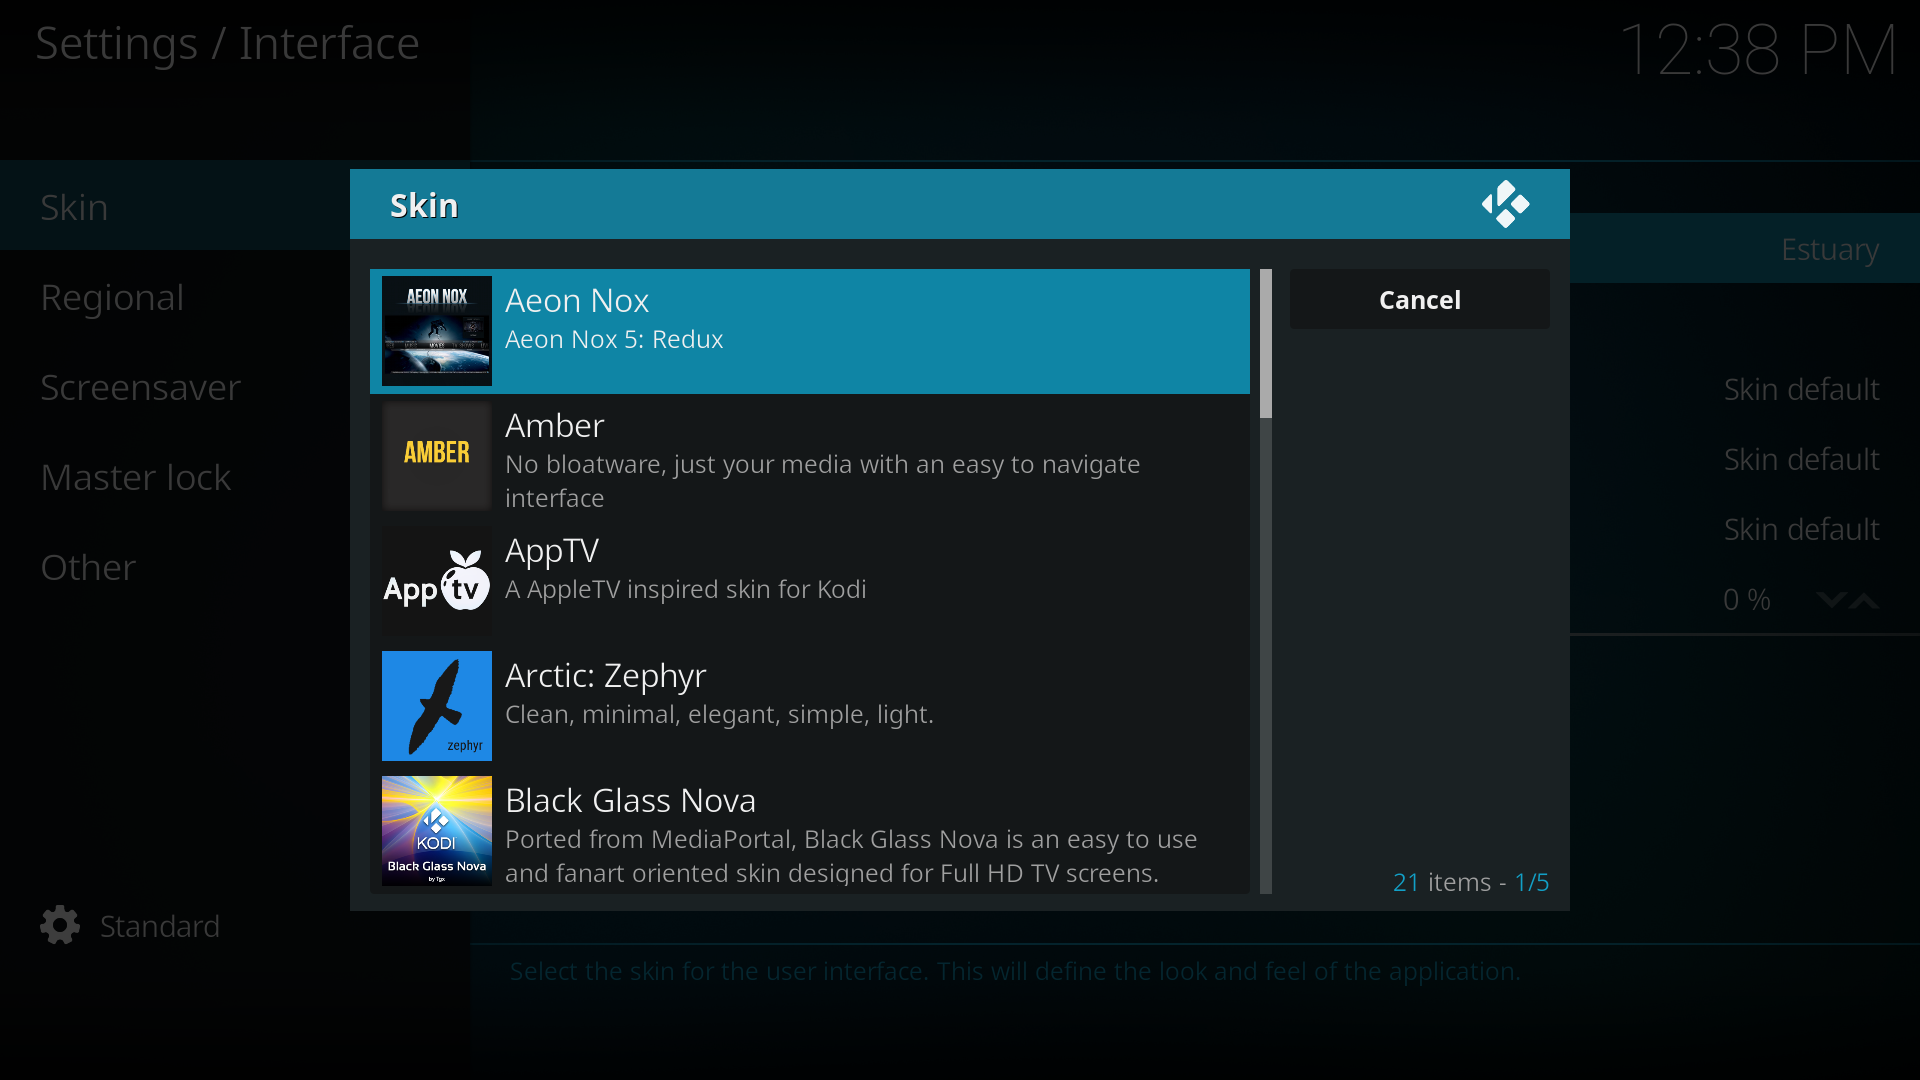
Step 6: In the new window, select the skin to install
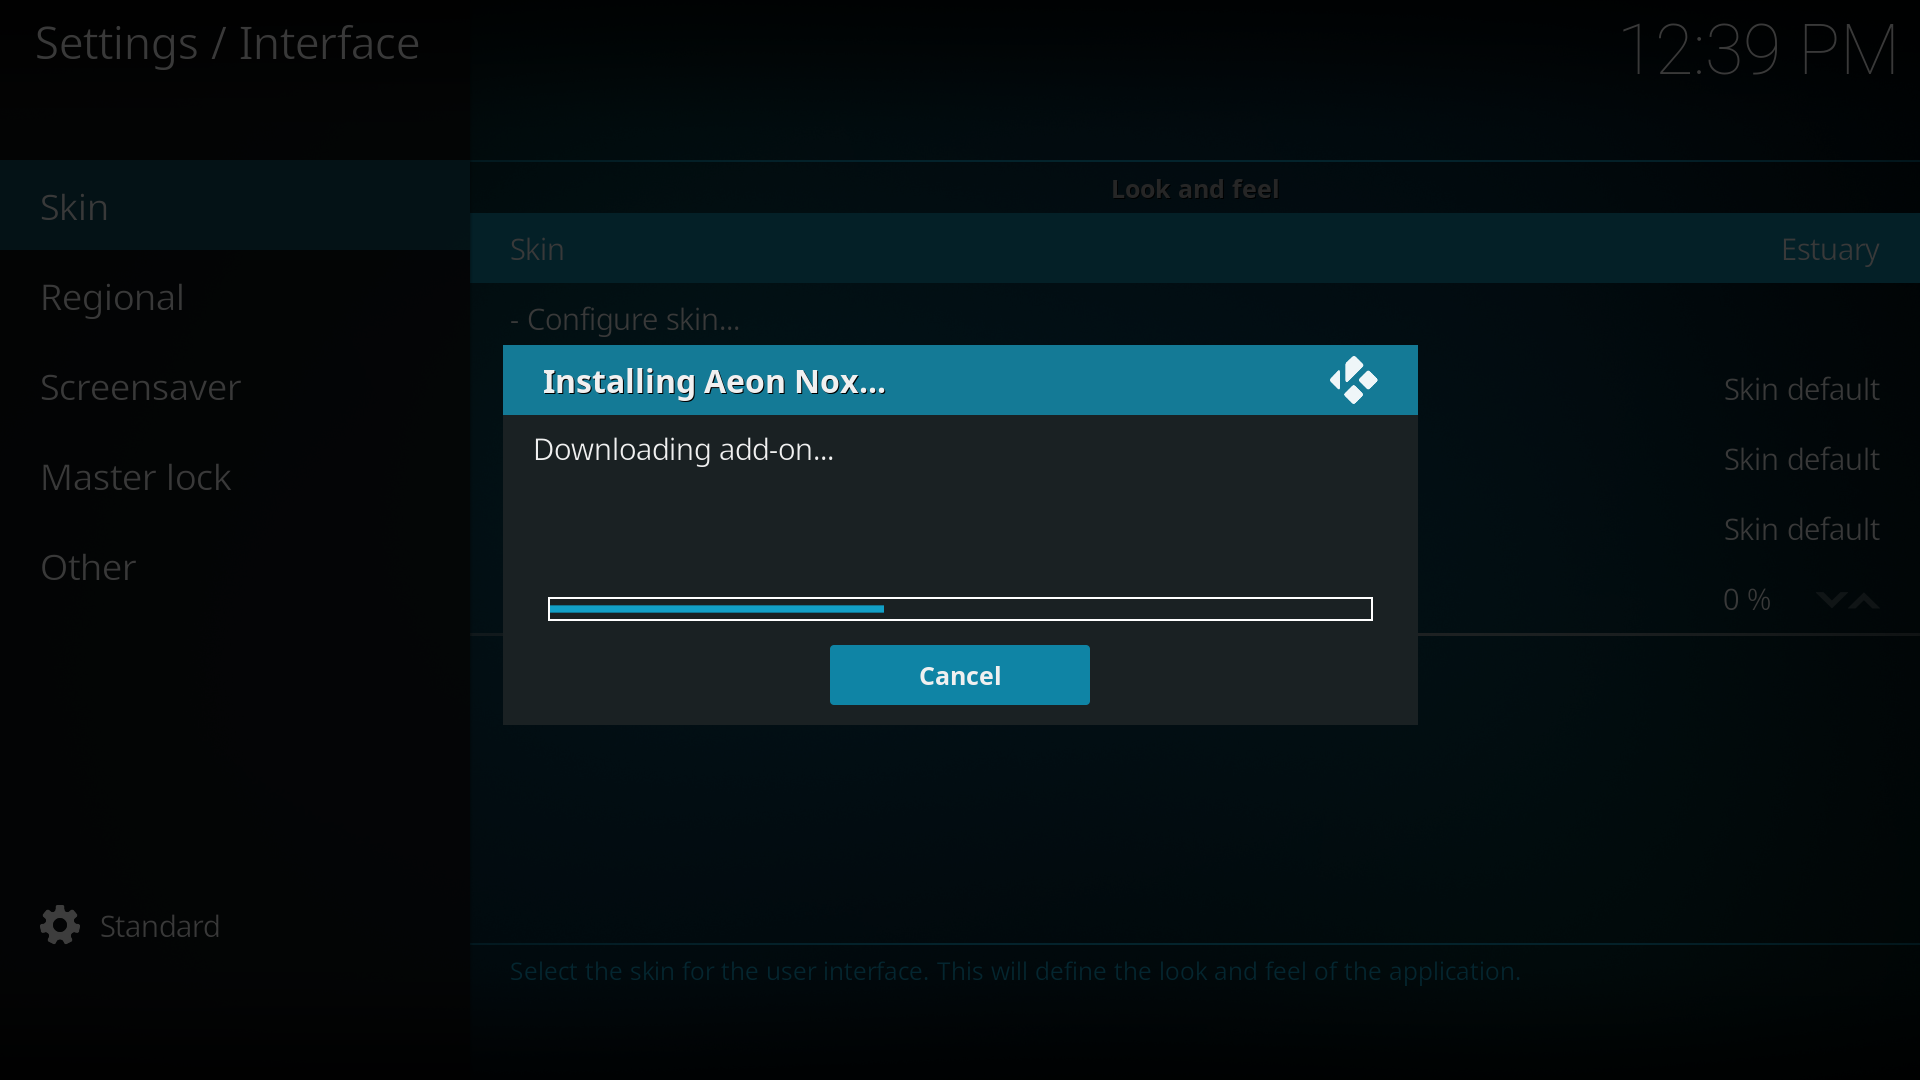
Step 7: After you have select the skin it will begin downloading and installing skin dependencies and the skin.
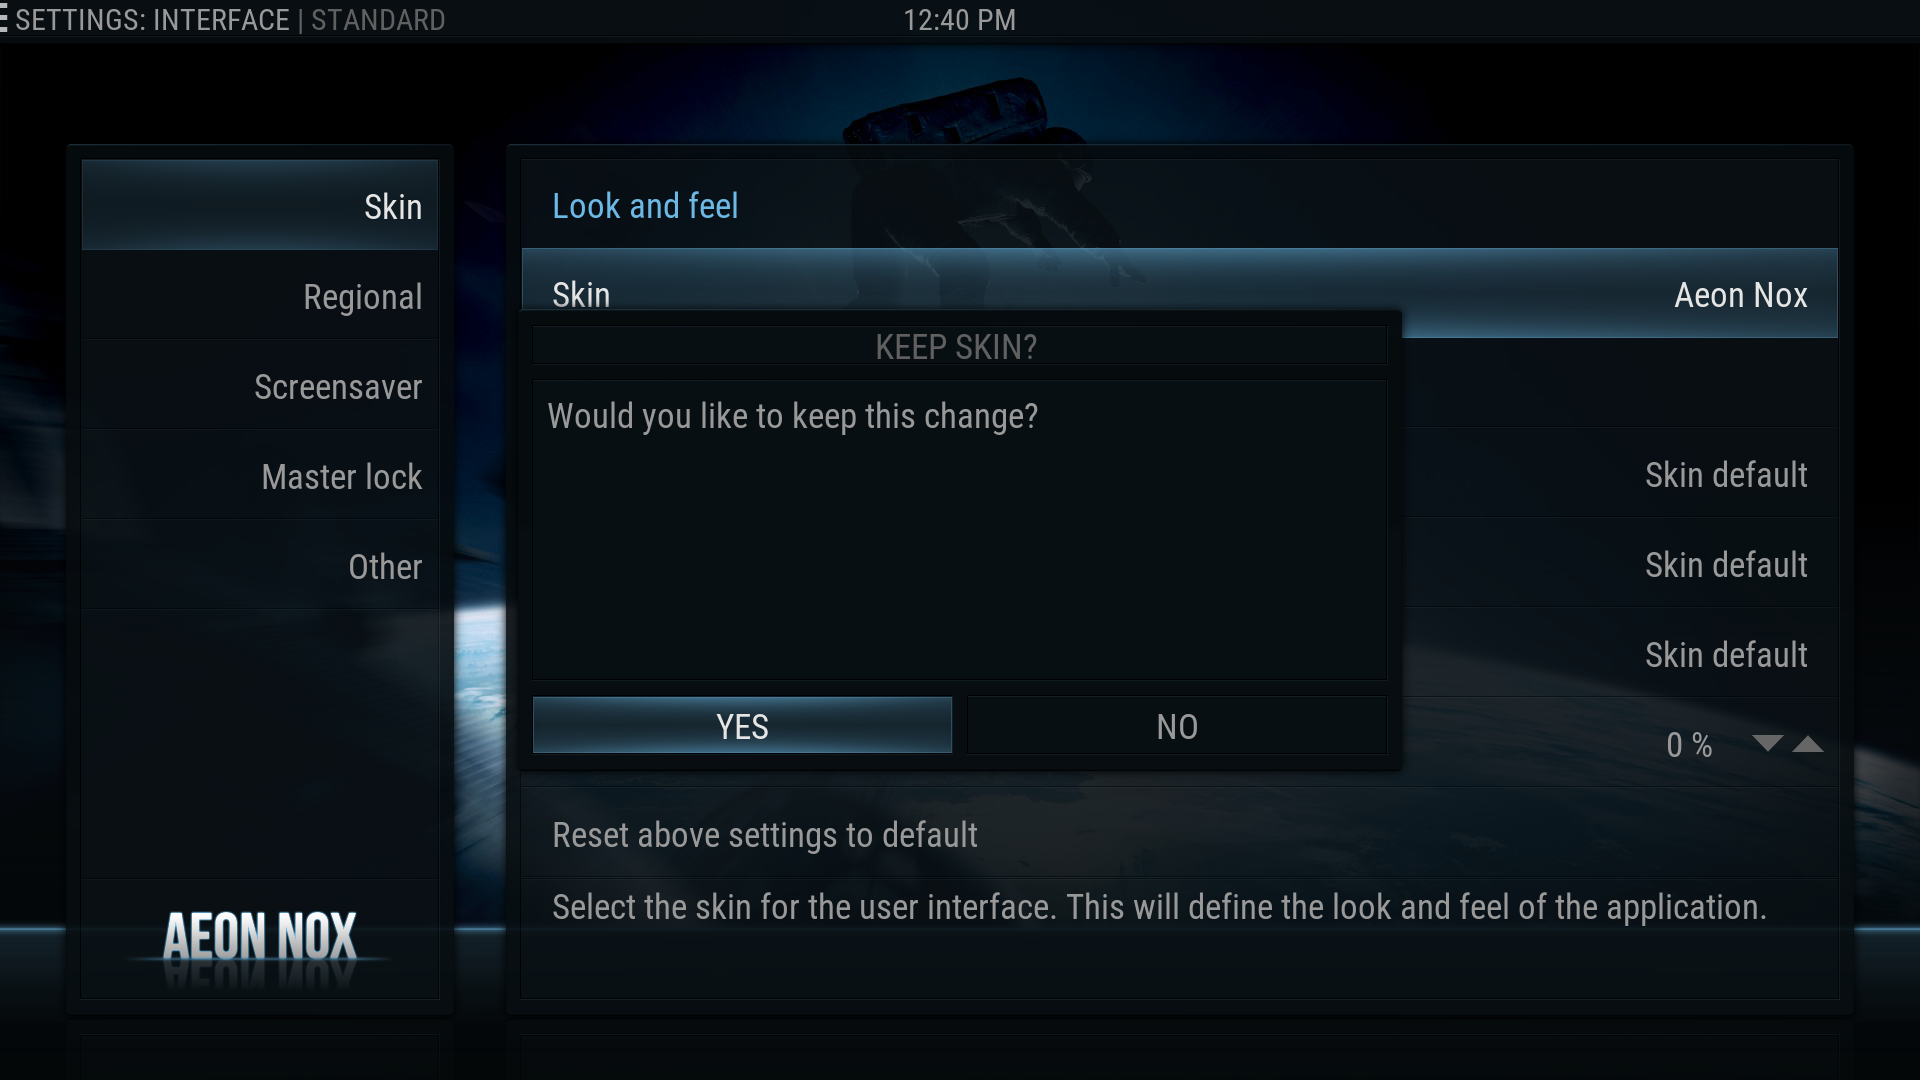
Step 8: Once installed, you will be asked if you want to start using that skin.
If you do then select Yes
Step 9: Enjoy your new skin!!!


Installing a skin from a zip file.
Although there are many skins already available to you from Kodi Add-on repository, there are even more that you may want to try out, including modified versions of the ones available in the Official Kodi repository. Some of those skins can be found in the Skin Support section of the Kodi forum as well as Work in Progress skins which can be found in the Skinning/WIP Skins sub-section of the Kodi forum.
To install these skins you will need to install them from a zip file. See: How to install from a ZIP file
| Return to top |
|---|