Archive:ITunes (DAAP)

|
THIS PAGE IS OUTDATED:
This page or section has not been updated in a long time, no longer applies, refers to features that have been replaced/removed, and/or may not be reliable. This page is only kept for historical reasons, or in case someone wants to try updating it. |
The Digital Audio Access Protocol (DAAP) is the protocol introduced by Apple in its iTunes software to share media across a local network.
iTunes Introduction
iTunes (from Apple) is a digital media-player application for Windows/Mac-OSX. It is also used for organizing digital music and video files. iTunes is also an interface to manage the music on Apple's popular iPod portable digital audio-player. Additionally, iTunes can connect to the iTunes Music Store (sometimes referred to as "iTMS") which allows users to purchase digital music and movie files that can be played by iPods and iTunes, the files downloaded from iTunes Music Store are however protected/encrypted by Apple's proprietary DRM (Digital Rights Management) (called FairPlay) which makes them impossible to play in anything other than iTunes or iPods, (thus XBMC can not play any files purchases on iTunes Music Store).
iTunes and XBMC
Creating a network share using iTunes is a simple solution if all that you want to stream from your PC to XBMC is music. However, XBMC is only able to connect to libraries shared by iTunes 6 or earlier. In order to use this method, you first need to download and install iTunes software on your Windows PC or Apple Mac-OS X computers.
- note: newer implementations of iTunes no longer use DAAP
Configuring iTunes on your computer
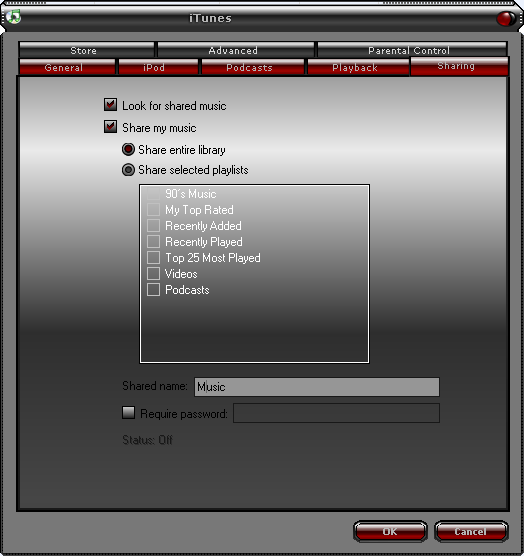
Step 1When you launch iTunes for the first time, it will prompt you to scan your computer for music files. Follow the onscreen prompts to scan your music library into iTunes. Step 2After scanning your music library, open the preferences diaglog in iTunes and click on the Sharing tab. Then, check the "Share My Music"" option, ensure that the "Share Entire Library" option is selected, and name the share. In this case, we called it Music.
How to Configure iTunes Sharing in XBMCJust bring up the context menu from the root listing of your sources in My Music Files and select Add Source. Then select Browse to browse for your path, and "Add Network Location...". You want to add an iTunes (DAAP) share, and you'll need to input the IP address of the PC where iTunes is being shared from. Click OK to return to the filebrowser, and then select the newly added iTunes source. You can then name the source in the box below and optionally select a thumbnail that will be used for that source.
You can add or change the iTunes source in Sources.xml like all Media Sources, your iTunes source needs to contain two pieces of information:
For the purpose of these examples, I will use 192.168.1.100 as the IP address of the PC where the shares are located. For your configuration, simply substitute the IP-address of your computer. <xml>
<source>
<name>iTunes Network Share (DAAP)</name>
<path>daap://192.168.1.100</path>
</source>
</xml>
Note! General information and advanced configuration of shares/sources regarding, see Media Sources. |
