Archive:HOW-TO:Use Handbrake on Mac to encode H.264 videos

|
THIS PAGE IS OUTDATED:
This page or section has not been updated in a long time, no longer applies, refers to features that have been replaced/removed, and/or may not be reliable. This page is only kept for historical reasons, or in case someone wants to try updating it. |
This guide is about using Handbrake on a Mac
This should still work on Handbrake for Windows or Linux but you may have to input the setting manually and save it. Some users have been unable to load the supplied preset on Windows.
Tools:
VLC - Site or direct download for 64 Bit Mac Build 1.0.2 here
Handbrake - Site
Extras:
Handbrake Presets:
Low Quality (This is just a lower constant quality with MP3 audio)
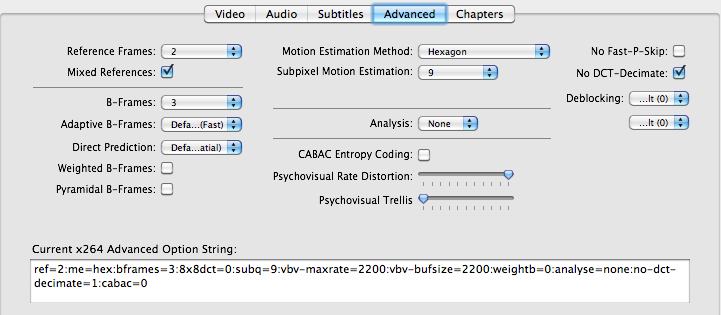
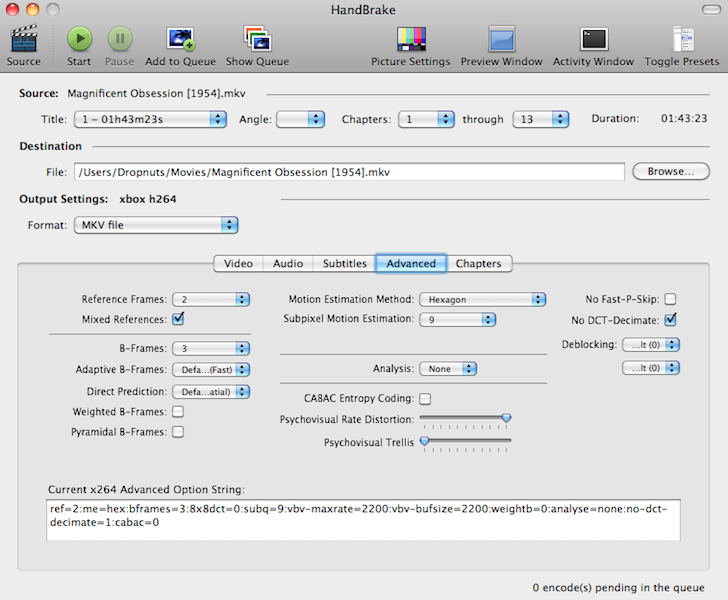
Or manually input this string and settings into the 'Advanced Settings' box:
ref=2:me=hex:bframes=3:8x8dct=0:subq=9:vbv-maxrate=2200:vbv-bufsize=2200:weightb=0:analyse=none:no-dct-decimate=1:cabac=0:b-pyramid=none:weightp=0
Info:
For this encoding process I have prioritised video quality over file size.
This is for encoding DVD sources to be used on the original xbox running xbmc. It uses the x264 codec so bitrate and advanced options have to be set specifically to allow it to run on old hardware.
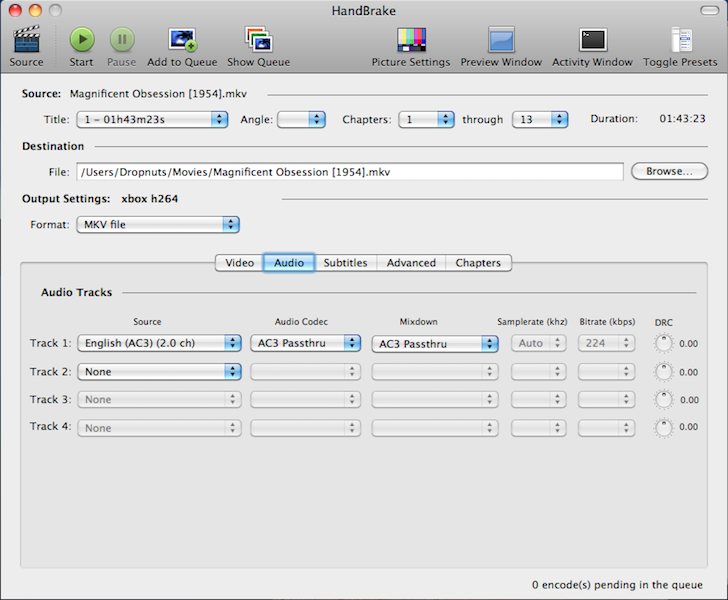
This is for use with AC3 or DTS passthrough. You can try it with MP3 or AAC audio, but no guarantees as this will require CPU for decoding.
1. Download VLC and Handbrake. Install them. On the Mac I would recommend running the 64 bit VLC build.
2. Download the Handbrake Presets and import them into Handbrake.
3. Load your source into Handbrake. You can rip straight from DVD using Handbrake, or load DVD images you have ripped previously with your ripper of choice.
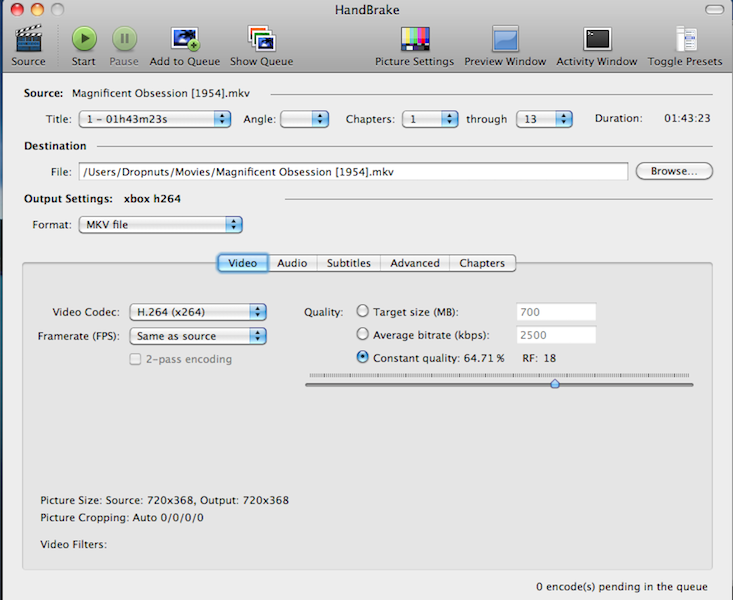
4. Make sure you have either xbox-x264 or xbox-x264-LQ preset selected.
5. Make sure container is MKV. Audio is AC3 or DTS Passthrough.
6. You have to change some of the advanced settings if you used the presets in the attachments in the latest versions of Handbrake, since some of the defaults have been changed recently. Add ":b-pyramid=none:weightp=0" to the String you see in the bottom or uncheck "Weighted P-frames" and set "Pyramidal B-Frames" to off.
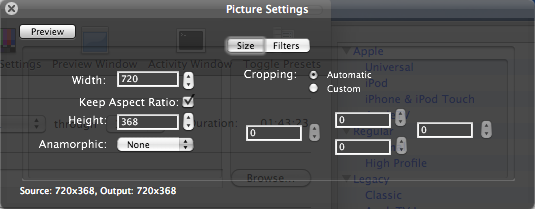
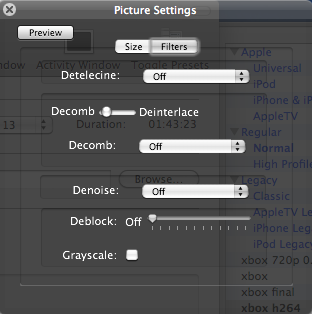
6. You should be able to leave your picture size at whatever Handbrake selects for the source. Make sure Anamorphic is off. If your source (checked in preview window) is interlaced (appears to have mismatched horizontal lines through the picture) then select Decomb (not Deinterlace) and medium or strong. Personal preference and experience here. You can also select Denoise or Deblock also for older or lower quality source material. Try not to if you can avoid it. It will increase encoding times.
7. You can set chapter markers and set up subtitles if you so wish.
Press start and wait.
These are not going to be the greatest possible quality encodes, they will not be the smallest file sizes, nor will they be the fastest. But it is a good trade off between the three, and you can do it natively on a Mac!
Enjoy.
I'd really like to thank the users on the forums who have helped me with testing a multitude of attempts leading up to this. I'd also like to give big kudos to the Handbrake developers who have given me so much assistance learning about encoding and finding the right settings for this preset. Please visit their site and let them know you appreciate all their hard work
--Cranial 10:50, 23 February 2010 (UTC) --User:sunsear 23:10, 12 March 2011 (GMT+1)
